Connect with us

Guides

Where to Install Smoke Detector in Bedroom With Ceiling Fan

Install your smoke detector in the ideal spot to maximize safety, but did you know that placement near ceiling fans can impact its effectiveness?

Published

on

install smoke detector ceiling fan

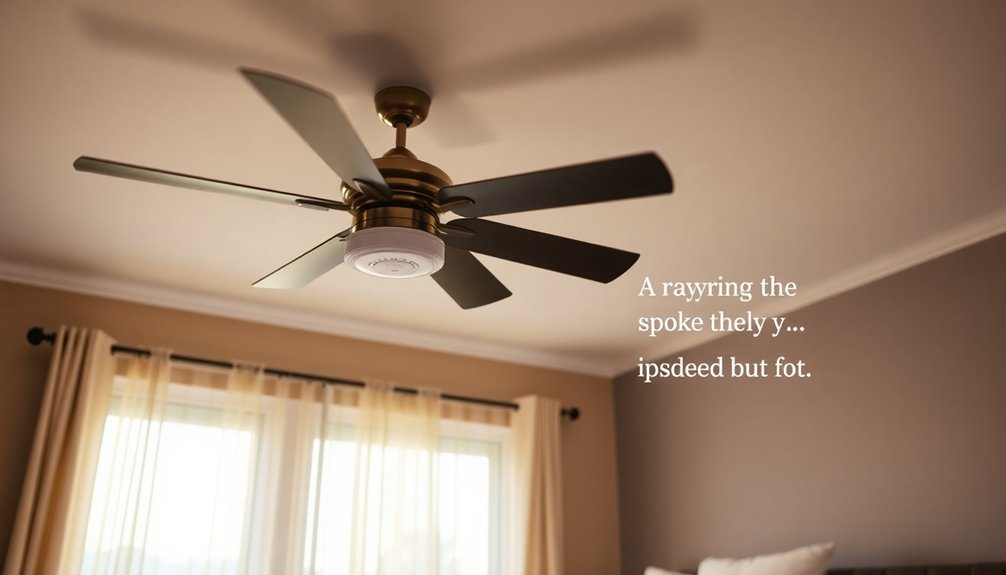
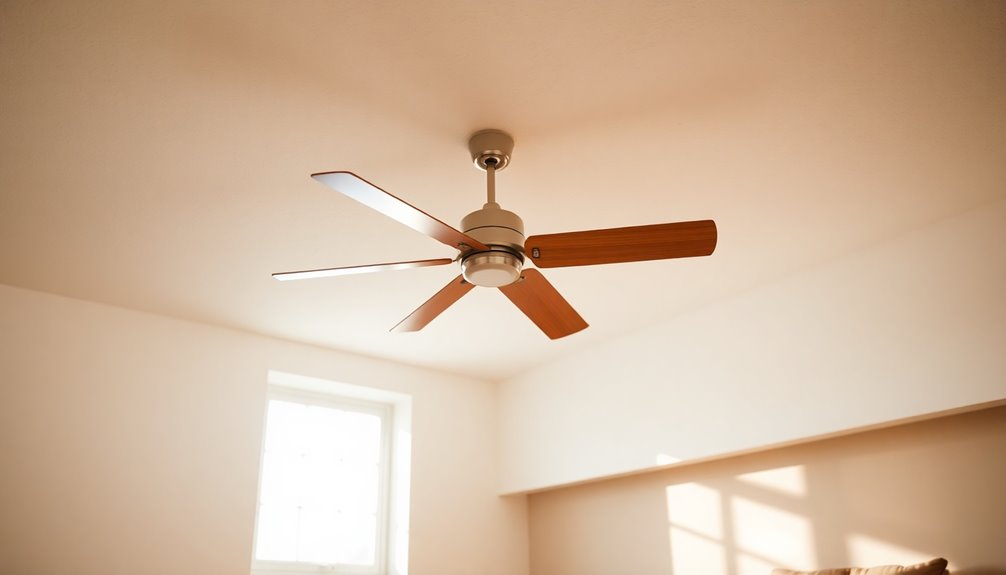
You should install your smoke detector in the center of your bedroom ceiling, ensuring it's at least three feet away from the ceiling fan blades to prevent airflow interference. This placement helps the detector sense smoke more effectively. If you opt for wall-mounted detectors, keep them 4-12 inches from the ceiling. Avoid corners, as smoke lingers there and can hinder activation. Don't forget to test your alarm monthly and maintain it for best performance. For additional tips on choosing the right type of detector and mastering placement, just explore further.

Key Takeaways

  • Install the smoke detector on the ceiling, ideally in the room's center, for maximum coverage.
  • Keep the detector at least three feet away from ceiling fan blades to prevent airflow interference.
  • Position it 4-12 inches away from the ceiling if wall-mounted, for optimal smoke detection.
  • Maintain a distance of 1.5 meters (4 feet) from fan-forced vents to reduce false alarms.
  • Ensure the smoke detector is within 21 feet of any point in the room for effective coverage.

Importance of Smoke Detectors

fire safety and prevention

When it comes to fire safety, having smoke detectors in your home is essential. These devices are critical for early smoke detection, giving you and your loved ones the time needed to evacuate safely. The National Fire Protection Association (NFPA) emphasizes that smoke detectors should be installed in every area of your home, including bedrooms, to guarantee thorough fire safety.

By installing smoke detectors, you greatly lower the risk of fire-related fatalities and property damage. Studies show that homes with functioning smoke detectors can reduce the risk of death in a fire by an impressive 55%. This statistic underlines their key role in protecting you and your family.

However, simply having smoke detectors installed isn't enough. Regular maintenance, like testing and changing batteries, is essential for making sure they operate effectively when needed.

This proactive approach not only enhances your fire safety but also provides peace of mind, knowing you're prepared in case of an emergency. Remember, the key to maximizing the benefits of smoke detectors lies in proper installation and ongoing maintenance, so don't overlook these important steps.

NFPA Recommendations for Placement

fire safety equipment placement

To guarantee your smoke detectors work effectively, you need to follow the NFPA's recommendations for placement. The NFPA suggests installing your smoke detector on the ceiling, ideally at the center of the room. This location guarantees ideal smoke detection, especially in bedrooms with ceiling fans. However, you'll want to position the detector at least three feet away from the fan blades. This distance prevents airflow interference that could delay smoke detection.

Additionally, make certain to mount your smoke detector at least 60 cm (2 feet) from walls. This spacing avoids smoke lingering in corners, which could also hinder timely alerts.

Advertisement

It's also crucial to install the smoke alarm 1.5 m (4 feet) away from any fan-forced vents. This reduces the risk of false alarms and guarantees the detector functions properly.

Lastly, don't forget to adhere to local codes and regulations regarding smoke detector placement. They might've additional requirements beyond the NFPA guidelines.

Following these recommendations will help keep you safe and guarantee your smoke detector responds effectively when it matters most.

Ideal Locations for Installation

optimal sites for setup

When it comes to installing smoke detectors in your bedroom, knowing the ideal locations is essential.

You'll want to take into account ceiling placement guidelines, wall mounting options, and the types of smoke detectors available to guarantee maximum safety.

Proper positioning can make all the difference in how quickly you detect smoke and respond to potential dangers.

Advertisement

Ceiling Placement Guidelines

Installing smoke detectors on the ceiling is essential for guaranteeing ideal safety in your bedroom. Following ceiling placement guidelines can make a significant difference in your home's safety. The NFPA recommends that you position your smoke detector at least three feet away from ceiling fan blades to prevent airflow interference, which can delay smoke detection.

For maximum effectiveness, mount the smoke detector close to the center of the room, as smoke rises and spreads outward. Additionally, verify the detector is at least 60 cm (2 feet) away from walls to avoid dead air spaces where smoke might linger.

Here's a quick reference table to help visualize ideal placement:

Placement Guidelines Description
Distance from Ceiling Fan At least 3 feet away
Center of the Room Close to the center for maximum detection
Distance from Walls At least 60 cm (2 feet) away from walls
Alternative Placement 4-12 inches from ceiling if wall-mounted
Regular Maintenance Test and maintain detectors regularly

Wall Mounting Considerations

Choosing the right location for wall mounting a smoke detector can greatly enhance safety in your bedroom. When you're dealing with a ceiling fan, you'll want to mount the detector 4-12 inches from the ceiling to guarantee effective smoke detection. This height helps avoid disruptions caused by airflow from the fan.

Additionally, it's vital to place the smoke detector at least three feet away from the fan blades, minimizing the risk of false alarms. Aim for detector placement near the center of the wall for ideal performance, but keep it clear of forced air vents by at least three feet.

Advertisement

Wall mounting is particularly beneficial if you have limited ceiling space or if the fan may hinder the detector's effectiveness.

Don't forget that regular testing and maintenance of your wall-mounted smoke detector are essential. This guarantees reliable operation, especially in bedrooms where airflow from ceiling fans can impact the detector's response.

Smoke Detector Types

Understanding the different types of smoke detectors can help you make informed decisions about where to install them in your bedroom. The National Fire Protection Association (NFPA) offers guidelines that can enhance your safety, especially when you have ceiling fans. Here are a few types to take into account:

  1. Ionization Smoke Alarms: Best for detecting fast-flaming fires, but may not respond as quickly to smoldering fires.
  2. Photoelectric Smoke Detectors: Highly recommended for bedrooms with ceiling fans, these are effective at detecting smoldering fires, which can start unnoticed while you sleep.
  3. Combination Alarms: These smoke alarms combine both ionization and photoelectric technologies, providing thorough protection for various fire types.
  4. Smart Smoke Detectors: These can send alerts to your phone and integrate with other smart home devices, guaranteeing you're always informed.

To comply with NFPA guidelines, install smoke detectors at least three feet away from ceiling fan blades. If ceiling installation isn't possible, mount them 4-12 inches below the ceiling.

Regular testing and maintenance are essential for all smoke detectors to verify they work effectively in emergencies.

Factors for Optimal Placement

ideal location considerations explained

When installing a smoke detector, ceiling placement is key for ideal detection, so aim for the center of the room.

Remember to keep it at least three feet away from any ceiling fans and vents to avoid interference.

Advertisement

If wall mounting, be mindful of the height and distance from potential airflow sources to guarantee reliable performance.

Ceiling Placement Guidelines

How can you confirm your smoke detector is ideally placed for effective monitoring? To guarantee optimal performance, follow these ceiling placement guidelines:

  1. Center the Detector: Install a smoke detector on the ceiling, ideally at the center of the room. This maximizes detection coverage.
  2. Maintain Distance from Ceiling Fans: Keep the detector at least three feet away from ceiling fan blades to prevent airflow interference that could hinder smoke detection.
  3. Clearance from Walls: According to NFPA 72, maintain a clearance of at least 60 cm (2 feet) from walls to avoid false alarms caused by airflow dynamics.
  4. Proximity to Bedroom Door: Position the smoke detector close to the bedroom door for early alerts during emergencies, while adhering to local codes and regulations.

If you have a larger bedroom, consider installing additional detectors to enhance coverage.

Regularly testing and maintaining your smoke detectors is essential, as it guarantees reliable operation and timely alerts in the event of a fire.

Wall Mounting Considerations

Wall mounting a smoke detector can be a practical solution for bedrooms, especially when ceiling installation isn't possible. When you choose to wall mount, position the smoke detector 4-12 inches from the ceiling to optimize its detection capabilities.

It's essential to keep the detector away from the direct airflow of your ceiling fan; ideally, it should be at least three feet from the fan blades. This prevents airflow interference that could delay smoke detection.

Advertisement

For the best results, mount the smoke detector near the corner of the room, about 2-3 feet from the walls. This placement enhances detection while minimizing the chances of false alarms caused by airflow dynamics.

Make sure the installation keeps the detector within 21 feet of any point in the room to guarantee effective smoke coverage.

Lastly, don't forget that regular testing and maintenance of wall-mounted detectors are important. This guarantees they function properly and provide timely alerts during emergencies, giving you peace of mind in your bedroom.

Choosing the Right Detector Type

selecting appropriate detector type

Choosing the right smoke detector type is vital for guaranteeing safety in your bedroom.

With a ceiling fan influencing airflow patterns, it's important to select a detector that minimizes false alarms while effectively detecting fires. Here are some options to take into account:

  1. Photoelectric smoke detectors: These are recommended for bedrooms with ceiling fans, as they excel at detecting smoldering fires, which are often more common in sleeping areas.
  2. Ionization smoke detectors: Although they respond quicker to fast-burning fires, they can trigger false alarms in rooms with airflow disruptions caused by ceiling fans.
  3. Dual-sensor smoke detectors: Combining both ionization and photoelectric technologies, these detectors offer extensive coverage for various fire types, making them a versatile choice.
  4. Regular testing: Whichever type you choose, make certain to test your smoke detector monthly to confirm it's functioning properly during emergencies.

Common Placement Mistakes

placement errors in recruitment

When it comes to smoke detector placement, many homeowners make critical mistakes that can compromise safety. One common mistake is placing the smoke detector too close to a ceiling fan. To avoid airflow interference that can delay smoke detection, make sure it's at least three feet away.

Additionally, installing a smoke detector in the corners of the room can lead to poor performance. Smoke tends to linger in corners, making it harder for alarms to activate.

Advertisement

Another oversight is failing to take into account the location of supply and return vents. If you position detectors in direct airflow, you might experience false alarms or hinder detection capabilities.

It's also essential not to neglect larger bedrooms. You may need more than one smoke detector to guarantee thorough coverage.

Lastly, if you're opting for wall-mounted detectors, avoid mispositioning them. They should be installed 4 to 12 inches from the ceiling to optimize effectiveness without obstructing airflow.

Impact of Ceiling Fans

ceiling fans positive influence

Ceiling fans can greatly affect the performance of smoke detectors, particularly in bedrooms where airflow is essential. The movement of air caused by ceiling fans can hinder smoke detection, delaying your smoke detector's response times during emergencies.

To guarantee your smoke detector works effectively, consider these important points:

  1. Distance: Install smoke detectors at least three feet away from ceiling fan blades to avoid airflow interference.
  2. Speed Settings: Operating your ceiling fan at lower speeds can help improve smoke detector function and reduce false alarms.
  3. Placement: Avoid placing smoke detectors directly beneath ceiling fans, as the airflow can disperse smoke particles away from the detector.
  4. NFPA Guidelines: Adhere to NFPA recommendations, which suggest positioning smoke detectors away from forced air systems for peak performance.

Maintenance and Testing Guidelines

maintenance and testing protocols

To guarantee your smoke detector operates effectively, regular maintenance and testing are essential. Start by following the manufacturers instructions and test your smoke detector at least once a month. Simply press the test button to verify it's functioning properly. If you hear a beeping sound, that's a clear sign to change the batteries immediately, or at least once a year to prevent any unexpected failures.

Every six months, take the time to clean your smoke detector. Dust and debris can accumulate and impair its function, so a quick wipe-down helps maintain its efficiency.

Advertisement

Remember that smoke detectors aren't meant to last forever; replace them every 10 years. Their sensitivity can diminish over time, which could lead to reduced effectiveness in an emergency.

To keep track of these important tasks, maintain a log of testing dates and battery changes. This not only helps you stay organized but also aligns with NFPA guidelines for fire safety.

Additional Safety Considerations

enhanced risk management strategies

In addition to regular maintenance, several safety considerations can enhance the effectiveness of your smoke detectors in the bedroom. By implementing the following guidelines, you can guarantee your smoke alarm operates at peak performance, especially in rooms with ceiling fans.

  1. Placement: Install the smoke detector at least three feet away from ceiling fan blades to prevent airflow interference, which could delay smoke detection.
  2. Height: Position the smoke detector on the ceiling or high on a wall, ideally within 4-12 inches from the ceiling, to maximize its ability to detect rising smoke.
  3. Type: Choose photoelectric smoke detectors for bedrooms with ceiling fans. They're less likely to trigger false alarms due to airflow disturbances compared to ionization detectors.
  4. Accessibility: Keep the area around the smoke detector clear, avoiding obstructions from furniture or decorations, guaranteeing it can effectively sense smoke in the room.

Frequently Asked Questions

Where Should Smoke Detectors Be Placed in Bedroom With Ceiling Fan?

You should place smoke detectors in your bedroom to maximize safety.

Ideally, install them on the ceiling, at least three feet away from the ceiling fan blades to avoid airflow interference. If that's not possible, mount them on the wall, 4-12 inches below the ceiling.

Position the detector near the center of the room for better detection. In larger bedrooms, consider multiple detectors for thorough coverage.

Don't forget to regularly test and maintain them!

Advertisement

Where Is the Best Place to Put a Smoke Detector in a Bedroom?

The best place to put a smoke detector in your bedroom is on the ceiling, ideally at least three feet away from any walls or ceiling fans to prevent airflow issues.

If ceiling installation isn't possible, mount it on the wall, keeping it 4-12 inches below the ceiling.

Position it near the center of the room for maximum effectiveness.

Don't forget to test it monthly and replace the batteries annually to guarantee it works properly.

How Far Should a Smoke Detector Be From a Bedroom?

Imagine a silent night, where every second counts.

Advertisement

When it comes to smoke detectors, you should install them at least three feet away from your bedroom. This distance guarantees they detect smoke quickly without interference from nearby airflow sources.

If possible, place them on the ceiling, ideally in the room's center.

Will a Ceiling Fan Affect a Smoke Detector?

Yes, a ceiling fan can affect a smoke detector's performance.

The airflow generated by the fan can disperse smoke, making it harder for the detector to sense it quickly.

To guarantee reliable smoke detection, you should keep the detector at least three feet away from the fan blades.

Advertisement

Additionally, using the fan on a lower speed can help smoke rise and reach the detector more effectively during an emergency.

Conclusion

In conclusion, installing a smoke detector in your bedroom is essential for your safety, especially if you have a ceiling fan. Keep it at least 10 feet away from the fan to avoid false alarms while ensuring it's easily accessible for maintenance. Remember, a stitch in time saves nine; regular testing and upkeep can make all the difference. Stay proactive, and you'll sleep better knowing you've taken the right steps to protect yourself and your loved ones.
Advertisement

Guides

How Much Does Mr Sparky Charge to Install a Ceiling Fan

Pricing for Mister Sparky’s ceiling fan installation varies widely; discover the factors that influence your final cost and what to expect.

Published

on

By

mr sparky ceiling fan installation

Mister Sparky usually charges between $100 and $300 to install a ceiling fan. Your final cost can vary based on installation complexity and any extra parts needed. For instance, the type of fan and local labor rates can impact pricing. If your current setup isn't sufficient, it might lead to additional labor costs. Hiring licensed professionals guarantees your installation is safe and up to code, plus you'll benefit from their expertise. If you're curious about specific estimates or financing options, you might find it helpful to explore more information on their services.

Key Takeaways

  • Mister Sparky's average installation cost for ceiling fans ranges from $100 to $300, depending on complexity and additional parts needed.
  • Costs can vary based on fan type, weight, local labor rates, and any required permits or structural modifications.
  • Installation typically takes 1-2 hours, with potential extra costs for safety compliance and additional materials like wiring and mounting brackets.
  • They offer customized estimates with transparent pricing to avoid hidden fees, ensuring customer confidence before work begins.
  • Mister Sparky provides a 100% Satisfaction Guarantee and licensed electricians for safe and professional installation.

Cost Breakdown for Installation

installation expense detailed analysis

When you hire Mister Sparky® for a ceiling fan installation, you can expect a clear cost breakdown that typically ranges from $100 to $300. This average cost can fluctuate based on several factors, including the complexity of the installation and any necessary additional parts.

Mister Sparky emphasizes transparent pricing, guaranteeing you know exactly what to expect before any work begins. Your specific cost will depend on the type of ceiling fan you choose, the condition of existing electrical boxes, and whether wiring upgrades are needed.

If your current setup isn't adequate, additional labor costs may be required to guarantee safe and efficient installation. Before any work commences, you'll receive a custom estimate, eliminating any surprises along the way.

Mister Sparky also offers financing options to help manage your expenses, making ceiling fan installation more accessible. By opting for a straightforward approach, you can approve costs ahead of time and focus on enjoying your newly installed ceiling fan without worrying about hidden fees.

With Mister Sparky, you're in good hands, knowing you've chosen a service that prioritizes transparency and quality.

Advertisement

Factors Affecting Pricing

pricing influences and considerations

When you're considering ceiling fan installation, several factors can impact the pricing.

The complexity of the installation, the cost of parts and materials, and local labor rates all play significant roles in determining what you'll pay.

Understanding these elements can help you make an informed decision about your installation.

Installation Complexity Impact

The complexity of your ceiling fan installation greatly influences the overall cost with Mister Sparky. Factors such as the type of fan, its weight, and whether new wiring or electrical boxes are needed play a significant role in determining installation complexity.

If your project requires additional charges for permits or modifications to existing structures for proper fan mounting, you'll see an increase in costs.

Mister Sparky's hourly labor rate also affects your total expenses. Typically, installation takes 1-2 hours, depending on project intricacy.

Advertisement

If any extra parts or materials are necessary to guarantee safety compliance, those costs will be added as well.

To provide you with a clear understanding of your potential expenses, Mister Sparky offers customized estimates tailored to your specific installation needs.

This approach guarantees transparent pricing, so you won't encounter any hidden fees.

Parts and Materials Cost

Several factors influence the cost of parts and materials for your ceiling fan installation with Mister Sparky. The type and style of the fan you choose can considerably affect pricing, with options ranging from $50 to over $500. Additionally, don't forget about extra materials like mounting brackets, electrical boxes, and wiring. If your installation requires upgrades or replacements for safety, these costs can add up quickly.

Local building codes may also dictate specific components, such as reinforced ceiling boxes for heavier fans, impacting your overall pricing. Mister Sparky prides itself on transparent pricing, so you won't encounter hidden fees. Before any work begins, you'll know exactly what you're paying for regarding parts and materials. Furthermore, the complexity of the installation plays a role in determining costs. Existing wiring conditions and potential permit requirements can influence the total you'll pay. Understanding the importance of color accuracy can help you choose a ceiling fan that complements your home's aesthetics, as the right fan can enhance the overall design.

Advertisement

In some cases, the installation may require advanced technology to ensure optimal performance and safety. Understanding these factors will help you budget effectively for your ceiling fan installation, ensuring you're prepared for any necessary adjustments as you work with Mister Sparky. By being informed, you can make the best choices for your home and enjoy your new ceiling fan with confidence.

Local Labor Rates

Local labor rates for ceiling fan installation can vary considerably based on your region. Typically, urban areas charge higher due to increased demand and a higher cost of living.

When you hire an electrician, expect their charges to range from $50 to $100 per hour, influenced by their experience and local market conditions.

The complexity of your installation also plays a key role in determining labor costs. If new wiring is necessary or you're opting for a more intricate ceiling fan model, be prepared for higher expenses.

Additional costs may arise if permits are required for your installation or if any repairs to existing electrical work are needed.

Advertisement

At Mister Sparky, we believe in transparency with our customers. Our StraightForward Pricing® guarantees you know your labor costs upfront, so there are no surprises.

By understanding how local labor rates, installation complexity, and potential additional costs interact, you can make informed decisions about your ceiling fan installation project.

Always consult with a licensed electrician to get an accurate estimate tailored to your specific situation.

Benefits of Professional Services

value of expert assistance

When you hire Mister Sparky for your ceiling fan installation, you're ensuring safety and compliance with electrical codes, which protects your home from hazards.

Their licensed electricians bring expertise and reliability, so you can trust that everything will be wired correctly for peak performance.

Plus, with their 100% Satisfaction Guarantee, you can feel confident that the job will meet your standards.

Advertisement

Safety and Compliance Assurance

Guaranteeing safety and compliance is essential when installing a ceiling fan, and hiring a licensed electrician can make all the difference.

Professional installation means your ceiling fan will adhere to local building codes, dramatically reducing the risk of electrical hazards. Licensed electricians are trained to ascertain that everything is up to par, which not only enhances safety but also promotes compliance.

With their expertise, these professionals guarantee that your fan is securely anchored, providing stability during operation. This secure anchoring helps to prevent accidents that could arise from improper installation.

Furthermore, experienced technicians conduct thorough inspections of your existing electrical systems, ensuring the ceiling fan's compatibility and safe operation.

Expertise and Reliability Benefits

Expertise and reliability are essential when it comes to ceiling fan installation, and hiring Mister Sparky guarantees you'll benefit from both. When you choose Mister Sparky, you're opting for licensed electricians whose expertise minimizes the risk of electrical hazards and guarantees compliance with local codes.

Advertisement

Their technicians know how to properly wire and securely mount ceiling fans, maximizing both performance and safety. With their professional installation, you can also ensure that your fan integrates seamlessly with your smart home devices, enhancing convenience and control.

With professional installation by Mister Sparky, you'll likely extend the lifespan of your ceiling fan while enhancing its energy efficiency, leading to long-term savings on your energy bills.

Their commitment to customer satisfaction is evident through their 100% Satisfaction Guarantee and transparent pricing, so you won't have to worry about unexpected costs cropping up during the installation process.

Additionally, Mister Sparky provides knowledgeable advice on fan selection and installation, guaranteeing you choose the best option tailored to your home and lifestyle.

By investing in their services, you're not just getting a ceiling fan installed; you're guaranteeing a safer, more efficient, and satisfactory experience overall. A well-installed ceiling fan can also enhance your home's security by deterring potential burglars and improving comfort levels.

Advertisement

Trust Mister Sparky to deliver exceptional expertise and reliability for your ceiling fan installation needs.

Importance of Safety Standards

safety standards matter significantly

Prioritizing safety standards during ceiling fan installation is vital for preventing accidents and guaranteeing a secure environment in your home.

When you hire Mister Sparky electricians, you can trust that they adhere to strict safety standards and local building codes. This commitment minimizes risks associated with ceiling fan installations.

Before the installation, licensed professionals verify the weight compatibility of your ceiling fan and the electrical box. Proper anchoring of the fan is essential to prevent hazards such as falling fixtures.

Electricians conduct thorough inspections of existing wiring and electrical systems to ascertain they meet safety requirements. This attention to detail helps identify potential electrical hazards like shocks or fires before they become an issue.

Customer Satisfaction and Guarantees

quality assurance and support

When you choose Mister Sparky for your ceiling fan installation, you can expect a commitment to customer satisfaction that's second to none. They back their work with a 100% Satisfaction Guarantee, so you know they'll do everything possible to meet your expectations.

Here are some key aspects of their service:

Advertisement
  1. On-Time Arrivals: Their motto, "We're On Time, You'll See, Or The Repair Is Free!™," highlights their dedication to punctuality.
  2. Licensed Technicians: All technicians are licensed, trained professionals, guaranteeing you receive quality service from reliable experts.
  3. UWIN Guarantee: This adds extra assurance, promising accountability and satisfaction for the work performed.
  4. Positive Customer Reviews: Many customers rave about the professionalism and thoroughness of the technicians, contributing to Mister Sparky's strong reputation.

With Mister Sparky, you can trust that your ceiling fan installation will be handled with the utmost professionalism and care.

Their commitment to quality service and customer satisfaction guarantees you'll have a positive experience from start to finish.

Common Installation Questions

frequently asked installation queries

Many homeowners have questions about ceiling fan installation, and understanding the basics can make the process smoother. One key consideration is whether you need an installation permit in your area. It's important to check local regulations before proceeding.

Proper anchoring is significant; your ceiling fan should be mounted to an electric ceiling box rated for heavy fixtures to guarantee stability and safety. During a technician inspection, Mister Sparky will evaluate your existing electric ceiling box to determine its compatibility with the new fan. If you're swapping out a light fixture, you might need to replace the box.

Additionally, you should verify the weight compatibility between the fan and the box to avoid any hazards. To comply with safety standards, ceiling fans should be installed at least 7 feet above the floor. This height not only meets regulations but also optimizes airflow, enhancing the fan's efficiency.

Contact Mister Sparky for Services

call mister sparky services

For any ceiling fan installation needs, reaching out to Mister Sparky is a smart choice. They're known for their professional electricians who can handle your installation with ease and expertise.

Here's what you can expect when you contact them:

  1. Customized Estimates: You'll receive tailored quotes based on your specific needs, the complexity of the installation, and the necessary parts.
  2. Transparent Pricing: Mister Sparky guarantees no hidden fees, so you know exactly what you're paying for.
  3. Satisfaction Guarantee: With a 100% satisfaction guarantee, you can rest easy that the quality of their service will meet your expectations.
  4. Emergency Services: If you need urgent assistance, Mister Sparky offers 24/7 emergency services for your ceiling fan installation needs.

To get started, simply contact Mister Sparky at (936) 265-7266. They'll be happy to discuss your specific needs and provide you with the most current pricing for your ceiling fan installation.

Don't hesitate to reach out and confirm your home remains comfortable and stylish!

Advertisement

Frequently Asked Questions

How Much Does It Cost to Have Someone Install a Ceiling Fan?

When you're considering having someone install a ceiling fan, costs typically range from $150 to $400.

This price varies based on factors like the fan type, whether new wiring is necessary, and where it'll be installed in your home.

You'll likely find that hiring a professional takes about 1-2 hours, which can influence labor costs.

It's wise to get a detailed estimate to avoid any unexpected expenses during the process.

How Much Does Home Depot Charge to Hang a Ceiling Fan?

If you're looking to hang a ceiling fan, Home Depot typically charges between $100 to $150 for installation.

Advertisement

Keep in mind that additional costs may arise if electrical work is necessary, like upgrading the ceiling box.

You might also need to factor in permit fees based on local regulations.

It's a good idea to check for promotions or discounts to help save some money on your installation.

How Long Does It Take an Electrician to Install a Ceiling Fan?

Imagine your ceiling fan's like a new puzzle piece, ready to complete your room.

Installing one generally takes an electrician about 1 to 2 hours. If you're replacing an old light fixture, it might take a bit longer since they'll need to check compatibility and make adjustments.

Advertisement

Plus, ensuring everything's securely mounted adds to the time. So, it's always best to schedule with a pro for a smooth, efficient installation process.

Should You Hire an Electrician to Install a Ceiling Fan?

You should definitely hire an electrician to install your ceiling fan.

They've got the expertise to guarantee everything's wired correctly, which keeps you safe from electrical hazards.

Plus, professional installation assures peak performance and longevity for your fan.

You won't have to worry about voiding warranties or facing costly repairs down the line.

Advertisement

With a licensed electrician, you'll save time and gain peace of mind knowing the job's done right.

Conclusion

When you choose Mr. Sparky for your ceiling fan installation, you're not just hiring a service; you're inviting peace of mind into your home. Like a well-tuned orchestra, their skilled professionals guarantee every detail harmonizes perfectly, giving you a cool breeze without the hassle. With safety as the foundation and customer satisfaction as the melody, your space transforms into a sanctuary. So, why wait? Let Mr. Sparky bring the breeze into your life today!

Continue Reading

Guides

How Long Does It Take to Install a Ceiling Fan

You might be surprised at how long it actually takes to install a ceiling fan, especially when considering various factors involved.

Published

on

By

ceiling fan installation time

Installing a ceiling fan usually takes 1 to 3 hours. If you hire a licensed electrician, they can often complete the job in 1 to 2 hours. The time can vary based on the complexity of the model and the current wiring conditions. Replacing an old fan might take a little longer due to removal and installation. If you're tackling it yourself, expect to spend about 3 to 5 hours, especially if there are complications. Understanding the process and potential hurdles can help you plan better. Curious about specific steps or tips for a smoother installation?

Key Takeaways

  • Typical ceiling fan installation takes 1 to 3 hours, varying by complexity and existing wiring conditions.
  • Licensed electricians can complete installations in 1 to 2 hours for quicker results.
  • Replacement installations, including removing old fans, generally take 1 to 3 hours.
  • Complex installations, such as those with high ceilings or extra wiring, may extend to 4 to 5 hours.
  • DIY installations may require 3 to 5 hours, depending on the installer's experience and the fan's complexity.

Average Installation Time

typical setup duration

When you're considering a ceiling fan installation, it's important to know the average installation time. Typically, you can expect the process to take between 1 to 3 hours. This duration often hinges on the complexity of the installation and existing wiring conditions.

If you hire licensed electricians for the job, they usually complete installations in just 1 to 2 hours, ensuring a quicker turnaround.

For replacement installations, the timeframe remains similar—around 1 to 3 hours—covering preparation, removal of the old fan, and mounting the new one.

However, if your installation involves complex factors, like high ceilings or additional wiring, you might see the installation time extend to 4 to 5 hours.

Key Factors Affecting Time

time influencing key factors

Several key factors can influence how long it takes to install a ceiling fan.

First, the installation time can vary greatly based on the complexity of the fan model. More intricate designs require additional assembly and mounting time.

Advertisement

Next, existing wiring conditions play an essential role; frayed wires or improper polarity can complicate the process and extend the timeline.

Access to the attic is another factor that can impact your installation time. If your ceiling construction requires modifications or additional wiring, the project may take longer than expected.

When you remove old fixtures, you might encounter unexpected complications, such as multiple cables or problems with the existing electrical box, which can further increase the time needed for your installation.

Step-by-Step Installation Process

detailed installation instructions provided

To successfully install a ceiling fan, start with the preparation phase, which usually takes about 15 to 30 minutes. Gather the necessary tools and materials while evaluating the existing wiring conditions.

If you're replacing an old ceiling fan, removing it could take another 15 to 45 minutes, depending on how complicated the installation is.

Next, you'll want to assemble a new fan, which generally requires 15 to 30 minutes. The time can vary based on the fan's design and the number of components.

Advertisement

Once assembled, move on to mounting the fan and connecting the electrical wiring. This part of the installation process can take between 30 to 60 minutes, especially if you're dealing with compatibility issues related to the electrical box.

Finally, it's essential to test the fan for proper function and balance. This step usually takes an additional 15 to 30 minutes to verify everything runs smoothly.

Following these steps will help you efficiently and safely install your ceiling fan, making sure you can enjoy its benefits in no time.

Cost Considerations

expense evaluation factors

Installing a ceiling fan can cost around $480 on average, which includes both labor and materials.

When considering the ceiling fan installation cost, it's important to factor in installation charges, which generally start at about $75. If your installation involves updates or complex electrical wiring, expect additional fees to apply.

Local installers often provide free quotes, so take advantage of this to effectively plan your budget.

Advertisement

Electricians typically charge hourly rates that range from $40 per hour, influenced by the complexity of installation and the condition of your existing fixtures. If your current setup requires more intricate work, such as replacing outdated wiring, your costs may rise considerably.

Replacement costs for ceiling fans can also vary widely based on the model you choose and specific installation requirements. Additionally, opting for an Energy Star certified fan can lead to greater energy savings over time, which may offset initial installation costs.

By understanding these cost considerations, you can better prepare for the overall investment in your ceiling fan project.

Professional vs. DIY Installation

expert versus self installation

When it comes to ceiling fan installation, you have two primary options: hiring a professional or tackling the project yourself. Each choice has its pros and cons, especially regarding time and complexity.

Typically, professional installation by experienced electricians takes between 1 to 3 hours. The average time for a standard installation is about 3.34 hours, which often includes tasks like removing old fixtures and assembling the new fan. On the other hand, if you decide to go the DIY route, it could take you 3 to 5 hours, especially if you're not familiar with the process.

Here's a quick comparison to help you decide:

Advertisement
Option Average Time Considerations
Professional 1 to 3 hours Safety, compliance, quick
DIY 3 to 5 hours Cost-saving, potential complications
Complexity Varies Ceiling height, wiring
Experience Required for DIY Knowledge of installation
Cost Higher for pro Savings possible for DIY

Ultimately, weigh your skills against the installation complexity to choose the best option for your ceiling fan.

Frequently Asked Questions

How Difficult Is It to Install a Ceiling Fan?

Installing a ceiling fan can be quite challenging, depending on your setup. If you've got existing wiring issues or an old fixture that's tough to remove, you might find yourself facing unexpected complications.

The fan's design plays a role too; simpler models are easier to assemble. Plus, if your ceiling has obstacles like plaster and lath, you'll need to navigate those carefully.

How Much Does Labor Cost to Install a Ceiling Fan?

Did you know that the average labor cost for ceiling fan installation starts at around $75?

When you hire an electrician, expect to pay about $40 per hour, with total costs reflecting the time it takes, usually ranging from 1 to 3 hours.

Advertisement

If there's no existing fan box or wiring, additional costs can arise.

Complications, like wiring issues, may also raise labor expenses, so getting a free quote can help you plan.

Can the Average Person Install a Ceiling Fan?

Yes, the average person can install a ceiling fan, but it requires some basic knowledge of electrical work.

If you're familiar with tools and wiring, you can tackle it yourself. However, be prepared for potential challenges like weight alignment and wiring issues.

Make sure you read the manufacturer's instructions carefully and have a clear plan in place.

Advertisement

If you're unsure, don't hesitate to consult a professional for assistance.

How Long Do Fans Take to Install?

You might've just bought that sleek new fan, and now you're wondering how long it'll take to get it up.

Generally, the installation can take anywhere from 1 to 5 hours. If you're lucky with a simple setup, it could wrap up in just an hour.

But if things get tricky with wiring or drywall work, you could be looking at several hours. It's all about the complexity of your specific situation.

Conclusion

In the grand adventure of ceiling fan installation, you might feel like a superhero conquering a challenging task! Whether you tackle it yourself or call in the pros, remember that time flies when you're having fun. So, gear up and immerse yourself in the process—before you know it, you'll be enjoying a cool breeze while feeling like you just saved the day! Don't let the installation time stress you out; embrace the journey and let your ceiling fan dreams soar!

Advertisement

Continue Reading

Guides

Why Does Ceiling Fan Hum

Baffled by your ceiling fan’s hum? Discover the common culprits behind this irritating noise and how to silence it effectively.

Published

on

By

ceiling fan humming sound

If your ceiling fan hums, it's likely due to a few common issues. Loose wire connections can create unwanted sounds, while poorly lubricated motors cause friction, leading to that annoying hum. Sometimes, improperly installed dimmer switches contribute to buzzing, especially at lower speeds. You might also find that loose screws or imbalanced blades worsen the problem. Regular checks, tightening, and lubrication can help quiet things down. If the noise persists despite your efforts, there are deeper issues to reflect upon. Discovering more about these would help you tackle the problem effectively.

Key Takeaways

  • Loose wire connections can cause humming sounds and vibrations in ceiling fans.
  • Poorly lubricated motors lead to increased friction, resulting in humming noises.
  • Incorrectly installed dimmer switches may trigger humming, especially at lower speeds.
  • Imbalanced fan blades create excessive vibration, contributing to persistent humming.
  • Regular maintenance and inspections can prevent and reduce humming issues in ceiling fans.

Common Causes of Humming

humming sound common sources

When your ceiling fan starts to hum, it can be frustrating, but understanding the common causes can help you address the issue. One major reason for that humming noise is loose wire connections. These connections can create unwanted sounds and might even lead to fan wobbling if not fixed.

Another common culprit is poorly lubricated motors; friction from a lack of lubrication can cause excessive humming, so regular maintenance is important.

Additionally, loose screws on the fan blades or motor components can contribute to vibrations, amplifying the noise you hear. It's crucial to perform routine checks to verify everything's tightened properly.

If your fan is connected to a dimmer switch, it might be improperly installed, causing a hum, especially at low speeds during nighttime use.

Ignoring these issues can lead to more significant problems, so it's imperative to address them early on. By keeping an eye on these factors, you can minimize the humming and enjoy a quieter, more efficient ceiling fan experience.

Advertisement

Electrical Issues and Solutions

electrical problems and remedies

Electrical issues can be a significant source of humming in your ceiling fan. Start by checking the wattage light bulbs you're using; incorrect wattage can interfere with the fan's operation.

If you've got a dimmer switch, verify it's compatible with your fan model, as incompatible switches can also cause humming. Cordless vacuums can serve as an alternative for quick cleanups around the fan area that might be obstructed. Additionally, choosing a fan with energy-efficient motors can help reduce electrical noise during operation. Air purifiers that utilize HEPA filters can also improve overall air quality in the room, creating a more pleasant environment.

Inspect the junction box for loose wire connections, as these can create buzzing sounds that not only annoy you but may also pose safety risks. Tightening any loose wires can help eliminate the noise.

If your fan has variable speed controls, be aware that these can produce humming due to the electrical current they use. Additionally, air quality can be affected by the fan's operation if it's obstructed, leading to ineffective airflow.

Should you notice the humming is more pronounced at lower speeds, this might indicate a faulty triac controller, which may need replacement to reduce the noise.

Regularly checking your electrical connections and confirming the fan is correctly wired to the power source can prevent persistent humming and improve overall performance. Additionally, ensuring that the fan is free from obstructions for effective airflow can help maintain optimal operation and reduce noise.

Advertisement

Mechanical Problems and Fixes

repairing mechanical issues efficiently

Mechanical problems can often be the culprits behind your ceiling fan's annoying hum. One common issue is loose screws or components. These can create vibrations that lead to a persistent noise during operation. You should regularly check and tighten any loose screws to minimize this noise issue.

Another factor could be a poorly lubricated motor; increased friction from lack of lubrication can result in humming. Make it a point to check and re-oil your motor regularly.

An imbalance in fan blades, caused by misalignment or damage, can also lead to excessive vibration and humming. Confirm that your blades are balanced for smooth operation.

Additionally, loose mounting hardware or improperly installed brackets can amplify the humming noise. It's vital to securely fasten all components during installation or maintenance.

Maintenance Tips for Quiet Operation

silent operation maintenance guide

To keep your ceiling fan running quietly, regular maintenance is key. Start by checking and tightening all screws on the fan blades and light fixtures. Loose blades can cause annoying hums, so make certain everything is secure.

Next, clean the fan blades and motor housing regularly to remove dust and grime, which can contribute to mechanical noise.

Lubricating the motor periodically is another essential maintenance tip. This reduces friction and noise, helping your ceiling fan stay quiet and prolonging its lifespan.

Advertisement

Additionally, inspect and secure wire connections in the junction box. Loose or bad wire connectors can lead to humming noises that disrupt your peace.

Lastly, consider using compatible dimmers and speed controls designed specifically for ceiling fans. These can minimize electrical buzzing or humming during operation, enhancing your overall experience.

When to Seek Professional Help

recognizing need for assistance

If your ceiling fan's humming noise persists despite your best maintenance efforts, it might be time to call in a professional. A noisy fan can indicate underlying issues that you may not be able to resolve on your own.

Here are some signs that it's time to seek help:

  • You notice crackling or sizzling sounds accompanying the humming.
  • The humming increases noticeably when using dimmer switches or variable speed controls.
  • Your fan is over 10 years old and has started humming louder than usual.

These strange noises can suggest deeper electrical problems, including loose wiring or motor housing wear.

If you've tightened screws and checked connections without success, a professional electrician can assess the situation and recommend necessary repairs or replacements. This is especially important if you're uncomfortable performing electrical inspections yourself.

Ignoring these signs could lead to dangerous situations, so don't hesitate to reach out for customer support if needed. Taking action promptly can prevent further complications and guarantee your safety.

Advertisement

Frequently Asked Questions

How Do I Stop My Ceiling Fan From Humming?

To stop your ceiling fan from humming, start by checking and tightening any loose screws on the blades and mounting brackets.

Next, inspect the wiring connections in the junction box for damage.

Make sure the motor is properly lubricated, as friction can increase noise.

Also, verify that you're using the correct wattage light bulbs.

If the humming continues, you might need to consult a professional electrician for further assistance.

Advertisement

Do Most Ceiling Fans Hum?

Yes, most ceiling fans do hum to some extent.

This humming usually comes from the electric motor operating, creating a low-frequency noise. You might notice it more with lower-quality fans or if they're hooked up to the wrong dimmer switches.

Fans with shaded pole motors tend to hum louder than those with capacitor run motors.

Regular maintenance and proper installation can help reduce the noise, but a little hum is pretty common.

How Do I Stop My Fan From Buzzing?

You might think a buzzing fan is just something you have to live with, but it doesn't have to be that way!

Advertisement

To stop your fan from buzzing, start by checking the wattage of your light bulbs; too high can cause issues.

Tighten any loose screws on the blades and fixtures.

Also, inspect wiring connections and lubricate the motor.

If the noise continues, consider replacing any incompatible dimmer switches or remote receivers.

Why Is My Ceiling Fan Making Noise?

If your ceiling fan's making noise, it's likely due to a few common issues.

Advertisement

First, check for loose screws or an improper mount—you may need to tighten or adjust them.

Next, inspect the motor; it might need lubrication.

Additionally, verify you're using the correct wattage bulbs and avoid dimmer switches if incompatible.

If the noise continues despite these checks, it might be time to call a professional electrician for help.

Conclusion

In summary, a humming ceiling fan can stem from various causes, but with the right approach, you can often resolve the issue yourself. For instance, imagine you discover that tightening a loose blade screw eliminates the hum entirely, restoring peace to your living space. By staying proactive with maintenance and addressing problems early, you can guarantee your fan runs smoothly and quietly, enhancing your comfort without the need for professional help.

Advertisement

Continue Reading

Affiliate disclaimer

As an affiliate, we may earn a commission from qualifying purchases. We get commissions for purchases made through links on this website from Amazon and other third parties.

Advertisement

Vetted

Trending