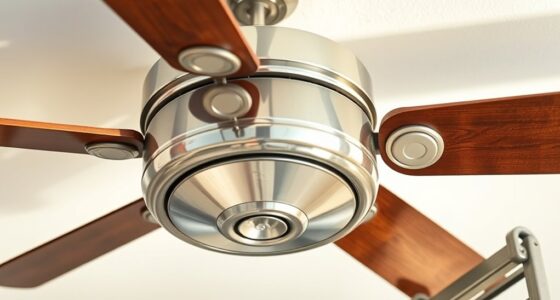

To update your ceiling fan wiring to meet modern standards, first turn off the circuit breaker and confirm power is disconnected using a voltage tester. Inspect the wiring and junction box for damage and make certain it includes a proper grounding wire; upgrade if necessary to comply with local codes. Connect the black or red hot wire, white neutral, and ground securely with UL-listed connectors, maintaining proper routing. Restoring power will verify correct operation, and following safety protocols guarantees compliance—more detailed steps help ensure a safe, reliable upgrade.
Key Takeaways
- Turn off the circuit breaker and verify power is disconnected before working on the wiring.
- Inspect and upgrade the junction box to ensure proper grounding per current electrical codes.
- Connect the fan’s wiring correctly: hot to hot, neutral to neutral, and ground to ground, using wire nuts.
- Use UL-listed cables and appropriate gauge (12/2 or 14/2) for safe, compliant wiring.
- Test the fan’s operation after restoring power to confirm proper, modern-standard wiring and functionality.
Updating ceiling fan wiring is a critical task that guarantees safety and ideal performance. Proper wiring ensures the fan operates efficiently, reduces fire risk, and complies with current electrical codes. Before beginning, turn off the circuit breaker to eliminate any risk of electrical shock. Confirm that the power is disconnected by testing the wires with a voltage tester. Safety is paramount; wearing insulated gloves and using insulated tools minimizes potential hazards during the process.
Ensuring proper wiring is crucial for safety, efficiency, and code compliance when updating a ceiling fan.
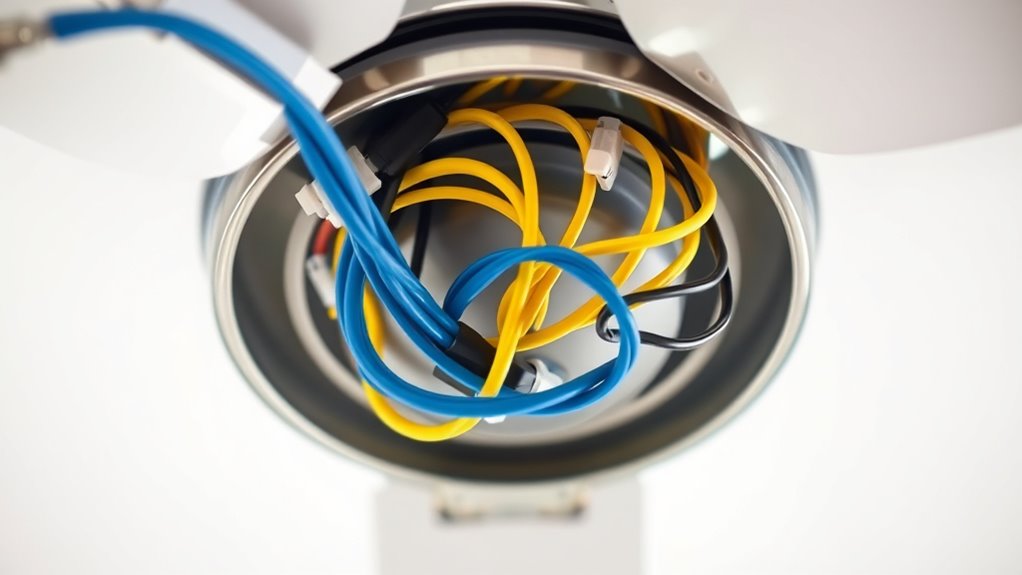
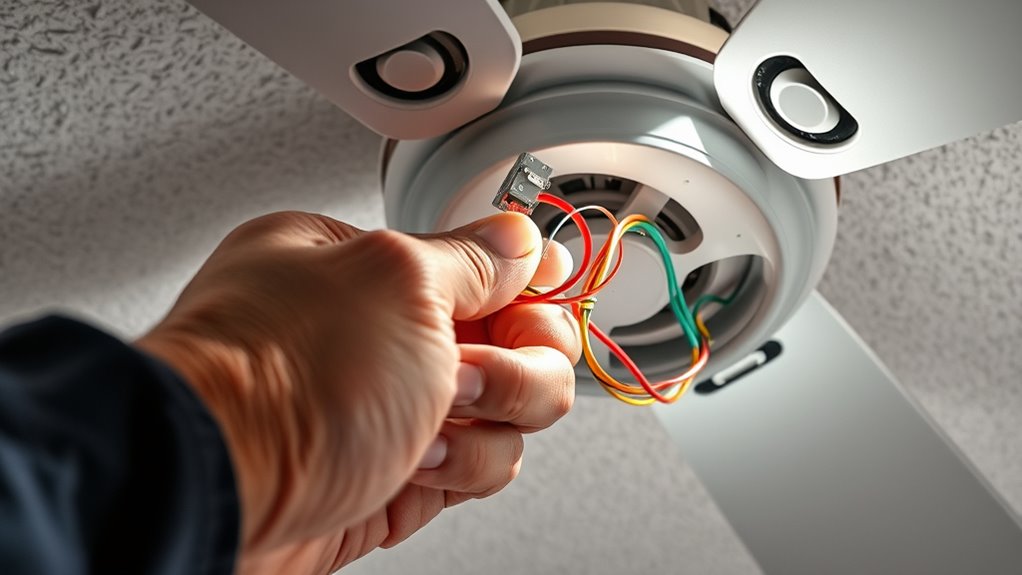
Once safety measures are in place, access the fan’s junction box. Remove the existing fixture, noting the wiring connections for reference. Modern standards typically require a grounded circuit; for this reason, the wiring should include a ground wire, usually copper or green. If the existing box lacks a ground wire, consider installing a grounding conductor or upgrading to a grounded box, as per local electrical codes. Inspect the wiring for damage, corrosion, or signs of wear, and replace any compromised cables before proceeding.
The new wiring setup should include a hot (live) wire, a neutral wire, and a ground wire. In most cases, the hot wire is black or red, the neutral is white, and the ground is green or bare copper. Connect the hot wire from the power source to the fan’s black or red wire, ensuring a secure, screw-tightened connection using wire nuts. Attach the neutral wire from the power supply to the fan’s white wire, again tightening securely. The ground wire from the power source should connect to the fan’s grounding wire or grounding screw. Confirm that all connections are tight, with no exposed copper, and that the wire nuts are properly secured to prevent detachment.
Modern wiring standards also emphasize the use of UL-listed wiring components that meet current safety codes. Use appropriately rated cables, such as 14/2 or 12/2 gauge wire, depending on the fan’s electrical load and local code requirements. When replacing the wiring, ensure that the cable length and routing are tidy, avoiding pinched or tightly bent cables that could compromise insulation or cause mechanical failure over time. Once all connections are secure, carefully push the wires back into the junction box, mount the fan, and restore power.
Finally, test the installation thoroughly. Turn the circuit breaker back on, verify the fan’s operation at different speeds, and check for any unusual noises or flickering lights. Proper updating of ceiling fan wiring not only enhances safety but also prolongs the lifespan of the fixture and contributes to overall electrical system integrity. Always adhere to local electrical codes and consider consulting a licensed electrician if you’re uncertain about any step in the process. Additionally, staying informed about electrical safety standards can help prevent hazards and ensure compliance with regulations.

Harbor Breeze 54-in Ceiling Fan Wire Extension Cord
Downrod wire extension kit
As an affiliate, we earn on qualifying purchases.
As an affiliate, we earn on qualifying purchases.
Frequently Asked Questions
Can I Update Ceiling Fan Wiring Myself Without Professional Help?
You can update ceiling fan wiring yourself if you have electrical experience and understand safety protocols. Turn off the power at the circuit breaker, verify the circuit is de-energized, and follow the wiring diagram carefully. Use proper tools, connect wires securely, and make certain grounding is correct. If you’re unsure at any step, it’s safest to consult a licensed electrician to prevent electrical hazards and code violations.
What Tools Are Necessary for Updating Ceiling Fan Wiring?
You’ll need a voltage tester to guarantee power is off, wire strippers for clean cuts, a screwdriver to remove and secure fixtures, and wire connectors for safe connections. A ladder helps reach the ceiling safely, and pliers assist in twisting wires securely. Think of these tools as your toolkit armor—each plays a crucial role to make your wiring project precise, safe, and compliant with modern standards.
How Long Does a Typical Ceiling Fan Wiring Upgrade Take?
A typical ceiling fan wiring upgrade takes about 1 to 3 hours, depending on your experience and the existing wiring complexity. You’ll need to shut off power, remove the fan, and replace or update the wiring according to current standards. If the electrical box is accessible and wiring is straightforward, the process is quicker. Complex installations or troubleshooting can extend the timeframe, so allocate enough time for safety and accuracy.
Are There Specific Codes I Need to Follow When Updating Wiring?
You need to follow the National Electrical Code (NEC) when updating your ceiling fan wiring. This code, adopted nationally, mandates specific wiring methods, grounding, and circuit requirements to guarantee safety and compliance. Approximately 50% of electrical fires involve improper wiring, highlighting the importance of adhering to these standards. Make sure to use UL-listed components, install a proper grounding wire, and consult local amendments, as they may impose additional requirements.
Is It Safe to Operate the Fan Immediately After Wiring Updates?
No, you shouldn’t operate the fan immediately after wiring updates. You need to verify all connections are secure, the circuit is properly tested for continuity and grounding, and an inspector verifies compliance with local electrical codes. Only after confirming that the wiring is correctly installed and safe should you turn on the fan. This prevents electrical hazards such as short circuits, shocks, or fire risks. Always follow proper safety procedures and code requirements.

3M Performance Plus Wire Connector, O/B+POUCH, Orange/Blue, Flexible Steel Spring Connectors, Twist On, CSA Certified, UL Listed, Pouch of 100, 22-12 AWG
STRONG BITING SPRING: for a secure, reliable and long-lasting connection in all your pigtail applications
As an affiliate, we earn on qualifying purchases.
As an affiliate, we earn on qualifying purchases.
Conclusion
By updating your ceiling fan wiring to meet modern standards, you guarantee unparalleled safety, efficiency, and peace of mind. Failing to modernize could leave your home vulnerable to electrical fires, shorts, or catastrophic failures—disasters that could devastate your family and property. Don’t gamble with outdated wiring; invest in precise, code-compliant upgrades today. Your home’s safety and your loved ones’ lives depend on meticulous, up-to-date electrical practices—because nothing is more valuable than safety.

(Pack of 10) 12 AWG Solid Copper Ground Wire with Green Ground Screws – 6.5" Edge-Stripped Grounding Wire, 5/8" Strip, 10-32 x 3/8" Captive Green Screws for Electrical Boxes
PACK OF TEN: This listing is for a pack of 10 green ground screws and grounding pigtails. Packaged…
As an affiliate, we earn on qualifying purchases.
As an affiliate, we earn on qualifying purchases.

Energeaster Solid Indoor 12/2 W/G NMB Cable 50ft Coil,Electrical Wire 12 Gauge Wire 2 Conductors Non-Metallic with Ground Wire(Yellow)
Wire Specification: Solid Indoor 12/2 NMB cable 50ft coil; Coated in Cable Jacket for easier pulling; stripping; and…
As an affiliate, we earn on qualifying purchases.
As an affiliate, we earn on qualifying purchases.