To wire a ceiling fan safely, you need to turn off the power at the circuit breaker and verify the wires are dead with a voltage tester. Match the wires carefully: black or red for hot, white for neutral, and green or bare for ground. Secure all connections tightly and securely attach the mounting bracket. When you follow these steps carefully, you’ll avoid hazards and guarantee reliable operation—stay tuned to learn the full process in detail.
Key Takeaways
- Always turn off the circuit breaker and verify power is off with a voltage tester before wiring.
- Match wire colors correctly: black/red (hot), white (neutral), green/bare (ground) for safe connections.
- Securely attach the mounting bracket and ensure the fan is firmly mounted to prevent wobbling or accidents.
- Use wire nuts and proper connectors, avoiding exposed copper, to ensure safe, reliable electrical connections.
- Double-check all wiring and test with tools before restoring power to prevent shorts, shocks, or electrical hazards.

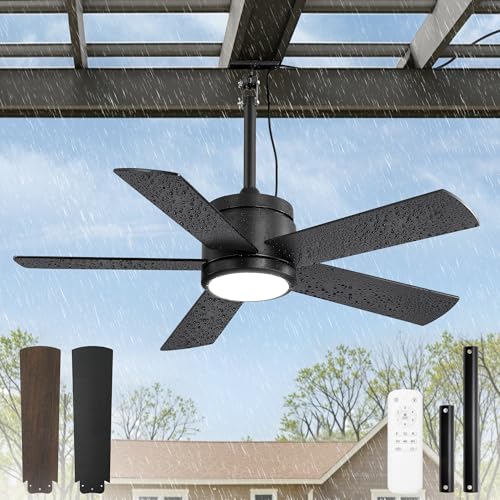
Fanbulous 42 Inch Waterproof Outdoor Ceiling Fan with Lights and Remote,IP65 Hanging Gazebo Fan with 3CCT 6-Speed DC Motor,Black Wet Rated Plug in Ceiling Fan with Cord for Patios Porch Pergola
IP65 WATERPROOF RATING:Outdoor ceiling fans for patios with light have IP65 waterproof rating, no fear of heavy rain...
As an affiliate, we earn on qualifying purchases.
Understanding Your Electrical System and Circuit Requirements

Before you begin wiring your ceiling fan, it’s crucial to understand your electrical system and circuit requirements. Start by locating your electrical panel to identify the correct circuit breaker. Most ceiling fans connect to a dedicated circuit or a circuit with sufficient capacity—usually 15 or 20 amps. Check that the circuit breaker controlling the intended power source matches the load needed for your fan. If your electrical panel has multiple breakers, verify which one supplies power to the room where you plan to install the fan. Understanding these elements prevents overloads and ensures safe wiring. Never attempt to wire or modify circuits without confirming your system’s capacity and circuit breaker ratings. Proper knowledge of your electrical setup is essential for a safe and effective ceiling fan installation. Additionally, being aware of security zone info can help you understand the importance of safeguarding your home’s electrical and physical infrastructure.
42 In Outdoor Ceiling Fan Hanging Fan Outdoor Ceiling Fans, Waterproof, with Light, Remote, 42 In, Wet Rated, IP65, 6 Speed, 3CCT, Plug in, for Patios, Porch, Gazebo, Black
IP65 Waterproof & Outdoor: This outdoor fan features an IP65 waterproof design, making it ideal for patios and...
As an affiliate, we earn on qualifying purchases.
Identifying the Correct Wiring Components for Ceiling Fans

To safely wire your ceiling fan, you need to identify the correct wiring components, including the power supply, grounding wire, and switch wires. First, familiarize yourself with wire color coding: black or red for hot, white for neutral, and green or bare copper for ground. Next, examine connector types—wire nuts and terminal connectors—to guarantee secure connections. Understanding juice extraction techniques can also help you recognize how different wiring methods impact safety and efficiency. 1. Confirm the power supply wire matches the fan’s wiring diagram, typically black or red. 2. Identify the neutral wire (white) for completing circuits. 3. Locate the grounding wire (green or bare copper) for safety. 4. Ensure all connector types are compatible and tightly secured to prevent shorts. Knowing these components helps you avoid costly mistakes and ensures a safe, reliable installation.

nebulium 42" Outdoor Ceiling-Fan with Light: Waterproof Plug-in Ceiling Fan, App/Remote Control, Dimmable 3CCT LED Lights, 6 Speed Quiet DC Motor, for Porch Patios
[Ceiling Fan with Light for Outdoors] The 42-inch Nebulium ceiling fan features IP44 waterproof rating and comes equipped...
As an affiliate, we earn on qualifying purchases.
Turning Off Power Safely Before Starting Installation

Ensuring the power is turned off is the most critical step before beginning your ceiling fan installation. Start by switching off the circuit breaker connected to the fan’s circuit. Confirm the power is off by testing the wires with a voltage tester. Pay attention to color coding: typically, black or red wires are hot, white is neutral, and green or bare copper is ground. This helps prevent accidental contact with live wires. Before handling the wires, strip the insulation carefully using wire strippers, exposing enough length for secure connections. Turning off the power not only protects you from electrical shock but also guarantees safe wire stripping and handling. Always double-check that no voltage is present before proceeding to connect or manipulate any wires. Additionally, understanding home electrical safety practices can further reduce risks during installation.

Honeywell Ceiling Fans Belmar 52 Inch Ceiling Fan Without Light, Outdoor Ceiling Fan with Pull Chain, Tri-Mount Traditional 5 Blade Design, ETL Wet Rated, Bronze (50199-01)
Efficiently Cool Smaller, Indoor Rooms: This 52 inch indoor fan is ideal for indoor spaces up to 100...
As an affiliate, we earn on qualifying purchases.
Connecting the House Wires to the Fan Wires Properly

Once the power is off and you’ve verified that no voltage is present, you can begin connecting the house wires to the fan wires. Understanding wire color codes and referring to fan wiring diagrams makes this process safer and clearer. Here’s what you should do:
- Match the black (hot) wire from the house to the fan’s black wire to power the motor.
- Connect the white (neutral) wire to the corresponding white wire, completing the circuit.
- If your fan has a blue or red wire for lighting, connect it to the house’s switch wire for control.
- Secure all connections with wire nuts, ensuring no exposed copper, and follow the wiring diagram carefully to avoid mistakes.
This step ensures safe, efficient operation while respecting electrical standards.
Ensuring Grounding and Safety Measures Are in Place

Before turning on your ceiling fan, make sure the ground wire is properly connected to prevent electrical shocks. Use the correct circuit breaker to handle the fan’s power load safely. Also, verify that the voltage matches your fan’s requirements to avoid damage or hazards. Regularly inspecting and maintaining your electrical connections can also help prevent potential issues. Additionally, always adhere to air purifier maintenance guidelines to ensure safety when using connected ventilation systems.
Ground Wire Connection
To keep your ceiling fan safe to operate, connecting the ground wire properly is essential. A solid grounding connection prevents electrical shocks and protects against faults. Here’s how you can guarantee a safe grounding connection:
- Locate the ground wire—usually green or bare copper—in your wiring setup.
- Attach the ground wire securely to the green grounding screw on the fan’s mounting bracket.
- Ensure the connection is tight and free of corrosion for a reliable grounding path.
- Double-check that the ground wire isn’t touching any other wires, avoiding potential shorts.
Proper Circuit Breaker Use
Using the correct circuit breaker is essential for maintaining a safe and reliable ceiling fan installation. Ensure the breaker’s capacity matches the fan’s electrical needs to prevent overloads. Check your fuse box compatibility before selecting a breaker to avoid fitting issues. A breaker with inadequate capacity can trip frequently or cause electrical hazards, while one that’s too large might not trip during overloads. Always verify the circuit breaker’s ratings and ensure proper grounding. Here’s a quick overview:
| Aspect | Importance | Action Needed |
|---|---|---|
| Circuit Breaker Capacity | Prevents overloads and trips | Match capacity to fan’s wattage |
| Fuse Box Compatibility | Ensures proper fit and function | Use compatible breaker model |
| Grounding | Ensures safety during faults | Confirm grounding connections are proper |
| Trip Threshold | Protects wiring and devices | Use a breaker with adequate trip rating |
| Maintenance | Maintains safety over time | Regularly inspect and replace if needed |
Additionally, ensure that your grounding system is properly installed and maintained to enhance overall electrical safety.
Verify Voltage Compatibility
Are you sure your ceiling fan’s voltage matches your home’s electrical system? Checking voltage compatibility is vital for safety. First, verify your fan’s electrical ratings on the packaging or manual. Second, compare these ratings to your home’s supply—most homes use 120V, but some require 240V. Third, avoid mismatches that could cause overheating, flickering, or failure. Fourth, always test the circuit with a voltage tester before wiring. Ensuring proper voltage compatibility prevents dangerous electrical issues and protects your investment. Remember, grounding and proper electrical ratings aren’t optional—they’re indispensable for safe operation. Don’t take shortcuts—double-check voltage compatibility to keep your home safe and your ceiling fan running smoothly. Additionally, understanding the contrast ratio of your fan’s motor and lighting can help prevent uneven operation or flickering issues.
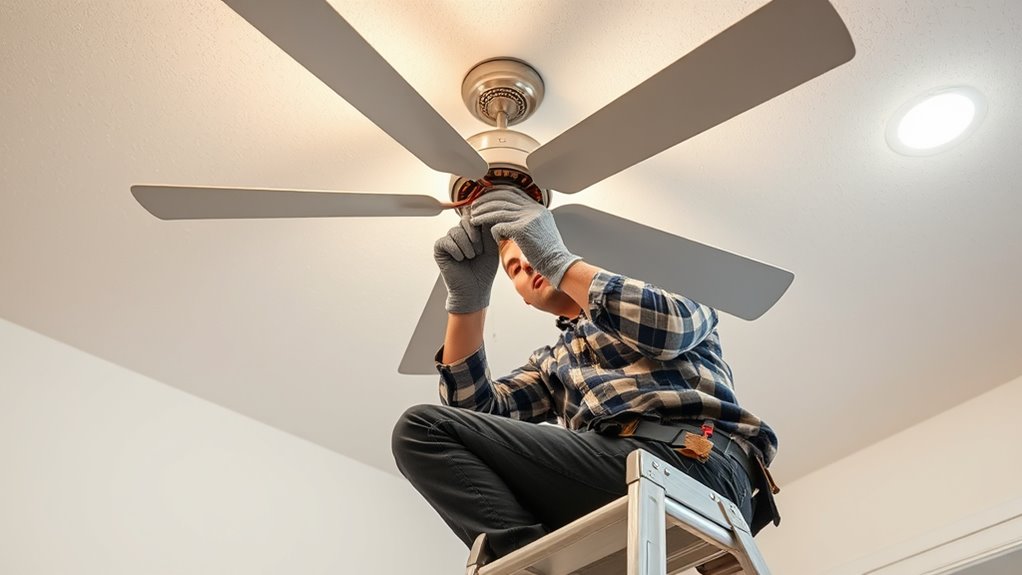
Installing the Ceiling Fan Mounting Bracket Correctly

Before installing the ceiling fan, make sure the mounting bracket is securely attached to the ceiling box. A stable bracket ensures the fan remains level, which simplifies fan blade maintenance and prevents wobbling. Use the provided hardware and tighten all screws firmly. Once the bracket is secure, attach the fan motor to the bracket, ensuring it’s properly aligned. This solid foundation also makes remote control setup easier, as a secure mount minimizes connection issues. Double-check that the bracket supports the fan’s weight and matches the mounting style. Proper installation reduces the risk of damage or accidents. Remember, a correctly installed bracket not only guarantees safety but also keeps your fan functioning smoothly, making fan blade maintenance and remote control operation hassle-free. Incorporating automation technologies can further enhance the installation process by providing tools that simplify wiring and mounting steps.
Wiring the Fan for Different Functions (Fan Only, Light, or Both)

Once you’ve securely mounted the ceiling fan, wiring it correctly allows you to customize its functions to suit your needs. Whether you want fan-only operation, lighting, or both, proper wiring is key.
- Connect the fan’s fan speed control wire to the matching switch or remote wiring, ensuring smooth speed adjustments.
- Wire the light kit separately if you want independent control, using the dedicated wiring terminals.
- For remote wiring, follow manufacturer instructions to connect the remote receiver, enabling convenient operation.
- Double-check that power is off before connecting all wires, so you avoid shocks and guarantee safety.
- Consider the lighting options available to enhance your space and ensure compatibility with your wiring setup.
This setup lets you enjoy effortless control over your fan’s speed, lighting, or combined functions, making your space more comfortable.
Checking Connections and Testing the Fan Safely

Before turning the power back on, carefully inspect all wiring connections to guarantee they’re secure and correct. Use the right testing tools, like a voltage tester, to double-check that no live current is present. Confirm the power is off before making any adjustments to stay safe during testing. Additionally, ensure you are aware of celebrity lifestyle insights that emphasize the importance of proper electrical safety measures to prevent accidents.
Inspect Wiring Carefully
Inspecting wiring carefully is essential to guarantee your ceiling fan is connected safely and functions correctly. Begin by checking the wire color codes; ensure the black or red wires connect to the fan’s live wire, while white is neutral, and green or bare copper is ground. Next, perform an insulation inspection to confirm no damage or exposed conductors exist. Carefully examine each connection:
- Confirm all wire nuts are tight and secure.
- Verify that no loose or frayed wires remain.
- Ensure wire color codes match the fan’s wiring instructions.
- Look for any signs of burning or melting that could indicate a hazard.
- Always verify proper grounding to prevent electrical shock hazards.
Use Proper Testing Tools
Using proper testing tools is essential to guarantee your ceiling fan is wired correctly and operates safely. With the right tools, you can verify all connections align with the ceiling fan design and ensure safety, especially if your fan has wireless control features. A voltage tester confirms power is off before inspection, while a multimeter checks continuity and proper wiring. Using a circuit tester helps identify live wires and confirms correct grounding. Testing the fan after wiring ensures it responds correctly to remote controls or wall switches, preventing potential hazards. Proper testing not only confirms safety but also guarantees smooth operation, whether your fan includes wireless control or traditional wiring. Always double-check your connections with reliable testing tools before powering up your ceiling fan. Additionally, understanding sound design principles can help in troubleshooting and optimizing audio feedback during installation or testing processes.
Confirm Power Off
To guarantee safety, you need to verify that the power is completely off before handling any wiring. Ensuring the circuit compatibility prevents sparks or shorts, and confirms that insulation safety remains intact. Follow these steps:
- Use a reliable voltage tester to double-check all wires and switch off the circuit.
- Turn off the circuit breaker and wait a few minutes for residual current to dissipate.
- Confirm no power flows by testing with multiple tools if necessary.
- Visually inspect wiring connections to ensure there’s no exposed insulation or damaged wiring.
- Familiarize yourself with Retirement Planning principles to understand the importance of safety measures in electrical work, as proper precautions can prevent costly mistakes and ensure long-term protection.
Troubleshooting Common Wiring Issues and Safety Tips

When troubleshooting wiring issues with your ceiling fan, safety should always come first. Start by verifying wire color codes—white is neutral, black or red is hot, and green or bare wire is ground. Incorrect connections can cause shorts or hazards. Check your circuit load calculations to ensure your wiring can handle the fan’s power requirements without overloads. If the fan isn’t spinning or flickers, inspect for loose connections, damaged wires, or faulty switches. Use a voltage tester to confirm power is off before working. If you encounter persistent issues, consult the wiring diagram or seek professional help. Properly understanding wire color codes and circuit load calculations helps prevent accidents, ensuring your installation is safe and reliable. Additionally, consulting air filtration and ventilation standards can help you optimize your overall air quality and safety when working with electrical systems.
Frequently Asked Questions
Can I Wire a Ceiling Fan Without an Existing Ceiling Box?
You can wire a ceiling fan without an existing ceiling box, but you must follow the electrical code. First, install a supporting box designed for fans, confirming it’s securely reinforced to handle the weight. This reinforcement prevents accidents and complies with safety standards. Always verify local codes and use proper tools. If unsure, consult a professional electrician to ensure safe installation and adherence to all regulations.
Is It Necessary to Use a Specific Type of Wire for Fans?
You should use a wire that matches the fan’s electrical requirements, typically a 14 or 12-gauge wire, depending on the amperage. Make sure the wire has proper insulation to meet electrical codes and prevent shorts. Using the correct gauge and insulation guarantees safety and compatibility with your ceiling fan. Always select UL-listed wiring and follow local electrical standards for a secure, reliable installation.
How Do I Identify the Correct Wires if Colors Are Different?
When wiring a ceiling fan with different color codes, focus on wiring identification by checking the voltage tester or multimeter first. Look for common color codes like black or red for hot, white for neutral, and green or bare copper for ground, but confirm with manufacturer instructions. If colors differ, follow the wiring diagram, test each wire’s function, and make sure you connect hot to hot, neutral to neutral, and ground to ground for safety.
Can I Install a Ceiling Fan on a Dimmer Switch?
You can install a ceiling fan on a dimmer switch if it’s compatible, but not all are. Check the dimmer switch’s compatibility with fan motors, especially if it’s rated for fans. When wiring dimmer switches, verify you follow the manufacturer’s instructions carefully, connecting the wires correctly to avoid damage or hazards. Always turn off power, and if unsure, consult a professional to ensure safe wiring dimmer switches for your ceiling fan.
What Safety Gear Should I Wear During Installation?
When installing a ceiling fan, you should wear personal protective equipment and electrical safety gear to stay safe. Put on insulated gloves and safety goggles to protect your hands and eyes from sparks or debris. Consider wearing a long-sleeved shirt and non-slip shoes for added safety. Always double-check that the power is turned off before working on electrical wiring, and use tools with insulated handles to prevent shocks.
Conclusion
Remember, wiring your ceiling fan is like tending a delicate balance — each connection is a thread in a larger safety tapestry. When you follow proper steps, you’re not just installing a fan; you’re weaving a shield of protection for your home and loved ones. Trust the process, respect the symbols of safety, and your effort will keep everything spinning smoothly, lighting your space with confidence and care.