Guides
Does Number of Blades on Ceiling Fan Matter
How does the number of blades on your ceiling fan impact performance and style? Discover the essential factors that can influence your choice.
The number of blades on your ceiling fan does matter, as it can affect both performance and style. Typically, three-blade fans offer a sleek look and can move air quickly, making them great for larger spaces. In contrast, five-blade fans provide smoother airflow and quieter operation, ideal for residential areas. While airflow efficiency is similar, noise levels rely more on blade pitch and motor power than just the count of blades. So, consider room size and your design preferences when choosing. Exploring these factors further might help you make the perfect selection for your home.
Key Takeaways
- The number of blades affects the fan's aesthetic and noise levels rather than airflow efficiency, which remains similar across different blade counts.
- Three-blade fans are better for modern designs and larger spaces due to their high-speed potential, while five-blade fans offer quieter operation.
- Five-blade fans are more effective in larger areas as they create steadier airflow and are generally quieter for residential environments.
- Innovations have allowed two-blade fans to perform comparably to traditional fans, challenging the conventional belief that more blades are better.
- When choosing a fan, consider blade count alongside motor power and blade pitch to ensure optimal performance for the designated space.
Understanding Ceiling Fan Blade Counts
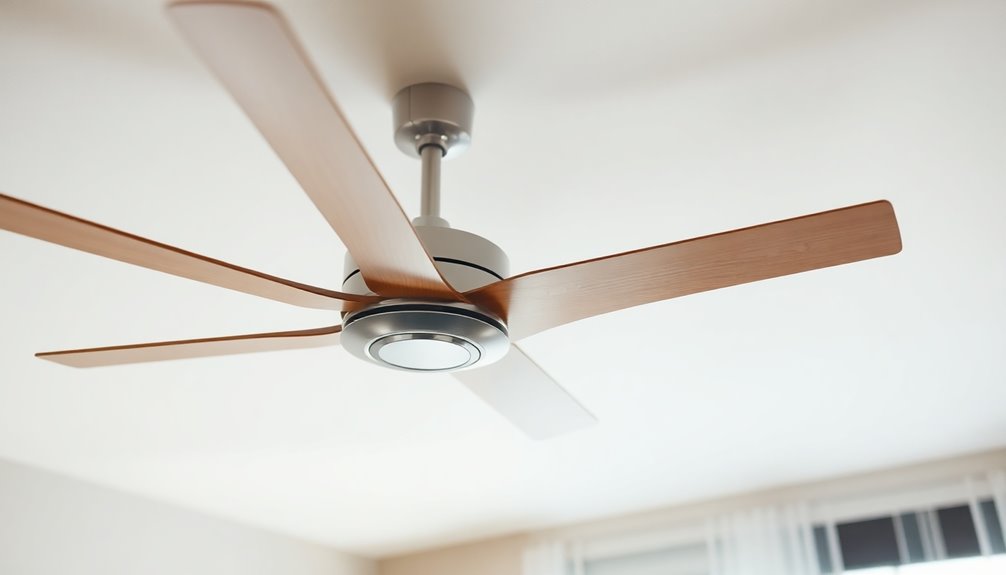
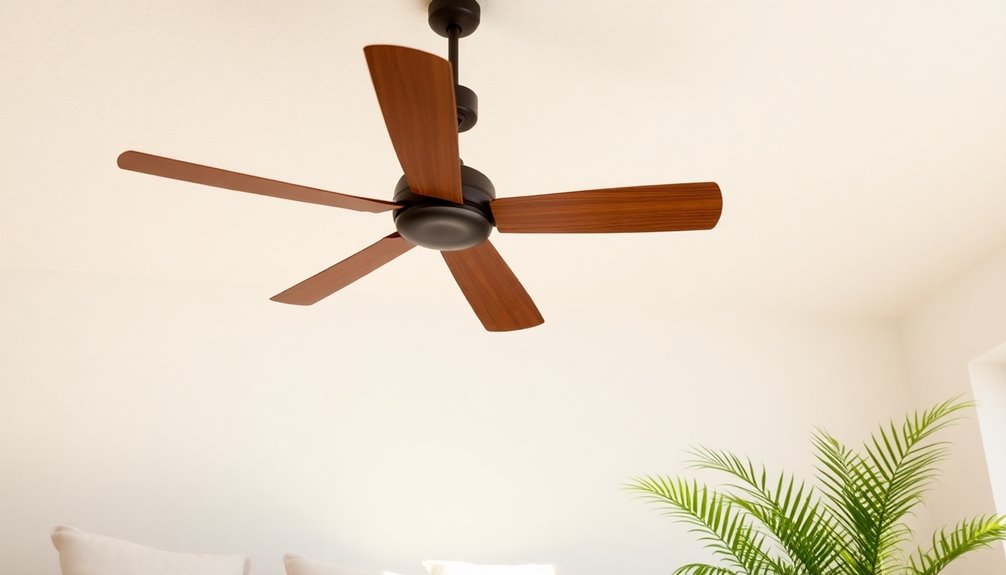
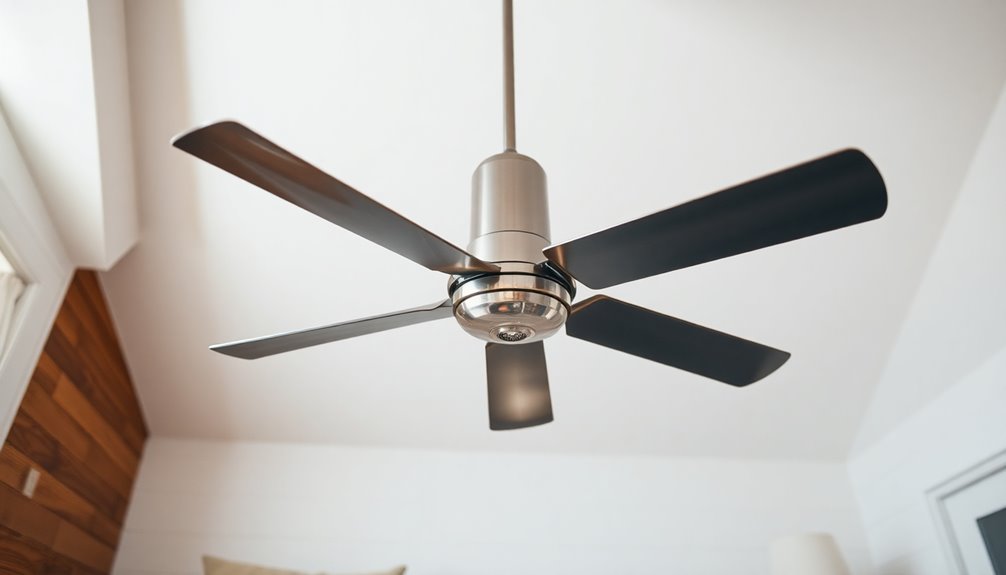
When choosing a ceiling fan, understanding blade counts is essential, as it can greatly impact both the fan's aesthetics and its performance. The number of blades on a ceiling fan typically ranges from three to five, with each configuration offering unique design elements.
Three-blade fans are often favored for their sleek, modern look and powerful airflow, making them perfect for small to medium rooms. If you value energy efficiency and quieter operation, five-blade fans strike a balance between effective air circulation and aesthetics, making them ideal for medium to large spaces.
While it might seem that more blades equate to better ceiling fan performance, the reality is that the differences in airflow efficiency among various blade counts are generally minimal. More blades can create smoother airflow and reduce noise, but fewer blades can achieve higher speeds due to less drag.
Ultimately, your personal preference for style and design plays a significant role in your choice. Whether you lean towards the contemporary vibe of three-blade fans or the classic appeal of five blades, understanding these aspects will help you make an informed decision that fits your space.
Performance Impact of Blade Count
The impact of blade count on ceiling fan performance often gets overshadowed by other factors like motor power and blade pitch.
While you might think more blades mean better airflow efficiency, that's not necessarily the case. Here are a few key points to ponder:
- Three Blades: These fans typically have a high-speed potential due to reduced drag, making them excellent for powerful air circulation.
- Four Blades: Often provide smoother and quieter airflow, ideal for residential settings where noise reduction is a priority.
- Advanced Design: Innovations allow two-blade fans to perform comparably to those with more blades, reducing the significance of blade count on performance.
- Aesthetics: Blade count primarily influences the fan's look, with consumer preferences heavily guiding the choice of configuration.
Room Size Considerations
When choosing a ceiling fan, room size plays a vital role in your decision.
For small rooms, a 3-blade fan can provide powerful airflow without overwhelming the space.
In larger areas, a 5-blade fan is often more efficient, ensuring air circulates effectively throughout the room.
Small Room Preferences
Selecting the right ceiling fan for a small room can greatly enhance your comfort and style. When choosing between 3-blade and 5-blade fans, consider the following:
- Airflow: 3-blade fans provide powerful airflow with minimal drag, making them ideal for effective cooling in small rooms.
- Aesthetics: 3-blade fans often feature a modern design that complements minimalist decor, enhancing the visual appeal of your space.
- Noise Levels: If you're in a noise-sensitive environment, 5-blade fans are typically quieter, focusing on smoother airflow without disturbing your peace.
- Personal Preferences: Ultimately, your choice should reflect your priorities—whether you prefer intense airflow from a 3-blade fan or a quieter operation from a 5-blade fan.
For small rooms, 3-blade fans offer a balance between performance and aesthetics, delivering effective cooling without overwhelming the space. Additionally, modern Energy Star certified fans can raise thermostat temp by 4°F, further improving energy efficiency.
On the other hand, if you value a calm atmosphere, a 5-blade fan might be the better fit.
Whichever you choose, make sure it aligns with your personal preferences to create the ideal environment.
Large Room Efficiency
For larger rooms, choosing the right ceiling fan can drastically improve air circulation and comfort levels. If your space exceeds 400 sq. ft., a 5-blade ceiling fan with a powerful motor is your best bet. This setup guarantees effective airflow, enhancing cooling performance throughout the room.
When dealing with expansive areas, consider fans with higher blade counts, like 8 or 12 blades. These fans create steadier airflow, which is vital for maintaining a consistent temperature. If your ceilings are over 9 ft., opting for fans with more blades will maximize airflow coverage, making sure every corner of your large room feels comfortable.
Remember, the blade count can greatly impact energy consumption. While more blades can lead to smoother airflow, they may require a more powerful motor to overcome drag and maintain efficiency.
It's important to strike a balance between blade count and motor power to optimize energy use.
Aesthetic Preferences in Fan Design
Aesthetic preferences play an essential role in choosing the right ceiling fan, as the number of blades can greatly influence a room's overall style. The blade count not only impacts functionality but also contributes to the fan's visual appeal.
Here are some considerations to keep in mind:
- 3-blade fans: These provide a minimalist look, perfect for modern interior designs, offering a sleek and uncluttered aesthetic.
- 4-blade fans: These add visual weight, making them ideal for traditional or ornate styles, enhancing the overall décor of your space.
- Two-blade fans: For those seeking a bold design statement, these fans bring a unique and unconventional flair to your room.
- Fans with six or more blades: These can complement industrial themes, introducing a more robust and visually interesting appearance.
Additionally, asymmetrical arrangements and varied blade lengths in fan design can introduce artistic flair, transforming your ceiling fan into a focal point.
Whatever your aesthetic preferences, choosing the right blade count guarantees your ceiling fan not only cools the room but also enhances its style.
Comparing Blade Counts: 3 vs. 5
When choosing between a three-blade and a five-blade ceiling fan, consider how each impacts airflow efficiency, noise levels, and design aesthetics.
Three-blade fans excel in speed and energy efficiency, making them great for smaller spaces.
On the other hand, five-blade fans offer smoother airflow and a quieter experience in larger rooms.
Your choice will depend on your specific needs and the style you want to achieve.
Airflow Efficiency Comparison
Ceiling fans often vary in blade count, and you'll frequently find yourself weighing the benefits of 3-blade versus 5-blade designs.
When it comes to airflow efficiency, both options have their merits, depending on your specific needs. Here's a quick comparison:
- 3-Blade Fans: Typically designed for higher speeds, these fans experience less drag, resulting in powerful airflow suitable for smaller spaces.
- 5-Blade Fans: With increased surface area, they offer a smoother and quieter airflow, making them ideal for larger rooms where noise reduction matters.
- CFM Efficiency: Surprisingly, the airflow efficiency (measured in CFM) doesn't differ much between the two. Modern fan technology guarantees effective performance across blade counts.
- Design Versatility: If aesthetics matter, 3-blade fans often fit minimalist designs, while 5-blade fans can blend well with various decor styles.
Ultimately, whether you choose 3-blade or 5-blade fans should depend on your preferences for airflow intensity, noise levels, and design compatibility rather than a strict performance metric.
Both can deliver effective airflow, but your specific needs will guide your choice.
Noise Level Considerations
Choosing between a 3-blade and a 5-blade ceiling fan can greatly impact the noise level in your space. While three-blade fans often deliver powerful airflow, they can generate more noise due to increased drag. On the other hand, five-blade fans are designed for smoother airflow, offering a quieter performance that many homeowners appreciate.
Blade Count | Airflow Performance | Noise Level | Recommended Use |
---|---|---|---|
3 Blades | High | Moderate | Large spaces |
5 Blades | Moderate | Low | Residential areas |
The difference in noise levels is usually minimal, especially with modern designs that prioritize quiet operation. Factors like blade pitch and motor power play a more significant role in noise than the number of blades. Fans with well-angled blades and efficient motors tend to operate more quietly, regardless of how many blades they have. If you're looking for a serene environment, five-blade fans are often the best choice, particularly in spaces where noise can disrupt comfort and ambiance.
Aesthetic Design Choices
The design of a ceiling fan can considerably influence the overall aesthetic of your space, especially when comparing three-blade and five-blade options.
Choosing the right blade count is essential for matching your ceiling fan design to your aesthetic preferences. Here are some key points to evaluate:
- Three-Blade Fans: They often feature a minimalist design that complements modern aesthetics, creating a sense of openness in a room. Additionally, these fans tend to be more energy-efficient, which can contribute to reducing cooling costs in the long run. The average price range for ceiling fans can also affect your decision, as three-blade models may often be more budget-friendly. Furthermore, the noise levels of modern heat pumps can also impact the overall comfort of a room, making quieter fans a beneficial choice.
- Five-Blade Fans: These fans provide smoother airflow and quieter operation, making them ideal for traditional design styles.
- Visual Weight: More blades can create visual weight, enhancing the appeal in spaces with classic decor, while fewer blades emphasize a sleek, contemporary look.
- Noise Levels: Three-blade fans typically produce more airflow but can be noisier due to less drag, while five-blade fans tend to operate quietly.
Moreover, selecting a ceiling fan that aligns with energy-efficient designs can enhance both comfort and sustainability in your living space.
Ultimately, your choice between three and five blades should align with your aesthetic preferences and the overall design theme of your space.
Both options are effective in functionality, but the right blade count will enhance your room's visual harmony.
Making an Informed Decision
When it comes to selecting a ceiling fan, understanding the number of blades is just one piece of the puzzle. A common misconception is that blade count alone dictates airflow efficiency and fan performance. In reality, factors like motor power and blade pitch play a more significant role.
For instance, modern 3-blade fans can deliver high-speed airflow with less drag, while 5-blade fans often provide a smoother and quieter operation.
To make an informed decision, evaluate your specific needs. If you're focused on airflow efficiency, check the CFM (Cubic Feet per Minute) ratings, which offer a clearer picture of a fan's performance than blade count alone.
Additionally, consider how the fan's design style fits within your space. Consulting with ceiling fan experts can also help you understand which fan suits your aesthetic preferences and functional requirements.
Ultimately, while blade count can influence the look of your ceiling fan, it's the combination of motor strength, blade pitch, and CFM that truly determines how well your fan will perform.
Choose wisely, and you'll find the perfect balance between style and functionality.
Frequently Asked Questions
Are 5 Blades Better Than 3 on a Fan?
When you're deciding if 5 blades are better than 3 on a fan, it really depends on your preferences and room size.
Five blades often provide smoother airflow and quieter operation, making them great for larger spaces.
However, three blades can offer higher speeds and powerful circulation.
Ultimately, consider factors like airflow efficiency, noise levels, and the design that fits your style before making a choice; it's not just about the blade count.
How Many Blades Are Better on a Ceiling Fan?
When it comes to ceiling fans, think of blades as the wings of a bird, each contributing to the flight's grace.
You might wonder how many blades are better. If you're after a powerful breeze for a small to medium room, three blades do the trick.
However, if you need a smoother, quieter experience in larger spaces, five blades are your best bet.
Ultimately, consider the room size and desired airflow when choosing.
Which Is Better, a 3 or 4 Blade Ceiling Fan?
When deciding between a 3 or 4-blade ceiling fan, consider your specific needs.
If you want powerful airflow and don't mind a bit of noise, a 3-blade fan might be your best bet.
However, if you prefer a quieter operation and smoother airflow, especially in larger rooms, go for a 4-blade fan.
Ultimately, it's about balancing airflow efficiency, noise levels, and the aesthetic you want in your space.
Is a 3-Blade or 5-Blade Pedestal Fan Better?
When it comes to choosing between a three-blade and a five-blade pedestal fan, you're in for a whirlwind of options!
If you crave powerful airflow, a three-blade fan might just blow you away with its speed.
However, if you prefer a whisper-quiet experience, the five-blade fan delivers smooth, gentle breezes.
Consider your room size and design style, and you'll find the perfect fan that suits your comfort needs and aesthetic.
Conclusion
When choosing a ceiling fan, the number of blades can play a role, but it's not the only factor to take into account. Curiously, studies show that fans with five blades can be up to 30% quieter than those with three. So, think about your room size, design preferences, and desired airflow before making a decision. Ultimately, it's about finding the right balance between style and function to keep your space comfortable and inviting.
Guides
Is It Hard to Install a Ceiling Fan
Wondering if installing a ceiling fan is difficult? Discover the surprising ease and key tips that will make your project a breeze!
Installing a ceiling fan isn't as hard as it seems. With the right tools, like screwdrivers and a voltage tester, you can tackle it yourself. First, make sure your existing electrical box is fan-rated and turn off the circuit breaker to stay safe. Measure your room to select the proper fan size, and center the fan for ideal airflow. Follow the wiring connections carefully, ensuring everything's tight and secure. Once installed, test for smooth operation. Encountering challenges is normal, but with a bit of guidance, you can handle it. There's a lot more to discover about installation details!
Key Takeaways
- Installing a ceiling fan requires basic tools and skills, making it manageable for most DIY enthusiasts.
- Properly selecting the fan size based on room dimensions simplifies the installation process and enhances airflow.
- Ensuring electrical compatibility and following wiring instructions is crucial for safe installation and operation.
- Safety precautions, like turning off power and using a voltage tester, are essential to prevent electrical hazards.
- Testing the fan post-installation ensures it operates smoothly and meets safety standards, confirming a successful setup.
Benefits of Ceiling Fans
When it comes to keeping your home comfortable, ceiling fans offer several benefits that can enhance your living space. They effectively cool a room in the summer by creating a wind-chill effect, making the temperature feel up to 10 degrees cooler. This means you can set your thermostat a bit higher, which helps lower your energy bill.
In the winter, you can run your ceiling fan in reverse to distribute warm air that rises to the ceiling. This simple adjustment not only boosts your comfort but can also reduce heating costs. Additionally, using a ceiling fan in conjunction with an air purifier can further improve indoor air quality, especially by removing pollutants that affect health. Ceiling fans can also complement HEPA filtration systems by enhancing overall air circulation.
Installing a ceiling fan improves air circulation, making your rooms feel more inviting and comfortable, regardless of their size.
Moreover, Energy Star-certified ceiling fans use up to 60% less energy than traditional fans, leading to significant savings on electricity bills. By circulating air throughout your home, ceiling fans enhance your HVAC system's efficiency, ensuring a more consistent temperature in every room. Additionally, many modern ceiling fans come with smart home compatibility, allowing for effortless control and customization of airflow.
Whether you're cooling off in the summer or spreading warmth in the winter, ceiling fans are a smart and stylish addition to your home.
Selecting the Right Size
When you're picking a ceiling fan, size matters.
For rooms under 12 feet, a 36-inch fan works best, while larger spaces need bigger fans to keep air flowing.
Understanding the recommended blade span based on your room's dimensions will help you make the right choice.
Room Dimension Guidelines
Choosing the right size ceiling fan for your room can greatly impact comfort and airflow. For rooms with a largest dimension under 12 feet, a 36-inch fan is your best bet. This size guarantees ideal airflow without overwhelming the space. Additionally, using a properly sized fan can lead to significant energy savings in your overall utility costs.
If your room measures between 12 to 15 feet, a 42-inch fan will provide adequate circulation for medium-sized areas.
For larger rooms, specifically those measuring 15 to 18 feet, you'll want to go for a 52-inch fan to effectively move air and maintain comfort levels.
If you have a particularly large or long narrow room, consider installing two smaller fans instead of one large fan. This approach enhances air circulation and creates a more balanced airflow throughout the space.
To determine the recommended size for your ceiling fan, divide your room's square footage by four. This will give you a solid guideline for selecting the perfect fan size, guaranteeing efficient performance and comfortable installation. Additionally, modern fans with Energy Star certification can significantly improve energy efficiency while maintaining optimal airflow.
Blade Span Recommendations
Choosing the appropriate blade span for your ceiling fan is essential to attaining ideal airflow and comfort in your space. The right blade span not only enhances air circulation but also complements your room size effectively. Here's a quick guide to help you choose the correct size:
Room Size | Recommended Blade Span |
---|---|
Under 12 feet | 36-inch |
12 to 15 feet | 42-inch |
15 to 18 feet | 52-inch |
Larger or long narrow | Two smaller fans |
For rooms under 12 feet in their largest dimension, a 36-inch fan is your best bet for maximum airflow. If your room measures between 12 to 15 feet, go for a 42-inch fan to guarantee balanced air circulation. In spaces that range from 15 to 18 feet, a 52-inch fan is ideal for adequate coverage and comfort. For larger or long narrow rooms, consider ceiling fan installation of two smaller fans to effectively distribute air throughout the space. Using these recommendations will make your ceiling fan installation seamless and effective.
Preparing for Installation
Before you start installing your ceiling fan, measure the room to guarantee you choose the right size for ideal airflow.
Gather the necessary tools, like a screwdriver and pliers, to make the process smoother.
Finally, check that your electrical box can support the fan to keep everything safe and secure.
Measure Room Size
Measuring your room size is essential for selecting the right ceiling fan. Start by determining the room's largest dimension. This will guide you in choosing a fan that fits perfectly.
For rooms under 12 feet, a 36-inch fan works well; for spaces between 12 to 15 feet, opt for a 42-inch fan; and for rooms from 15 to 18 feet, a 52-inch fan is ideal.
To guarantee maximum airflow, calculate the recommended blade span by dividing the room's square footage by 4. If you have a large or long and narrow space, consider using two smaller fans instead of one large fan in the room to enhance air circulation effectively.
When installing, center the fan directly in the room for the best air distribution and keep at least 1.5 feet from walls to avoid airflow obstruction.
Additionally, confirm that the fan mounting bracket is compatible with your ceiling height. This alignment won't only improve comfort during both cooling and heating seasons but also prevent inefficiencies, guaranteeing you get the most out of your ceiling fan.
Gather Necessary Tools
To kick off your ceiling fan installation, gather the essential tools you'll need. First, grab both a flathead and Phillips screwdriver. These will help you secure the fan and its components in place.
Next, a wire stripper/cutter is vital for preparing and connecting the wires properly. This tool guarantees that your electrical connections are secure and safe.
Don't forget a voltage tester. It's important to confirm that the power is off before you begin any electrical work. This step assures your safety during the installation process.
A stable ladder or step stool is also necessary, allowing you to reach the ceiling comfortably and safely while you work.
Before you start, make sure you have all the components from the ceiling fan kit, including the fan blades, motor, and mounting bracket. Having everything organized will make the installation process smoother and more efficient. Additionally, ensure that you choose a fan suitable for your room size to maximize airflow efficiency.
By preparing these tools and components beforehand, you'll set yourself up for a successful ceiling fan installation, making the task a whole lot easier.
Now that you've gathered everything, you're ready to jump into the installation!
Check Electrical Compatibility
Verifying your ceiling fan's electrical compatibility is vital for a successful installation. Start by checking the existing light fixture to confirm that the electrical box is fan-rated, meaning it can support the weight and movement of the fan.
Next, inspect the wiring in the ceiling. You should see a black wire (hot), a white wire (neutral), and a bare copper wire (ground). Make certain these match the requirements of your ceiling fan.
Don't forget to check the circuit breaker. You'll need to verify that the electrical supply for the room can handle the additional load of the ceiling fan. If you're unsure, consult an electrician to avoid any issues.
Before you begin the installation, use a voltage tester to verify there's no power running through the wires. This step is vital for your safety.
If your fan will be controlled by a wall switch, make sure that switch is compatible with the fan's wiring requirements to guarantee proper functionality. By taking these precautions, you'll set yourself up for a smooth and safe ceiling fan installation.
Safety Precautions to Follow
Before diving into your ceiling fan installation, it is vital to prioritize safety. Start by turning off the power at the circuit breaker to prevent electrical shocks. After that, use a voltage tester to confirm that the power is completely off at the wires you'll be working with. This step is significant for your safety.
Next, make certain to wear safety goggles and gloves to protect yourself from debris and any electrical hazards during the installation process. It is also important to mount your ceiling fan to a fan-rated electrical box. This guarantees it can support the fan's weight and prevents accidents down the line. Additionally, ensure that you maintain recommended distances between the fan and combustible materials, similar to the clearances from combustibles required for safe wood stove installation.
When you're ready to connect the wires, secure all wire connections with wire nuts and electrical tape. This will help avoid exposed wires, which can lead to short circuits or fire hazards.
Here's a quick reference table of safety precautions:
Precaution | Description |
---|---|
Turn Off Power | Always switch off at the circuit breaker |
Use a Voltage Tester | Confirm power is off before starting |
Wear Safety Gear | Goggles and gloves are a must |
| Secure Wire Connections | Use wire nuts and tape to prevent hazards
Removing the Old Fixture
With safety measures in place, you can move on to removing the old fixture. First, verify the power's off at the circuit breaker and double-check with a voltage tester.
Once you're sure it's safe, carefully detach the existing light fixture. Start by unscrewing the mounting screws holding it in place, then gently pull it away from the ceiling. Be cautious to avoid damaging the wiring.
As you remove the old fixture, take note of how the wires are connected. You'll typically see:
- Black (hot) wire
- White (neutral) wire
- Green or bare copper (ground) wire
Inspect the wiring closely for any damage or wear. If you find any exposed wires, cap them with wire nuts for safety. This step is essential as you prepare for the new ceiling fan installation.
Finally, remember to dispose of the old fixture properly—remove any light bulbs and recycle or discard them per local regulations. By following these steps for removing the old fixture, you'll set a solid foundation for your new ceiling fan.
Mounting the Ceiling Fan
When mounting your ceiling fan, it's essential to use proper techniques to guarantee it's securely attached and safe.
Make sure you're working with a fan-rated electrical box and follow the manufacturer's instructions closely. This will help you avoid any issues with stability or electrical safety once the fan is in place.
Proper Mounting Techniques
Properly mounting a ceiling fan is essential for guaranteeing its safety and performance. To achieve this, start by using a fan-rated electrical box that can handle the fan's weight. This step helps prevent any damage or accidents down the line.
Next, choose a mounting bracket specifically designed for ceiling fans, as it offers extra stability compared to standard light fixture options.
Here are some key points to remember during the installation:
- Secure the mounting bracket to a ceiling joist or support beam for peak stability.
- Confirm the fan is at least seven feet above the floor for proper clearance.
- Keep the fan centered and at least 1.5 feet away from walls to maximize airflow.
When attaching the fan motor assembly to the mounting bracket, follow the manufacturer's guidelines closely. Make sure all screws are tightened, and connections are secure before you proceed.
Taking these proper mounting techniques into account won't only enhance your fan's performance but also guarantee a safe installation, allowing you to enjoy a cool breeze without worry.
Ensuring Electrical Safety
Mounting your ceiling fan correctly sets the stage for a safe installation, but confirming electrical safety is the next essential step. Before you start, always turn off the power at the circuit breaker to prevent electrical shock. Use a voltage tester to verify the power to the light is completely off before touching any wires coming from the ceiling.
Make sure your ceiling fan is mounted to a fan-rated electrical box, designed to support the weight and motion of the fan.
When it's time to connect the wires, match the fan wires—typically black, white, and green—to the corresponding household wires: hot, neutral, and ground. This step is critical for maintaining proper electrical function and safety.
Once you've connected the wires, secure them with wire nuts and wrap them with electrical tape. This prevents exposed wires and guarantees everything is safely contained within the junction box.
Wiring Connections Explained
Connecting the wires for your ceiling fan is an essential step that can seem intimidating if you're unfamiliar with electrical work. Understanding the color scheme and proper connections will make the process smoother.
Generally, you'll find the following wires:
- Black wire: This is your hot wire for the fan.
- White wire: This serves as the neutral wire.
- Green or bare copper wire: This is your ground wire.
If your ceiling has a red wire, it's typically for a separate light fixture. You can connect this to the blue wire from the fan if you're using a light kit.
Before making any connections, verify you identify which hot wire (black or red) controls your fan or lights with a non-contact voltage tester.
Secure all wire connections using wire nuts or Wago lever nuts to avoid exposed splice points that could lead to electrical hazards.
Once you've made the connections, carefully push all wires back into the junction box to keep everything neat and prevent interference with the fan assembly.
This attention to detail will enhance your ceiling fan installation experience.
Final Assembly Steps
Once you've secured your wiring connections, you can move on to the final assembly steps of your ceiling fan installation.
Start by loosening the mounting screws on the bracket to guarantee a secure fit when lifting the fan assembly into place. Carefully position the fan over the mounting bracket and tighten those screws to maintain stability and prevent any wobbling.
Next, it's time to attach the blades. Follow the manufacturer's instructions closely, making sure each blade is securely fastened to the motor assembly with the screws provided. This step is essential for the fan's overall performance and stability.
After attaching all the blades, double-check for stability and proper alignment. You want to confirm that your fan is level and securely mounted to avoid any issues later on.
Finally, restore power to the circuit and connect the light switch. With everything in place, you can now enjoy your newly installed ceiling fan.
Just remember to check its functionality, including speed settings and any light fixtures, to confirm everything works smoothly before completing the installation.
Testing the Installed Fan
Testing your newly installed ceiling fan is essential to guarantee it operates efficiently and safely. Once you've restored power, use the pull chain or remote control to turn on the fan. Check how it runs at all speed settings, making sure it operates smoothly.
Here's what to keep an eye on during testing:
- Wobbling fan blades: If you notice any wobbling, it may indicate misalignment or loose blades. Tighten the screws or reposition the blades as needed.
- Light bulbs: If your fan includes lights, flip the wall switch to turn them on and verify they illuminate properly.
- Unusual noises: Listen carefully while the fan operates. Any strange sounds could signal installation issues that require your attention.
To further guarantee safety, use a voltage tester to confirm all wiring connections are secure and that there's no electrical current at exposed splices.
Common Installation Challenges
When installing a ceiling fan, you might quickly encounter several common challenges that can complicate the process. One of the most significant hurdles is ensuring your ceiling fan is mounted on a fan-rated electrical box. This is essential for safety and stability. Additionally, sizing the fan correctly for your room is important; a fan that's too small will underperform, while one that's too large may create noise issues.
Achieving the right height during installation is also necessary. Aim for a clearance of 7–10 feet from the floor and at least 8 inches from the ceiling. Wiring can be tricky too; matching the fan wires with your household wiring is necessary for functionality. Finally, be prepared to navigate obstacles such as joists or plumbing, which may require extra tools or planning. It's also important to consider the energy-efficient models available, which can significantly reduce overall energy consumption.
Challenge | Solution | Tips |
---|---|---|
Electrical box support | Use a fan-rated box | Check weight ratings |
Proper sizing | Measure room dimensions | Consult fan sizing charts |
| Wiring connections | Match fan wires accurately | Color-code for easy reference
Frequently Asked Questions
Is It Hard to Install Your Own Ceiling Fan?
Installing your own ceiling fan isn't necessarily hard, but it does require some basic electrical knowledge and the right tools.
You'll need to choose the right fan size for your space and guarantee you have a sturdy electrical box. Safety's key, so always turn off the power first.
Can the Average Person Install a Ceiling Fan?
Imagine trying to fix a smartphone without any instructions—frustrating, right?
But when it comes to installing a ceiling fan, you've got the tools and guidance to succeed. With the right preparation, including a ladder, screwdrivers, and the fan's manual, you can tackle this project.
Just remember to turn off the power and use a voltage tester for safety. In one to two hours, you'll have your new fan spinning and your room refreshed!
Do You Need an Electrician to Install a New Ceiling Fan?
You mightn't need an electrician to install a new ceiling fan if you have basic electrical knowledge and the right tools.
Many fans come with easy-to-follow instructions.
However, if you're uncomfortable with electrical work or if the installation requires new wiring or modifications, hiring a licensed electrician is a smart choice.
It guarantees safety, compliance with local codes, and peace of mind, especially if your existing electrical setup isn't fan-rated.
How Much Should I Expect to Pay to Have a Ceiling Fan Installed?
You might think hiring an electrician's too expensive, but consider it a worthwhile investment.
Expect to pay between $100 and $300 for professional installation, depending on complexity and local rates. If you need extra electrical work, like a new junction box, costs can rise.
Alternatively, DIY saves money, with fan kits ranging from $50 to $300, though you'll need some electrical know-how.
Don't forget about store installation services, typically costing $75 to $150.
Conclusion
Installing a ceiling fan might seem like climbing a mountain, but with the right tools and steps, you'll find it's more like a gentle stroll through the park. You've embraced the benefits, tackled the challenges, and now, with a flick of the switch, you can feel the cool breeze dance around your room. So, grab your toolkit and let your ceiling fan take flight—transforming your space into a haven of comfort and style!
Guides
What Size Are Ceiling Fan Light Bulbs
An essential guide to ceiling fan light bulb sizes reveals surprising options that could elevate your space—discover which one fits your fan best!
Ceiling fan light bulbs vary in size, so you'll find options like A19, A15, and G-shaped bulbs. The A19 is a standard choice, fitting most modern fans, while the A15 is better for tighter spaces. G-shaped bulbs, like G25 and G16.5, offer decorative flair and are perfect for broader areas or candelabra bases. Remember, the base type matters too; most newer fans use an E26 base, while older ones might need E12 or E11. Choosing the right size and type is essential for safety and performance. Keep exploring, and you might uncover more tips on selecting the perfect bulbs!
Key Takeaways
- Common bulb sizes for ceiling fans include A19, A15, T12, G25, and G16.5, each suitable for different fan designs and spaces.
- The A19 bulb is the most versatile, fitting many modern ceiling fan light kits effectively.
- Bulb bases vary, with E26 being the most common for newer fans, while older models may require E12 or E11 bases.
- Wattage is crucial; standard incandescent bulbs range from 40-60 watts, while LEDs typically use 6-9 watts for similar brightness.
- Always measure existing bulbs' diameter in eighths of an inch and check fixture specifications for compatibility when replacing bulbs.
Types of Ceiling Fan Bulbs
When choosing bulbs for your ceiling fan, it's important to take into account the various types available. The most common option is the A19 bulb, which measures 2.375 inches in diameter and fits many modern ceiling fans. These bulbs typically come with a medium screw base (E26), making them compatible with newer models.
However, if you have an older fan, you might need different bulb sizes, such as E11 or E12, so it's essential to check the fixture specifications before purchasing.
Besides A19, other bulb shapes like A15, T12, and G25 can also be used depending on your fan's design and lighting needs. The shape and size of the bulbs you choose not only affect light distribution but also contribute to the overall aesthetic of your ceiling fan and room.
For instance, a G25 bulb can create a more decorative look, while a T12 might offer a more focused beam. Choosing the right bulb can enhance the functionality of your ceiling fan and improve overall room comfort(#).
Ultimately, understanding the various types of ceiling fan light bulbs and ensuring compatibility with your fixture will help you achieve the desired ambiance and functionality in your space.
Common Bulb Sizes
Choosing the right bulb size for your ceiling fan is essential for guaranteeing both functionality and style. The most common bulb size you'll encounter is the A19 bulb, which has a diameter of 2.375 inches and fits many standard fixtures.
However, there are several other bulb sizes you might consider for your ceiling fan light. Here are a few popular options:
- A15: Smaller than the A19, suitable for tighter spaces.
- T12: Tubular shape, often used for different lighting styles.
- G25: Larger globe-shaped bulb, great for open spaces.
- G16.5 bulbs: Ideal for decorative fixtures, typically compatible with candelabra bases.
Understanding these common bulb sizes helps you achieve the right balance between light distribution and aesthetic appeal.
Understanding Bulb Bases
Understanding the various bulb bases is vital for guaranteeing your ceiling fan light operates effectively. Most newer ceiling fan light bulbs use the E26 medium screw base, which is widely compatible and easy to find.
However, if you have an older model, you might need to check for different base sizes, such as E12 or E11. The bulb size is essential, as it's indicated by a code that specifies its shape and diameter. For instance, an A19 bulb shape has a 2.375-inch diameter, while an A15 shape is often required for ceiling fan fixtures to fit nicely with shades and decorative elements.
Always verify the specific bulb base type against your fan's socket to confirm proper fitting and functionality. Using the correct bulb base size isn't just about compatibility; it's also about safety.
Exceeding wattage limits can lead to overheating, putting your light fixture at risk for damage. Additionally, selecting the right bulb types can help manage your energy costs effectively, guaranteeing your ceiling fan lights operate efficiently without compromising safety.
Importance of Wattage
Wattage plays an essential role in the performance of your ceiling fan light bulbs, directly influencing both brightness and energy consumption. When selecting bulbs, understanding wattage helps you achieve the desired lighting while maintaining energy efficiency.
Here are some key points to take into account:
- Brightness: Higher wattage generally means more light, but energy-efficient LEDs can provide similar brightness at lower wattages.
- Standard Wattage: Incandescent bulbs for ceiling fans typically range from 40 to 60 watts, while LEDs equivalent to these only require about 6 to 9 watts.
- Maximum Wattage: Always adhere to the maximum wattage specified for your light fixture to avoid overheating and potential fire hazards, especially with older ceiling fan models.
- Dimmable Bulbs: If you choose dimmable bulbs, verify their wattage is compatible with the dimmer switch to prevent flickering and guarantee smooth operation.
Light Color and Temperature
The color temperature of your ceiling fan light bulbs can greatly affect the ambiance of your space. Choosing the right light color is essential for achieving the desired mood. Typically, you'll find warm white bulbs ranging from 2700K to 3000K, which create a cozy atmosphere. In contrast, cool white bulbs, with a color temperature of 3500K to 4100K, promote an energetic feel. If you want a natural look, consider daylight bulbs that mimic sunlight, ranging from 5000K to 6500K.
Here's a quick reference table to help you select the right color temperature for your lighting fixture:
Light Type | Color Temperature (Kelvin) | Ambiance |
---|---|---|
Warm White | 2700K – 3000K | Cozy and Inviting |
Cool White | 3500K – 4100K | Bright and Energetic |
Daylight | 5000K – 6500K | Natural and Clear |
Many LED bulbs now offer color-changing capabilities, allowing you to adjust the temperature to suit your needs. When selecting bulbs, always consider the ambiance you want to create.
Quality of Light Bulbs
Quality plays an essential role when selecting ceiling fan light bulbs, as it directly impacts both performance and longevity.
Choosing the right bulb size and type is vital for achieving ideal lighting performance. Here are four key factors to keep in mind:
- Light Bulb Size: Make sure you select the correct size, such as A19, A15, T12, or G25, to guarantee compatibility with your fan's fixture.
- Maximum Wattage: Remember that incandescent bulbs can reach up to 60 watts, while LED ceiling fan bulbs typically use only 9 watts. This difference highlights the importance of energy efficiency.
- Bulb Shapes: Pay attention to bulb shapes to avoid light distribution problems. The right shape enhances your room's lighting and avoids fixture damage.
- Compatibility: Always check that the chosen bulb is compatible with your ceiling fan. This prevents frequent replacements and maintains consistent lighting quality.
Dimmable Options
When it comes to enhancing your ceiling fan's lighting, dimmable options offer a fantastic way to adjust brightness and set the mood in any room. Dimmable ceiling fan light bulbs allow for adjustable brightness settings, making it easy for you to create different atmospheres. You can choose warmer tones for cozy evenings or cooler tones to enhance focus and visibility.
Many of these options come in energy-efficient LED varieties, giving you a longer lifespan and lower energy costs compared to traditional incandescent bulbs. However, verify their compatibility with dimmer switches, as not all bulbs support this functionality. Checking specifications before purchasing is vital to avoid disappointment.
When selecting dimmable bulbs, keep an eye on their wattage. It's important to confirm that the wattage doesn't exceed your ceiling fan's maximum wattage limit. Exceeding this limit not only compromises performance but also increases the overheating potential, which can lead to safety hazards.
Choosing for Aesthetics
When you're selecting ceiling fan light bulbs, consider how they match your room decor and the design of the fixture.
The right bulb shape can enhance the overall aesthetic appeal, making your space feel more cohesive.
With options like A19, A15, and decorative shapes like G25, there's plenty of variety to suit your style.
Matching Room Decor
To create a cohesive and inviting atmosphere in your space, selecting the right ceiling fan light bulbs is crucial. When considering matching room decor, think about the shape, size, and finish of the bulbs. Here are some key factors to keep in mind:
- Light Bulb Base: Common options like A19 and G25 bulbs fit various aesthetics. A19 bulbs offer a classic look, while G25 bulbs add a decorative touch.
- Color Temperature: Opt for warmer bulbs (2700K-3000K) to create a cozy ambiance in living areas. Cooler bulbs (5000K-6500K) are better for task-oriented spaces, like kitchens.
- Brightness of the Bulb: Confirm the brightness complements your decor; dimmable LED bulbs can adjust to different moods and settings.
- Finish: Choose between frosted or clear bulbs. Frosted bulbs provide softer lighting that blends seamlessly with your decor, enhancing the overall aesthetic.
Light Fixture Design
Choosing the right light fixture design for your ceiling fan can elevate your space and enhance its aesthetic appeal. When selecting bulbs, consider the base size and style of light bulb that aligns with your ceiling fan's design. Common choices, like A19 bulbs for Hunter fans, guarantee ideal light distribution while maintaining visual harmony.
Popular shapes for ceiling fan lights include A, T, and G, each offering unique characteristics that can complement your decor. For decorative purposes, opting for dimmable LED bulbs not only provides functional lighting but also allows you to create mood lighting that enhances the overall atmosphere of the room.
It's essential to verify that the bulb shape and size match the fixture specifications. This alignment contributes considerably to the room's energy efficiency and aesthetic appeal.
Bulb Shape Variety
There's a wide variety of bulb shapes available for ceiling fans, each offering unique aesthetic benefits that can transform your space.
Choosing the right shape isn't just about looks; it also affects light distribution and overall functionality. Here are some popular options to evaluate:
- A19 Shape: Commonly used in Hunter fans, this versatile bulb has a diameter of 2.375 inches, fitting seamlessly into many ceiling fan light kits.
- G-Shaped Bulbs: Measured in eighths of an inch, G16.5 is a popular size for decorative fixtures, adding a stylish touch to your fan setup.
- Globe Shapes: These round bulbs provide a soft, diffused light, enhancing the ambiance while making a bold aesthetic statement.
- Candelabra Shapes: Perfect for traditional or vintage styles, these bulbs create an elegant look and are often used in ceiling fans with intricate designs.
Replacement Tips
When it comes to replacing ceiling fan light bulbs, getting the right size is essential for ideal performance. To guarantee a successful replacement, follow these tips:
- Identify the size: Check the existing bulb's shape and diameter, commonly indicated as A19 or A15. This helps in finding compatible replacements.
- Measure diameter: Use a ruler to measure the existing bulb's diameter in eighths of an inch for accuracy.
- Check the fixture: Always refer to the fixture specifications for compatibility. Different ceiling fan models may require specific bulb sizes and shapes.
- Base type matters: Most modern ceiling fans use a medium screw base (E26), but older models might need E12 or E11 bases.
- Wattage limit: Be cautious about the wattage limit on your fixture. Exceeding this can lead to overheating and potential damage.
Here's a quick reference table to help you:
Aspect | Details |
---|---|
Size | A19, A15 |
Base | E26, E12, E11 |
Wattage | Check fixture |
Compatibility | Refer to specs |
Measurement | Diameter in eighths |
Frequently Asked Questions
What Size Light Bulb Do Ceiling Fans Take?
When you're choosing a light bulb for your ceiling fan, it's important to know the specific size and base required.
Many fans use standard bulbs like A19 with an E26 base, but older models might need different sizes.
Always check your fan's specifications before buying. This guarantees you'll get the right fit and peak performance.
Don't forget to take into account the bulb shape and wattage for the best lighting experience!
Are E26 and A19 the Same?
E26 and A19 aren't the same, although they often go together.
E26 refers to the base size, which measures 26 millimeters in diameter, while A19 describes the bulb's shape and size, approximately 2.375 inches wide.
You'll find many bulbs with an E26 base that fit an A19 shape, making them compatible for various fixtures.
Just remember to check both the base and shape to guarantee they match what you need for your lighting.
Are E12 and A15 the Same?
No, E12 and A15 aren't the same.
E12 refers to the bulb base size, specifically a candelabra base that's 12mm in diameter.
On the other hand, A15 describes the bulb shape, which has a diameter of 1.875 inches.
While an A15 bulb can have an E12 base, not all E12 bulbs fit the A15 shape.
Always check your fixture's specifications to verify compatibility when selecting the right bulb.
Does an A19 Bulb Fit in a Ceiling Fan?
Yes, an A19 bulb typically fits in most ceiling fans, especially those made after 2018.
You'll find that A19 bulbs have a medium E26 screw base, which matches standard fixtures.
However, it's essential to check your ceiling fan's specifications, as some older models might require different bulb sizes.
Always verify the maximum wattage limit for your fan to avoid any overheating issues and guarantee safe operation.
Conclusion
Now that you know about the various types of ceiling fan light bulbs, sizes, and wattage, you're ready to make your choice. But wait—what if you pick the wrong bulb? Imagine flicking the switch and nothing happens, or worse, a glaring light that ruins the cozy vibe. Don't let that happen! Take the time to contemplate your options, and you'll illuminate your space just right. The perfect bulb is out there, waiting for you to discover it!
Guides
Why Ceiling Fan Not Working
You may discover surprising reasons why your ceiling fan isn’t working, and knowing them could lead you to an unexpected solution.
If your ceiling fan isn't working, it could be due to several common issues. Start by checking the power supply; tripped circuit breakers or loose wiring might be the culprits. A burnt capacitor can also prevent the fan from operating. Make sure the wall switch is on and the remote control's batteries are fresh. Inspect the fan for any damaged blades or electrical connections. If the fan still won't operate, the problem could lie deeper within the motor or control circuit. There's more to explore on how to troubleshoot and fix these issues effectively.
Key Takeaways
- Check for tripped circuit breakers, as they can interrupt the power supply to the fan.
- Inspect wiring connections for looseness, damage, or fraying that could hinder electrical flow.
- Ensure the wall switch is in the "ON" position and that remote control batteries are functioning.
- Test the fan's capacitor and motor for faults, as burnt capacitors often prevent operation.
- Look for power supply issues, such as voltage fluctuations or power surges, which can damage components.
Causes of Ceiling Fan Malfunction
When your ceiling fan isn't working, it's often due to several common issues. One of the first things to check is loose wiring or faulty wiring connections, which can disrupt the power supply to the fan. Without a steady power source, your ceiling fan motor may not function correctly.
Another common culprit is a burnt capacitor, which can prevent the motor from turning at all. You should also consider the impact of insufficient power supply, often caused by voltage fluctuations or tripped circuit breakers. If the breaker has tripped, you'll need to reset it to restore functionality.
Additionally, inspect the fan blades. Damaged or unbalanced fan blades can lead to inefficiency, noise, or complete failure to operate. An unbalanced fan can also strain the motor, leading to a motor malfunction over time.
Troubleshooting Steps to Take
To get your ceiling fan working again, start by checking the power supply.
Inspect the circuit breaker for any tripped switches, and make certain the wall switch is turned ON.
If everything looks good there, take a closer look at the wiring connections to confirm they're secure and intact. Additionally, ensure that your ceiling fan is compatible with smart home compatibility if it has advanced features that require specific settings.
Check Power Supply
One of the first steps in troubleshooting a ceiling fan that isn't working is checking the power supply. Start by inspecting the circuit breaker or fuse box to make certain the power supply is active. If the circuit has tripped or a fuse has blown, reset it or replace the fuse to restore power to the fan.
Next, grab a circuit tester or multimeter to confirm that power is reaching the fan's wiring. Loose or damaged wiring can hinder operation, so verify connections are secure.
Don't forget the wall switch—make sure it's in the "ON" position. Sometimes, it's as simple as inadvertently turning it off. If your fan uses a remote control, consider replacing the batteries to rule out low power issues affecting functionality.
Additionally, evaluate whether the fan is on a dedicated circuit. If it's sharing a circuit with other devices, you may encounter electrical issues that need further investigation.
Inspect Wiring Connections
Before diving into wiring connections, turn off the power to the ceiling fan at the circuit breaker for your safety.
Now, carefully remove the switch housing cover to access the wiring. This step is vital in your ceiling fan troubleshooting process. Inspect wiring connections for any loose, damaged, or frayed wires that could disrupt electrical flow.
Using a multimeter, test the continuity of the wiring connections. This will help you confirm that power is reaching the fan's motor and switches. Look for any signs of damaged wiring that might be causing a wiring issue.
Verify all wire nuts and connectors are securely fastened; exposed wires can lead to shorts or electrical failures, so it's important to check for those too.
If you've secured all connections and the fan still isn't working, don't hesitate to consult a professional electrician. They can address deeper wiring problems that may be beyond a simple DIY fix.
Electrical Failures and Solutions
When your ceiling fan stops working, electrical issues could be the culprit.
You might encounter problems like loose wiring, a burnt capacitor, or insufficient power supply.
Let's explore how to troubleshoot these common electrical failures and when to call in a professional for help.
Common Electrical Issues
Electrical failures can be a major headache, especially when your ceiling fan suddenly stops working. One common culprit is tripped circuit breakers, which interrupt the power supply to the fan. A quick reset can often restore functionality.
If that doesn't solve the issue, check for loose wiring connections, either within the fan or at the switch. Faulty wiring can prevent power from reaching your ceiling fan, so it's vital to inspect and tighten or replace any problematic connections.
Another potential issue is a neutral line failure, which can affect both the fan and the light simultaneously. In such cases, diagnostic testing is important to isolate the problem.
Power surges can also wreak havoc on your ceiling fan, damaging internal components like control circuit boards in certain brands. If you suspect damage, you may need to replace these parts to get your fan running again.
Before diving into fan-specific troubleshooting, test the power at the switch using a power line wire test probe. This helps confirm whether electrical issues exist upstream, guiding you to the right solution for your ceiling fan not working.
Troubleshooting Power Supply
Power supply issues can be frustrating, especially when your ceiling fan won't turn on. Start your troubleshooting by checking the circuit breaker; if it's tripped, it may have interrupted the power supply to the fan.
If the breaker is fine, inspect the wiring connections within the fan housing. Loose or damaged wires can disrupt the electrical flow and prevent the fan from operating.
Next, grab a circuit tester to verify that power is reaching the fan. If no power is detected, the problem could be with the fan switch or the electrical supply.
Don't forget to check that the fan switch is fully engaged and in the "ON" position; this is a common oversight that can easily stop the fan from running.
If your ceiling fan is on a dedicated circuit, make sure no other devices on that circuit are drawing excessive power. This can cause voltage fluctuations that affect the fan's performance.
Professional Help Needed
If basic troubleshooting doesn't resolve the issue with your ceiling fan, it's time to contemplate that the problem might be more complex than a simple power supply failure.
Electrical failures can stem from various sources that require the expertise of a licensed electrician. Here are some common issues that might necessitate professional help:
- Faulty Wiring Connections: Loose or damaged wires can disrupt the power supply and lead to malfunctioning. Proper maintenance of electrical components, similar to how one maintains air purifier filters, is essential for preventing such issues. Regular inspections can help identify air quality problems that may affect electrical systems. Additionally, ensuring that the wiring is not exposed to dust and debris can further safeguard against electrical failures. Furthermore, compliance with local fire safety codes is crucial to avoid electrical hazards when dealing with wiring.
- Burnt Capacitors: These components store energy and can fail over time, causing the fan to stop working.
- Damaged Motor Components: A malfunctioning motor can result from wear and tear or power surges, requiring replacement.
Attempting to fix complex wiring issues without proper knowledge can create safety hazards and further damage your ceiling fan. Additionally, ensuring that your home has good ventilation practices can help mitigate some electrical issues related to air quality, which might indirectly impact your ceiling fan's performance.
Compliance with electrical safety regulations is essential for ensuring that all repairs are performed according to local codes.
If you suspect that your ceiling fan might've deeper issues, don't hesitate to seek professional help. A qualified technician can diagnose and resolve the problem safely, restoring your fan to proper working condition.
Issues With Fan Speed Control
When dealing with issues related to fan speed control, you might find that the culprit often lies with the capacitor. A faulty capacitor can prevent your fan from adjusting speeds properly, leading to inconsistent fan speed and even overheating. Additionally, problems with the fan switch can hinder your ability to change speeds. Testing the switch functionality with a multimeter is vital to identify any faults.
Electrical connections are another significant area to inspect. Damaged connections can disrupt the signal for speed control, necessitating inspection and repair to guarantee peak performance. Regular maintenance is essential; cleaning and lubricating ball bearings can help prevent speed-related issues before they escalate.
Here's a table summarizing common issues and their solutions:
Issue | Solution |
---|---|
Faulty Capacitor | Replace the capacitor |
Worn Ball Bearings | Clean and lubricate |
Fan Switch Malfunction | Test with a multimeter |
Damaged Electrical Connections | Inspect and repair |
Common Brand-Specific Considerations
Many ceiling fan brands come with specific quirks that can affect their performance and maintenance. Understanding these nuances can save you time and frustration when troubleshooting your ceiling fan.
Here are three key considerations to keep in mind:
- Wiring Configurations: Brands like Casablanca may have unique wiring setups. Always refer to the manufacturer's documentation for specific troubleshooting steps to avoid improper repairs.
- Remote Control Issues: Certain brands often face problems with remote control receivers, particularly after power surges. If your fan isn't responding, check if the receiver needs replacement.
- Control Circuit Boards: Fans from manufacturers like Hunter might experience frequent electrical failures due to faulty control circuit boards. If you suspect this, consult the troubleshooting steps in your documentation to determine if replacement parts are necessary.
When to Seek Professional Help
Some situations clearly call for professional help, especially when dealing with ceiling fan issues. If your ceiling fan stopped working and basic troubleshooting hasn't resolved persistent fan problems, it's time to evaluate a professional assessment. Complex wiring issues or internal parts failures, like a faulty motor or a capacitor that goes bad, can pose safety risks if you attempt repairs without the right expertise. Additionally, understanding filial responsibility laws can help in planning for future financial needs that may arise from home maintenance costs.
Here's a quick reference to help you decide when to contact a licensed electrician:
Situation | Action Needed | Recommendation |
---|---|---|
Ceiling fan stopped working | Troubleshoot a ceiling fan | DIY basics first |
Unusual noises or non-spinning | Persistent fan problems | Consult a professional |
Complex wiring issues | Electrical components involved | Contact a licensed electrician |
Suspected internal part failure | Faulty motor or capacitor goes bad | Seek professional help |
| Lack of tools or comfort | Handling electrical components | Hire a qualified technician
Frequently Asked Questions
Why Would a Ceiling Fan Just Stop Working?
A ceiling fan might just stop working for several reasons.
You could have loose or faulty wiring connections disrupting the power supply. It's also possible that a burnt capacitor is preventing the motor from functioning.
If you've tripped a circuit breaker, that'll interrupt power until you reset it.
Additionally, mechanical issues like damaged blades can hinder performance, causing the fan to stop altogether.
Check these factors to pinpoint the problem.
How Do You Fix a Ceiling Fan That Won't Turn?
Imagine standing beneath a ceiling fan, hoping for a cool breeze, but nothing happens.
To fix it, start by checking the power supply—ensure the circuit breaker hasn't tripped and all switches are on.
Next, inspect the wiring inside the fan for any loose connections.
If you've got a remote, replace the batteries.
If it still doesn't turn, you might need to replace a burnt capacitor or consult a professional.
What Is the Common Problem of a Ceiling Fan?
When you think about common problems with ceiling fans, several issues might come to mind.
You might notice electrical failures, like tripped breakers or loose wiring, which can prevent the fan from receiving power.
Unbalanced or damaged blades could make it wobble and operate inefficiently.
You should also consider a faulty capacitor, which might restrict speed or prevent the motor from starting.
Finally, remote control issues could hinder functionality, often due to dead batteries.
Why Is My Ceiling Fan Light Not Turning On?
You walk into the room, expecting the comforting glow of your ceiling fan light, but nothing happens.
First, check if the light switch is on—sometimes it's the simplest things.
If it is, try replacing the bulbs; they might be burned out.
Inspect the fixture for loose connections.
If you're using a remote, don't forget to check the batteries.
If all else fails, the manual might hold the key to your mystery.
Conclusion
To summarize, if your ceiling fan isn't working, identifying the cause is key to getting it back in action. Remember, about 30% of ceiling fan issues stem from electrical failures. By following troubleshooting steps and considering brand-specific quirks, you can often resolve the problem yourself. However, don't hesitate to call a professional if you're uncertain or if the issue persists. Keeping your fan in good shape can enhance airflow and comfort in your home!
-
Guides3 weeks ago
How Much to Install a Ceiling Fan
-
Vetted3 weeks ago
15 Best Name Brand Window Air Conditioners for Ultimate Comfort This Summer
-
Vetted3 weeks ago
15 Best Window Air Conditioners With Heat Pumps for Year-Round Comfort
-
Vetted3 weeks ago
15 Best Over-the-Sill Window Air Conditioners for Efficient Cooling in Small Spaces
-
Vetted3 weeks ago
15 Best 115 Volt Window Air Conditioners to Keep Your Home Cool This Summer
-
Vetted3 weeks ago
15 Best Window Air Conditioners of 2025, According to Consumer Reports
-
Guides3 weeks ago
Which Way Does a Ceiling Fan Go in the Summertime
-
Guides3 weeks ago
Can You Spray Paint a Ceiling Fan