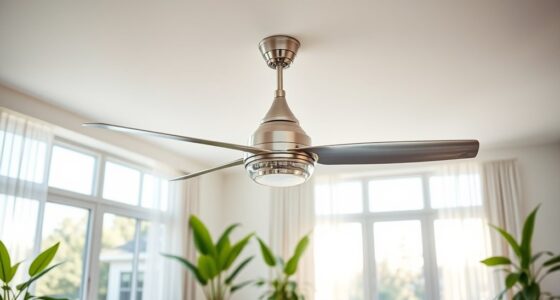

To successfully DIY your ceiling fan, start by turning off power and disassembling the blades and motor cover. Sand all surfaces smoothly, then protect electrical components with tape. Choose a durable, semi-gloss or enamel spray paint and apply a primer for better adhesion. Set up a DIY spray booth using cardboard and guarantee proper ventilation. After multiple thin coats and thorough drying, reassemble carefully. Keep your fan looking fresh with these expert tips—you’re about to discover how!
Key Takeaways
- Disassemble the fan, clean, and sand all parts for smooth paint adhesion and professional results.
- Use high-quality primer and spray paint, applying thin, even coats for durability and a flawless finish.
- Create a DIY spray booth with cardboard and tarps to contain overspray and protect surrounding surfaces.
- Apply paint in multiple light coats, sanding lightly between layers to prevent drips and ensure smooth coverage.
- Reassemble once fully dry, tightening hardware securely and inspecting for wobbling or noise for optimal operation.

Zinsser Ceiling Acrylic Paint & Primer in One, 13 oz, Flat White
- Stain-blocking ceiling spray paint: Blocks stains and primes surfaces
- Low odor formula: Suitable as all-purpose primer
- Fast drying: Dries in 30 minutes
As an affiliate, we earn on qualifying purchases.
As an affiliate, we earn on qualifying purchases.
Preparing Your Ceiling Fan for Painting

Before you start painting your ceiling fan, it’s essential to prepare it properly. First, turn off the electrical breaker to cut power completely, and switch off the fan. Remove the fan blades and light fixture, labeling screws and parts so you can reassemble easily. Use a paint brush to carefully clean and inspect all parts before sanding. Sand the fan blades, motor covers, and brackets with 100-120 grit sandpaper to guarantee smooth paint adhesion. Be thorough but gentle to avoid damaging delicate components. Protect electrical components and the motor area by covering or taping them during painting. Clean all parts thoroughly with warm water and mild soap or baby wipes, then dry completely. Proper preparation helps ensure a professional-looking finish and safe project completion. Additionally, reviewing keto diet tracking techniques can help you stay on schedule during your project. Incorporating proper project planning strategies can further streamline the painting process and prevent setbacks. Ensuring that you understand the Glycolic Acid Benefits for Skin can also be advantageous if you plan on refreshing your personal space with a new look or decor. Moreover, taking time to research different pinball machine features can inspire creative ideas for your home entertainment setup. Considering professional voiceover techniques can also enhance your presentation or instructional videos related to DIY projects.
Selecting the Right Materials and Paints

Choosing the right materials and paints is key to a professional-looking finish. You should select high-quality, durable paints like semi-gloss or enamel. Consider applying primer for better adhesion. Additionally, selecting appropriate color schemes can significantly enhance the overall aesthetic and harmony of your space. Using the right tools, such as brushes or rollers designed for ceiling surfaces, can also make a notable difference in achieving a smooth, even coat. Being aware of narcissistic behaviors can help you better understand your choices and set realistic expectations for your project. To ensure longevity, choosing paints with excellent UV resistance can prevent fading over time. Moreover, selecting carrier oils for essential oils can aid in creating a smooth application if you plan to incorporate aromatherapy elements into your space.
Suitable Paint Types
Selecting the right paint type is essential for achieving a smooth, durable finish on your ceiling fan. For metal surfaces, spray paint like Rustoleum Ultra Cover in Gloss provides a factory-like sheen and high durability. Use a primer designed for metal to guarantee proper adhesion and prevent chipping.
Water-based paints are a popular choice because they’re easier to work with and less toxic. However, oil-based paints also work well for long-lasting results.
Avoid high-gloss paints, as they can cause glare and distract from your ceiling. Opt for semi-gloss or enamel spray paints formulated specifically for appliances and furniture to withstand humidity, heat, and cleaning.
Choosing the right paint ensures your fan maintains its appearance and function over time.
Primer Recommendations
Have you considered using a primer specifically designed for metal or wood surfaces to guarantee your ceiling fan paint job lasts? Choosing the right primer is vital for durability and a smooth finish.
For metal surfaces, opt for a primer that improves adhesion and prevents rust or corrosion over time. If you’re shifting from light to dark colors, select a stain-blocking primer to prevent bleed-through and uneven tones. Additionally, selecting a primer compatible with your paint type is crucial to ensure proper bonding and a professional result.
Apply light, even coats, allowing each layer to dry thoroughly before adding more. Always follow the manufacturer’s instructions regarding drying times and compatibility with your chosen topcoat.
Using the proper primer ensures your paint adheres well, resists peeling, and provides a professional-looking finish that stands the test of time. Proper surface preparation, including selecting an appropriate primer, is essential for maximizing the longevity of your paint job surface preparation.
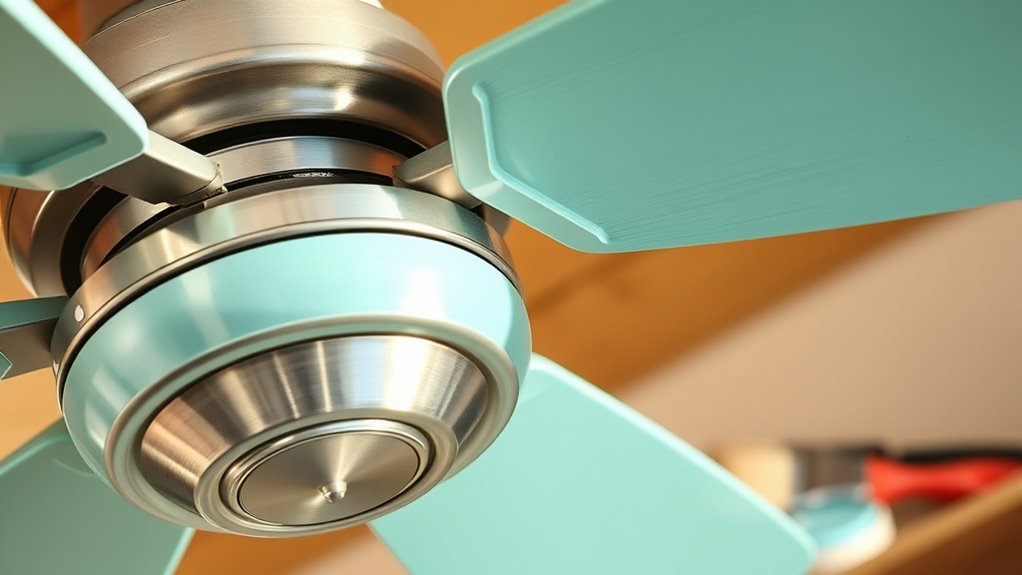
Color and Finish Choices
When it comes to giving your ceiling fan a professional finish, the right choice of paint and its finish can make all the difference. For a smooth, durable look on blades and metal surfaces, opt for semi-gloss or gloss spray paints with primer. Enamel or oil-based paints provide long-lasting color that resists chipping and fading, especially on metal parts. To add texture and depth, consider using water-based stains or tinted glazes. For efficiency, choose fast-drying spray paints like Rustoleum Ultra Cover in Gloss to minimize wait times between coats. To match your room decor, avoid high-gloss finishes; instead, select semi-gloss or matte options for a subtle, glare-free appearance that complements your space. Paint application techniques are crucial to achieving a professional-looking finish. Additionally, understanding paint compatibility with different surfaces can help prevent peeling or bubbling over time. Knowing cost factors associated with different paints can assist in selecting a budget-friendly option that still provides quality coverage. Regional flavors and traditions can inspire color choices that harmonize with your environment. Incorporating proper surface preparation can further enhance the durability and appearance of your painted ceiling fan.
Disassembling and Sanding Fan Components

Before painting your ceiling fan, start by carefully disconnecting it from the power source and removing the fan blades with a screwdriver, making sure to label the screws for easy reassembly. Next, disassemble the motor housing and any brackets or components, keeping all screws organized in labeled containers. Once disassembled, sand all surfaces of the fan blades, motor cover, and brackets with 100-120 grit sandpaper to guarantee a smooth, paintable surface. Use gentle, downward strokes, especially on edges and detailed areas, to avoid damaging delicate parts. After sanding, clean each component thoroughly with warm water and detergent, then dry everything completely before proceeding to paint. Proper disassembling and sanding are vital for a professional-looking finish and long-lasting results. Sound vibrations are believed to enhance cellular regeneration and overall health, so ensure your fan surfaces are smooth to achieve the best possible finish. Additionally, maintaining proper toilet maintenance and repairs can prevent issues that might require similar disassembly and repair work in the future.
Creating a DIY Spray Painting Setup
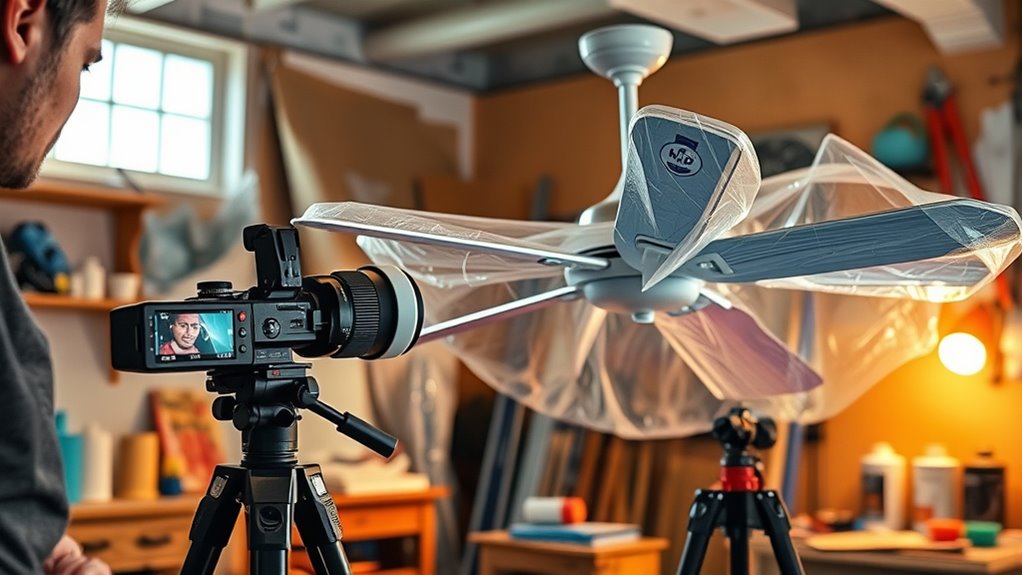
To set up your spray painting area, start by building a simple spray booth using flattened cardboard boxes and a tarp to protect the floor. Proper cost behavior analysis can help you determine the right equipment and setup for efficient painting. Make sure to elevate parts like fan blades with foam or lifts to prevent overspray on nearby surfaces. Choose the right spray tools and spray at least 6-8 inches from the surface for smooth, even coats. Additionally, selecting the appropriate materials such as spray paint and protective gear can enhance your results and safety during the project. Using specialized spray tips designed for specific finishes can also improve the overall quality of your work.
Building a Spray Booth
Creating a DIY spray booth is an effective way to contain overspray and achieve a professional finish. You can build a simple spray booth using large flattened cardboard boxes arranged with the bottom on the floor, covering the area with a tarp if needed. This setup helps contain overspray and keeps your workspace clean.
Use foam or other lifts inside the cardboard to elevate the ceiling fan parts, preventing overspray on surrounding surfaces. Guarantee proper ventilation by choosing a well-ventilated area, allowing fumes to dissipate and airflow to improve.
After painting, fold and store the cardboard materials for future use, maintaining a clean and efficient workspace. This DIY setup provides a cost-effective, reusable solution for a controlled spray painting environment.
Protecting Surroundings
Setting up a DIY spray painting area requires careful attention to safeguarding surroundings from overspray and paint fumes. Start by constructing a spray booth using large flattened cardboard boxes, with the sides folded up to contain overspray.
Cover the surrounding floor with a tarp or drop cloth to shield surfaces from drips and overspray.
Elevate the fan parts, like blades and brackets, using foam or small lifts to prevent overspray from settling underneath.
Always choose a well-ventilated space or go outdoors to ensure proper airflow and minimize fumes.
This setup helps contain overspray within your spray booth, protecting nearby furniture and walls.
After painting, fold and store the cardboard materials flat for easy reuse.
Proper ventilation and protective coverings are essential for a safe, clean project environment.
Selecting Painting Tools
Choosing the right painting tools is essential for achieving a smooth, professional finish on your ceiling fan. To create a DIY spray painting setup, you’ll need a spray gun or aerosol spray paint like Rustoleum 2X for even coverage. Use a brush for touch-ups or detailed areas, and apply primer to guarantee better paint adhesion.
Before spraying, sand the fan blades to smooth out imperfections and improve paint adhesion. Build a spray booth using large flattened cardboard boxes to contain overspray and facilitate cleanup. Set up the booth with the bottom on the floor, covering surfaces with a tarp, and use foam or small lifts inside to elevate parts, preventing overspray on the ground.
Properly selecting and preparing your tools ensures a flawless finish.
Applying Primer and Paint for a Smooth Finish

To achieve a smooth and professional-looking finish on your ceiling fan, start by applying a light coat of primer. Use a semi-gloss or gloss primer to improve paint adhesion and create a solid base. Spray primer from about 6-8 inches away in thin, even layers to prevent drips and uneven coverage.
Applying multiple thin coats, allowing each to dry thoroughly, results in a better surface than one heavy coat. For curved or intricate areas, use a brush or spray gun to ensure even coverage without pooling.
To enhance smoothness, lightly sand between coats of primer. This step helps eliminate imperfections and prepares the surface for the final paint, ensuring a sleek, polished finish.
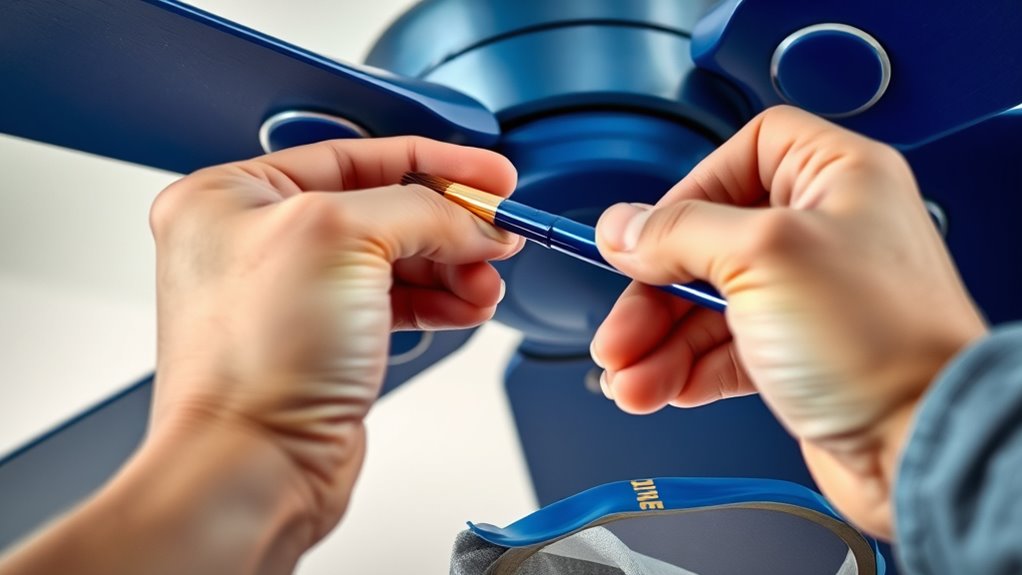
Tips for Painting Difficult Areas and Details

When painting around vents, intricate details, or tight corners, precision becomes key to achieving a clean, professional look. Use a small brush with a flat or square tip to carefully navigate these tricky areas.
Mask off vents and screening with painter’s tape or a popsicle stick to prevent overspray and guarantee clean lines.
For hard-to-reach spots, a detail brush or a dipped Q-tip offers precise control without affecting surrounding surfaces.
To maintain crisp edges, hold your brush steady and take your time.
Additionally, use masking techniques and gentle pushes to keep paint contained.
Remember, patience and steady hands are essential for a flawless finish in detailed areas.
Proper masking and tools make all the difference in achieving professional results.
Reassembling and Ensuring Proper Functionality

Before reassembling your ceiling fan, make sure all painted parts are completely dry to prevent smudges or damage.
Carefully reassemble the blades and hardware, tightening screws securely to ensure stability.
Reassemble blades and hardware securely to ensure a stable, safe ceiling fan.
During the operation check, turn the power back on and verify smooth, balanced movement.
Conduct an inspection to confirm all wiring connections are properly secured and that paint hasn’t obstructed any electrical components.
Listen for wobbling or unusual noises, which could indicate loose parts or misalignment.
Make necessary adjustments to improve balance and reduce noise, ensuring safe and efficient fan operation.
Taking these steps guarantees the fan functions correctly after painting and maintains its longevity.
Proper reassembly and thorough testing are essential for a professional-looking, reliable finished project.
Maintaining and Touching Up Your Painted Fan
Regular maintenance of your painted ceiling fan helps preserve its appearance and functionality over time. To keep your paint finish looking fresh, regularly clean the blades with a damp cloth to prevent dust buildup.
When you notice chips or scratches, use touch-up paint and a small brush to repair chips seamlessly, matching the original color.
Periodically inspect the fan for signs of wear or peeling, and reapply a thin coat of paint if needed to maintain the finish.
Avoid harsh chemicals or abrasive scrubbers that can damage the paint.
If the paint begins to fade or chip considerably, consider repainting or recoating the fan to refresh its look and protect the surface.
Proper upkeep ensures your fan remains both beautiful and functional.
Frequently Asked Questions
What Kind of Paint Do You Use on a Ceiling Fan?
When painting your ceiling fan, you should use high-quality, semi-gloss or enamel spray or brush-on paint designed for metal or wood surfaces. Look for low VOC, quick-drying paints to reduce fumes and save time.
Always prime first, especially when changing colors, to get a smooth finish.
For metal parts, choose specialized metal spray paint to prevent rust and chipping, following the manufacturer’s instructions for the best results.
How to Paint a Ceiling Fan at Home?
To paint a ceiling fan at home, start by turning off the power and removing the fan blades and light fixtures.
Sand the surfaces with 120 grit sandpaper to help paint stick better.
Use a spray primer and spray paint for a smooth finish, applying light coats from 6-8 inches away.
Cover electrical parts, then let everything dry for 24-48 hours before reassembling and running the fan.
How to Paint a Ceiling Fan Without Taking It Down?
Think of your ceiling fan as a blank canvas, waiting for a fresh coat of personality. To paint it without taking it down, cover the motor and surroundings with painter’s tape and plastic.
Use spray paint or a foam brush for smooth strokes on the blades, keeping the spray at least 6-8 inches away. Turn off the fan, work carefully, and let the paint dry completely before flipping the switch back on.
What Is the Trick to Painting Ceilings?
The trick to painting ceilings is to prep properly and use the right tools. You should clean and lightly sand the surface, then mask off edges with painter’s tape.
Use a high-quality roller with an extension pole to reach comfortably, and apply multiple thin coats in a consistent pattern like “W” or “Z.” This approach guarantees even coverage, reduces drips, and gives you a smooth, professional-looking finish.
Conclusion
With patience and the right techniques, you can transform your ceiling fan into a stunning focal point. Think of it as giving your space a fresh new voice—one brushstroke at a time. Just remember to take your time, stay steady, and enjoy the process. Before you know it, your DIY fan makeover will be the highlight of your room, proving that a little effort can truly turn the ordinary into extraordinary.