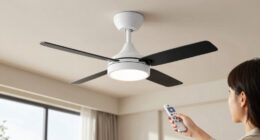
Yes, you can fix a ceiling fan pull chain, whether it's an external break or an internal issue. If it's an external break, you can easily replace the chain with a new extension chain. For internal breaks, you might need to replace the pull chain switch itself. Always turn off the power at the circuit breaker first and use proper tools like screwdrivers and a voltage tester. Regular maintenance, like checking for wear and cleaning, is key to preventing future problems. If you'd like to understand the entire process and tips for repairs, there's more to cover.
Key Takeaways
- Yes, a ceiling fan pull chain can be fixed by replacing the broken switch or extending the chain if damaged.
- Ensure safety by turning off power at the circuit breaker and using a voltage tester before starting repairs.
- Disassemble the fan carefully to access the pull chain mechanism, inspecting for damage or wear during the process.
- Gather necessary tools like screwdrivers, wire strippers, and a replacement pull chain switch for efficient repair.
- Regular maintenance and inspection can prevent future pull chain issues and extend the lifespan of the ceiling fan.

4 Pack Bronzed Ceiling Fan Pull Chain Extension, 12 Inches Classic Drop Shaped Pendant Pull Chains for Ceiling Fans and Lights, Decorative Fan Pulls Extenders with Connector (2 light and 2 fan)
- Package Includes: 4 bronze ceiling fan pull chains
- Material: Durable metal construction
- Design: Drop-shaped pendant with icons
As an affiliate, we earn on qualifying purchases.
As an affiliate, we earn on qualifying purchases.
Types of Chain Breaks

When it comes to ceiling fan pull chains, you'll encounter two main types of breaks: external and internal.
An external break is often visible and easily accessible, meaning you can quickly spot that the chain has broken. Typically, all you need is an extension chain for a rapid fix.
On the other hand, an internal break hides within the fan housing, requiring more extensive disassembly. If the chain's missing, you might need a complete replacement of the pull chain switch.
Common causes for these breaks include excessive wear from frequent use, friction at the housing opening, and dust accumulation that disrupts smooth operation.
When a chain has broken, it can hinder your fan's functionality greatly, potentially leading to complete operational failure if you don't address it promptly.
Regular inspection and maintenance of the pull chain mechanism can help prevent these issues, ensuring your ceiling fan remains in good working order.
Safety Precautions

Before diving into any ceiling fan repairs, it's vital to prioritize safety. First and foremost, turn off the power at the circuit breaker. This step is important to prevent electrical shock. Once you've done that, grab a voltage tester to confirm that the power is indeed off before touching any electrical components of the fan.
Next, make sure you have a stable ladder ready for the job. It's a good idea to have an assistant hold the ladder for support to prevent any falls while you work on the fan. Safety goggles are another must-have; wear them to protect your eyes from debris or components that might fall during the disassembly process.
Finally, as you work with the electrical connections, make certain that everything is properly insulated and secured. This will help you avoid short circuits or electrical hazards when you reassemble the fan.
Required Tools

To successfully fix your ceiling fan pull chain, you'll need a few essential tools and safety gear.
Having the right equipment not only makes the job easier but also keeps you safe from potential hazards.
Let's go over what you'll require and the recommended replacement parts to get started.
Essential Tools Overview
Equipping yourself with the right tools is fundamental for a successful ceiling fan pull chain repair. Having the necessary items on hand can make the process straightforward and efficient.
Here's a quick overview of the fundamental tools you'll need:
- Voltage Tester: Before you start, verify the power is off. This tool helps you confirm that it's safe to work on your ceiling fan pull chain.
- Step Ladder: A 6-foot step ladder is essential for safely accessing the ceiling fan during your repair.
- Screwdrivers: You'll need both flathead and Phillips screwdrivers to remove screws securing the fan components. This is critical for disassembly.
- Wire Strippers: If you're preparing new switch wires, wire strippers are required. You might also need wire cutters for any electrical connections.
Don't forget to wear safety goggles to protect your eyes from any debris while disassembling and working on the fan.
With these tools ready, you'll be well-equipped to tackle your ceiling fan pull chain repair with confidence.
Safety Gear Importance
Safety gear is essential when tackling a ceiling fan pull chain repair. It not only guarantees your safety but also makes the process smoother. Here's a quick overview of the necessary tools and their importance:
| Tool | Importance | Safety Benefit |
|---|---|---|
| Safety Goggles | Protects your eyes from debris | Prevents eye injuries |
| Stable Ladder | Provides safe access to the fan | Reduces the risk of falls |
| Voltage Tester | Confirms power is off before starting work | Minimizes electrical shock risk |
| Insulated Tools | Helps prevent accidental electrical contact | Enhances safety while working |
| Manual Screwdriver Set | Essential for disassembling and reassembling | Guarantees proper fit and function |
Using safety goggles will shield your eyes from any flying debris. A stable ladder is vital to safely reach the fan without risking a fall. Always use a voltage tester to confirm the power is disconnected before you start. Insulated tools add an extra layer of protection against electrical shocks. Finally, keep a manual screwdriver set handy for efficient disassembly and reassembly. Prioritizing these safety measures makes your repair process much safer and more effective.
Recommended Replacement Parts
When replacing a ceiling fan pull chain, having the right replacement parts is vital for a successful repair.
You'll need specific items to guarantee everything fits and works properly. Here's a quick list of recommended replacement parts and tools you should gather:
- Replacement Pull Chain Switch: Make sure it's compatible with your fan model; you can find these at your local hardware store or online.
- Extension Chain: This may be necessary if your existing chain is too short or damaged.
- Voltage Tester: This is essential for confirming the power is off before you start working, keeping you safe from electrical hazards.
- Tools: Gather manual screwdrivers (both flathead and Phillips), wire strippers, wire nuts for securing connections, safety goggles, and a 6-foot step ladder for access.
With these parts and tools ready, you'll be well-equipped to tackle your ceiling fan pull chain repair.
Step-by-Step Repair Process

Now that you have your tools ready, you can start the repair process.
Begin by disassembling the fan fixture to access the pull chain mechanism.
Once you've made the necessary repairs, you'll reassemble everything and test the fan to guarantee it works properly.
Required Tools Overview
Before diving into the repair of your ceiling fan pull chain, it's essential to gather the right tools for the job. Having the appropriate tools won't only make the process smoother but also guarantee your safety.
Here's what you'll need:
- Voltage Tester: To confirm that all electrical components are de-energized before you start working on the ceiling fan pull switch.
- Screwdrivers: You'll need both flathead and Phillips screwdrivers to remove the fan's cover and access the internal components.
- Wire Strippers: Essential for any necessary electrical connections during the repair process.
- Safety Goggles: Protect your eyes while you're working, especially when handling small parts or working in awkward positions.
Additionally, a 6-foot step ladder will help you reach the fan easily, and wire cutters may be necessary in case you encounter damaged wires.
It's also important to note that using a ceiling fan can lead to lower energy bills, enhancing the overall efficiency of your home.
Keeping your workspace organized and having someone to hold the ladder can enhance your safety and efficiency. With these tools on hand, you're well-prepared to tackle the ceiling fan pull chain repair.
Disassembly of Fan Fixture
To begin disassembling the fan fixture, first turn off the power at the circuit breaker to guarantee your safety. Use a voltage tester to confirm the fan is de-energized before proceeding. Start by removing any light bulbs to prevent breakage, then unscrew the lower section of the ceiling fan from the motor base to access the interior components.
Next, locate and unscrew the metal collar that secures the pull switch in place. Keep all screws organized for easy reassembly later. Carefully detach the pull switch from the housing, making sure to note the orientation of the wires for accurate reconnection.
While you're in there, inspect the internal components for any damage or wear, ensuring all parts are accounted for before you proceed with repairs or replacements.
Here's a quick overview of the disassembly steps:
| Step | Action |
|---|---|
| 1 | Turn off power at the circuit breaker |
| 2 | Remove light bulbs |
| 3 | Unscrew lower section from motor base |
| 4 | Unscrew metal collar for pull switch |
| 5 | Detach pull switch and inspect parts |
Reassembly and Testing Steps**
Reassembling the ceiling fan after replacing the pull chain and switch requires careful attention to detail. Follow these steps to guarantee a successful reassembly and testing:
- Reinsert the switch back into the fixture housing, making sure all wires are properly tucked away to avoid damage.
- Replace any light bulbs and decorative globes that were removed during disassembly. Be sure to secure them in place as they were originally.
- Restore power at the circuit breaker to allow electricity to flow back to the fan. This step is essential for testing the functionality of the new components.
- Check all electrical connections to verify they're tight and that the switch is receiving power. If the fan doesn't operate as expected, revisiting this step may solve the issue.
After completing these steps, clean up your workspace by disposing of any old parts and putting away your tools.
Don't forget to document the repair process for future reference. This will help you remember what was done and assist anyone else, if needed, in the future.
Your ceiling fan is now ready for use!
Identifying the Problem

A broken pull chain can create significant frustration for anyone trying to operate their ceiling fan. To identify the problem, start by examining the chain itself. If it's visibly detached or hanging outside the fan, you likely have a simple external break. In this case, an extension chain may be all you need for a quick fix.
However, if the fan still won't operate, the issue might be more complex. You should also inspect the pull switch assembly. This can help you determine whether the broken chain is the culprit or if there's a malfunction with the switch.
Internal damage can be trickier to diagnose, often requiring you to disassemble the fan housing. Look for wear and tear at connection points, as frequent use can lead to jamming or breaking.
If you suspect internal damage, assess the condition of both the chain and the switch mechanism to guide your repair approach. By systematically checking these components, you'll be better equipped to understand what's gone wrong and how best to proceed with repairs.
Common Issues

After identifying the problem with your ceiling fan, it's important to recognize the common issues that can arise with pull chains.
Here are four frequent problems you might encounter:
- Stuck or Jammed: Over time, the pull chain can become stuck or jammed due to wear and tear, making it difficult to operate the fan.
- Chain is Broken: Sometimes, the chain links can break, which might require you to replace the entire pull chain or switch to restore functionality.
- Faulty Pull Chain Switch: The pull chain switch itself can fail, preventing your fan from turning on or off properly, which is a common issue.
- Dust and Debris Accumulation: Dust and debris can build up around the chain mechanism, affecting the fan's operation and necessitating regular cleaning.
Addressing these common issues promptly can help you avoid needing to replace a ceiling fan before it's necessary.
Keep an eye out for these problems, and with a bit of maintenance, you can keep your ceiling fan running smoothly.
Replacing Components

When you need to replace components of your ceiling fan, it's important to follow a systematic approach to guarantee everything functions properly afterward.
First, disconnect the power to the ceiling fan to ensure your safety. Next, you'll need to remove the light fixture to access the pull switch mechanism. Carefully detach the old switch by removing the screws and disconnecting the wires, taking note of their configuration for proper reconnection.
Once you have the old switch out, it's time to install the new switch. Strip approximately 0.5–0.75 inches of insulation from the new switch wires before connecting them to the corresponding wires from the fan. Make sure the connections are secure, using wire nuts to tighten them.
After that, secure the new switch in place, and reattach the light fixture along with any other components you removed earlier.
Finally, restore power to the fan and test the functionality of the new pull chain. This confirms that you've successfully replaced the ceiling fan components and that everything is working as it should.
Maintenance Tips

Maintaining your ceiling fan is just as important as replacing its components. Regular upkeep not only enhances the fan's performance but also extends its lifespan. Here are some essential maintenance tips you should follow:
- Clean the Blades: Dust buildup can hinder functionality, so be certain to clean the fan blades regularly. A damp cloth works wonders.
- Inspect the Pull Chain: Check the pull chain every few months for signs of fraying or damage. Catching issues early can prevent bigger problems down the line.
- Avoid Yanking: When using the pull chain, avoid yanking or using excessive force. This can weaken the links, leading to breakage and more costly repairs.
- Lubricate Moving Parts: To guarantee smooth operation, lubricate the moving parts of the fan, including the pull chain assembly. This reduces friction and wear, keeping everything running smoothly.
Additionally, consider using a longer pull chain to make it easier to reach, reducing strain on the mechanism.
When to Call a Professional

Sometimes, DIY repairs just don't cut it. If you're still facing issues with your ceiling fan after your attempts, it's time to contemplate calling a professional. Safety should be your priority, especially if you've noticed any electrical concerns or frayed wiring during your inspections. These issues can pose serious risks, so don't hesitate to seek expert help.
Complex fan designs, like those with integrated lighting or advanced controls, often require specialized knowledge for repairs. If you lack the necessary tools or experience, involving a professional can prevent potential hazards and further damage.
Additionally, check if your fan is still under warranty. Attempting repairs yourself might void the coverage, leading to extra costs down the line.
Here's a quick guide to help you decide:
| Situation | Action Needed | Reason |
|---|---|---|
| Persistent issues post-DIY | Call a professional | Guarantee proper functionality |
| Electrical concerns detected | Call a professional | Mitigate safety risks |
| Complex fan design | Call a professional | Requires specialized knowledge |
| Warranty coverage applies | Call a professional | Avoid voiding warranty |
In these cases, getting help is the best way to go.
Understanding the Pull Chain Mechanism

The pull chain mechanism in your ceiling fan is a simple yet essential component that lets you control its speed and lighting with ease. This mechanism consists of a chain connected to a switch, allowing you to adjust settings with just a pull. Understanding how it works can help you fix issues when they arise.
Here are some key points to keep in mind:
- Chain Types: Pull chains can break externally, where they're visible, or internally, hidden within the fan housing.
- Common Breaks: Friction at the housing opening often causes internal chain breaks, which might need you to disassemble the fan.
- DIY Fix: Replacing a broken pull chain is usually straightforward. You'll typically need to remove the fan's lower section to install a new chain or switch.
- Maintenance Tips: Regularly inspect the pull chain to prevent issues and extend your ceiling fan's lifespan.
Frequently Asked Questions
Can a Ceiling Fan Pull Be Fixed?
Yes, you can fix a ceiling fan pull. If the chain's broken externally, adding an extension chain is easy.
For internal breaks, you'll need to disassemble the fan and might've to replace the pull chain switch, which involves reconnecting wires.
Regular maintenance can help prevent these issues, so keep an eye on the chain and switch.
You can find replacement parts at hardware stores or online, making it a manageable DIY project.
What to Do if a Chain Breaks on a Ceiling Fan?
When it rains, it pours, especially when a ceiling fan chain breaks.
First, check if the break's external or internal. If it's external, you can easily add an extension chain.
For internal breaks, turn off the power at the circuit breaker and disassemble the fan to inspect the pull chain switch.
Replace any broken parts, securely reassemble everything, and then restore power to guarantee your fan's back in business.
How Much Does It Cost to Replace a Pull Chain on a Ceiling Fan?
Replacing a pull chain on a ceiling fan usually costs between $10 and $30 for parts, depending on your fan's model and chain type.
If you hire a professional, labor can add another $50 to $100.
However, if you tackle the repair yourself, you can find pull chain switch kits online or at hardware stores for under $20.
Just remember, if there are other issues, total repair costs could rise considerably.
Can a Chain Be Replaced on a Ceiling Fan?
Yes, you can replace a chain on your ceiling fan.
First, you'll need to access the pull chain switch inside the fan housing. Make sure you have the right replacement chain, which you can find at hardware stores or online.
Disassemble the fan, remove the damaged chain, and install the new one by threading it through the switch mechanism.
Just remember to use proper tools and safety gear while you work.
Conclusion
Fixing a ceiling fan pull chain isn't rocket science; with the right tools and a bit of patience, you can tackle it yourself. Remember, safety's key—turn off the power before starting any repairs. Whether you need to replace a broken chain or just give it a little TLC, maintaining your fan guarantees it runs smoothly for years. So, roll up your sleeves and get to it—don't let a small issue leave you feeling like you're stuck in the Stone Age!