To troubleshoot your fan’s seasonal direction quickly, turn off the power and locate the switch on the fan’s motor or canopy, usually labeled “Summer” or “Winter.” Adjust the switch to the correct setting: counterclockwise for summer to create a cooling breeze, or clockwise for winter to push warm air downward. Make sure blades spin freely and smoothly after switching. If issues persist, more tips can help you guarantee your fan works perfectly year-round.
Key Takeaways
- Turn off the fan and wait for blades to stop before adjusting the switch for safety.
- Locate the switch near the motor, typically labeled “Summer” or “Winter,” and ensure the fan is off.
- Check that blades are securely attached, aligned, and spinning freely without wobbling or noise.
- Switch the direction lever or switch to the appropriate setting for summer (counterclockwise) or winter (clockwise).
- Turn the fan back on and observe blade movement to confirm correct rotation and smooth operation.

Ceiling Fan Light Switch Zing Ear Pull Chain ZE-109 Fan Light Switch, On-Off Speed with Pull Chain Compatible with Ceiling Fans, Lamps and Wall Lights (1, Bronze)
Zing Ear ZE-109 Two-wire pull chain switch, activates canopy lamps by gently tugging the beaded chain, compatible with…
As an affiliate, we earn on qualifying purchases.
As an affiliate, we earn on qualifying purchases.
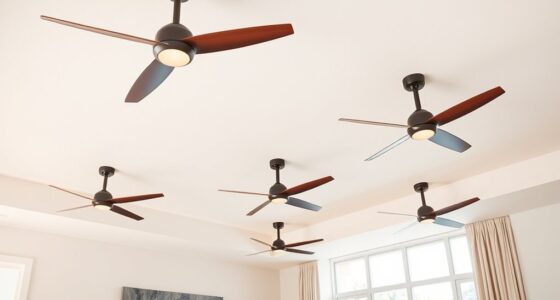
Understanding Fan Blade Rotation and Its Impact

Understanding how fan blades rotate is essential for ensuring your ceiling fan works correctly in both summer and winter. The blade angles play a vital role in determining airflow direction. When the blades are angled properly, they push air downward or upward depending on the season. Motor speed also impacts how effectively the blades move air; a higher speed increases airflow, while a lower speed reduces it. If the blade angles are off or the motor isn’t operating correctly, your fan won’t produce the desired airflow. Fan blade alignment is crucial for optimal performance and energy efficiency. This can lead to inefficient cooling in summer or inadequate heating circulation in winter. By understanding how blade angles and motor speed work together, you can troubleshoot and optimize your fan’s rotation to suit each season’s needs.

Supco FBP100 Fan Blade And Blower Wheel Puller
Package dimensions:2.286 cms(L) x2.286 cms(W) x28.702 cms(H)
As an affiliate, we earn on qualifying purchases.
As an affiliate, we earn on qualifying purchases.
Identifying the Correct Fan Direction for Different Seasons

To guarantee your ceiling fan operates effectively year-round, you need to set the correct direction for each season. Recognizing the right fan orientation tips ensures comfort and energy savings. In summer, set the fan to spin counterclockwise for a cooling breeze. In winter, switch to clockwise rotation to push warm air downward. Use this table to identify the correct seasonal fan settings:
| Season | Fan Direction | Effect |
|---|---|---|
| Summer | Counterclockwise | Provides a cool breeze |
| Winter | Clockwise | Circulates warm air |
| Spring | Adjust based on need | Transition period |
| Fall | Adjust based on need | Prepare for cooler months |
Adjusting fan orientation tips help you stay comfortable year-round without wasting energy. For optimal efficiency, understanding how AI technology influences energy management can help you make smarter decisions about your home’s climate control.

Ceiling Fan Reverse Switch 6-Pin Toggle – Ceiling Fan Direction Switch, Prewired 6-Wire Leads, 3A 250V / 6A 125V, Compact Easy Install Replacement for Indoor Outdoor Fans, Forward Reverse Control
Reverse Direction Control: 6-pin ceiling fan reverse switch, a forward reverse switch rated 3A 250V / 6A 125V…
As an affiliate, we earn on qualifying purchases.
As an affiliate, we earn on qualifying purchases.
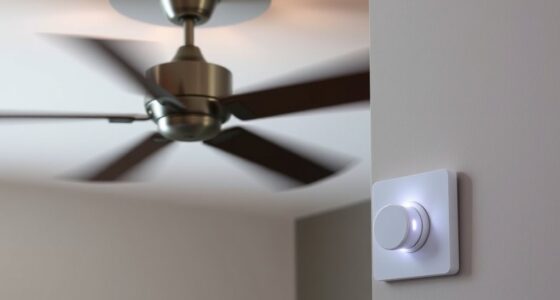
Locating and Accessing the Fan’s Adjustment Switch

Start by finding the fan panel, which is usually behind a grille or cover. Carefully remove the fan cover to access the internal components without damaging it. Once exposed, locate the adjustment switch, typically near the motor or control area, to change the fan’s direction. Glycolic acid benefits for skin can sometimes be observed in how well the fan operates by ensuring the area is clean and free of buildup before making adjustments.
Find the Fan Panel
Locate the fan panel by first turning off the power to guarantee safety. Usually, the panel is accessible from the ceiling or a side compartment, depending on your fan’s design. Look for a small cover plate near the motor or on the fan’s canopy, which often hides the adjustment switch. The fan blade design can sometimes give clues about the switch’s location; fans with more blades or specific blade angles might have the switch on the motor housing. Accessing this panel is essential because it allows you to adjust the fan’s direction for summer or winter settings. Proper positioning of the switch is crucial for fan efficiency, as it ensures optimal airflow and motor performance. Remember, a well-placed adjustment switch helps optimize motor efficiency and ensures your fan runs smoothly in either season.
Remove Fan Cover Carefully
Gently remove the fan cover to access the adjustment switch without damaging any parts. Use cover removal techniques like unscrewing screws carefully or sliding panels if they’re designed that way. Be mindful of the fan blade alignment; avoid knocking or bending blades as you work. Carefully lift the cover straight off to prevent damaging clips or tabs. If the cover is stuck, gently wiggle it free rather than forcing it, which could cause cracks. Once removed, you’ll have clear access to the switch or control mechanism. Keep track of all screws or clips for reassembly. Taking your time during cover removal ensures you don’t misalign or damage components, making the process smoother and safer for your fan’s long-term operation. Additionally, understanding how the fan’s rotation direction impacts airflow can help you troubleshoot more effectively.
Locate the Adjustment Switch
Once you’ve removed the fan cover, the adjustment switch should be visible and accessible. It’s usually a small, sliding switch or a pull chain located near the fan blade assembly. Carefully inspect the area around the fan blade for this switch—it’s often positioned on the motor housing or on a nearby control plate. The adjustment switch is designed to change the direction of the fan blades, so look for labels like “Summer” or “Winter.” If you don’t see it right away, use a flashlight to illuminate hard-to-see spots. Make sure the fan is turned off before you attempt to locate or adjust the switch. Automation technology has made it easier to identify and access these switches in modern fans. Once found, you’ll be ready to switch the fan’s direction based on your seasonal needs.

HFYHWT 20PCS Ceiling Fan Balancing Kit, 5 Sets High Calibration Blade Balance Tool Including 5 Pcs Resilient Clips and 15 Pcs Metal Self-Adhesive 3G Weight
PROFESSIONAL RESULTS: Ceiling fan balance kit include balance clip to locate problem area, self-adhesive 3G Weight-Balance helps to…
As an affiliate, we earn on qualifying purchases.
As an affiliate, we earn on qualifying purchases.
How to Change Fan Direction Safely and Effectively

To change your fan’s direction safely, start by turning off the fan and unplugging it if necessary. Make sure you understand how to switch the fan settings without risking injury. Once you’re ready, adjust the fan blades to the correct direction to guarantee ideal airflow for the season. Properly maintaining your fan can also help prevent damage or safety hazards, ensuring a smooth transition between seasons.
Switch Fan Settings Safely
Switching your fan’s direction is simple, but it’s important to do so safely to avoid injury or damage. Before making any changes, turn off the fan and wait for the blades to stop spinning. This prevents accidental injury and protects the motor. When adjusting the settings, ensure your hands are dry and steady to maintain control. Properly switching fan direction can improve energy efficiency by optimizing airflow for the season, which can also reduce fan noise. If your fan has a remote or wall switch, use it carefully to avoid forcing the blades or damaging the mechanism. Always follow the manufacturer’s instructions, and never attempt to change the direction while the fan is running. Safe handling guarantees efficient operation without risking harm or unnecessary wear. Additionally, understanding the fan motor technology can help you troubleshoot issues more effectively and ensure longevity.
Adjust Fan Direction Properly
Before adjusting your fan’s direction, make sure the fan is turned off and the blades have come to a complete stop. This prevents injury and protects your fan motor. To change the direction, locate the fan’s switch—often on the motor housing or a pull chain. Adjusting the blade pitch is key: for summer, set the blades to rotate counterclockwise, creating a breeze, while in winter, switch to clockwise to push warm air downward. Proper blade pitch ensures effective airflow. Be gentle when moving the switch to avoid damaging the fan motor or misaligning the blades. Confirm the blades are properly aligned and spinning freely before turning the fan back on. Correctly adjusting fan direction enhances comfort and optimizes energy use year-round. Additionally, knowing how to reset your fan can help resolve any operational issues that may arise.
Confirming Proper Fan Rotation After Adjustment

After adjusting your fan’s direction for summer or winter, ensuring that it’s spinning correctly is vital. First, turn on the fan and observe the blade movement. Confirm it rotates counterclockwise for summer and clockwise for winter. Second, check the fan speed; it should run smoothly without wobbling or excessive noise. If the speed feels inconsistent or noisy, recheck your adjustment. Third, listen for unusual fan noise, which can indicate improper rotation or loose blades. If you notice wobbling, turn off the fan and tighten any loose screws or blades. Proper rotation guarantees maximum airflow and quiet operation. Additionally, cultivating creative practice can help you develop the patience and attention needed for precise adjustments. Confirming these points helps guarantee your fan is working efficiently and correctly aligned for the season.
Troubleshooting Common Issues When Fan Direction Won’t Change

If your fan isn’t changing direction despite attempts to adjust it, there may be underlying issues preventing the movement. One common problem is a faulty fan motor that isn’t responding to the switch or control mechanism. Check if the motor is running smoothly and without unusual noise; a malfunctioning motor can hinder blade movement. Another issue could be blade alignment—if the blades are misaligned or bent, they may resist changing rotation direction. Ensure the blades are securely attached and properly balanced. Sometimes, debris or dust buildup can cause the blades to stick, so clean them thoroughly. Additionally, protective styling benefits offered by certain fans or related accessories might influence how the fan operates, so consider these factors. If these steps don’t resolve the issue, the internal switch or wiring may be faulty, requiring professional inspection to restore proper fan operation.
Tips for Maintaining Proper Fan Function Throughout the Year

Keeping your ceiling fan in top shape year-round guarantees efficient airflow and energy savings. To achieve this, regularly check and adjust the fan speed to suit seasonal needs. Use your remote control to easily switch speeds without climbing ladders. Here are three tips to maintain proper fan function:
- Clean the blades and motor housing monthly to prevent dust buildup that can hinder performance.
- Test the remote control periodically to ensure it’s responsive and replace batteries when needed.
- Verify the fan’s direction and speed settings before switching seasons to ensure ideal comfort and efficiency.
Additionally, understanding fan operation mechanics can help you troubleshoot more complex issues effectively.
Frequently Asked Questions
Can You Change Fan Direction Without Turning off the Power?
You can change the fan direction without turning off the power by using your remote control or wall switch. Most fans have a reversible switch that allows you to switch between summer and winter modes. Using the remote, simply press the reverse button, or toggle the switch on the fan. This way, you can adjust the fan’s direction safely and quickly without shutting off the power, ensuring comfort year-round.
Do Ceiling Fans Have Different Adjustments for Summer and Winter?
Think of your ceiling fan like a seasonal wardrobe. For summer fan settings, you’ll want the blades to spin counterclockwise, creating a cool breeze. In winter, switch to winter fan adjustments by reversing the blades to clockwise, helping warm air rise. Most fans have a switch to make this change easily. So, yes, your fan has different adjustments for summer and winter, and switching is quick and simple.
How Often Should Fan Blades Be Cleaned to Ensure Proper Rotation?
You should clean your fan blades at least once every few months to guarantee proper rotation and ideal air circulation. Dust buildup can cause imbalance, making the fan wobble and reducing efficiency. Regularly wiping the blades with a damp cloth prevents dust accumulation and keeps the fan running smoothly. If you notice decreased airflow or strange noises, it’s a good sign it’s time for a quick cleaning to maintain proper air circulation.
Is It Necessary to Balance Fan Blades After Changing Direction?
Balancing fan blades isn’t usually necessary after changing direction, unless you notice vibration issues. If your fan wobbles or makes noise, it could be due to unbalanced blades, which might cause vibration problems. In that case, you should check and fix fan blade balancing. Proper balancing guarantees smooth operation, reduces noise, and prevents unnecessary wear, making your fan last longer and work more efficiently.
What Safety Precautions Should Be Taken When Adjusting Fan Settings?
Safety first, because a stitch in time saves nine. When adjusting fan settings, always turn off and unplug the fan to prevent electrical safety hazards. Wear gloves if blades are dirty or sharp, and guarantee proper maintenance to avoid accidents. Keep the area clear of clutter, and handle parts carefully. By taking these precautions, you keep yourself safe and protect your equipment, making adjustments smooth as butter.
Conclusion
By understanding how to adjust your fan’s direction, you guarantee comfort year-round, much like a trusty steed pulling a carriage through changing seasons. Remember to locate the switch, change the rotation safely, and confirm it’s correct. If issues arise, troubleshoot promptly to keep your fan functioning smoothly. Staying attentive to your fan’s needs is as timeless as a good book — it keeps your home cozy whether summer’s heat or winter’s chill, just as the wise old owl would advise.