To integrate your ceiling fan with Apple HomeKit, select a compatible smart fan controller like Eve Energy or Lutron Caséta. Turn off power, follow wiring diagrams to connect the device’s live, neutral, and load wires securely. Use the manufacturer’s app to configure and connect the device to Wi-Fi, then pair it with your Home app via the setup code. Proper installation and setup guarantee seamless automation—continue to explore the details for a reliable smart fan system.
Key Takeaways
- Choose compatible smart fan controllers supporting HomeKit, such as Eve Energy or Lutron Caséta.
- Properly wire the smart controller to your ceiling fan and power source following safety protocols.
- Set up the device using the manufacturer’s app, connecting it to your Wi-Fi network.
- Pair the smart fan controller with Apple HomeKit via the Home app and scan the setup code.
- Organize your fan in the Home app, and use Siri or automation to control it seamlessly.

Are you looking to automate your ceiling fan with Apple HomeKit? To achieve seamless integration, you’ll need a compatible smart fan controller or hub that supports HomeKit, such as the Eve Energy, Lutron Caséta, or third-party Wi-Fi-enabled switches. Begin by disconnecting power from the fan at the circuit breaker to ensure safety during installation. Remove the existing wall switch or fan control panel, exposing the wiring. Carefully identify the live (hot), neutral, and load wires, following the manufacturer’s wiring diagram for your specific device.
To automate your ceiling fan with HomeKit, install a compatible smart controller safely by disconnecting power and following wiring instructions.
Connect the smart controller according to the device instructions. Typically, you’ll attach the live wire from the power source to the controller’s input terminal, connect the neutral wire to the neutral terminal, and link the load wire to the output terminal that controls the fan. Use wire nuts and electrical tape to secure connections, ensuring they are tight and insulated. Once wired, mount the controller securely within the wall box, then restore power at the breaker.
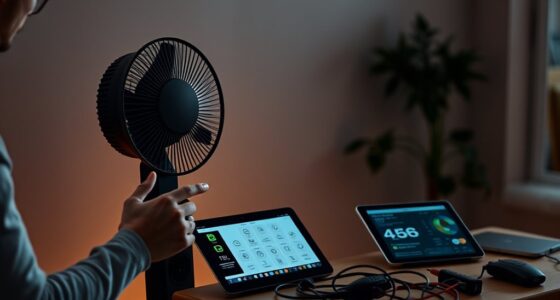
Next, download the corresponding app provided by your smart device manufacturer. Follow the app’s setup process to add the new device. This generally involves turning on Bluetooth or Wi-Fi, selecting the device from the app’s device list, and following prompts for network configuration. During setup, ensure your iPhone is connected to the same Wi-Fi network you intend to use for HomeKit integration. Once the device is recognized, assign it a descriptive name, such as “Living Room Ceiling Fan,” to facilitate voice commands and automation.
To add the device to Apple HomeKit, open the Home app on your iPhone. Tap the “Add Accessory” button, then scan the HomeKit setup code typically found on the device or packaging. Follow on-screen instructions to complete pairing. Assign the fan to a specific room for easier control and automation. After pairing, test the setup by turning the fan on and off via the Home app or Siri voice commands. Adjust fan speed or set schedules if supported by your controller.
To ensure reliable operation, verify your Wi-Fi connection’s strength and stability. If you encounter connectivity issues, reposition your Wi-Fi router or consider a mesh network for better coverage. Keep your device firmware updated through the manufacturer’s app to maintain security and functionality. Additionally, employing a smart home hub can help streamline device management and improve automation reliability. With these precise steps, you’ll successfully automate your ceiling fan with Apple HomeKit, enabling voice control, scheduling, and integration with other smart home devices for a seamless experience.
Frequently Asked Questions
Can I Control Multiple Ceiling Fans With One Apple Homekit Setup?
Yes, you can control multiple ceiling fans with one Apple HomeKit setup. First, verify each fan has a compatible smart switch or hub. Connect each device individually to your HomeKit app via the Home app on your iPhone or iPad. Assign each fan to a different room or zone. Once set up, you can control all fans simultaneously or separately through scenes, automations, or voice commands.
What Is the Power Consumption Impact of Integrating My Ceiling Fan?
Integrating your ceiling fan with smart technology doesn’t turn your home into a power-hungry monster. It slightly increases energy use due to the smart hub or Wi-Fi module, typically less than a few watts. To minimize impact, guarantee your fan’s smart features are used efficiently—turn it off when not needed and set schedules. This way, you optimize energy savings while enjoying convenient automation.
Are There Any Safety Concerns When Installing a Smart Ceiling Fan?
Yes, there are safety concerns when installing a smart ceiling fan. You should turn off the power at the circuit breaker before installation, make certain your wiring matches the manufacturer’s specifications, and verify all connections are secure to prevent electrical shorts. Use proper tools and follow the installation manual carefully. If unsure, consult a licensed electrician to avoid risks like electrical shock or fire. Always prioritize safety during setup.
How Do I Troubleshoot Connectivity Issues With My Smart Ceiling Fan?
First, confirm your Wi-Fi network is stable; restart your router if needed. Next, verify your smart fan is within range and powered on. Open the app and check for firmware updates. If the fan still disconnects, reset it by turning it off and on, then re-pair it through the app. Finally, ensure your device’s Bluetooth and Wi-Fi are enabled, and restart both your device and the fan for a fresh connection.
Can I Set Schedules for My Ceiling Fan Through Apple Homekit?
Yes, you can set schedules for your ceiling fan through Apple Homekit. Open the Home app, select your fan, tap “Automation,” then choose “Add Automation.” Opt for “A Time of Day Occurs,” set your desired time, and select “Control Accessories” to turn the fan on or off. Confirm your settings, and your fan will operate like a precise, automated clockwork, running seamlessly on your schedule.
Conclusion
By following these steps, you seamlessly integrate your ceiling fan with Apple HomeKit, turning on and adjusting settings effortlessly. Coincidentally, the same process that enhances your home’s automation also simplifies your daily routine. Once set up, enjoy precise control via Siri or the Home app, ensuring comfort at your command. This integration not only optimizes your space but also aligns with your tech-savvy lifestyle, making every moment more convenient and connected.