To automate your ceiling fan with IFTTT, make certain your fan is Wi-Fi-enabled or connected via a smart switch compatible with platforms like Zigbee or Z-Wave. Set up triggers based on environmental sensors, temperature thresholds, or time schedules, using webhooks or integrations with smart hubs. Configure applets to control the fan automatically while allowing manual overrides. For detailed setup steps and optimization tips, you’ll find additional insights that help streamline your automation process.
Key Takeaways
- Connect a compatible smart fan switch or Wi-Fi-enabled fan to your smart home hub or Wi-Fi network.
- Create IFTTT applets triggered by environmental sensors or time-based conditions to control the fan.
- Use webhooks or API integrations from sensors to automate fan activation based on temperature or humidity.
- Incorporate manual override options via voice commands or app controls to ensure user control.
- Test and refine your automation setup to ensure reliable operation and optimal comfort.

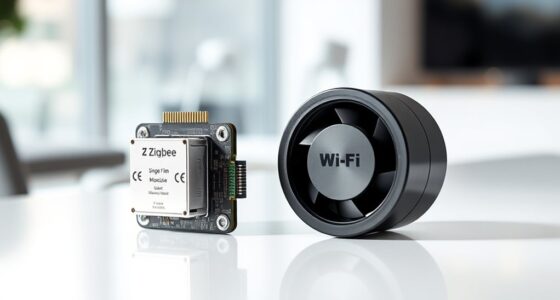
Automating your ceiling fan with IFTTT (If This Then That) allows for seamless integration with smart home systems, enabling precise control based on environmental factors or user preferences. This integration leverages web-based applets that connect your smart devices, allowing for automated responses to specific triggers. To implement this, you need compatible hardware—such as a smart fan switch or a Wi-Fi-enabled fan—and a compatible platform like the IFTTT service. First, guarantee your ceiling fan is connected to a smart hub or directly to Wi-Fi, supporting protocols such as Wi-Fi, Zigbee, or Z-Wave. Once your device is recognized by your smart home ecosystem, you can create or activate IFTTT applets that link environmental sensors, like temperature or humidity sensors, to fan controls.
Automate your ceiling fan with IFTTT for smart, responsive control based on environmental data.
The core of this setup involves defining precise triggers and actions. For example, you can set an IFTTT applet to turn on the fan when room temperature exceeds a specific threshold—say, 75°F—detected by a compatible temperature sensor. Conversely, you can automate the fan to turn off once the temperature drops below that threshold. This requires configuring a webhook or an API call from the sensor platform to IFTTT, which then issues commands to the fan. You may need to use a third-party service or custom integrations if your devices don’t natively support IFTTT, such as MQTT brokers or smart home hubs like SmartThings or Hubitat.
Timing and environmental variables are vital for refining fan automation. You can incorporate time-based triggers, like activating the fan during peak heat hours or when the house is unoccupied, by integrating with calendar or geolocation services. For instance, you can set a trigger to turn off the fan when you leave home or arrive, reducing energy consumption. Additionally, integrating with weather services allows your system to adapt dynamically, turning on the fan proactively ahead of heat waves or adjusting based on forecasted humidity levels. To perfect control, you should also consider implementing hysteresis—delays or thresholds that prevent rapid toggling—and adding manual override options, such as voice commands via smart assistants, to guarantee user control without compromising automation.
Finally, testing and troubleshooting are essential to guarantee reliability. Confirm that each trigger accurately reflects environmental changes and that commands reach your fan without delay. Use logs and test applets extensively to verify correct operation and modify thresholds or conditions as needed for maximum comfort and energy efficiency. By meticulously configuring these IFTTT applets and ensuring device compatibility, you achieve a highly responsive, energy-efficient, and precise ceiling fan automation system tailored to your specific environment and preferences.
Frequently Asked Questions
Can I Automate Multiple Ceiling Fans With IFTTT?
Yes, you can automate multiple ceiling fans with IFTTT. To do this, guarantee each fan is compatible with smart home integrations or connected via smart switches or hubs. Then, create individual applets linking your triggers, like time or sensor activity, to each fan’s control. Use unique identifiers for each device to avoid conflicts. This setup allows precise, simultaneous automation across multiple fans, enhancing your comfort and energy efficiency.
What Are Common Issues When Setting up IFTTT for Fans?
Sometimes, you might encounter connectivity hiccups or delayed responses when setting up IFTTT for fans. You should verify your Wi-Fi stability, confirm your smart devices are compatible, and double-check your applet configurations. Also, be mindful of service outages or API limitations that could interfere with automation. Regularly updating firmware and app versions helps maintain smooth operation. Troubleshooting these common issues ensures your fan automation runs seamlessly and reliably.
Is IFTTT Compatible With All Ceiling Fan Brands?
IFTTT isn’t compatible with all ceiling fan brands; compatibility depends on whether your fan supports smart home integration via platforms like Philips Hue, Lutron, or SmartThings. You need a compatible smart device or hub that connects your fan to these platforms. Check your fan’s specifications and available integrations first. If your fan isn’t natively supported, you might require additional hardware or custom solutions to enable IFTTT automation.
How Secure Is My Data When Using IFTTT Integrations?
Your data security with IFTTT depends on its encryption protocols and your account settings. IFTTT uses HTTPS encryption to protect data in transit and stores information securely. However, since it connects third-party services, vulnerabilities can arise if those services aren’t secure. To safeguard your data, enable two-factor authentication, review app permissions regularly, and avoid sharing sensitive information through automations. Staying vigilant minimizes potential security risks.
Can I Set Different Schedules for Different Rooms?
Yes, you can set different schedules for different rooms using IFTTT by creating individual applets linked to specific smart devices. You’ll need to assign each applet to the corresponding room’s smart ceiling fan or compatible control system. Configure separate trigger conditions and timing parameters for each room. This setup allows precise scheduling, ensuring each fan operates independently according to your routines, enhancing energy efficiency and comfort.
Conclusion
By integrating IFTTT with your ceiling fan, you gain precise control through automation, enhancing comfort and energy efficiency. While manual adjustments offer immediate tactile feedback, automation provides seamless, data-driven responses based on temperature, time, or occupancy. This juxtaposition highlights the power of technology to enhance everyday comfort without sacrificing control. Embrace these detailed configurations to create a smart environment that reacts intelligently, saving you effort while maintaining ideal airflow and energy consumption.