
To replace a ceiling fan capacitor, first make sure power is turned off and verify the circuit is de-energized. Visually inspect the capacitor for bulging or leaks, and use a multimeter to check its capacitance against the specifications. Disconnect the faulty component carefully and connect the new capacitor with matching voltage and capacitance ratings, reassemble, and restore power. If the fan still struggles to start or runs intermittently, further troubleshooting may be needed to ensure proper operation.
Key Takeaways
- Safely verify the capacitor is faulty through visual inspection or using a multimeter before replacement.
- Match the new capacitor’s voltage and capacitance ratings exactly to ensure compatibility.
- Disconnect and document the wiring connections of the old capacitor before removing it.
- After installing the new capacitor, reassemble the fan and test for proper operation and noise levels.
- Troubleshoot persistent issues by checking wiring, motor windings, or consulting a professional if problems remain.

A faulty ceiling fan capacitor can cause the fan to run improperly or not operate at all, making it essential to replace it promptly. The capacitor functions as an energy storage device that provides the necessary torque to start the fan’s motor and maintain smooth operation. When it fails, the motor may struggle to start, run intermittently, or produce unusual noises. Diagnosing a faulty capacitor involves a systematic approach, beginning with safety precautions. Turn off the power supply at the circuit breaker to eliminate the risk of electrical shock, and use a voltage tester to verify that the circuit is de-energized. Capacitors store residual charge even after power removal; thus, you must discharge it safely using a resistor or insulated screwdriver before handling.
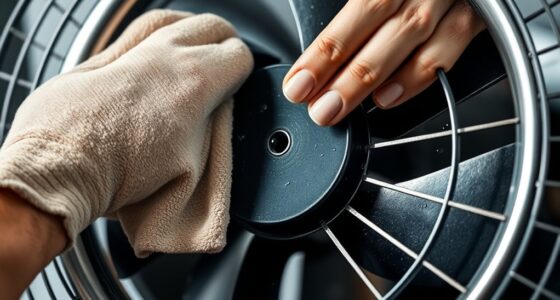
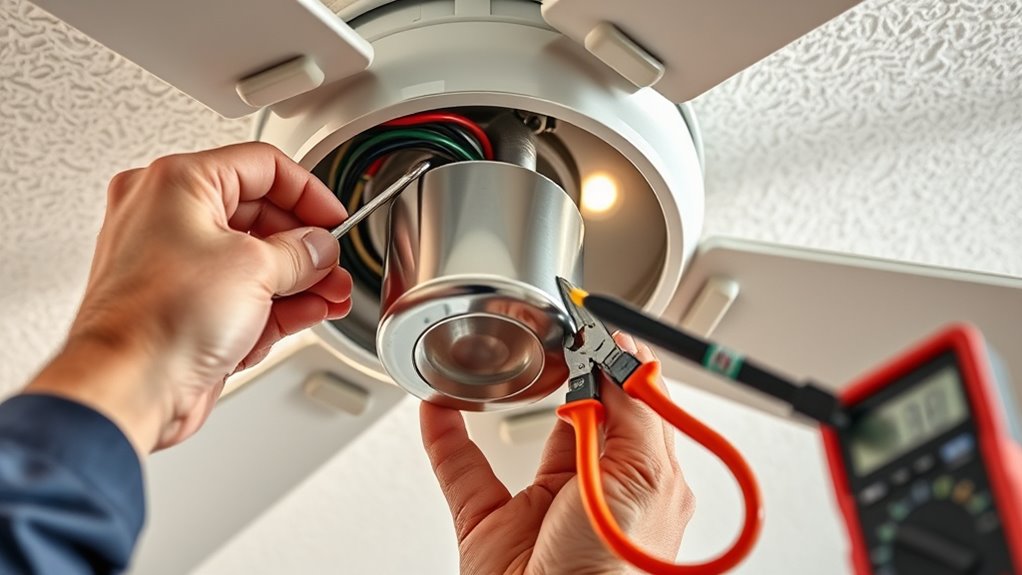
Once safety is assured, access the fan’s motor housing by removing the canopy cover. Identify the capacitor, which typically appears as a cylindrical or oval-shaped component with two or more leads connected to the motor. Examine it visually for signs of damage: bulging, discoloration, cracks, or leaking fluid indicate a failed component that requires replacement. Using a multimeter set to capacitance mode, measure the capacitor’s value and compare it with the specifications printed on its casing. A reading considerably lower than the rated capacitance signifies failure, as the capacitor can no longer store sufficient charge. If the multimeter shows no reading or an open circuit, the capacitor is defective.
When replacing the capacitor, confirm compatibility by matching the voltage rating and capacitance value precisely. Disconnect the faulty capacitor by carefully removing the leads, noting their connections or taking a photo for reference. Install the new capacitor by securely connecting the leads to the same terminals, ensuring firm contact. Avoid touching the terminals during operation, as improper wiring or a faulty capacitor can lead to electrical hazards or damage to the motor. After installation, double-check all connections for security and correct polarity if applicable. Reassemble the fan’s motor housing, restore power at the circuit breaker, and turn on the fan to verify proper operation. The fan should start smoothly without unusual noises or vibrations.
If the fan still exhibits issues or fails to operate after replacing the capacitor, further troubleshooting is necessary. Possible causes include motor winding faults, faulty wiring, or defective switches. In such cases, consult a professional technician to conduct thorough diagnostics. Properly replacing a ceiling fan capacitor not only restores functionality but also extends the lifespan of the fan, ensuring safe and efficient operation. Always adhere to safety guidelines and manufacturer instructions when handling electrical components, and never attempt repairs beyond your skill level.
Frequently Asked Questions
How Do I Identify the Correct Replacement Capacitor Size?
You identify the correct replacement capacitor size by checking the existing capacitor’s specifications, usually printed on its side. Look for the capacitance value in microfarads (μF), voltage rating, and physical size. Make certain the new capacitor matches these ratings precisely. If you can’t read the old one, consult the fan’s manufacturer specifications or user manual. Using an incompatible capacitor can cause fan malfunction or damage.
Can I Replace the Capacitor Without Turning off the Power?
No, you shouldn’t replace a ceiling fan capacitor without turning off the power. Doing so risks electrical shock or damage to the components. Always switch off the circuit breaker, wait for the fan to lose power, and confirm the power is off with a voltage tester. Only then can you safely access and replace the capacitor, ensuring your safety and proper functioning of the fan.
What Safety Precautions Should I Take During Replacement?
You should always turn off the power before replacing a ceiling fan capacitor to prevent the risk of electric shock. Wear insulated gloves and use a grounded tool to handle components safely. Confirm the circuit is de-energized with a voltage tester before touching any wiring. Keep your workspace dry and avoid working alone in case of emergencies. These precautions guarantee your safety and proper installation during the replacement process.
How Long Does a Ceiling Fan Capacitor Typically Last?
A ceiling fan capacitor typically lasts between 5 to 10 years, depending on usage and environmental conditions. You should monitor for signs like reduced fan speed, unusual noise, or the fan not starting. Regular inspections can help identify deterioration early. If the capacitor shows signs of bulging, leaking, or burning smell, replace it immediately to prevent further electrical issues or motor damage. Proper maintenance prolongs the capacitor’s lifespan and ensures safe operation.
Is It Necessary to Lubricate the Fan Motor After Replacing the Capacitor?
No, you typically don’t need to lubricate the fan motor after replacing the capacitor. Studies show that most modern ceiling fans are designed with sealed bearings that require minimal maintenance. If you notice unusual noise or stiffness, then lubrication might be necessary. Otherwise, guarantee the motor and blades are clean and free of debris to maintain ideal operation. Proper installation of the capacitor is vital for efficient, quiet fan performance.
Conclusion
Replacing a ceiling fan capacitor is straightforward if you follow the proper steps and safety precautions. Ensuring the capacitor is functioning correctly can save you from costly repairs and improve your fan’s performance. Remember, a stitch in time saves nine—addressing issues promptly prevents bigger problems down the road. By understanding the process and troubleshooting effectively, you maintain a safe and efficient cooling system. Don’t let minor issues turn into major headaches; tackle them head-on with confidence.