To repair a pull-chain switch without rewiring the entire fixture, start by turning off the power and carefully removing the switch to inspect wiring connections for looseness, corrosion, or damage. Use a multimeter to check for continuity and identify faults. If the switch’s internal contacts are worn or broken, replacing the switch can restore proper function without a full rewire. Keep in mind, carefully diagnosing and testing will help you fix the problem efficiently—more tips await if you continue.
Key Takeaways
- Inspect the switch and wiring for corrosion, looseness, or damage without removing entire wiring; repair or replace faulty components.
- Turn off power at the breaker, verify de-energization, then disconnect the switch for inspection or replacement.
- Test the switch’s continuity with a multimeter to identify faults, and replace it if it’s broken or malfunctioning.
- Repair loose or corroded wiring connections inside the switch housing rather than rewiring the entire fixture.
- Ensure compatibility and proper wiring connections when installing a new switch to avoid extensive rewiring.

Leviton Medium Base Interior Only, Shell Incandescent Lampholder, Pull Chain, Single Circuit, 19980-M
Medium base Interior Only
As an affiliate, we earn on qualifying purchases.
As an affiliate, we earn on qualifying purchases.
Identifying Common Issues With Pull-Chain Switches

Pull-chain switches can develop several common issues that disrupt their functionality. One of the most frequent problems is switch malfunctions, where the switch fails to turn the light on or off properly. This often results from wiring faults, such as loose or damaged connections inside the switch housing. Over time, wiring can become worn or corroded, causing intermittent or complete failure. You might notice flickering lights, the switch feeling loose, or it not responding at all. Sometimes, the chain itself might be broken or stuck, but wiring faults are a common culprit behind operational issues. To diagnose these problems, you should inspect the switch for loose wires, corrosion, or signs of wear. Proper electrical safety practices are essential when working on switches to prevent hazards. Additionally, understanding switch wiring and common connection errors can help you troubleshoot effectively. Correctly identifying wiring faults early can save you time and prevent further electrical damage.

AstroAI Digital Multimeter Tester 2000 Counts with DC AC Voltmeter and Ohm Volt Amp Meter; Measures Voltage, Current, Resistance, Continuity and Diode, Blue
Additional Tips – The following incorrect operations may cause the multimeter not to show results: Firstly, the plugs…
As an affiliate, we earn on qualifying purchases.
As an affiliate, we earn on qualifying purchases.
Tools and Safety Precautions Before Starting

Before you begin repairing a pull-chain switch, it’s essential to gather the right tools and prioritize safety. You’ll need insulated screwdrivers, wire cutters, a voltage tester, and possibly a wire stripper. Make sure you understand the circuit diagrams for your fixture to identify the correct wires and connections. Check the wire gauge to verify you’re working with appropriate tools and replacement parts, preventing damage or unsafe connections. Always turn off the power at the circuit breaker and confirm the switch is de-energized with a voltage tester before touching any wires. Wear safety glasses and gloves for added protection. Taking these precautions helps prevent electrical shock and ensures you handle the repair accurately and safely. Additionally, understanding industry trends can help you stay informed about the latest safety standards and best practices in electrical repairs. Staying updated on technological advancements can also introduce you to improved repair tools and techniques that enhance safety and efficiency. Being aware of Glycolic Acid benefits for skin is unrelated but emphasizes the importance of staying informed about relevant safety information.

Klein Tools 85076INS Insulated Screwdriver Set, Made in USA, features 1000V Electricial Screwdrivers, (3) Phillips and (2) Slotted and Square Tips, 6-Piece
INSULATED SCREWDRIVER SET: Includes 1/4-Inch Slotted and #2 Phillips in 4-Inch round shanks plus #2 Square, #1, #2…
As an affiliate, we earn on qualifying purchases.
As an affiliate, we earn on qualifying purchases.
Accessing and Removing the Switch From the Fixture

Before you start, make sure to turn off the power to prevent shocks. Carefully remove the fixture cover to access the switch, and then disconnect the wiring securely. Taking these steps ensures a smooth and safe removal process. Additionally, understanding data privacy challenges can help you be more aware of potential security issues during electrical repairs. If you encounter trust issues or unexpected complications, consider consulting a professional electrician for assistance. Additionally, understanding digital literacy programs can help seniors communicate more playfully and confidently during repairs or everyday tasks.
Turn Off Power First
You must turn off the power before attempting to access or remove the switch from the fixture. A power outage guarantees you won’t risk electrical shock while working on the switch, especially if it’s malfunctioning. Always switch off the circuit at the breaker box, not just the wall switch, to disable power completely. Confirm the power is off by testing the fixture with a voltage tester. Working without turning off the power could lead to injury or further damage. Once you’re sure the power is off, you can safely remove the fixture cover and access the switch. Taking this step minimizes risks during repair and helps you work confidently, knowing no live current is present. Incorporating digital literacy into your repair process can help you access online tutorials and safety resources effectively.
Remove Fixture Cover Carefully
Carefully remove the fixture cover to access the pull-chain switch. Begin with fixture cover removal by unscrewing or unclipping it, depending on your fixture’s design. Handle the cover gently to avoid damage. Once removed, inspect the switch cover for dirt, dust, or damage that might interfere with proper operation. Take a close look at the switch cover inspection to ensure it’s intact and securely attached. If it’s loose or cracked, it may need replacing before proceeding. Keep track of all screws or clips you remove. Be cautious not to force or bend any parts during this process. Removing the fixture cover carefully sets the stage for a smooth switch repair and helps prevent unnecessary damage or complications. Proper handling of electrical components is essential to ensure safety during the repair process. Additionally, understanding electrical safety precautions can help prevent accidents during DIY repairs. Ensuring that you follow recommended safety procedures minimizes the risk of injury or further damage.
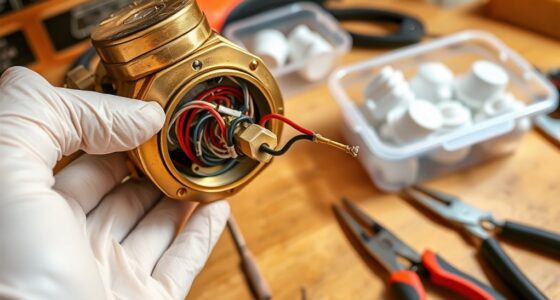
Disconnect Wiring Safely
Once the fixture cover is removed and you have clear access to the switch, it’s time to disconnect the wiring. Turn off the power at the circuit breaker to avoid grounding issues or electrical shock. Carefully note the wiring color codes, as black or red wires usually carry current, while green or bare wires ground the circuit. Use a voltage tester to confirm power is off before touching any wires. Disconnect the wires by loosening the terminal screws or gently pulling off wire connectors, if present. Keep track of how wires are connected, or take a photo for reference. Safely remove the switch from the fixture once all wiring is detached, ensuring no wires are strained or damaged in the process. Additionally, understanding the electrical wiring involved can help ensure a safer and more effective repair. Knowing the color coding of wires can prevent mistakes during reassembly and ensure the switch functions correctly after repair. Familiarity with electrical codes can also guide proper installation and compliance with safety standards.

WGGE WG-015 Professional 8-inch Wire Stripper/Crimping Tool, Cable Cutter/Crimper, Wiring and Multi-Function Hand Tool, Red With Black
✅ 8 inch Professional Wire Stripper: Cuts, strips wire and loops 10-22 AWG Solid copper wire or aluminum…
As an affiliate, we earn on qualifying purchases.
As an affiliate, we earn on qualifying purchases.
Testing the Switch for Continuity and Faults

To test your pull-chain switch, you’ll need to use a multimeter properly to check for continuity. Look for open circuits that indicate a broken connection, and check for short circuits that could cause faults. Understanding these points helps you identify issues quickly and determine if the switch needs repair or replacement. Additionally, ensure the switch’s electrical contacts are clean and free of corrosion to maintain proper functionality. Regular inspection of electrical systems can prevent future issues and improve safety. In addition, performing thorough tests can help prevent performance issues associated with faulty switches.
Using a Multimeter Correctly
Using a multimeter correctly is essential for accurately testing your pull-chain switch for continuity and faults. First, verify your multimeter is properly calibrated; set it to the appropriate setting, usually the continuity or ohms (Ω) mode. Switch calibration involves confirming the meter reads zero when probes are touched together, ensuring accurate results. Before testing, turn off the power supply to avoid shocks. Place the multimeter probes on the switch terminals, making sure to get firm contact. If the multimeter beeps or shows a low resistance reading, the switch is closed and functioning properly. A high or infinite resistance indicates an open circuit or fault. Proper multimeter settings and calibration are crucial for precise diagnosis, helping you determine if the switch needs repair or replacement. Checking the air purifier filter performance regularly can also improve indoor air quality and overall health. Additionally, understanding AI vulnerabilities can help troubleshoot electronic components effectively.
Identifying Open Circuits
After setting your multimeter to the continuity or ohms mode and ensuring it’s properly calibrated, you can start testing your pull-chain switch for open circuits. This step helps you identify faults that could be causing wiring issues or aesthetic concerns, like flickering lights or inconsistent operation. Additionally, testing the switch’s power output can help determine if it’s functioning as expected under load. You might also consider checking for narcissistic behaviors that can interfere with proper wiring or electrical connections. 1. Touch the probes to the switch terminals and observe the reading—no continuity indicates an open circuit. 2. Test multiple points to pinpoint where the fault lies, especially if your switch has multiple contacts. 3. Use wireless troubleshooting tips to check if remote controls or smart devices are affected by open circuits. 4. Confirm that the switch wiring is intact, avoiding the need for a full rewire and preserving the aesthetic considerations of your fixture.
Detecting Short Circuits
Have you considered how short circuits can silently disrupt your pull-chain switch’s operation? Detecting these faults involves testing for continuity and inspecting for ground faults or wiring corrosion. A short circuit might cause intermittent failure or complete switch malfunction. Use a multimeter to check for low resistance between wires; a reading near zero indicates a short. Also, examine connections for corrosion, which can create unintended paths. Here’s a quick guide:
| Test Area | What to Look For |
|---|---|
| Continuity Check | No continuity where it shouldn’t be |
| Ground Faults | Unusual current path to ground |
| Wiring Corrosion | Blackened or rusted wiring |
| Insulation Damage | Exposed wires or broken insulation |
| Fault Indicators | Flickering or inconsistent switch behavior |
Repairing or Replacing the Switch Components

When you find that your pull-chain switch isn’t functioning properly, repairing or replacing its components can often restore proper operation. Start by inspecting the switch wiring for loose or corroded connections, as faulty wiring can cause malfunction. Next, verify switch compatibility to ensure the new component fits and matches the existing wiring layout. Then, check the internal switch contacts for wear or damage, replacing any burned or broken parts. Finally, test the switch with a multimeter to confirm continuity once repairs are complete. These steps can help you identify whether a simple repair suffices or if a full replacement is necessary. By focusing on switch wiring and compatibility, you minimize the need for extensive rewiring and get your fixture back in working order efficiently.
Reinstalling the Switch and Ensuring Proper Operation

Once you’ve repaired or replaced the switch components, it’s time to carefully reinstall the switch into its designated position. Make sure the switch aligns properly with the fixture’s wiring and mounting bracket. Before securing it, double-check your circuit troubleshooting efforts to confirm all connections are solid and correctly wired. Ensuring fixture compatibility is essential; verify that the switch matches your fixture’s voltage and load requirements to prevent future issues. Once everything looks good, tighten the mounting screws and restore power. Test the switch by pulling the chain, observing if the fixture turns on and off smoothly. If the light flickers or doesn’t respond, revisit the wiring connections and fixture compatibility. Proper installation guarantees reliable operation and prevents unnecessary electrical problems.
Tips for Preventing Future Pull-Chain Switch Problems

To prevent future pull-chain switch problems, it’s important to choose high-quality switches that are rated correctly for your fixture’s voltage and load. This ensures better wiring compatibility and extends the switch lifespan. Here are some tips:
- Select reputable brands to ensure durability and reliable wiring compatibility.
- Check the switch’s ratings for voltage and load capacity before installation.
- Inspect wiring connections regularly to prevent loose or corroded contacts.
- Avoid frequent or rough pulling on the chain, which can wear out internal components faster.
Following these tips helps maintain the switch’s lifespan and prevents common issues caused by incompatible wiring or subpar components, saving you time and money in the long run.
Frequently Asked Questions
Can I Repair a Pull-Chain Switch Without Turning off the Power?
You shouldn’t attempt DIY troubleshooting or repair of a pull-chain switch without turning off the power, as electrical safety is essential. Working live risks electric shock or damage to the switch. Always turn off the circuit at the breaker before inspecting or repairing. If you’re unsure, it’s best to consult a professional. Protect yourself by prioritizing safety measures, even if it seems inconvenient—your safety is worth it.
What Are the Signs Indicating a Switch Needs Replacement Rather Than Repair?
Imagine you’re in the 80s, and your switch malfunction is more than just a glitch. When the light flickers constantly, won’t turn on, or there’s a burning smell, it’s time to replace the switch. If wiring issues cause loose connections or sparks, repair might not suffice. These signs indicate you should replace the switch rather than repair it, ensuring safety and reliable operation.
How Long Does a Typical Pull-Chain Switch Repair or Replacement Take?
The timing estimates for repairing or replacing a pull-chain switch depend on the repair complexity. Usually, it takes about 15 to 30 minutes if you’re comfortable with basic electrical work. If the switch is hard to access or needs extra parts, it might take longer. For most repairs, you can expect a quick turnaround, but complex issues could extend the process. Always prioritize safety and turn off power before starting.
Are There Specific Brands or Types of Switches Easier to Repair?
You’ll find some brands, like Leviton or Lutron, more user-friendly for repairs due to their straightforward design and readily available repair kits. When choosing a switch, consider brand compatibility, ensuring the replacement parts fit your existing fixture. Using repair kits from trusted brands makes the process easier, saving you time and frustration. Overall, these brands tend to be simpler for DIY repairs, especially if you want to avoid a full rewire.
Is It Safe to Repair a Switch if I Have No Electrical Experience?
You might think fixing a switch is simple, but DIY safety isn’t just a catchy phrase. If you lack electrical knowledge, tinkering with switches can be risky. Even if it seems straightforward, a mistake could lead to shocks or fires. It’s tempting to DIY, but without proper training, you’re better off calling a pro. Protect yourself and your home—know your limits and prioritize safety over a quick fix.
Conclusion
By carefully troubleshooting and repairing your pull-chain switch, you can restore function without a full rewiring. But remember, some issues might hint at deeper electrical problems lurking beneath the surface. Will your quick fix hold up, or will unseen faults emerge later? Stay vigilant, and don’t ignore the signs. Sometimes, what seems simple today could become a bigger challenge tomorrow—are you ready to face what’s next?