To clean and maintain your ceiling fan motor, start by turning off the power at the breaker and ensuring the blades have stopped. Remove the light fixture if necessary, then carefully detach the blades for cleaning. Inspect the motor for dust buildup and use a soft cloth or microfiber towel with isopropyl alcohol to wipe it down. Use compressed air for vents and fins, check for wear on internal components, and apply lubricant if recommended. Proper reassembly and testing guarantee smooth operation; continue for detailed procedures to optimize your fan’s performance.
Key Takeaways
- Turn off power and carefully disassemble the fan to access the motor components safely.
- Use compressed air and soft cloths to clean dust, dirt, and debris from vents, fins, and external surfaces.
- Inspect and clean internal parts, applying lubricant to bearings if recommended by the manufacturer.
- Reassemble the fan securely, ensuring blades and fixtures are correctly aligned.
- Test fan operation for smooth, quiet performance and check for overheating or unusual noises.

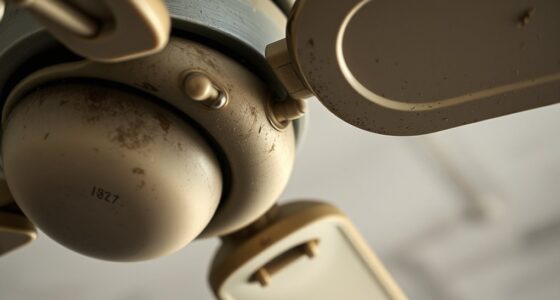
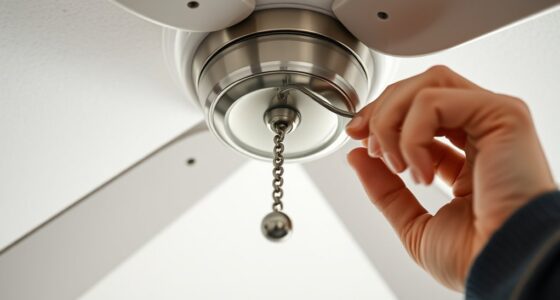
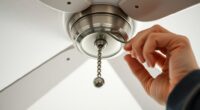
Over time, dust and dirt accumulate on your ceiling fan motor, reducing its efficiency and potentially causing overheating. This buildup obstructs airflow around the motor’s components, impairing cooling mechanisms and increasing the risk of premature failure. To maintain ideal operation, regular cleaning and maintenance are essential, especially for the motor’s internal parts. Begin by turning off the power supply at the circuit breaker to ensure safety during the procedure. Verify that the fan blades have come to a complete stop before proceeding. Next, remove the fan’s light fixture, if applicable, and then detach the fan blades carefully, noting their orientation for correct reinstallation. This allows unobstructed access to the motor housing, which is typically secured with screws or clips.
Regularly clean your ceiling fan motor to prevent overheating and ensure optimal performance.
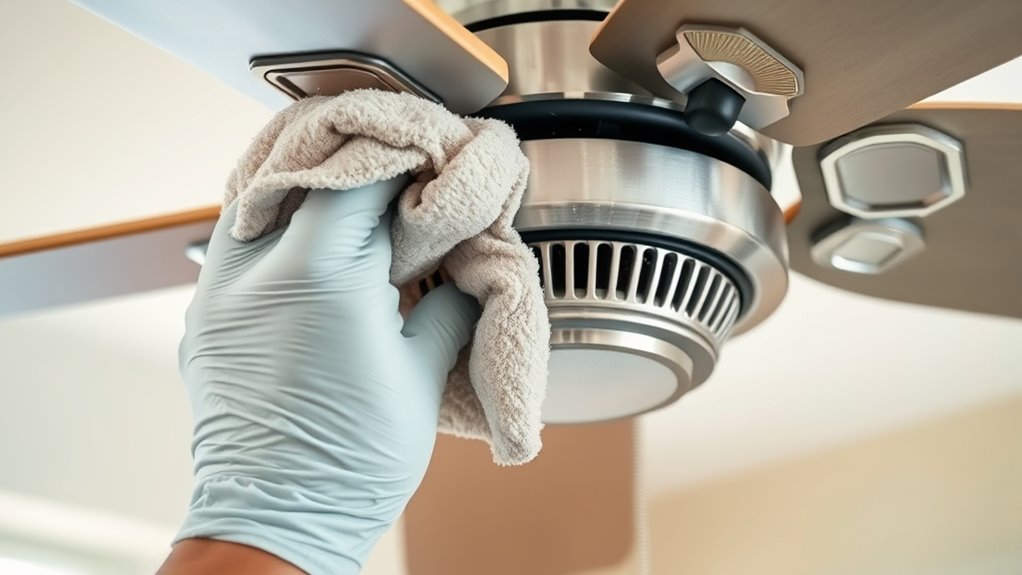
Once exposed, inspect the motor for visible dust, dirt, and debris accumulation. Use a soft, lint-free cloth or microfiber towel to gently wipe down the exterior surface, avoiding excessive pressure that could damage delicate components. For more stubborn grime, a mild cleaning solution composed of water and isopropyl alcohol can be applied with a cloth, ensuring no liquid seeps into electrical parts. Compressed air proves effective in dislodging dust from hard-to-reach areas within the motor housing. Hold the can upright and use short bursts to prevent moisture buildup. Focus on the ventilation openings and cooling fins, as these are critical in dissipating heat generated during operation. Do not insert objects that could damage the internal parts; instead, rely on compressed air and soft brushes designed for electronic components.
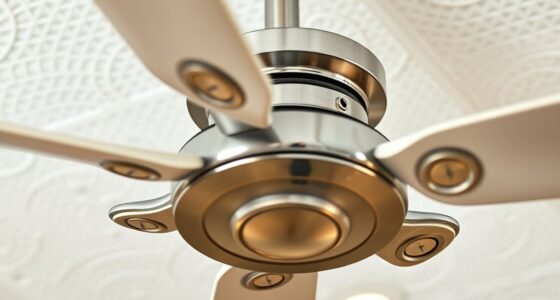
If your fan motor features accessible bearings or brushes, inspect them for wear or corrosion. Use a multimeter to check for electrical continuity if you’re comfortable with electrical diagnostics. If the motor exhibits signs of significant wear or electrical faults, consider consulting a professional or replacing the motor entirely. Regular lubrication of the motor’s bearings, if specified by the manufacturer, can extend operational lifespan; apply a small amount of manufacturer-approved lubricant to the bearing surfaces, avoiding excess that could attract dust. Additionally, ensuring proper tuning of your ceiling fan can help optimize its performance and efficiency. Reassemble the fan components in the reverse order, ensuring all screws and clips are tightened securely but not overtightened to prevent damage.
Finally, restore power at the circuit breaker and test the fan’s operation. Observe for unusual noises, vibrations, or overheating during operation, which may indicate underlying issues requiring further inspection. Routine cleaning and precise maintenance prevent dust accumulation, preserve motor efficiency, and prolong the lifespan of your ceiling fan. Adhering to these technical steps ensures safe, effective, and sustained performance from your ceiling fan motor.

Ceiling Fan Cleaner Duster with 72‘’ Extendable Long Handle Cleaning Duster Kit, Reusable Chenille & Microfiber Mop Head for High Ceiling Fan Blade Wall Blinds Cobweb
【Multipurpose Household Cleaning Tool】MNWHUC ceiling fan cleaner duster could be used to clean ceiling fan, baseboard, blinds, moldings,…
As an affiliate, we earn on qualifying purchases.
As an affiliate, we earn on qualifying purchases.
Frequently Asked Questions
How Often Should I Perform Ceiling Fan Motor Maintenance?
You should perform ceiling fan motor maintenance every 6 to 12 months, depending on usage and environment. Regularly inspect for dust, debris, and signs of wear to guarantee peak performance. If you notice unusual noise or wobbling, conduct maintenance sooner. Clean blades and motor housing carefully, and lubricate moving parts if applicable. Consistent maintenance prevents motor failure, extends lifespan, and maintains energy efficiency, making sure your fan operates smoothly over time.
Can I Replace a Ceiling Fan Motor Myself?
Yes, you can replace a ceiling fan motor yourself if you’re comfortable with electrical work and follow safety protocols. First, turn off power at the breaker. Then, carefully disconnect the wiring, remove mounting hardware, and detach the faulty motor. Install the new motor by reversing these steps, ensuring all connections are secure. Refer to your fan’s wiring diagram and manufacturer instructions for proper installation. If unsure, consult a professional.
What Safety Precautions Are Necessary During Motor Cleaning?
You should always disconnect the power before cleaning the motor to prevent electrical shock. Wear insulated gloves and safety goggles to protect against dust and debris. Use a soft brush or compressed air to remove dirt, avoiding contact with electrical parts. Make sure the fan is completely turned off and the circuit breaker is off. Never attempt cleaning while the fan is energized; safety precautions are essential to prevent injury and damage.
Are There Specific Cleaning Products Recommended for Fan Motors?
You should use a gentle, electrical-safe cleaner like isopropyl alcohol or a mild detergent diluted with water. Avoid harsh chemicals, solvents, or abrasive cleaners, as they can damage the motor’s components and insulation. Apply the cleaner with a soft cloth or brush, ensuring no liquid enters the motor housing. Always power off and unplug the fan before cleaning to prevent electrical hazards. Proper cleaning preserves motor efficiency and prolongs lifespan.
How Can I Tell if My Ceiling Fan Motor Is Failing?
Is your ceiling fan whispering warnings? If your fan’s motor struggles to start, makes unusual noises, or wobbles excessively, these are signs it might be failing. You should also notice decreased airflow or irregular operation. Regularly inspect for burning smells or overheating. Addressing these symptoms promptly can prevent complete failure. Use a multimeter to test for electrical continuity, confirming if the motor’s internal components are compromised before considering replacement.

DRQ Ceiling Fan Cleaner Duster, Reusable Microfiber Duster with Extension Pole, 13 to 48 Inch Fan Blade Cleaner, Removable Dusters for Cleaning Walls Bookshelves Door Window Top (Blue)
[Easy to Store] The ceiling fan cleaning tools has a hanging hole at the back that is easy…
As an affiliate, we earn on qualifying purchases.
As an affiliate, we earn on qualifying purchases.
Conclusion
Regularly cleaning your ceiling fan motor keeps it running smoothly, much like tending to the roots of a tree ensures healthy growth. When you maintain it diligently, you’re safeguarding its longevity and efficiency, preventing dust buildup from stifling its performance. Think of your effort as pruning away debris, allowing fresh energy to circulate. Consistent maintenance transforms your fan into a resilient, well-oiled machine—a symbol of care that sustains comfort and functionality in your space.

Compressed Air Duster-3 Gear Adjustable 100000RPM Electric Air Duster with LED Light, Rechargeable Cordless Air Blower for Keyboard Electric Devices Cleaning. Replaces Compressed Air Cans (Black)
Powerful Performance:The air duster has a maximum speed of 100000 RPM motor with 3 gear adjustable airflow settings,…
As an affiliate, we earn on qualifying purchases.
As an affiliate, we earn on qualifying purchases.

Ceiling Fan Oil 8 Oz Universal Fan Lubricant
KEEP YOUR FANS RUNNING SMOOTHLY: Keeps Box, Ceilings, table and portable fans operating smoothly in any temperatures!
As an affiliate, we earn on qualifying purchases.
As an affiliate, we earn on qualifying purchases.