To wire a ceiling fan to separate wall switches, start by turning off the power and preparing your workspace with the right tools and safety gear. Identify and label the existing wires in your ceiling box, then connect the fan’s black wire to your main power and run a separate wire to each switch for the fan and light. Double-check connections and test the system for proper operation. Continue with the steps to guarantee a safe, functional setup.
Key Takeaways
- Identify and label wires for the fan, light, and switches, ensuring proper color code recognition (hot, neutral, ground).
- Connect the fan’s hot wire to one switch and the light’s hot wire to a separate switch for independent control.
- Use a wiring diagram to connect the power source to both switches, then to the fan and light, following safety procedures.
- Install dedicated switch wiring for the fan and light, ensuring neutral and ground wires are securely joined.
- Test each switch to confirm independent operation of the fan and light before securing switch plates and restoring power.

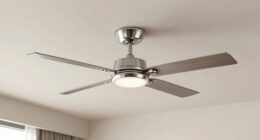
72 inch Ceiling Fans with Lights,Large Ceiling Fan with Light and Remote Control, Dimmable, 3CCT, Quiet, Black Modern Ceiling fan For Living Room, Bedroom, Kitchen, Patio, Farmhouse, Indoor/Outdoor
Ceiling Fan with Light: Decorate your home with Amico ceiling fan! While bringing you coolness and comfort, it...
As an affiliate, we earn on qualifying purchases.
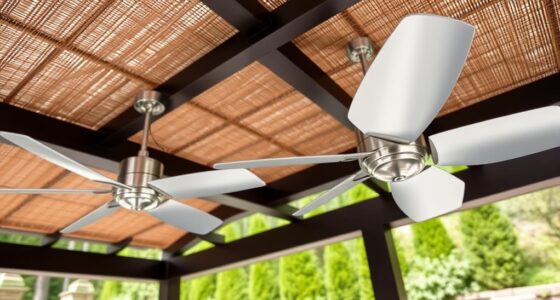
Understanding Your Ceiling Fan and Electrical System

Before you begin wiring your ceiling fan, it is vital to understand how your ceiling fan and electrical system work together. Proper fan blade alignment ensures the blades spin smoothly and quietly, preventing wobbling or uneven wear. When selecting a fan, check for remote control compatibility if you prefer wireless operation; many modern fans include remote controls that simplify adjustments. Understanding the wiring setup helps guarantee safe and effective installation. Some fans have separate wiring for light kits or multiple speed settings, so familiarize yourself with the fan’s manual beforehand. Recognizing how the electrical system connects to the fan and its controls allows you to troubleshoot potential issues later. Additionally, knowing how floating on water can influence humidity levels in your home may help in choosing the right fan settings for optimal comfort. Being aware of proper wiring techniques ensures your installation is both safe and reliable. Understanding these electrical connections provides a solid foundation for a safe, successful wiring process.

addlon Ceiling Fans with Lights, 42 Inch Low Profile Ceiling Fan with Light and Remote Control, Flush Mount, Reversible, 3CCT, Dimmable, Quiet, Black Small Ceiling Fan for Bedroom Indoor/Outdoor Use
Ceiling Fan with Light: Bring more than just wind and light, but comfort! addlon modern ceiling fan, with...
As an affiliate, we earn on qualifying purchases.
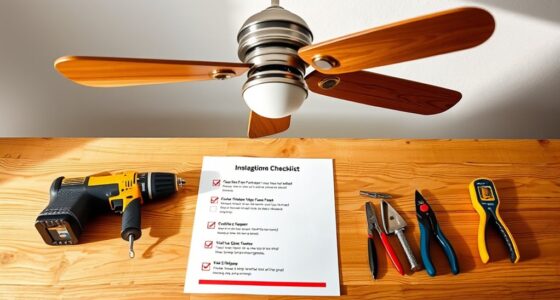
Gathering Necessary Tools and Safety Equipment

Before you start wiring your ceiling fan, make sure you have all the essential tools on hand, like screwdrivers and pliers. You also need safety gear such as gloves and safety glasses to protect yourself during the process. Remember to turn off the power and follow proper shutdown procedures to prevent any electrical accidents. Incorporating safe electrical practices ensures a smoother and risk-free installation. Additionally, understanding potential pitfalls in adopting new payment technologies can help you be more vigilant about safety hazards during electrical work. Being aware of essential safety precautions is crucial when working with electrical components to prevent injuries.
Subheading 1: Essential Tools Required
To safely install a ceiling fan, you’ll need to gather the right tools and safety equipment first. Having the proper tools guarantees a smooth wiring process, especially when integrating wireless control or smart switches. Make sure you have:
- A voltage tester to confirm power is off
- A screwdriver set for wiring and mounting
- Wire strippers to prepare your electrical wires
- A ladder sturdy enough for ceiling access
These tools help you handle the electrical connections securely. If you’re adding smart switches, ensure compatibility with your fan’s wiring system. Wireless control options often simplify operation, but proper wiring is essential for seamless integration. Always double-check your tools before starting to avoid delays or hazards. Additionally, understanding the types of home security systems can help you choose the best setup for safety and functionality. Being aware of voltage levels in your system can prevent electrical accidents during installation. Familiarity with electric power generation methods can also be beneficial if you consider alternative energy sources for your home.
Subheading 2: Safety Gear Necessities
Ensuring safety during ceiling fan wiring starts with gathering the right protective gear. You need personal protective equipment that shields you from electrical hazards, such as insulated gloves and safety goggles. Electrical safety is vital, so always wear gear that prevents accidental shocks or burns. A pair of insulated tools can also provide extra protection when handling wiring. Make sure your workspace is clear of clutter to reduce trip hazards. Wearing a non-conductive hat or sleeves can further minimize contact with live wires. Remember, proper safety gear isn’t just recommended—it’s indispensable for protecting yourself from potential injuries. Taking these precautions ensures you stay safe while working with electrical components, reducing the risk of accidents during your ceiling fan wiring project. Additionally, inspecting your air purifiers for any dust buildup or filter issues before starting can help maintain a clean and safe workspace. Being aware of dog breeds and their characteristics can also be helpful if you have pets at home, ensuring they are kept safe during electrical work. To further improve safety, understanding the benefits of glycolic acid exfoliating toner can remind you of the importance of proper skin protection when working in environments that may involve dust or chemicals.
Subheading 3: Power Shutdown Procedures
When shutting off the power for your ceiling fan, it’s vital to gather all the necessary tools and safety equipment beforehand. This helps prevent accidents caused by circuit overloads or accidental contact with live wires. To do this effectively, make sure you have:
- A circuit tester to confirm power is off
- Insulated screwdrivers for wiring tasks
- Proper safety gloves and goggles
- A flashlight in case lighting is poor
Understanding wiring color codes is essential, so double-check your wiring before working. Always turn off the correct circuit breaker to avoid overloads, and verify no current flows through the wires. Digital literacy programs can also be helpful in understanding electrical safety and wiring procedures. Preparing these tools and safety gear ensures a safe, smooth shutdown process, minimizing risks associated with electrical work. Additionally, familiarizing yourself with basic electrical principles can help you better understand the wiring layout and ensure safe handling during the project. Moreover, awareness of Hydrogen energy safety can provide insights into handling potential risks associated with electrical systems, emphasizing the importance of safety precautions.

Amico Ceiling Fans with Lights, 42 inch Low Profile Ceiling fan with Light and Remote Control, Flush Mount, Reversible, 3CCT, Dimmable, Noiseless, Black Ceiling Fan for Bedroom, Indoor/Outdoor Use
Ceiling Fan with Light: Decorate your home with Amico ceiling fan! While bringing you coolness and comfort, it...
As an affiliate, we earn on qualifying purchases.
Turning Off Power and Preparing the Workspace

Before you start wiring the ceiling fan, it’s essential to turn off the power at the circuit breaker to prevent electrical shocks. Once the power’s off, clear your workspace and gather your tools. Confirm the ceiling fan placement allows for easy access and future adjustments, especially if you plan to add wireless control options. Check for any existing wiring that might interfere with your work. Use a voltage tester to verify no current is flowing before touching wires. Keep a clean, well-lit area to avoid accidents. Additionally, reviewing wiring safety protocols can help ensure a secure installation. Considering the Grobal World principles of sustainability, choosing eco-friendly wiring materials can also contribute to safer and greener home improvements. Familiarizing yourself with electrical codes can further prevent potential hazards during installation.

Fanbulous 65 Inch Ceiling Fans with Lights and Remote, Black Indoor/Outdoor Ceiling Fan with Quiet Reversible DC Motor, 6 Speeds, 3CCT, 8 Blades Large Ceiling Fan for Living Room Bedroom Patio
65 Inch Large Ceiling Fan: The living room ceiling fan has 2 colors on each blade - a...
As an affiliate, we earn on qualifying purchases.
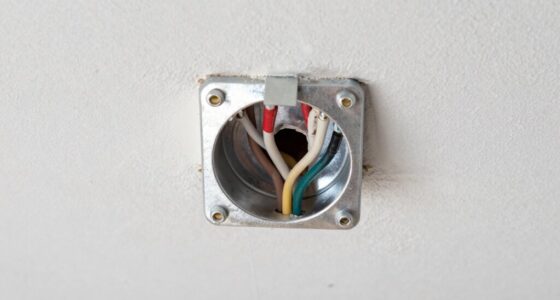
Identifying and Labeling Existing Wires

Start by inspecting the wires in the ceiling box. Carefully examine each wire and use wire identification techniques to determine their purpose. Pay close attention to wire color codes, as they help distinguish between different functions. To keep track of your findings, consider labeling each wire with tape or a marker. Look for common color codes: black or red for hot wires, white for neutral, and green or bare copper for ground. Use a multimeter if necessary to verify voltage and confirm wire types. Additionally, understanding the role of automation in electrical systems can help in planning future upgrades in automation technology. Recognizing electrical wiring standards can further assist in safely identifying wires and ensuring proper connections. Confirming wire functions through voltage testing is essential for safety and accuracy. – Note wire colors and functions for future reference – Use labels or tape to identify each wire clearly – Confirm wire roles with a multimeter if unsure – Double-check your labels before disconnecting anything
Connecting the Fan to the First Switch

When connecting the fan to the first switch, you need to guarantee the power source is properly wired. Use correct wiring techniques to avoid shorts or electrical hazards. Double-check your connections before turning on the power to keep everything safe and functional. Ensuring proper wiring can prevent issues like overvoltage damage and promote safe operation. Additionally, understanding electrical safety protocols is crucial for a successful installation.
Power Source Connections
Have you ever wondered how to properly connect your ceiling fan to the power source and the first switch? First, verify your power source matches the fan’s voltage compatibility to prevent damage. Next, turn off the circuit breaker before working. When making connections:
- Attach the grounding wire securely for grounding safety.
- Connect the hot wire from the power source to the fan’s black (or red) wire.
- Link the neutral wire from the power source to the fan’s white wire.
- Use wire nuts and electrical tape to secure all connections firmly.
Always confirm grounding safety and double-check wire colors. Properly connecting the power source ensures safe operation and reduces electrical hazards, setting the foundation for reliable fan control through your switches.
Proper Wiring Techniques
Connecting your ceiling fan to the first switch involves setting up the wiring so you can control the fan from a single location. Use proper wiring techniques to ensure safety and functionality, especially if your fan includes smart technology or remote control features. First, connect the black (hot) wire from the power source to the switch and then to the fan’s black wire. The white (neutral) wires connect together, and ground wires are securely attached. If your fan supports remote control or smart technology, confirm that the wiring accommodates signal transmission.
| Step | Action |
|---|---|
| 1 | Connect power source to switch wiring |
| 2 | Link switch to fan’s hot wire |
| 3 | Join neutral wires together |
| 4 | Attach ground wires securely |
Wiring the Light Kit to a Separate Switch

To wire the light kit to a separate switch, start by turning off the power at the circuit breaker to guarantee safety. This setup enhances lighting control, allowing you to operate the fan and light independently. Before wiring, verify circuit compatibility to prevent overloads or electrical issues. Here are key steps:
Turn off the breaker first, then wire the light kit to a separate switch for independent control.
- Identify the wires for the light kit and fan, typically marked or color-coded.
- Connect the light kit’s hot wire (usually black) to a separate switch wire.
- Use wire nuts to join the light’s neutral wire (white) with the fan’s neutral.
- Install a switch for the light, connecting it to the dedicated circuit wire for independent control.
This configuration offers flexibility in lighting control while maintaining safe, compatible wiring practices.
Testing the Circuit and Troubleshooting Common Issues

Before turning the power back on, it’s essential to test your wiring to verify everything functions correctly and safely. Use a circuit tester or voltage meter to perform circuit testing at each switch and connection point. Check that the switches control the fan and light independently, and make certain there are no dead zones or unexpected power flows. If something isn’t working, follow troubleshooting tips like verifying wire connections, inspecting for loose or damaged wires, and confirming proper grounding. Ensure the switches are wired correctly and that no circuit paths are shorted. If you encounter issues during testing, turn the power off immediately to prevent shocks or damage. Proper circuit testing helps catch problems early, ensuring your ceiling fan setup operates safely and reliably.
Finalizing Connections and Restoring Power

Once you’ve confirmed that all wiring is correct and secure, you can proceed to finalize the connections and restore power. Before turning the circuit back on, double-check that wire nuts and terminals are tight, and that no exposed wires remain. When power is restored, test your ceiling fan’s functions, including the remote control and any smart home integration. Guarantee the fan responds correctly to remote commands and app controls. If you installed separate switches, verify each switch controls the fan independently. Be sure your wiring supports modern features like remote control operation and smart home compatibility. Finally, secure all switch plates and covers to prevent accidental contact. This step ensures your ceiling fan operates safely, reliably, and seamlessly integrates with your smart home system.
Frequently Asked Questions
Can I Wire a Ceiling Fan Without an Existing Switch?
You might think wiring a ceiling fan without an existing switch is impossible, but wireless control makes it easy. You can install a fan with remote control or smart technology, allowing you to adjust fan speed and lighting without rewiring. This setup eliminates the need for a dedicated wall switch, giving you convenient control from anywhere. So yes, you can wire a ceiling fan without an existing switch, using modern wireless options.
Is It Possible to Add a Dimmer Switch to the Fan Light?
Yes, you can add a dimmer switch for your fan light, but you need to verify dimmer compatibility first. Not all dimmers support fan lighting, so choose one rated for lighting and fans. Installing a dimmer allows you to control light dimming levels easily. Make sure to turn off power before wiring, and follow the manufacturer’s instructions to ensure safe, effective light dimming and proper operation.
How Do I Troubleshoot if the Fan Doesn’t Turn on After Wiring?
If your fan doesn’t turn on, start troubleshooting power issues by checking wiring connections thoroughly. Make sure all wires are securely connected and match the wiring diagram. Turn off power before inspecting to avoid shocks. Test the circuit with a voltage tester to confirm power flows properly. If everything seems correct but the fan still doesn’t work, consider replacing the switch or motor, or calling a professional for further help.
What Safety Precautions Are Necessary for High Ceiling Fans?
Imagine the risks lurking above your head. Before working with high ceiling fans, you must prioritize safety. Always guarantee electrical grounding is secure to prevent shocks. Wear personal protective equipment like gloves and goggles to shield yourself from potential sparks or debris. Suspense hangs in the air, but with proper precautions, you can confidently tackle the job, knowing you’ve minimized danger and protected yourself while handling those lofty fans.
Can I Upgrade an Existing Single Switch to Control Multiple Fans?
Yes, you can upgrade a single switch to control multiple fans, but you’ll need to install a multi-location or smart switch that supports fan speed and remote control features. This allows you to adjust fan speed and turn each fan on or off independently. Make sure your wiring can handle the load, and consult a professional if you’re unsure. Upgrading improves convenience and control over your fans.
Conclusion
Wiring a ceiling fan to separate wall switches might feel like untangling a knot, but with patience, you can do it yourself. Just follow the steps carefully, double-check your connections, and stay safe. Once everything’s connected, you’ll enjoy better control over your fan and light, making your space more comfortable. Remember, like a skilled craftsman, your attention to detail guarantees a smooth, successful project. Happy wiring!