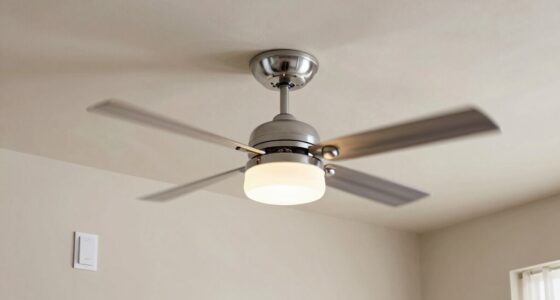

To replace a ceiling fan mounting bracket, first turn off power at the breaker and verify no current by testing the switch. Remove the fan blades and light kit, then loosen and take off the existing bracket, inspecting the ceiling box for stability. Attach the new bracket securely to the ceiling box, ensuring alignment and support. Reconnect the wiring, reassemble the fan, and restore power. Continuing will guide you through each detailed step for a safe and stable installation.
Key Takeaways
- Turn off power at the circuit breaker and confirm no current before beginning work.
- Remove fan blades, light kit, and canopy to access the mounting bracket.
- Support and carefully detach the old bracket, inspecting the ceiling box for stability.
- Attach the new mounting bracket securely to the ceiling box, ensuring it is level.
- Reconnect wiring, reassemble the fan components, restore power, and verify proper operation.
Replacing a ceiling fan mounting bracket is a straightforward process that requires careful attention to safety and detail. Begin by ensuring the power supply to the fan is completely shut off at the circuit breaker to eliminate any risk of electrical shock. Confirm the disconnection by switching on the fan or light to verify no current is present. Gather all necessary tools, including a screwdriver, voltage tester, adjustable wrench, and possibly a ladder, depending on your ceiling height. Wear safety goggles and gloves to protect against debris and sharp edges during disassembly.
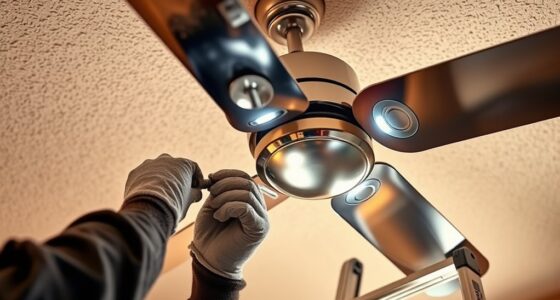
Start by removing the fan blades and light kit, if installed, to gain clear access to the mounting bracket. Carefully support the fan motor to prevent accidental dropping while detaching mounting components. Use a screwdriver to loosen and remove the screws securing the fan’s canopy or housing, exposing the mounting bracket and electrical wires. Inspect the existing bracket for signs of damage or corrosion; if the bracket is bent, cracked, or rusted, it warrants replacement.
Next, verify the mounting bracket’s compatibility with your ceiling box and fan model. Disconnect the bracket from the electrical wiring, noting the wire connections or taking a photo for reference. Carefully disconnect the wires using a wire stripper or pliers, ensuring no damage occurs to the wiring insulation. Remove the mounting bracket by unscrewing it from the ceiling box using the appropriate screwdriver or wrench. During this process, support the ceiling box if it is not securely mounted to prevent shifting or damage.
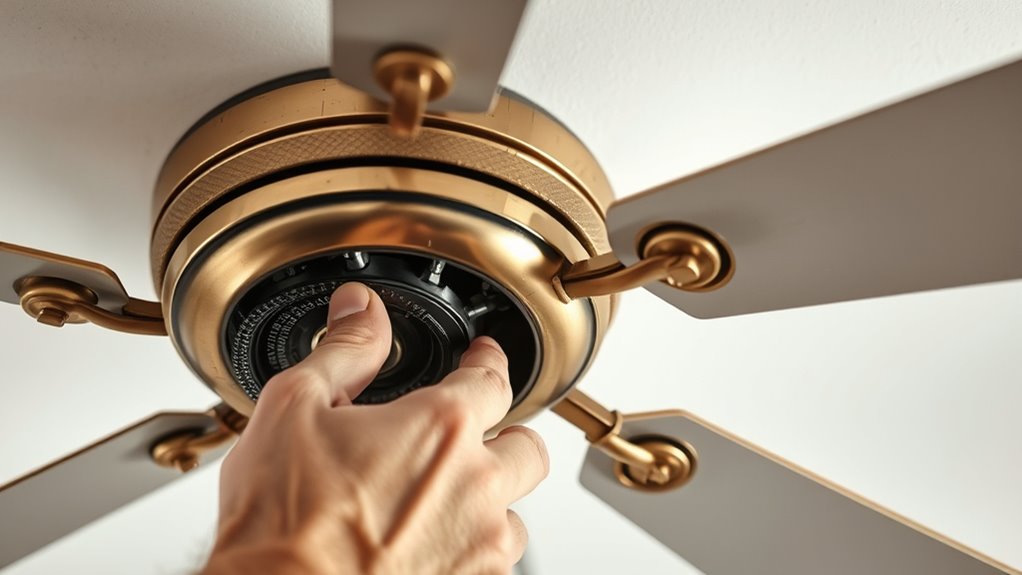
Before installing the new bracket, examine the ceiling box for stability and integrity. Confirm it is securely attached to a joist or ceiling support structure capable of supporting the fan’s weight. Attach the new mounting bracket to the ceiling box, aligning it precisely with the mounting holes. Use the correct screws, ensuring they are tight and flush to prevent wobbling or instability. Make sure the bracket is level and firmly anchored, as this will influence the overall stability of the fan once reassembled. Consulting the best practices for electrical safety can help ensure proper installation and avoid hazards.
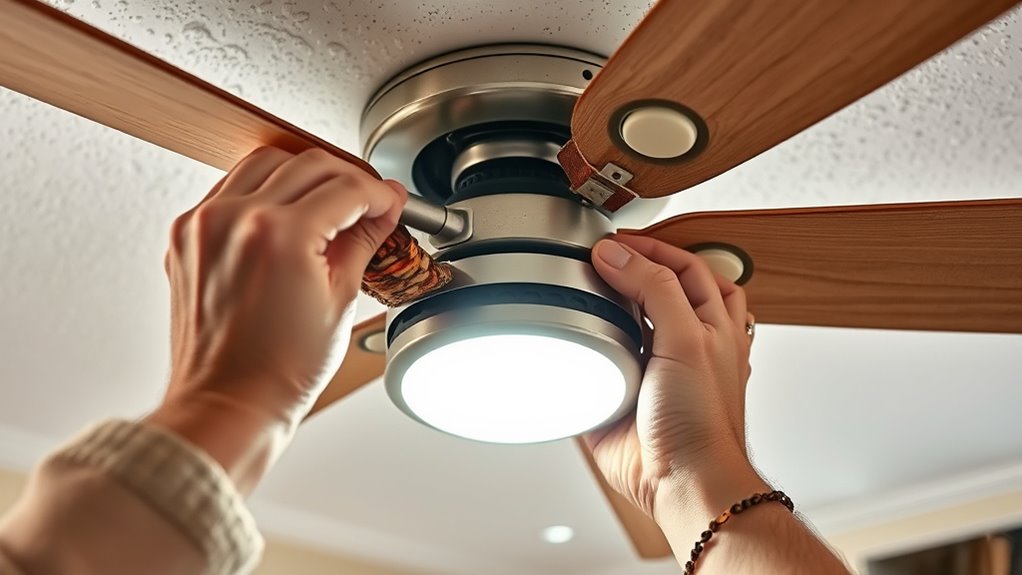
Once the bracket is securely in place, reconnect the electrical wiring following the previous configuration or the instructions provided with the new bracket. Use wire nuts to secure connections and electrical tape for extra insulation if necessary. Double-check all connections for tightness and proper insulation. After confirming the wiring is correct and secure, attach the fan’s mounting plate or canopy to the new bracket. Reassemble the fan components in reverse order, taking care to tighten all screws properly for a stable, secure installation.
Finally, restore power at the circuit breaker, turn on the fan, and verify proper operation. Ensure the fan is balanced, stable, and free of wobble. If any issues persist, recheck the mounting and wiring connections. This methodical approach guarantees a safe, precise replacement of your ceiling fan mounting bracket, restoring functionality and safety to your ceiling fan installation.

Ceiling Fan Blade Arms Replacement Kit White Fan Brackets Mounting Kit for Replacing The Worn Blades Easy to Install Bracket Accessories
The package includes a ceiling fan blades arms replacement kit with dimensions of approximately 17x11x4.2cm/6.69×4.33×1.65 inches
As an affiliate, we earn on qualifying purchases.
As an affiliate, we earn on qualifying purchases.
Frequently Asked Questions
Can I Replace the Bracket Without Turning off the Power?
No, you shouldn’t replace the bracket without turning off the power. Working with live electrical wiring poses a serious risk of electric shock or short circuits. Always turn off the circuit breaker supplying power to the fan before starting any repair or replacement. Use a voltage tester to confirm the power is off. Following these safety precautions ensures your safety and prevents damage to the electrical system during the bracket replacement.
What Tools Are Needed for Replacing the Mounting Bracket?
Approximately 60% of electrical accidents occur due to improper tool use. To substitute your ceiling fan mounting bracket, you’ll need a screwdriver (Phillips and flat-head), a voltage tester, pliers, and possibly a ladder for access. Make certain the power is off before starting. Use the screwdriver to remove the old bracket, the voltage tester to confirm no live wires, and the pliers for wire connections. Proper tools ensure safety and a secure installation.
How Do I Identify the Correct Replacement Bracket?
You identify the correct replacement bracket by measuring your current bracket’s diameter, checking the mounting hole configuration, and noting the weight capacity. Compare these specifications with the fan’s manufacturer guidelines. Confirm compatibility by matching the material, such as steel or aluminum, and verify that the bracket’s shape aligns with your fan’s mounting system. Always confirm that the replacement matches your fan’s model number or part number for proper fit.
Is It Necessary to Hire an Electrician for This Task?
You don’t necessarily need to hire an electrician if you have basic electrical skills and tools. However, if you’re uncomfortable working with wiring or unsure about the safety procedures, it’s best to consult a licensed professional. Ensuring proper grounding and correct wiring connections is vital for safety and functionality. If you decide to proceed yourself, turn off power at the breaker and follow all safety guidelines meticulously to prevent hazards.
How Long Does It Typically Take to Replace a Ceiling Fan Bracket?
Replacing a ceiling fan bracket typically takes about 30 to 60 minutes, depending on your experience and the ceiling’s accessibility. You’ll need to turn off the power, remove the fan blades, disconnect wiring, unbolt the old bracket, and secure the new one firmly. Use proper tools and follow manufacturer instructions carefully to guarantee safety and proper installation. If you encounter issues, consider consulting a professional electrician.

Teemyaa 2 Pack Light Fixture Mounting Brackets, Ceiling Light Mounting Plate, Wall Lights Mount Blocks with Screw and Nuts, 4” Round Junction Box Adaptor for Wall Sconce, Chandelier, Pendant
UNIVERSAL BRACKT: Our flexible installation bracket with fastener and decorative nuts to mount light fixture on a canopy…
As an affiliate, we earn on qualifying purchases.
As an affiliate, we earn on qualifying purchases.
Conclusion
Replacing a ceiling fan mounting bracket may seem challenging, but with careful attention, it’s straightforward. Think of it as restoring the foundation of your cooling comfort—once secure, your fan will operate safely and efficiently. Remember, a properly installed bracket isn’t just a piece of hardware; it’s the backbone of your fan’s stability. By following these steps precisely, you guarantee long-lasting performance and peace of mind—because a secure mount is the key to a breezy, trouble-free space.

RACO RETRO-BRACE 936 1.5-in. Deep Ceiling Fan Box for Old Work 2.5-in. Knockouts, Old Work Electrical Box, Adjustable Brace, and Mounting Bracket for Ceiling Light Fixtures & Chandelier Fans
DESIGNED FOR RESTORATIONS: Our Hubbell RACO RETRO-BRACE 1.5-in. Deep Ceiling Fan Box for Old Work is specially designed…
As an affiliate, we earn on qualifying purchases.
As an affiliate, we earn on qualifying purchases.

Harbor Breeze 54-in Ceiling Fan Wire Extension Cord
Downrod wire extension kit
As an affiliate, we earn on qualifying purchases.
As an affiliate, we earn on qualifying purchases.