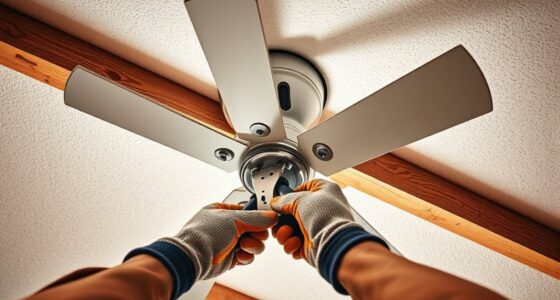
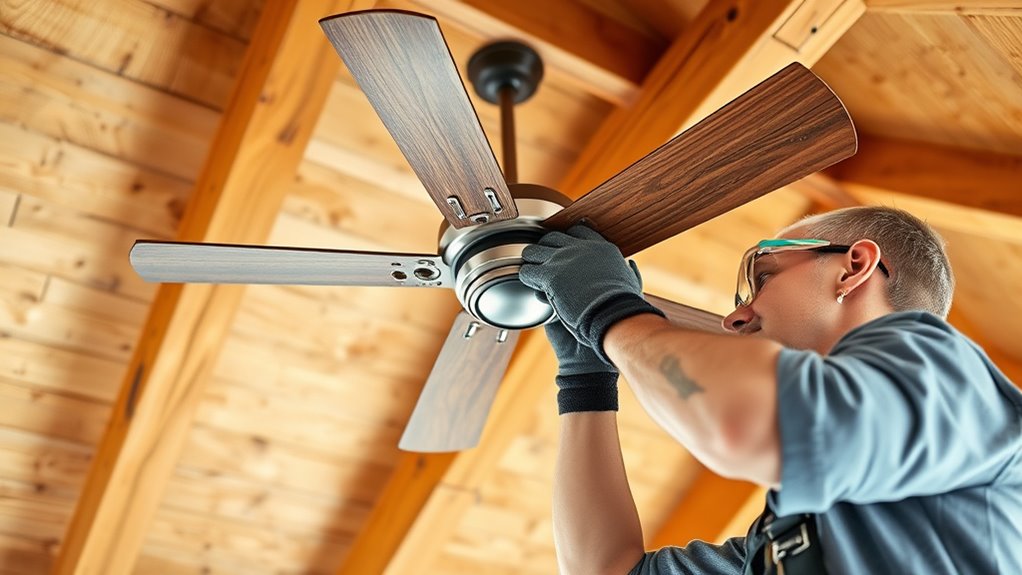
When mounting a fan on exposed beams, first check the beams’ structural integrity for cracks, rot, or damage, making certain they can support the weight. Measure beam dimensions and ceiling height to confirm sufficient clearance. Inspect existing wiring for safety and capacity. Choose sturdy, corrosion-resistant hardware compatible with your beam material, and follow safety standards and codes. Proper planning ensures a secure, safe installation that enhances airflow. Keep exploring to learn more about perfecting your setup.
Key Takeaways
- Inspect the beams for structural integrity, damage, and support capacity to ensure they can safely hold the fan.
- Measure beam dimensions and ceiling height to confirm proper clearance and suitable mounting locations.
- Check existing electrical wiring for safety, capacity, and accessibility, consulting an electrician if needed.
- Choose appropriate, sturdy mounting hardware compatible with beam material and fan weight for secure attachment.
- Ensure fan placement allows sufficient clearance from beams and decorative elements for safe, efficient operation.

Ceiling Fan Mounting Bracket with Hanger Ball Set, Heavy-Duty Carbon Steel Cathedral Canopy Bracket for High-Ceiling Applications with Ground Wire & Mounting Hardware (Black)
Industrial-Grade Steel Build – Constructed from reinforced carbon steel for maximum load-bearing capacity (up to 50lbs) and long-lasting…
As an affiliate, we earn on qualifying purchases.
As an affiliate, we earn on qualifying purchases.
Assessing the Structural Integrity of the Beams
Before mounting a fan on beams, you need to verify that the beams can support the additional weight. Inspect the beams for signs of damage, such as cracks, rot, or warping, which could compromise their strength. Guarantee the beams are solid and stable, as this affects both safety and aesthetic appeal. If you’ve added decorative finishes, check that they don’t hide structural issues; a sturdy appearance doesn’t always mean the beams are sound. You want the beams to provide reliable support and maintain their visual charm. Remember, the integrity of the beams influences the overall look of your space, so take the time to assess their condition carefully. Strong, healthy beams ensure your fan stays secure and your room remains attractive. Additionally, understanding the environmental considerations of your space can help ensure your modifications are sustainable and safe over time. Regular inspections can help identify potential issues early, preventing safety hazards related to structural stability.

Big Ass Fans I-Beam Adapter Mounting Kit for Large Commercial Ceiling Fans (Essence and e-Series), For Indoor or Outdoor Use, Installation Instructions Included
BUILT FOR BIG FANS: The I-Beam Adapter Mounting Kit is your solution for installing our large, commercial line…
As an affiliate, we earn on qualifying purchases.
As an affiliate, we earn on qualifying purchases.
Determining the Weight Capacity of the Beams
To determine how much weight your beams can handle, start by evaluating their material strength and support system. Stronger materials and solid support structures allow for heavier loads, including your fan. Make sure to take into account both factors carefully to ensure safety and stability. Additionally, assessing the support system of the beams can provide insights into their overall capacity to bear weight safely. Consulting building codes and standards can also help confirm the maximum load limits for exposed beams in your area.
Beam Material Strength
The strength of the beam material directly determines how much weight it can safely support. Different beam materials, like wood, steel, or concrete, have varying load capacities that influence fan compatibility. For example, a steel beam generally supports heavier loads than a wooden one of similar size. It is crucial to identify the beam material before mounting your fan, as this affects the maximum weight it can handle. If you’re unsure about the material, consult a structural engineer or inspect the beams for markings or characteristics. Knowing the beam’s material helps you select a fan that won’t exceed its weight capacity, ensuring safety and stability. Additionally, understanding floor and carpet cleaning guides can inform you about how modern tools assist in assessing structural integrity. Always verify that your fan’s weight is compatible with the beam’s material strength before proceeding.
Existing Beam Support
Evaluating the existing support of your beams is essential to determine how much weight they can handle. Start by examining the beam surface—look for cracks, warping, or signs of stress. Check the mounting brackets used to attach fixtures; their size and material influence load capacity. To help gauge support strength, consider this simple table:
| Beam Surface Condition | Support Capacity (Approximate) |
|---|---|
| Good, smooth, sturdy | High |
| Slight cracks or dents | Moderate |
| Significant damage | Low or unsafe |
| Worn or rotted | Not suitable for mounting |
Understanding these factors helps ensure your fan’s weight is safely supported without risking damage or failure. Additionally, reviewing existing beam support can reveal potential reinforcement needs before mounting. It is also advisable to periodically inspect beams for signs of deterioration to prevent unexpected failures. For added safety, consulting a structural engineer can provide expert guidance on beam integrity and load limits.

Telescoping Inspection Mirror mechanics Tool Set – 360 Swivel for Extra Viewing Dead Angle, Line of Sight Obstacle Area
Larger View – 3.3 Inch Round Mirror Equipped with an 8.3cm (3.3") high-definition round mirror, up to 50%…
As an affiliate, we earn on qualifying purchases.
As an affiliate, we earn on qualifying purchases.
Checking for Proper Clearance and Space
Before mounting your fan, you need to check that there’s enough space around it. Measure the beam dimensions precisely to make certain the fan will fit securely. Also, confirm that the ceiling height and blade clearance are adequate to prevent any obstructions or safety issues. Ensuring proper clearance and space is essential for optimal airflow and safety.
Measure Beam Dimensions Carefully
To guarantee your fan fits properly, carefully measure the dimensions of the beams where you plan to mount it. Accurate measurements ensure proper clearance and help you consider beam aesthetics and color coordination. Use a tape measure to determine the width, height, and thickness of each beam. Keep in mind that uneven beams might require adjustments or shimming. Here’s a quick reference:
| Beam Dimension | Measurement (in inches) | Notes |
|---|---|---|
| Width | Check for beam aesthetics and color coordination compatibility | |
| Height | Ensure enough space for fan installation | |
| Thickness | Confirm mount stability | |
| Spacing Between Beams | Verify mounting options | |
| Overall Length | For planning clearance |
Accurate measurements prevent surprises and ensure your fan complements the space. Additionally, understanding cost and budgeting aspects can help plan for any necessary modifications or upgrades to your mounting setup. Proper planning and measurement can also prevent installation issues during setup. When assessing the beams, consider the exposed wood style typical of farmhouse bedrooms to ensure the fan installation harmonizes with your decor.
Confirm Ceiling Height Clearance
Ensuring there’s enough ceiling height clearance is essential for safe and effective fan installation. You need to check that the fan won’t hang too low, which could interfere with decorative lighting or impede movement. Adequate space also enhances aesthetic considerations by maintaining a balanced look in the room. Measure from the beam to the ceiling to confirm there’s enough room for the fan’s height, typically at least 7 feet above the floor for safety. If your ceiling is higher, consider a longer downrod. Proper clearance prevents accidental contact with the fan blades and ensures a clean, polished appearance. Don’t forget to account for any lighting fixtures or decorative elements that might affect the overall height and visual harmony of the room.
Ensure Fan Blade Space
How can you be sure your fan blades have enough space to rotate freely? First, measure the distance between the blades and nearby surfaces like beams or walls. Make certain there’s at least 10-12 inches of clearance, especially if you’re considering decorative options that add flair to your fan design. Proper space not only prevents wobbling or noise but also enhances safety. When evaluating aesthetic considerations, remember that a well-spaced fan looks balanced and sleek, avoiding cluttered or cramped appearances. If the blades are too close to the beams, adjust the fan placement or blade length. Taking these steps ensures smooth operation and helps your fan blend seamlessly with your room’s decor, making both function and style work together. Additionally, understanding how sound vibrations influence your environment can help you select a fan that operates quietly and contributes to a peaceful space. Incorporating wall organization solutions near the fan area can further improve the overall aesthetic and functionality of your room. Regularly inspecting the proper clearance will maintain optimal airflow and prolong the lifespan of your fan.

Westinghouse 0110000 Saf-T-Brace for Ceiling Fans, 3 Teeth, Twist and Lock,Silver(Pack of 1)
Saf-T-Brace allows safe, simple installation of fans and fixtures
As an affiliate, we earn on qualifying purchases.
As an affiliate, we earn on qualifying purchases.
Evaluating Electrical Wiring and Power Sources
Before installing a fan on beams, it is essential to carefully evaluate the existing electrical wiring and power sources. Check the wiring for signs of damage, corrosion, or outdated insulation that could pose safety risks. Make certain the electrical wiring can handle the fan’s power requirements and is properly grounded. Confirm that the power sources are easily accessible and located near the installation site. If you’re unsure about the wiring’s condition or capacity, consider consulting a licensed electrician. Avoid relying on overloaded circuits or extension cords, which can cause electrical hazards. Properly assessing the electrical wiring and power sources ensures a safe installation and reliable operation of your ceiling fan. Taking these steps prevents future electrical issues and guarantees long-term functionality. Additionally, verifying the electrical system’s capacity can help prevent potential overloads and ensure the fan operates efficiently. It’s also advisable to review any GMC tuning modifications that might influence electrical load capacities if your setup involves vehicle-related electrical enhancements. Conducting a thorough electrical inspection can further identify any hidden issues that may affect the installation process.
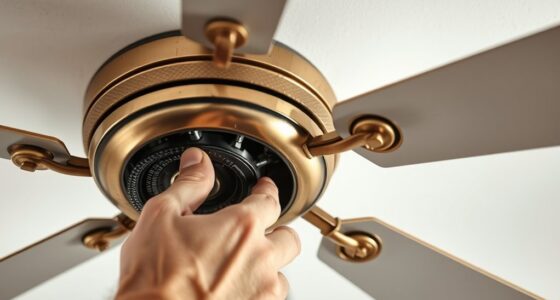
Selecting the Appropriate Mounting Hardware

Selecting the right mounting hardware is essential for a secure and safe fan installation on beams. Your choice of mounting bracket and hardware selection determines how well the fan stays in place and handles operational stresses. Look for a sturdy, corrosion-resistant mounting bracket compatible with your fan’s weight and size. Consider beam material—wood or metal—and make certain your hardware can securely grip or attach to it. Use heavy-duty bolts, anchors, or clamps designed for exposed beams. Proper hardware should also distribute weight evenly to prevent stress points. Always verify that the hardware you select meets the manufacturer’s specifications and load capacity. By choosing appropriate mounting brackets and hardware, you ensure your fan remains stable, safe, and durable over time.
Ensuring Safety and Code Compliance
Making certain safety and code compliance is essential when mounting a fan on beams, as improper installation can lead to accidents or damage. You must follow local building codes and electrical safety standards, including proper grounding and secure mounting methods. While considering decorative aspects, make certain the fan’s placement doesn’t compromise structural integrity or safety. Aesthetic integration is important, but it shouldn’t override safety requirements. Check that the fan’s weight and mounting hardware meet code specifications, and verify that electrical connections are up to code. Using certified components and consulting professionals can help you avoid code violations. Prioritize safety above all, making sure that the fan is securely attached, well-ventilated, and compliant with all relevant regulations—this guarantees a safe, attractive, and functional installation. Additionally, understanding the security implications of electrical installations can help prevent potential hazards or theft risks.
Planning for Ventilation and Airflow Efficiency
Effective planning for ventilation and airflow efficiency is essential to guarantee your fan provides ideal comfort and energy savings. Consider both decorative options and aesthetic considerations to ensure the fan blends seamlessly with your space. Proper placement optimizes airflow, reducing energy waste and improving comfort. Use the table below to evaluate key factors:
| Factor | Consideration |
|---|---|
| Fan size | Match to room size for balanced airflow |
| Location | Position where airflow reaches all areas |
| Decorative style | Choose designs that complement your decor |
| Ventilation needs | Ensure adequate circulation for space type |
| Aesthetic appeal | Balance function with visual harmony |
Planning ahead helps you select the right fan that’s both effective and visually pleasing.
Frequently Asked Questions
Can I Mount a Fan on Beams Made of Different Materials?
You can mount a fan on beams made of different materials, but you need to consider beam material compatibility and mounting surface considerations. Make certain the material can support the weight of the fan and that your mounting hardware is suitable for that surface. Check for strong, stable spots on each beam type, and use appropriate anchors or brackets to secure your fan safely. This prevents damage and ensures safe operation regardless of beam material.
How Do I Prevent Vibrations From Affecting the Beams?
To prevent vibrations from affecting the beams, you should focus on vibration isolation techniques and ensuring beam stability. Use rubber or neoprene mounts between the fan and the beams to absorb vibrations, reducing transfer. Secure the fan firmly, avoiding loose fittings. Additionally, reinforce the beams if needed, and consider adding damping materials to improve overall stability. These steps help maintain beam integrity and minimize vibration-related issues.
What Tools Are Essential for Installing on Exposed Beams?
Preparing for perfect placement, you’ll want precise tools. First, grab a power drill to drill holes and tighten screws. Then, use sturdy mounting brackets to securely hold the fan. These tools guarantee you can confidently connect, secure, and stabilize the fan on exposed beams. With the right equipment, mounting becomes manageable, making your project smooth and successful. Proper tools turn a tricky task into a straightforward, satisfying setup.
How Often Should I Inspect the Beams After Mounting the Fan?
You should inspect the beams regularly to guarantee their integrity, ideally on an annual inspection schedule. Keep an eye out for any signs of damage, such as cracks, warping, or rot, which could compromise the beam’s strength. Frequent inspections help you catch issues early, maintaining safety and stability. If you notice any concerns, consult a professional immediately to assess whether repairs or reinforcement are needed to preserve the beam’s integrity.
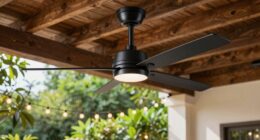
Are There Specific Weather Considerations for Outdoor Beams?
This weather is as unpredictable as a rollercoaster, so outdoor beams need special attention. You should consider weather resilience and outdoor conditions when planning to mount a fan. Extreme rain, snow, or high humidity can weaken the beams or cause rust. Make sure the beams are weatherproofed or treated for outdoor use. Regular inspections are essential to guarantee they stay strong and safe despite the changing elements.
Conclusion
Before mounting a fan on exposed beams, you want to be sure everything is solid—like building a house on a rock. Double-check the beams’ strength, clearance, and wiring, and choose the right hardware. This way, you guarantee safety and efficiency while keeping your space stylish. Treat your beams like the backbone of your room, supporting your comfort and safety every step of the way. When in doubt, always consult a professional to keep things running smoothly.