To mount a ceiling fan to a ceiling joist, locate the joist using a stud finder and mark its center accurately, guaranteeing proper support. Turn off power and confirm the electrical box is rated for the fan’s weight, then securely attach a sturdy fan-rated box directly to the joist. Align the mounting bracket carefully, tighten screws securely without overtightening, and verify everything is stable. Proper installation prevents wobbling or failure; more detailed steps follow to ensure safety and durability.
Key Takeaways
- Locate the ceiling joist using a stud finder and mark its center for accurate fan mounting.
- Turn off power, remove existing fixture, and ensure the electrical box is rated for fan support.
- Attach the mounting bracket securely to the joist or a reinforced electrical box aligned with the joist.
- Confirm the fan’s weight is supported properly and ensure the mounting is stable without wobbling.
- Complete wiring according to instructions, ensuring all connections are secure and compliant with electrical codes.

Have you ever wondered how to safely and effectively mount a ceiling fan? Proper installation is essential to ensure stability, safety, and long-term operation. When mounting directly to a ceiling joist, your primary goal is to securely attach the fan’s mounting bracket to the structural framing to prevent wobbling, shifting, or potential failure. Begin by locating a ceiling joist using a stud finder. Confirm the position by tapping or measuring from a wall to identify the joist’s edges, ensuring your measurements are accurate. Once identified, mark the center of the joist with a pencil, making sure your mark aligns precisely with the joist’s centerline for maximum support.
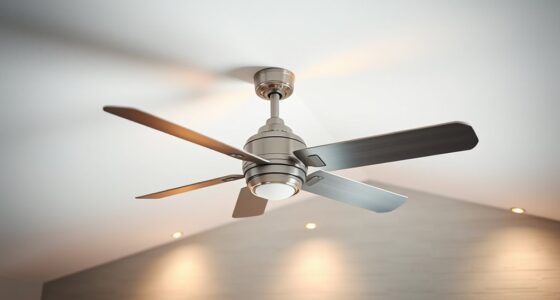
Securely attach the ceiling fan’s mounting bracket to the ceiling joist for safe, stable operation.
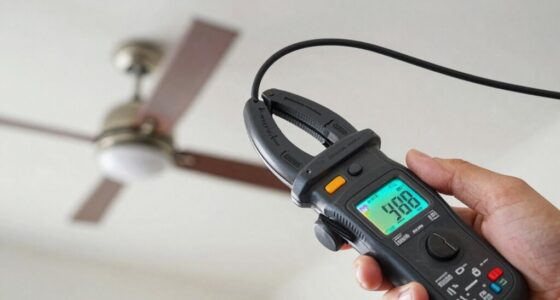
Before drilling, turn off the circuit breaker to disable power to the fixture’s circuit. This safety measure prevents accidental electrocution. Next, verify that the electrical box is rated for fan support—standard boxes often aren’t sufficient for ceiling fans and may need to be replaced with a fan-rated box that can sustain the weight and movement. Remove the existing fixture, disconnecting the wiring carefully, and secure the fan-rated box to the joist directly, using screws appropriate for the ceiling material, typically wood screws. Ensure the box is firmly attached, with no movement or wobbling, as this is critical to supporting the fan’s weight and dynamic loads.
Align the mounting bracket supplied with your ceiling fan with the pre-drilled holes in the electrical box. Use a level if necessary to ensure the bracket is horizontal, as an uneven mount can cause operational issues or wobbling. Insert screws through the bracket holes into the joist or the reinforced electrical box mounting points, tightening them securely but avoiding overtightening which could damage the box or strip the screw threads. Check for stability by gently tugging on the bracket to verify it’s firmly anchored. The focus here must be on structural integrity; any compromise in attachment could lead to safety hazards or damage over time.
Once the bracket is secured, proceed with wiring the fan according to the manufacturer’s specifications, ensuring all connections are tight and properly insulated. This initial step—mounting the bracket securely to the joist—is the foundation for a safe and reliable ceiling fan installation. It guarantees the fan’s stability during operation, minimizes vibration, and reduces the risk of electrical or mechanical failure. Additionally, consulting local electrical codes can help ensure your installation meets safety standards and legal requirements. Always adhere to local electrical codes and, when in doubt, consult a professional electrician to verify that your mounting method meets safety standards. Properly mounting to a ceiling joist is an essential, precise step that ensures your ceiling fan remains safe and functional for years to come.

Westinghouse 0110000 Saf-T-Brace for Ceiling Fans, 3 Teeth, Twist and Lock,Silver(Pack of 1)
Saf-T-Brace allows safe, simple installation of fans and fixtures
As an affiliate, we earn on qualifying purchases.
As an affiliate, we earn on qualifying purchases.
Frequently Asked Questions
Can I Install a Ceiling Fan on a Drywall Ceiling Without a Joist?
Yes, you can install a ceiling fan on drywall without a joist by using a proper mounting bracket attached to a strong electrical box rated for fan support. Confirm the electrical box is securely fastened to a ceiling stud or a ceiling support brace designed for fan mounting. Avoid attaching directly to drywall alone, as it can’t support the fan’s weight, risking safety and damage. Always follow manufacturer instructions and safety standards.
What Tools Are Necessary for Mounting a Fan to a Joist?
You’ll need a stud finder to locate the joist precisely, a sturdy drill with appropriate bits for pilot holes, a level to ensure proper alignment, and a screwdriver for securing mounting brackets. Safety gloves and goggles protect you during installation, while a ladder provides safe reach. Using these tools carefully guarantees a secure, balanced mount, reducing risks of wobbling or falling. Double-check measurements before drilling to avoid damaging electrical wires or plumbing.
How Do I Ensure the Fan Is Balanced After Installation?
To make certain your ceiling fan is balanced, first turn it on and observe its operation. If it wobbles, turn off the fan and check the blades for alignment and tightness. Use a blade balancing kit or weight clips if needed, attaching them to the blades’ center. Make small adjustments, testing each time, until the fan runs smoothly without wobbling, guaranteeing safe and efficient operation.
Is It Safe to Install a Fan on a Tilted or Sloped Ceiling?
Imagine installing a fan on a 15-degree sloped ceiling; it’s safe if you use a compatible angled ceiling mount. You should make certain the fan’s mounting bracket is securely attached to a ceiling joist or a suitable support, and use an adjustable downrod. Verify that the fan blades are level and balanced. Always follow manufacturer instructions and local electrical codes to prevent stability issues or accidents.
Can I Upgrade My Existing Fan to a More Powerful Model Easily?
Yes, you can upgrade your existing fan to a more powerful model, but make certain the new fan’s weight and mounting requirements match your ceiling’s support capabilities. Turn off the power, remove the existing fixture, and verify the electrical box is rated for ceiling fans. Follow the manufacturer’s installation instructions carefully, use appropriate mounting hardware, and double-check all connections for safety and stability before turning the power back on.

Southwire Electrical Box for Ceiling Fan, Light Fixture, 50lb Ceiling Fan and 75lb Light Fixture Support, Depth Adjustable, Gray, MSBFAN
Adjustable & Secure Installation: The Southwire Electrical Box offers quick setup and strong support as a durable electrical…
As an affiliate, we earn on qualifying purchases.
As an affiliate, we earn on qualifying purchases.
Conclusion
Mounting a ceiling fan securely to a ceiling joist guarantees ideal safety and performance. Remember, improper installation can lead to accidents or damage; hence, always double-check your connections and use appropriate hardware. Did you know that improperly mounted fans can wobble or fall, causing injuries? Studies show that ceiling fan accidents are more common than you’d think. Prioritize precision and safety throughout your installation to enjoy efficient, safe airflow and peace of mind.

PenX Wall and Ceiling – Stud and Joist – Magnetic Finder – Tool and Scanner – PRO
ACCURATE, EASY TO USE, AND SAFE: PenX Wall and Ceiling Stud and Joist Magnetic Finder innovative US patent…
As an affiliate, we earn on qualifying purchases.
As an affiliate, we earn on qualifying purchases.
Westinghouse 0110000 Saf-T-Brace for Ceiling Fans, 3 Teeth, Twist and Lock,Silver(Pack of 1)
Saf-T-Brace allows safe, simple installation of fans and fixtures
As an affiliate, we earn on qualifying purchases.
As an affiliate, we earn on qualifying purchases.