To install a hugger or flush mount ceiling fan, first turn off the power at the breaker and confirm no voltage using a tester. Remove the existing fixture, then attach the mounting bracket to a ceiling-rated box secured to the joist or brace. Connect the fan’s wiring to the house wiring, matching colors properly, and guarantee all connections are tight. Secure the fan motor, assemble the blades, and restore power to test. Following these steps carefully will guide you through a safe setup, with additional details available if you continue.
Key Takeaways
- Turn off power, verify no voltage, and remove existing fixture before starting installation.
- Ensure ceiling box is rated for fan support and securely mounted to joists or braces.
- Attach the mounting bracket and connect wiring matching color codes, including ground wire.
- Secure the fan motor to the mounting bracket, then lift and lock the fan onto the mount.
- Attach blades, install light fixtures if applicable, restore power, and test for proper operation.

Installing a ceiling fan requires careful preparation and adherence to safety protocols to guarantee proper operation and stability. Before beginning, turn off the circuit breaker supplying power to the existing fixture to prevent electrical shock. Use a voltage tester to confirm the power is fully disconnected. Gather all necessary tools and components, including a screwdriver, wire strippers, a ladder, and the mounting hardware provided with your fan. Carefully read the manufacturer’s instructions, as specifications can vary between models.
Ensure safety first: turn off power, confirm disconnection, and gather tools before installing your ceiling fan.
Start by removing the existing light fixture or ceiling mount. If there’s a ceiling box already installed, verify that it is rated to support the weight of the fan. Most fans require a box that is securely fastened to the ceiling joist or a brace for support. If the existing box isn’t rated for ceiling fans, replace it with a compatible fan-rated box. Once the mounting box is secured, attach the mounting bracket supplied with your fan to the ceiling box using screws, ensuring it’s firmly anchored and level.
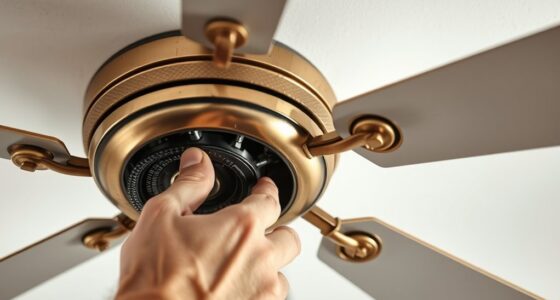
Next, prepare the fan’s mounting components. Connect the fan’s mounting plate to the bracket, following the manufacturer’s wiring diagram. Typically, this involves matching wire colors: black or red for hot, white for neutral, and green or copper for ground. Strip about 1/2 inch of insulation from each wire if necessary, and twist them together securely with wire nuts. Connect the ground wire from the fan to the grounding wire or screw in the mounting bracket. Double-check all connections for tightness and correctness.
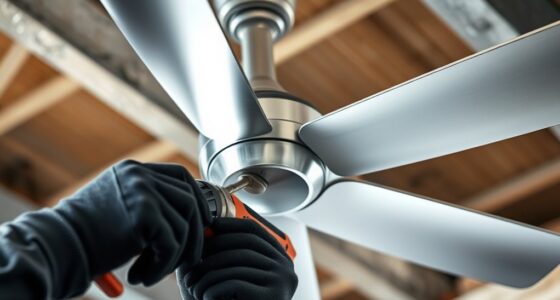
When attaching the fan motor to the mounting plate, align the mounting holes and secure the motor assembly with the provided screws. Depending on the model, you may need to lift the fan assembly onto the mounting bracket or secure it via a locking mechanism. Once mounted, connect the fan’s wiring harnesses to the house wiring, matching colors consistently: black to black (hot), white to white (neutral), and green or copper to ground. Tuck the wires carefully into the ceiling box, ensuring no pinched or exposed wiring.
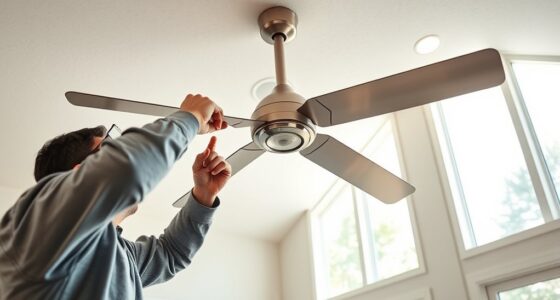
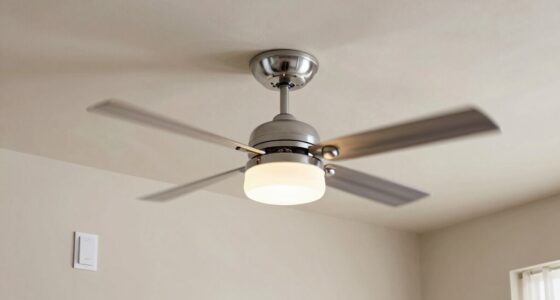
Finally, attach the fan blades following the manufacturer’s instructions, ensuring they are securely fastened and balanced to prevent wobbling. Install any light fixtures or bulbs if applicable. Restore power at the circuit breaker, and turn on the switch to verify proper operation. Observe the fan for any unusual vibrations or noises, and adjust blade alignment if necessary. Properly installed, your ceiling fan should operate smoothly, providing efficient airflow and safety for years to come. Additionally, modern fans often incorporate smart technology for remote control and energy efficiency.

RACO RETRO-BRACE 936 1.5-in. Deep Ceiling Fan Box for Old Work 2.5-in. Knockouts, Old Work Electrical Box, Adjustable Brace, and Mounting Bracket for Ceiling Light Fixtures & Chandelier Fans
DESIGNED FOR RESTORATIONS: Our Hubbell RACO RETRO-BRACE 1.5-in. Deep Ceiling Fan Box for Old Work is specially designed…
As an affiliate, we earn on qualifying purchases.
As an affiliate, we earn on qualifying purchases.
Frequently Asked Questions
Can I Install a Hugger Fan on a Sloped Ceiling?
Yes, you can install a hugger fan on a sloped ceiling, but you’ll need a compatible angled mounting system or a sloped ceiling adapter. First, check the fan’s specifications to verify it’s rated for sloped installation. Then, attach the mounting bracket using the appropriate hardware. Adjust the fan’s angle carefully to maintain proper clearance and airflow, guaranteeing safety and ideal performance on your sloped ceiling.
What Tools Are Needed for Flush Mount Fan Installation?
You’ll need a Phillips-head screwdriver for secure mounting, a stepladder to reach the ceiling comfortably, and a voltage tester to verify safety before wiring. A drill with bits helps create holes or secure mounting brackets. Optional but useful tools include pliers for wire twisting and a wire stripper for preparing electrical connections. Gathering these tools beforehand ensures a smooth, precise installation process, minimizing errors and safety risks.
How Do I Determine the Right Fan Size for My Room?
Measure your room’s square footage accurately. For rooms up to 75 square feet, select a fan with a blade span of 29-36 inches. For 76-144 square feet, opt for 36-42 inches. Larger rooms, over 144 square feet, require fans with blades spanning 48-54 inches. Make certain the fan’s airflow capacity (CFM) matches room size for maximum efficiency. Proper sizing guarantees effective air circulation and energy efficiency.
Is It Necessary to Turn off Power at the Breaker Before Installation?
You should turn off the power at the breaker before installation, just as a safety net catches a falling object. This step prevents electrical shock and damage. Visualize the breaker switch as a barrier between you and live wires. Always verify that power is off by testing the wires with a voltage tester. This precaution guarantees a safe, controlled environment, reducing risks during the installation process.
Can I Install a Ceiling Fan Myself or Should I Hire a Professional?
You can install a ceiling fan yourself if you have basic electrical skills and follow safety protocols. Make certain the power is turned off at the breaker, carefully read the manufacturer’s instructions, and use proper tools. However, if you’re unfamiliar with electrical work or unsure about wiring, it’s safer to hire a professional electrician. This ensures correct installation, compliance with electrical codes, and reduces risk of injury or damage.

Southwire Electrical Box for Ceiling Fan, Light Fixture, 50lb Ceiling Fan and 75lb Light Fixture Support, Depth Adjustable, Gray, MSBFAN
Adjustable & Secure Installation: The Southwire Electrical Box offers quick setup and strong support as a durable electrical…
As an affiliate, we earn on qualifying purchases.
As an affiliate, we earn on qualifying purchases.
Conclusion
Once you’ve successfully installed your hugger or flush mount ceiling fan, you’ll appreciate how the process mirrors everyday precision—each component fitting perfectly, much like a puzzle piece. The coincidence of the fan’s quiet operation aligning with your room’s aesthetic reflects meticulous planning. Proper installation guarantees safety and efficiency, allowing you to enjoy ideal airflow. Remember, attention to detail during setup minimizes future issues, making your investment both reliable and seamlessly integrated into your space’s design.

Honeywell Ceiling Fans Glen Alden, 52 Inch Classic Flush Mount Indoor LED Ceiling Fan with Light, Pull Chain, Quick-2-Hang Dual Finish Blades, Reversible Motor – 50182 (Brushed Nickel)
Room Size and Design: 52-inch ceiling fan designed for medium to large rooms up to 400 square feet,…
As an affiliate, we earn on qualifying purchases.
As an affiliate, we earn on qualifying purchases.

Ceiling Fan Mounting Bracket Mounting Kits Fan Components for Cathedral Canopy Living Room, 77059 Ceiling Fan Parts Black (Without Wire)
CONVENIENT KIT: In each package, you will receive 1 ceiling fan mounting bracket; each bracket comes with 2…
As an affiliate, we earn on qualifying purchases.
As an affiliate, we earn on qualifying purchases.