
To install a ceiling fan on a concrete ceiling, start by gathering the right tools like a drill, masonry bits, anchors, and safety gear. Choose a sturdy location with proper support, mark drilling spots accurately, and drill holes carefully, managing dust. Secure anchors, mount the bracket, and connect wiring following safety procedures. Finally, attach the fan and blades, then test everything for stability and smooth operation. For detailed steps, continue exploring the process in full.
Key Takeaways
- Identify and secure support beams or reinforced areas in the concrete ceiling for stable mounting.
- Mark precise drill points using a level, avoiding obstacles, and verify support before drilling.
- Use a carbide-tipped masonry drill bit with dust management techniques to create clean holes for anchors.
- Connect wiring properly by turning off power, matching color-coded wires, and securing all connections.
- Attach the fan securely, balance blades, test operation, and tighten all hardware for safety and stability.

12-PCS Masonry Drill Bit Set & Concrete Drill Bit Set, 1/8 to 1/2 inch Professional Carbide Drill Bits Tip for Glass, Tile, Brick, Cement Concrete Plastic Wood etc. Masonry Drill Bits Set by DYRECELVE
PROFESSIONAL CARBIDE DRILL BIT SET:This masonry drill bit set includes 12PCS carbide drill bit, suitable for cement, brick,…
As an affiliate, we earn on qualifying purchases.
As an affiliate, we earn on qualifying purchases.
Gathering the Necessary Tools and Materials
Before you begin installing your ceiling fan on a concrete ceiling, it’s essential to gather all the necessary tools and materials. You’ll need a drill with masonry bits, a screwdriver, a level, a measuring tape, and anchors suitable for concrete. Make sure your ceiling fan comes with a wireless remote for easy operation and improved energy efficiency, allowing you to control fan speed and lighting remotely. You might also want a step ladder and safety gear like goggles and gloves. Double-check that you have the appropriate mounting bracket and electrical supplies. Having everything ready guarantees a smoother installation process, prevents delays, and helps you set up a fan that’s both functional and energy-efficient, enhancing your room’s comfort and convenience. Additionally, understanding installation requirements ensures your fan is securely mounted and operates safely. Being aware of electrical safety protocols can help prevent accidents during installation. For optimal performance, consider the electric power generation aspects to ensure your fan’s electrical connections are efficient and reliable.

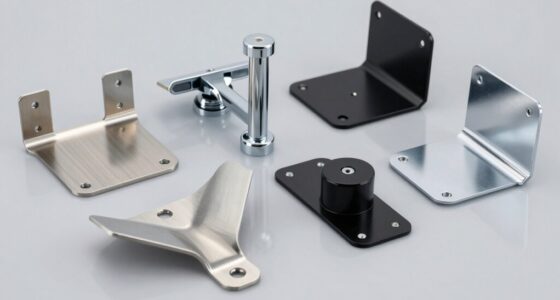
Ceiling Fan Mounting Bracket,1PCS AICWIOO Cast Aluminum Sloped Cathedral Ceiling Canopy Bracket for Living Room Outside Patio Porch with Mounting Hardware(Black)
QUALITY MANUFACTURING – Our Ceiling Fan Mounting Kits is constructed from cast aluminum not cheap plastic,offering exceptional strength,corrosion…
As an affiliate, we earn on qualifying purchases.
As an affiliate, we earn on qualifying purchases.
Choosing the Right Location and Mounting Bracket
Start by selecting a spot that maximizes airflow and suits your room’s layout. Make sure the surface where you’ll mount the bracket is solid and free of cracks or debris. Properly securing the mounting surface is essential for a safe and stable installation. Additionally, consider the self-watering plant pots concept to ensure the fixture can support the weight of the fan and any moisture-related factors. It’s also important to verify that the security of the mounting surface can handle the fan’s weight and vibrations to prevent accidents. Consulting best practices for mounting can further ensure a secure installation.
Assess Optimal Spot
Choosing the right spot for your ceiling fan is essential to guarantee it operates safely and efficiently. You want to balance ventilation considerations with aesthetic placement to enhance your space. First, confirm the fan is centered in the room or over the area needing the most airflow. Consider the height of your concrete ceiling to avoid obstruction or noise. Think about how the fan’s placement complements your room’s design. Visualize the fan spinning smoothly without hitting walls or furniture. Keep in mind that proper spacing from walls and fixtures is critical for maximum airflow and safety. Additionally, understanding the best vacuums for dust removal can help ensure your space remains clean and allergen-free, complementing your ceiling fan installation. Proper placement also involves considering air circulation patterns, which can improve overall room comfort. Paying attention to ceiling height is crucial, as it influences the size and type of fan suitable for your space. This guarantees your ceiling fan performs well and looks great in your space.
Secure Mounting Surface
Ensuring your concrete ceiling can support the weight of a ceiling fan is essential for safety and stability. Start by locating supporting beams or reinforced areas that can handle the load capacity of the fan and mounting bracket. Avoid installing in sections of the ceiling without adequate support, as this can cause the fan to become loose or fall. Use a stud finder or tap the ceiling to identify strong supporting beams. Once found, verify their load capacity to ensure they can bear the fan’s weight. Secure the mounting bracket directly to these beams or reinforced sections, not just the concrete surface. Proper support prevents accidents and ensures your ceiling fan remains safely mounted over time. Additionally, understanding the importance of proper support and reinforcement helps maintain the longevity and safety of your installation. Remember that load capacity is a key factor in choosing the right support structures to prevent potential hazards. For added stability, consider using anchor bolts designed specifically for concrete, which can provide extra security and peace of mind.

RACO RETRO-BRACE 936 1.5-in. Deep Ceiling Fan Box for Old Work 2.5-in. Knockouts, Old Work Electrical Box, Adjustable Brace, and Mounting Bracket for Ceiling Light Fixtures & Chandelier Fans
DESIGNED FOR RESTORATIONS: Our Hubbell RACO RETRO-BRACE 1.5-in. Deep Ceiling Fan Box for Old Work is specially designed…
As an affiliate, we earn on qualifying purchases.
As an affiliate, we earn on qualifying purchases.
Marking and Drilling Holes Into the Concrete
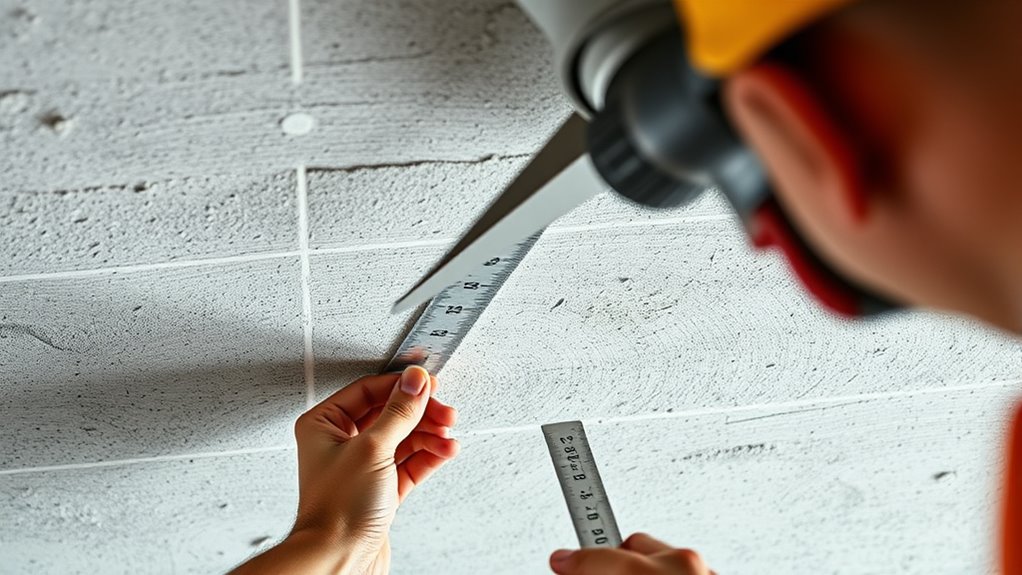
Start by selecting the exact spot for your ceiling fan, ensuring it’s centered and clear of obstacles. Use a level and marker to accurately outline where you’ll drill the holes. When drilling, apply steady pressure and choose the right bit to make clean, precise holes in the concrete. Incorporating imagination mobilizes mental potential can help you visualize the perfect placement and anticipate any challenges during installation. Remember to consider protective styling benefits to avoid damaging your existing ceiling structure during the process. Additionally, understanding HVAC system benefits can provide insight into how proper installation contributes to overall home comfort and efficiency.
Choosing the Right Spot
Before you mark and drill into the concrete ceiling, it’s essential to carefully select the best spot for your ceiling fan. Think about ventilation considerations—placing the fan where it promotes good airflow throughout the room. Also, consider aesthetic placement to ensure the fan complements your space and doesn’t look out of place. Visualize these key points:
- Positioning the fan centered in the room for balanced airflow
- Avoiding locations near beams or fixtures that could interfere with mounting
- Choosing a spot that aligns with existing electrical wiring or easy access for wiring installation
Proper Marker Placement
To guarantee your ceiling fan is securely mounted, accurate marker placement is crucial. Begin by positioning your fan’s mounting bracket according to your marked spot, ensuring it’s level for proper decorative accents. Use a pencil or chalk to mark the drill points through the bracket’s holes. Double-check these marks for accuracy, as precise placement impacts energy efficiency and stability. Correctly marking the holes prevents misalignment and unnecessary drilling, saving you time and effort. Keep in mind that well-placed holes contribute to a clean look, matching your ceiling’s aesthetic. Before drilling, verify your marks one last time. Proper marker placement is essential for a secure, long-lasting installation that enhances your room’s decor while maintaining ideal energy efficiency.
Drilling Techniques and Tips
Once you’ve marked the drill points accurately, it’s time to focus on drilling into the concrete ceiling. Start by selecting the right drill bit—preferably a carbide-tipped masonry bit designed for concrete. This ensures clean, efficient holes and reduces wear on your drill. Keep dust management in mind by attaching a shop vacuum nearby or using a dust shroud to catch concrete debris as you drill. Apply steady pressure without forcing the drill, allowing the bit to do the work. Remember to periodically withdraw the bit to clear dust and debris, preventing overheating. Visualize the process:
- Watching concrete dust collect in your vacuum or shroud
- Hearing the steady grind of the drill as it bites into the concrete
- Feeling the drill’s vibration lessen as the hole deepens
- Understanding the importance of using appropriate drilling techniques to protect your equipment and ensure safety
- Recognizing the benefits of digital literacy in modern home improvement projects to access online tutorials and resources
Additionally, staying aware of refrigeration cycle principles can help you troubleshoot any unexpected issues with your tools or setup, ensuring a smoother project.
LPHUMEX Universal Ceiling Fan Remote Control Kit, 3-in-1 AC Motor Ceiling Fan Light Timing & Speed Remote, for Hunter/Harbor Breeze/Westinghouse/Honeywell/Other Ceiling Fan lamp
☞Easy Installation – Installation of the Universal Ceiling Fan Remote Controls Kit is a breeze and the looks…
As an affiliate, we earn on qualifying purchases.
As an affiliate, we earn on qualifying purchases.
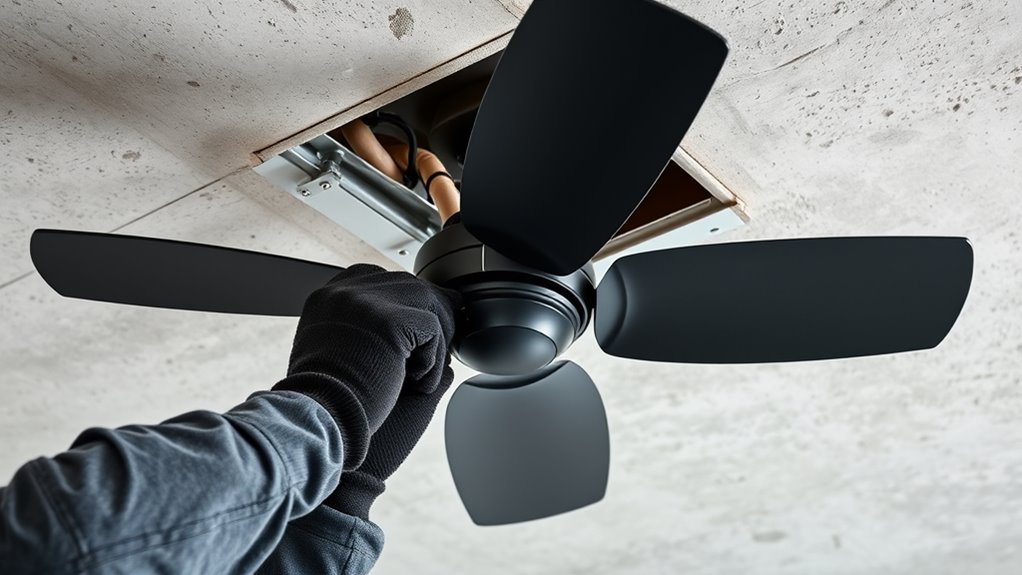
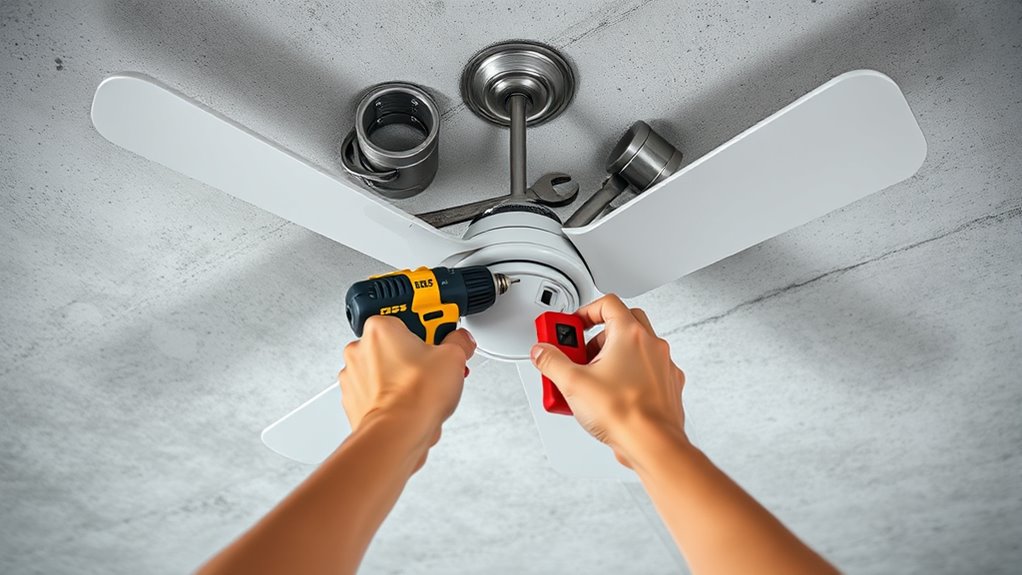
Installing Anchors and Securing the Mounting Bracket
Since concrete is a hard, dense material, you’ll need to use the appropriate anchors to securely attach the mounting bracket for your ceiling fan. Start with anchor installation by selecting the right type of anchors—expansion anchors or sleeve anchors work best for concrete. Use a concrete drill bit to create holes that match your anchors’ size, applying steady pressure and letting the drill do the work. Once the holes are drilled, insert the anchors firmly into the concrete, ensuring they sit flush. Choosing the right anchors is essential for a secure installation and long-term safety. Next, position the mounting bracket over the anchors and secure it with heavy-duty bolts. Tighten the bolts firmly to ensure the bracket is stable. Proper anchor installation guarantees your ceiling fan will stay securely mounted and operate safely. Environmental considerations should also be taken into account to prevent damage to surrounding surfaces during installation.
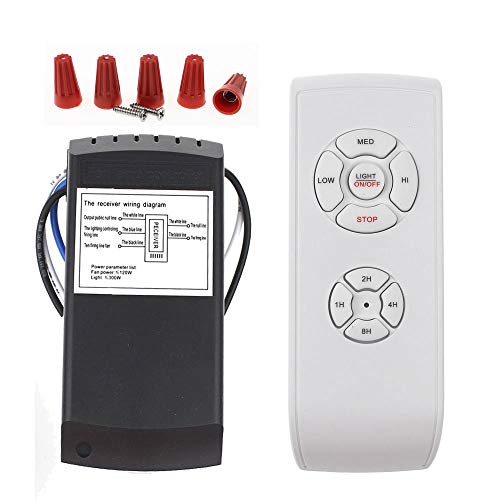
Wiring the Ceiling Fan for Safe Operation
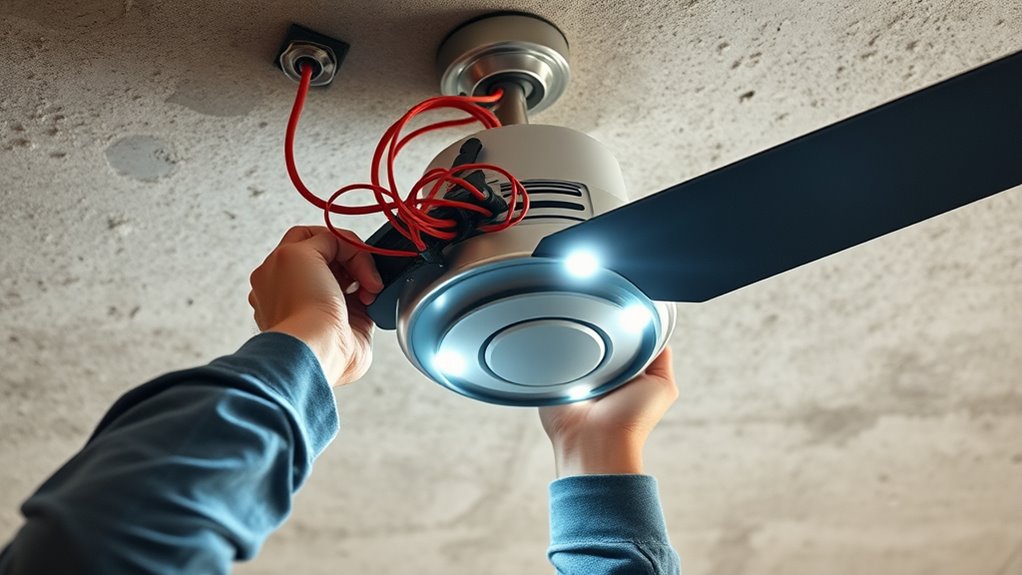
Before starting to wire your ceiling fan, turn off the power at the circuit breaker to guarantee safety. Visualize carefully connecting the wires: the ground wire, switch wiring, and the fan’s electrical leads. Confirm the ground wire is securely attached to the grounding screw in the mounting bracket, providing a safe path for electrical faults. Next, connect the fan’s switch wiring to the house wiring, matching color-coded wires—typically black to black (hot), white to white (neutral). Use wire nuts to secure each connection, ensuring no exposed copper. Imagine testing your work with a voltage tester before restoring power. Proper wiring guarantees safe operation and prevents electrical hazards. Take your time, double-check each connection, and make sure everything is tight and correctly insulated. Understanding electrical safety and proper wiring techniques is essential to prevent hazards and ensure the longevity of your ceiling fan. Familiarizing yourself with electrical wiring standards can further help ensure a secure setup.
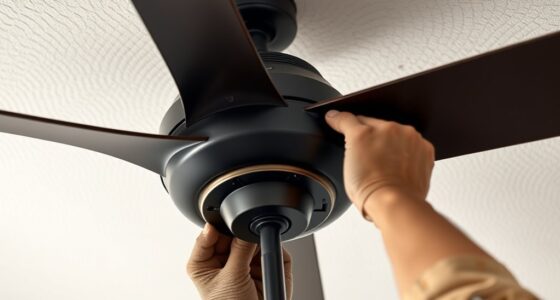
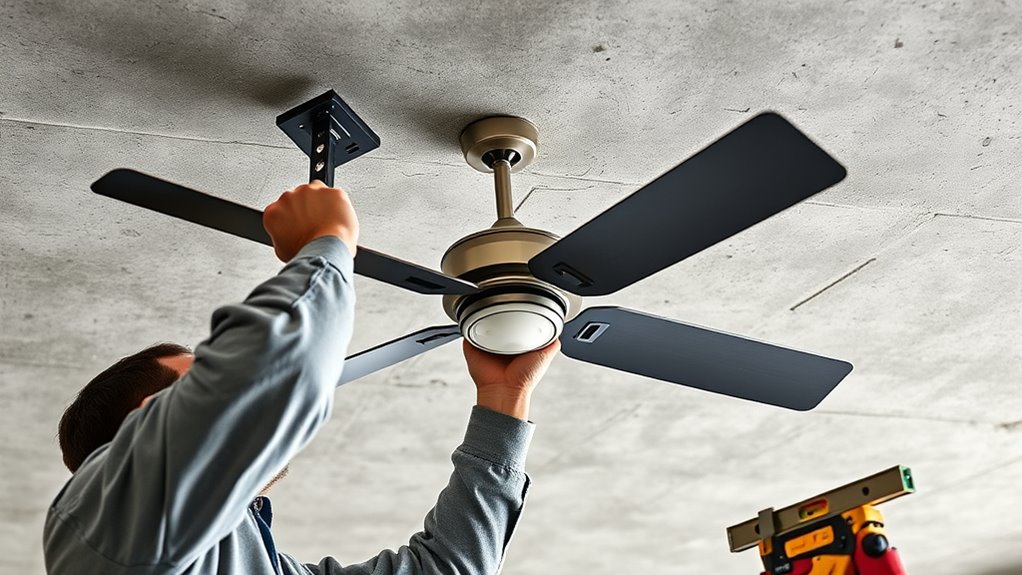
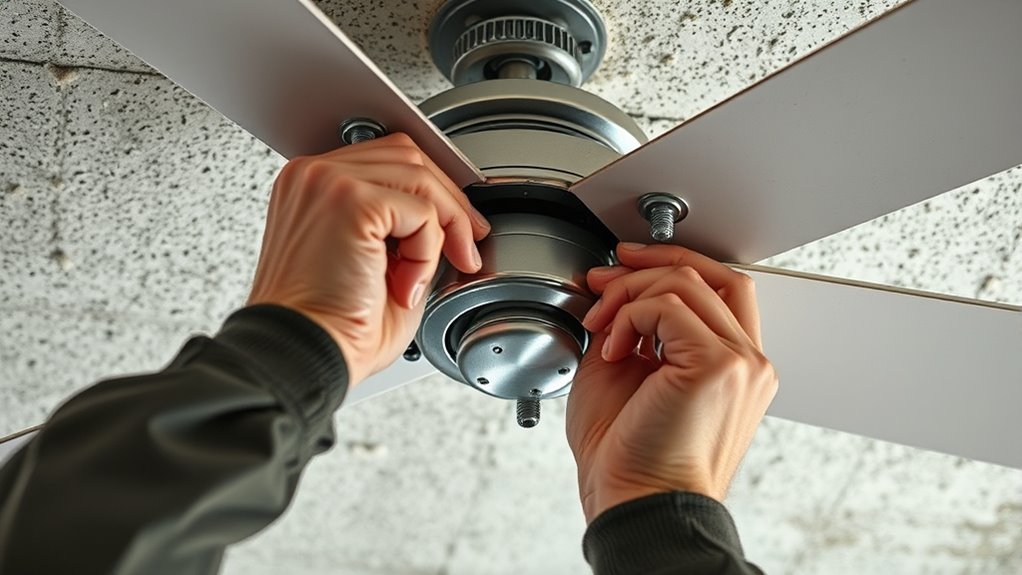
Mounting the Fan and Attaching Blades
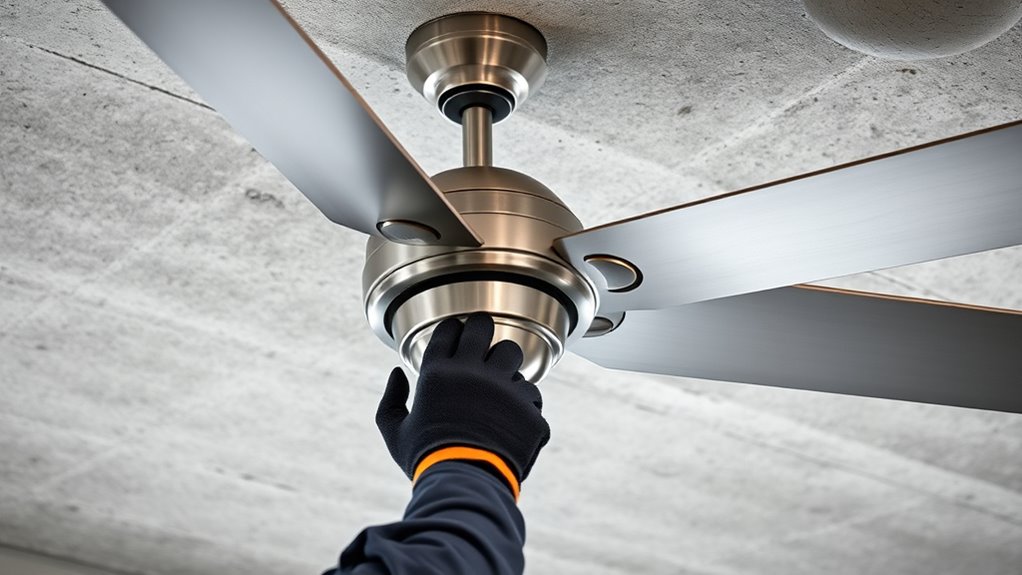
After confirming your wiring is secure and safe, you can now focus on mounting the fan and attaching the blades. Start by securely fastening the fan motor to the ceiling bracket, ensuring it’s stable. When attaching the blades, follow the manufacturer’s instructions carefully. Proper fan blade balancing is essential to prevent wobbling, so check each blade’s weight and make adjustments if needed. Use the table below to understand key aspects:
| Step | Important Tip | Tool Needed |
|---|---|---|
| Mounting the fan | Secure mounting for safety | Drill, screws |
| Attaching blades | Balance blades before final tightening | Fan blade balancing kit |
| Installing remote setup | Test remote control functions | Remote, receiver |
| Final check | Ensure fan operates smoothly | None |
Balancing blades and setting up the remote control guarantee ideal performance and quiet operation. Proper installation techniques contribute significantly to the overall safety and efficiency of your ceiling fan.
Final Checks and Testing the Ceiling Fan

Once you’ve completed the installation and setup of your ceiling fan, it’s important to perform thorough final checks to confirm everything operates correctly. Start by inspecting the wiring connections to verify they follow electrical codes and are secure. Turn on the fan to test its operation at various speeds, listening for unusual sounds that might indicate loose components. Confirm that the fan blades are balanced and rotate smoothly without wobbling. Check that the switch and remote (if applicable) respond properly. Remember to prioritize safety precautions; turn off power before making adjustments. Finally, ascertain that all screws and mounting hardware are tight, and the fan is firmly attached. These steps help ensure your ceiling fan functions safely and efficiently for years to come.
Frequently Asked Questions
Can I Install a Ceiling Fan on a Concrete Ceiling Myself?
You can install a ceiling fan yourself if you’re comfortable with DIY projects, but consider DIY considerations like securing proper tools and safety gear. Confirm your ceiling fan is compatible with your concrete ceiling’s structure and electrical setup. You’ll need to use appropriate anchors and possibly a mounting bracket designed for concrete. If you’re unsure or inexperienced, consulting a professional can prevent potential issues and ensure safe, secure installation.
What Safety Precautions Should I Take When Working With Concrete Ceilings?
Think of working on a concrete ceiling as dancing on a sturdy stage—you need to stay safe. Always prioritize electrical safety by turning off power before starting. Wear proper personal protective equipment like goggles, gloves, and a dust mask to shield yourself from debris and dust. Use a sturdy ladder, and ensure it’s stable. Remember, safety isn’t just a step—it’s the rhythm that keeps you safe while working overhead.
How Do I Determine the Weight Capacity of the Concrete Ceiling?
You determine the weight capacity of your concrete ceiling by checking its concrete strength, which influences how much weight it can safely hold. Consult a structural engineer or review building codes for specific load limits. Also, assess your mounting hardware’s weight rating, as it must match or exceed the fan’s weight. Properly anchoring with suitable anchors guarantees safe support, preventing damage or accidents.
Is It Necessary to Hire a Professional for This Installation?
You might wonder if you need a professional for this project. While DIY can save money, it’s easy to make pitfalls that compromise safety and stability. Hiring a professional offers expertise, guarantees proper installation, and reduces risks. With complex tasks like mounting on a concrete ceiling, professional skills help avoid damage and ensure your fan works safely. Ultimately, investing in expert help can prevent costly mistakes and give you peace of mind.
What Tools Are Best for Drilling Into Concrete Efficiently?
You might wonder what tools work best for drilling into concrete efficiently. Turns out, concrete drill bits are essential for this task—they’re designed to cut through tough surfaces. Pair them with a reliable hammer drill, which combines rotary motion with a pounding action, making the job easier. Using these tools together guarantees you drill clean holes quickly, saving you time and effort when working on concrete surfaces.
Conclusion
Now that you’ve installed your ceiling fan on a concrete ceiling, you’ve accomplished something truly monumental—like moving mountains! With your tools and patience, you’ve turned a challenging task into a breeze. Enjoy the cool comfort and silent breeze it provides, transforming your space into a sanctuary of relaxation. Remember, your skill and determination are nothing short of legendary. Sit back, relax, and bask in the glory of your incredible DIY victory!