Guides
How Many Blades Do US Ceiling Fans Have Compared to Indian Fans?
Mystery surrounds the number of blades on US and Indian ceiling fans, impacting airflow and cooling efficiency – delve into the differences for optimal cooling comfort.
US ceiling fans typically have 3 to 5 blades, while Indian fans usually feature 3 blades. The number of blades on US fans can vary, with some opting for 4 or 5 blades to enhance airflow and circulation. In contrast, Indian fans prioritize functionality, aiming for optimal airflow efficiency to provide a strong cooling effect. Factors like regional climate demands and design preferences influence the blade configuration, impacting air movement and power consumption. Understanding these distinctions can help homeowners choose the right fan for their needs, ensuring efficient airflow and cooling performance.
Key Takeaways
- US fans typically have 3 to 5 blades, while Indian fans usually have 3 blades for optimal airflow.
- US fans may opt for 4 or 5 blades for enhanced airflow and aesthetics.
- Indian fans prioritize functionality, with some high-speed models featuring 4 or 5 blades.
- US fans balance airflow and design, while Indian fans focus on airflow efficiency.
- Blade configuration is influenced by regional climate demands and design preferences in both countries.
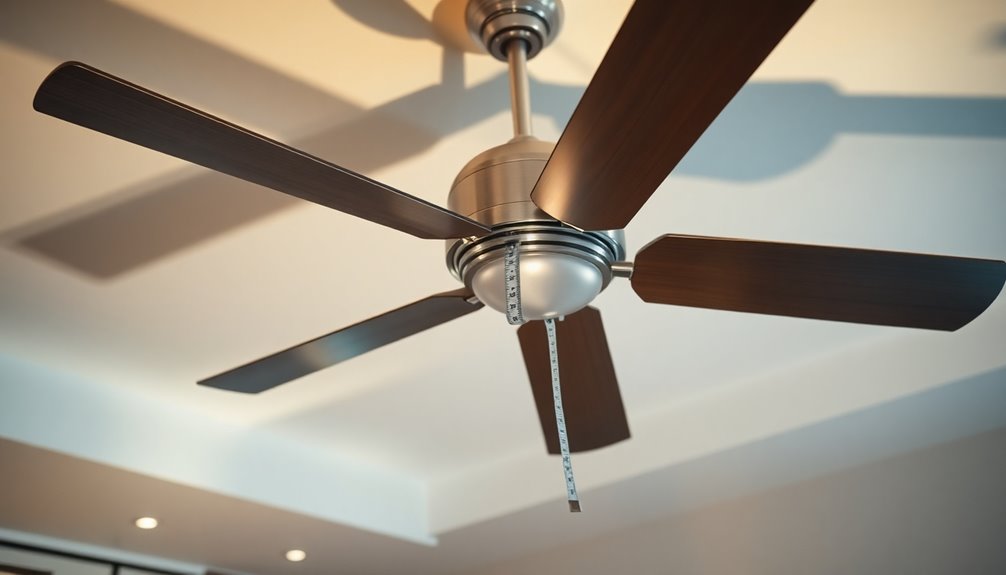
Average Number of Blades on US Fans
On average, US ceiling fans typically feature 3 to 5 blades, with many opting for 4 or 5 blades for enhanced airflow and circulation. The number of blades on a ceiling fan can impact its performance and efficiency. More blades generally mean more air circulation, making the room feel cooler.
Some high-end US fans may have 3 blades for a sleek and modern look, catering to those who prioritize style. When choosing a fan, consider the room size and ceiling height to determine the optimal number of blades for efficient airflow.
Fans with more blades are designed to work well in conjunction with air conditioning systems, ensuring a comfortable environment. Whether you prefer a classic 4-blade design or a more contemporary 5-blade option, US ceiling fans offer a variety of choices to suit your aesthetic preferences and cooling needs.
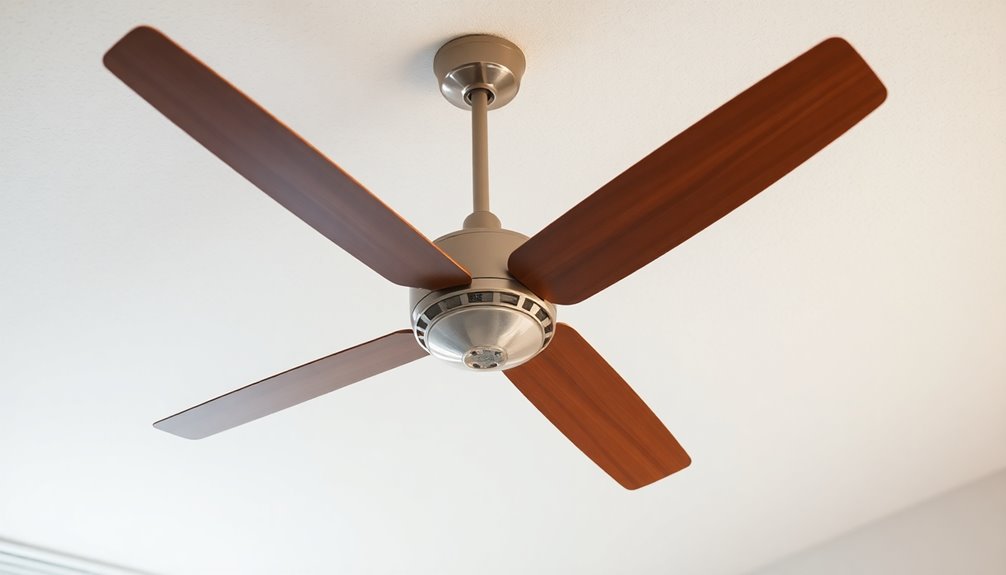
Average Number of Blades on Indian Fans
When comparing the average number of blades on US ceiling fans to Indian fans, it can be observed that Indian ceiling fans typically feature 3 blades for optimal airflow and cooling efficiency. Indian fans are designed with functionality in mind, focusing on providing a strong cooling effect without necessarily lowering room temperature. The choice of three blades strikes a balance between airflow and power consumption, ensuring an effective cooling solution for the Indian climate.
While some high-speed Indian fans may have 4 or 5 blades to enhance airflow, the standard remains at 3 blades for most models. Unlike some US fans that prioritize decorative features like fancy lights, Indian fans concentrate on maximizing airflow to deliver a refreshing breeze. This emphasis on functionality over aesthetics showcases the practical approach Indian manufacturers take in designing ceiling fans tailored to the needs of Indian households.
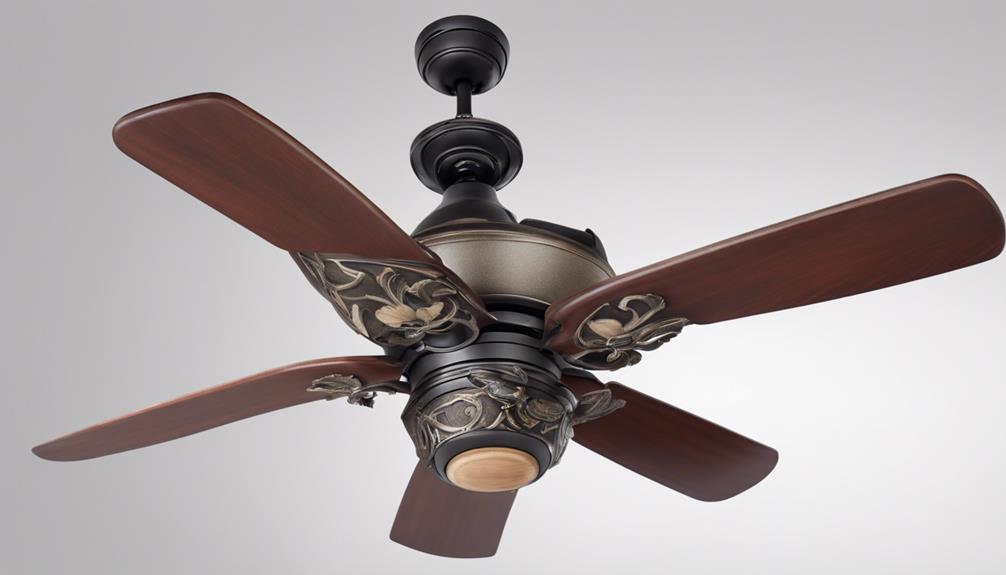
Factors Influencing Blade Configuration
Factors influencing the configuration of blades in ceiling fans include regional climate demands and design preferences. In the US, where ceiling fans commonly have 3 to 5 blades, the focus is on balancing airflow and aesthetics. This is especially important in rooms with lower ceilings, where more blades help circulate air efficiently.
On the other hand, Indian fans typically feature 3 blades to maximize airflow for a cooling effect. The amount of air movement and power consumption are impacted by the number of blades, with American fans often designed to complement air conditioning systems. Indian fans prioritize airflow efficiency over decorative elements, reflecting the emphasis on cooling in warmer climates.
Understanding these factors can help homeowners choose the right fan for their needs, whether it's enhancing air circulation or maximizing cooling effectiveness. Ultimately, the design of ceiling fan blades plays a crucial role in determining the fan's performance in terms of airflow and comfort.
Impact of Blade Design on Airflow
Blade design significantly influences the airflow efficiency and cooling performance of ceiling fans. When considering the impact of blade design on airflow, it's essential to understand how it affects the overall effectiveness of the fan motor.
Here are three key points to consider:
- Blade Pitch: The angle of the blades plays a crucial role in determining how much air the fan can circulate. A steeper blade pitch can move more air but may require a more powerful fan motor to maintain efficiency.
- Blade Shape: The shape of the blades can also impact airflow. Curved blades are often more efficient at moving air compared to flat blades, as they can create better air circulation within a room.
- Blade Number: The number of blades on a fan can affect airflow and noise levels. While more blades can provide better air distribution, they may also create additional drag on the fan motor, potentially reducing overall efficiency.
Considering these factors can help you choose a ceiling fan with the right blade design for optimal airflow and cooling performance.
Comparison of Blade Designs and Efficiency
US ceiling fans typically feature 3 to 5 blades, emphasizing air conditioning support and decorative aspects. When comparing the blade designs and efficiency of US and Indian ceiling fans, it's essential to note the focus on airflow and cooling effects. Here's a breakdown of the key differences:
Aspect | US Ceiling Fans | Indian Ceiling Fans |
---|---|---|
Blade Designs | Blades designed for efficiency and airflow support | Blades configured for maximum airflow and cooling |
Efficiency | Emphasizes complementing air conditioning | Prioritizes higher airflow and cooling effect |
US fans are crafted to efficiently generate airflow and work in tandem with air conditioning systems, whereas Indian fans prioritize maximum airflow and evaporative cooling, ideal for hotter climates. By understanding these distinctions in blade designs and efficiency, consumers can choose the ceiling fan that best suits their needs and climate conditions.
Frequently Asked Questions
Why Do Indian Fans Have 3 Blades?
In Indian fans, the 3-blade design is specifically crafted to enhance air circulation and maximize cooling efficiency. This configuration optimizes airflow and power consumption, ensuring effective cooling without compromising room temperature.
The deliberate choice of 3 blades in Indian fans prioritizes functionality and efficiency over additional features like reverse rotation or fancy lights. The design is tailored to suit hot climates, providing a cooling effect that's essential for comfort in Indian households.
Why Do American Fans Have 5 Blades?
American fans typically have 5 blades for enhanced aesthetic appeal and energy efficiency. The additional blades not only look stylish but also help in distributing air more evenly, especially in rooms with lower ceilings.
This design choice balances functionality and decoration, making these fans popular in the U.S. The 5-blade configuration also contributes to better cooling efficiency, highlighting the focus on both design and performance in American ceiling fans.
What Is the Size of Ceiling Fan Blade in India?
In India, ceiling fan blades typically range from 1200mm to 1400mm in size. They commonly feature 3 blades to maximize efficiency and cooling effects.
The design prioritizes functionality over decorative aspects. The larger blade size aids in generating higher airflow for hot climates.
This emphasis on airflow and cooling efficiency sets Indian fans apart, showcasing a blend of practicality and design aesthetics tailored for optimal performance.
Does the Number of Blades on a Ceiling Fan Make a Difference?
Having the right number of blades on a ceiling fan can affect energy efficiency, aesthetics, air circulation, and noise levels. More blades may enhance airflow but could also increase noise and reduce efficiency.
Understanding these aspects can help in selecting a fan that suits your needs. It's crucial to strike a balance between blade count and performance to ensure optimal comfort and functionality in your living space.
What is the Standard Number of Blades for Ceiling Fans in Different Countries?
In the United States, the standard ceiling fan blade count is generally four or five. However, in countries like India and Australia, the standard number of ceiling fan blades is often three. The blade count can affect the fan’s performance and air circulation, so it’s important to consider when purchasing a ceiling fan.
Conclusion
In conclusion, when it comes to the number of blades on ceiling fans, the US tends to have more blades than Indian fans.
This difference in design can impact airflow and efficiency.
So, next time you're shopping for a fan, consider the number of blades and how it might affect the cool breeze in your home.
Happy fan hunting!
Guides
Can You Replace Ceiling Fan Blades With Longer Ones
By replacing ceiling fan blades with longer ones, you may enhance airflow, but potential risks await—discover what you need to know before making changes.
You can replace ceiling fan blades with longer ones, but it's not without risks. Longer blades can stress the motor, leading to overheating, noise, or vibrations. They may also create imbalances that affect airflow efficiency. It's essential to stick to the manufacturer's specifications when considering modifications. Ignoring these guidelines could void warranties and cause safety hazards. Also, installing longer blades often requires new holes, complicating the process. Make sure you have the right tools and check your fan's performance after installation. If you're curious about the best practices and options for improving airflow, there's more to explore.
Key Takeaways
- Replacing ceiling fan blades with longer ones is generally not recommended due to potential motor stress and overheating risks.
- Longer blades may require modifications like drilling new holes, which can impact balance and performance.
- Increased weight and size of longer blades can lead to vibrations, noise, and motor burnout during extended use.
- Always consult the manufacturer's specifications before attempting any blade replacements to ensure safety and warranty coverage.
- Monitor motor temperature and airflow after installation to ensure optimal performance and identify any potential issues.
Understanding Ceiling Fan Blade Sizes
When you're replacing ceiling fan blades, understanding their sizes is fundamental to secure peak performance. Ceiling fan blades come in various lengths, with common options being 42 inches and 52 inches.
When you consider replacing your blades, it's important to select ones that match the size of your existing blades. If you choose blades that are too long, you risk stressing the fan motor, which can lead to overheating or malfunction.
While longer blades might seem like they could improve air distribution, they don't greatly enhance airflow; the efficiency of the motor plays a more critical role. Manufacturers often advise against using longer blades than originally designed for your fan, underscoring the importance of sticking to specified blade sizes for safety and ideal performance.
Modifying blade size by drilling new holes for attachment can create balance issues, leading to unwanted noise and vibrations.
It's essential to confirm that your new ceiling fan blades are precisely aligned and securely attached during installation. By understanding ceiling fan blade sizes, you can make informed choices that keep your fan running smoothly and efficiently.
Factors to Consider for Replacement
Before replacing your ceiling fan blades, it's vital to take into account several key factors to guarantee proper functionality and safety. First, check your fan's manufacturer's specifications. Many brands, like Hampton Bay, warn against using longer blades than originally designed for your fan model. Doing so can strain the motor and lead to overheating or failure.
When you consider longer blades, you might need to drill new holes for alignment, which can affect the fan's balance. A poorly balanced fan can wobble or create noise, detracting from its efficiency.
Additionally, while longer blades can enhance airflow, they also add weight, which could compromise motor efficiency if the motor isn't designed for it.
It's wise to maintain the same weight and size as your original blades to guarantee peak performance. If you're uncertain or considering modifications, consult ceiling fan specialists or manufacturers.
This step is essential not only for safety but also to avoid voiding any warranties. Remember, making informed decisions will help keep your ceiling fan running smoothly and safely, so weigh these factors carefully before proceeding.
Importance of Manufacturer Specifications
When you're replacing ceiling fan blades, sticking to the manufacturer's specifications is essential.
Not only does this guarantee peak performance, but it also keeps you safe from potential issues like overheating or motor malfunctions.
Ignoring these guidelines can even void your warranty, so always double-check before making any changes.
Adhering to Guidelines
Adhering to manufacturer specifications is vital for anyone considering replacing ceiling fan blades. When you replace the blades, it's important to stick to the recommended sizes. Manufacturers often advise against using longer blades than specified, as this can lead to motor strain and potential malfunction.
Straying from these guidelines not only jeopardizes your fan's performance but can also void your warranty, leaving you responsible for costly repairs.
Additionally, extended blade sizes can greatly alter the fan's airflow and overall efficiency, which are fine-tuned for the original blade dimensions. If you choose incorrectly, you might face issues like wobbling and increased noise, compromising the fan's structural integrity.
To avoid these pitfalls, always consult the manufacturer or a ceiling fan specialist before making any changes. They can provide valuable insights into the proper blade sizes and guarantee adherence to safety codes.
Safety and Performance Risks
Ignoring manufacturer specifications when replacing ceiling fan blades can lead to significant safety and performance risks. If you opt for longer blades than recommended, you might strain the motor, which can cause overheating and eventual malfunction.
The manufacturer's guidelines are there for a reason—they emphasize keeping blade size compatible to maintain the fan's structural integrity and performance.
Using longer blades may also result in an unbalanced fan, leading to excessive noise and vibration. Over time, this can further damage the motor and create unsafe conditions.
Additionally, altering the blade size can void any warranties you might have, highlighting the importance of sticking to manufacturer specifications for both safety and continued coverage.
Before making any changes, it's essential to consult with manufacturers or professionals. They can help guarantee that you meet safety and performance standards.
Remember, sticking to the recommended blade size isn't just about aesthetics; it's about preserving the functionality and longevity of your fan.
Don't take unnecessary risks—following the guidelines will keep your ceiling fan running smoothly and safely.
Risks of Using Longer Blades
Using longer blades than recommended can put a serious strain on your fan's motor, leading to overheating and potential failure.
You'll also need to take into account balance and stability; improper alignment can cause annoying vibrations and noise.
It's essential to weigh these risks before making any changes to your ceiling fan blades.
Motor Strain Risks
Longer ceiling fan blades might seem like a simple upgrade for improved air circulation, but they can impose significant strain on the fan motor. When you use longer blades, you're likely to increase the load on the motor, which can lead to overheating and even burnout during extended use.
Manufacturers like Hampton Bay explicitly advise against this modification to avoid motor strain risks and guarantee the durability of the fan.
Additionally, the extra weight of longer blades can negatively impact the fan's performance. This added weight may create vibrations or imbalances that put further stress on the motor, increasing the likelihood of malfunction.
If you alter the blade size beyond the manufacturer's specifications, you might also void any existing warranties, leaving you liable for any cumulative damage to the motor.
It's essential to monitor the motor temperature when using longer blades. Overheating can pose serious hazards, including potential fire risks.
Balance and Stability Issues
Modifying a ceiling fan by adding longer blades can lead to significant balance and stability issues. If the longer blades aren't properly aligned with the existing blade arms, you'll likely notice wobbling or noise during operation. This imbalance can't only be annoying but can also put extra strain on the fan motor.
Over time, this strain may cause overheating and eventually lead to motor failure, especially if your fan wasn't designed to handle the added weight.
Moreover, changing the blade size affects the fan's center of gravity, requiring you to perform careful adjustments and balance checks to guarantee stable operation without vibrations.
Manufacturer specifications typically suggest specific blade sizes for ideal airflow and efficiency, so deviating from these guidelines can compromise both performance and safety.
To mitigate risks, it's essential to monitor the fan's performance and motor temperature after installing longer blades. Overheating can pose fire hazards and lead to malfunction.
Keeping all these factors in mind will help you maintain the balance and stability of your ceiling fan, making sure it operates safely and efficiently.
Tools Needed for Blade Replacement
When replacing ceiling fan blades, you'll need a few essential tools to guarantee the process goes smoothly. First, grab a screwdriver, as it's important for removing and installing the screws that secure the fan blades to the motor and housing.
You'll also need a ladder or step stool to safely reach the ceiling fan, especially if it's mounted high up.
Next, don't forget a measuring tape. This tool is essential for ensuring that your new blades match the required dimensions for proper fit and compatibility with your fan.
Before you start the replacement, use a cleaning cloth or duster to remove any dust and debris from the fan blades and housing. This step will help maintain your fan's performance and appearance.
If your new blades require drilling new holes for installation, you'll need a drill and the appropriate drill bits.
Make sure you have everything ready before you begin the replacement process. With these tools in hand, you'll be well-equipped to tackle the task of replacing your ceiling fan blades successfully.
Step-by-Step Replacement Process
Start by making sure you've got your tools ready and your workspace clear.
Grab a ladder or step stool to safely access your ceiling fan. Before you begin, clean the existing blades to make it easier to spot the attachment points for removal.
Carefully unscrew the existing blades from the fan motor, keeping the screws organized for easy reinstallation. It's vital to guarantee that your new fan blades are the same size as the old ones to avoid any motor strain or overheating issues.
Once you've removed the old blades, take your new fan blades and install them one at a time using the existing screws.
Make sure each blade is securely attached and check for stability and alignment as you go along.
After you've installed all the new fan blades, give everything a once-over to confirm everything looks good and is properly fitted.
This step is essential to prevent wobbling or noise once you start using the fan again.
With everything in place, you're now ready to test your fan's performance in the next step!
Testing Your Ceiling Fan After Change
After you've replaced the ceiling fan blades, it's essential to test the fan thoroughly.
Start by running it at low, medium, and high speeds to check for smooth performance and any unwanted wobbling.
Pay attention to any unusual noises, as they could indicate a problem with the installation or blade balance.
Performance Evaluation Post-Installation
Once you've swapped out the ceiling fan blades, it's crucial to put your new setup to the test. Start by checking the fan at various speeds. Note improvements in airflow and rotation speed, and keep an eye on any wobbling or unusual noise, which can indicate balance issues.
Here's a quick checklist to guide your evaluation:
Test Element | Action | Observation |
---|---|---|
Speed Test | Run the fan at low, medium, and high speeds | |
Motor Temperature | Check the motor temperature after prolonged use | |
Airflow Distribution | Compare airflow in the room with previous performance |
After testing, verify the motor isn't overheating, as longer blades can put extra strain on it. It's also important to note that any unusual noise could indicate mechanical failure, which may lead to more significant issues. Evaluate the overall airflow distribution to see if it meets your expectations. Finally, record any changes in noise levels. The goal is to achieve a quieter, more efficient fan experience with your new blades. By following these steps, you'll gain a clear understanding of your ceiling fan's performance post-installation.
Noise and Vibration Check**
It's important to conduct a thorough noise and vibration check following the blade replacement. This step guarantees your ceiling fan operates safely and efficiently. Here's what you should focus on:
- Test the fan at low, medium, and high speeds.
- Listen for any rattling or grinding noises.
- Observe the fan's oscillation for excessive wobbling.
- Check that the blades are securely attached and aligned.
- Consider using a balance kit if vibrations are present.
As you test the fan, monitor it closely. Any unusual noises or vibrations can indicate an imbalance or that the new blades may be too heavy for the motor.
Rattling sounds often suggest improper mounting, while grinding noises might point to friction issues. Watch for wobbling, as this can lead to serious mechanical problems or safety concerns.
If you notice any vibrations, don't ignore them. A balance kit can help adjust the blade position, reducing both noise and instability.
Alternative Options for Improved Airflow
While simply replacing ceiling fan blades might seem like a quick fix for improving airflow, there are several alternative options that can yield better results.
For instance, installing a larger ceiling fan with a steeper blade pitch can greatly enhance airflow in your room. Instead of just swapping blades for longer ones, consider lowering the mounting height of your existing fan; this can improve air circulation and make it more effective at distributing cool air throughout the space.
If you're dealing with a larger area, utilizing multiple fans can offer more consistent cooling than relying on a single fan with modified blades.
Regular maintenance is also essential—cleaning your fan blades and ensuring they're balanced can optimize performance without needing to replace the blades at all. Additionally, consider investing in the best home security systems to ensure that your home remains safe and comfortable while you enjoy improved airflow.
Finally, if you're looking for a more permanent solution, explore new fan models specifically designed for larger spaces. These models can provide better airflow solutions than attempting to modify current fan blades.
Expert Recommendations for Safety
Safety should be your top priority when replacing ceiling fan blades. It's vital to follow expert recommendations to guarantee a safe and efficient operation. Here are some key points to take into account:
- Always consult your ceiling fan manufacturer before making changes.
- Choose blades that match the original specifications to prevent motor overload.
- Limit new blade length to no more than 2-3 inches longer than the originals.
- Verify proper installation by securing blades tightly and checking for wobbling.
- Regularly monitor the fan's performance for signs of motor strain or overheating.
Ignoring these safety guidelines can lead to serious hazards, including overheating and potential fire risks. Experts strongly advise sticking to blades that adhere to the fan's original design to maintain balance and avoid additional strain on the motor.
Proper installation is vital; loose blades can create dangerous wobbling. Additionally, after replacement, keep an eye on your fan's performance—any unusual noises or excessive heat could signal a serious issue.
Customer Experiences and Insights
Gathering insights from customers who've replaced their ceiling fan blades reveals a wealth of information that can guide your decision-making. Many users primarily inquire about blade replacements for aesthetic upgrades, but they often express concerns regarding airflow efficiency and noise levels.
You'll find that a significant number of satisfied customers—7,588 to be exact—report positive experiences specifically about their fan blade replacement inquiries, highlighting a strong service reputation.
Customer experiences also show that 12,024 individuals shared insights on the effectiveness of these modifications. You'll notice that feedback often emphasizes improved airflow and reduced noise, which are critical factors in your overall comfort.
High customer retention rates suggest that people trust the services that assist with ceiling fan modifications, indicating reliability.
With a staggering 169,357 satisfied customers seeking guidance on ceiling fan blade modifications, it's clear there's a robust demand for this kind of home improvement. Engaging with this wealth of customer experiences can help you make an informed choice, ensuring your ceiling fan not only looks great but functions efficiently too. Additionally, many customers recommend considering the impact of airflow efficiency when selecting new blades to maximize performance.
Frequently Asked Questions
Do Longer Ceiling Fan Blades Work Better?
Longer ceiling fan blades might seem like they'd work better, but that's not always the case.
While they can provide wider air distribution, they don't necessarily improve airflow without a strong motor. You could end up straining the motor, risking overheating or even malfunction.
Plus, if you're considering modifications to fit those blades, you might compromise the fan's balance.
Sticking to the manufacturer's recommendations usually guarantees peak performance and longevity.
Can You Just Change the Blades on a Ceiling Fan?
Yes, you can change the blades on a ceiling fan, but you need to guarantee they match the original size.
Using blades that are too long can stress the motor and lead to issues like overheating.
Always check your fan's manual for compatibility and installation instructions, as proper alignment is essential to avoid wobbling and noise.
What Is the Difference Between a 42 Inch and 52 Inch Ceiling Fan?
Choosing between a 42-inch and a 52-inch ceiling fan is like picking a brush for your canvas.
The 42-inch fan's more compact design suits smaller rooms, offering gentle airflow.
On the other hand, the 52-inch fan sweeps across larger spaces, providing a stronger breeze and a bolder presence.
If you want efficient air movement and style, consider the dimensions of your room before making your choice.
Is a 5 Blade Ceiling Fan Better Than a 3 Blade?
When you compare a 5-blade ceiling fan to a 3-blade model, you'll likely notice several advantages.
The 5-blade fan provides better airflow and quieter operation, thanks to the increased number of blades distributing the load. It also tends to wobble less, enhancing stability during use.
While it may consume slightly more energy, the improved airflow efficiency makes it suitable for larger spaces.
Plus, the traditional look of a 5-blade fan can add charm to your room.
Conclusion
In summary, replacing your ceiling fan blades with longer ones can feel like trying to fit a square peg in a round hole—it might not work as you hoped. Always keep manufacturer specifications in mind to guarantee safety and performance. If you're looking to improve airflow, consider other options like a more efficient fan design. Trust your instincts, and remember that sticking to guidelines can keep your space comfortable and breezy without unnecessary risks.
Guides
What Direction Should Ceiling Fan Go in Winter
Stay cozy this winter by learning the best ceiling fan direction; discover how a simple adjustment can enhance your heating efficiency!
In winter, you should set your ceiling fan to spin clockwise. This creates an updraft that pushes cold air up and circulates warm air down toward the floor, keeping your space cozy. By running the fan on a low speed, you can enhance comfort and even reduce heating costs by up to 15%. Just remember to turn off the fan first before changing the direction using the switch or remote. Making this simple adjustment can greatly optimize your heating efficiency, especially when temperatures drop. Stick around to learn more tips on maximizing your home's warmth and comfort this winter!
Key Takeaways
- Set your ceiling fan to rotate clockwise in winter to create an updraft and circulate warm air downwards.
- Clockwise rotation prevents drafts and reduces cold spots in your living space for enhanced comfort.
- Adjusting the fan direction can save up to 15% on heating bills by improving energy efficiency.
- Change the fan direction at the start of winter or during Daylight Savings Time for optimal warmth.
- Use low-speed operation for the fan to maintain a gentle updraft while consuming minimal energy.
Importance of Fan Direction in Winter
When winter rolls around, it's crucial to pay attention to your ceiling fan's direction. Setting your fan to rotate clockwise creates an updraft that pulls cold air upwards, allowing warm air trapped near the ceiling to be pushed down towards the floor. This simple adjustment greatly enhances your comfort during the colder months.
Running your ceiling fan at low speed in a clockwise direction can also boost energy efficiency. By maintaining a steady temperature, you can reduce heating costs by up to 10%, meaning you won't have to rely as heavily on your heating system.
You'll find that comfortable indoor temperatures can be achieved while allowing for lower thermostat settings.
Most ceiling fans come equipped with a ceiling fan switch that lets you easily reverse the fan's direction. This feature is typically located near the fan base, making it convenient to adjust as the seasons change.
How to Change Fan Direction
To change your ceiling fan's direction for winter, start by turning it off and letting it come to a complete stop for safety.
If you have a ceiling fan with a pull chain, locate the reverse switch on the fan body. Pull that switch to change the fan direction to clockwise.
For remote-controlled fans, make certain your remote is paired, turn off the fan, and press and hold the fan button until you see a light blinking. This indicates that the direction has been successfully changed to clockwise.
If you own smart fans, you can easily adjust the direction using compatible mobile apps or voice commands. This makes switching to clockwise rotation for winter a breeze.
Once you've changed the direction, don't forget to turn the fan back on at a low speed. This will guarantee warm air circulates downwards, making your space more comfortable.
By following these steps, you'll keep your ceiling fan energy efficient and maximize its effectiveness during winter months.
With the right adjustments, your ceiling fan can make a significant difference in your home's warmth and comfort.
Benefits of Clockwise Rotation
Changing your ceiling fan's direction to clockwise for winter offers several advantages that can enhance your home's comfort. By creating an updraft, the clockwise rotation pulls cold air upwards and pushes warm air down towards your living space. This helps distribute heat evenly throughout the room, reducing cold spots and maintaining a cozy environment.
Benefit | Description |
---|---|
Updraft | Pulls cold air up, allowing warm air to circulate. |
Energy Savings | Low speed operation can save up to 15% on heating bills. |
Heat Distribution | Guarantees even warmth, enhancing overall comfort. |
Comfort | Prevents drafts that can come from higher speeds. |
Easy Adjustment | Use the reversing switch to quickly change direction. |
With your ceiling fan set to low speed, you'll enjoy the gentle updraft that enhances warmth without creating discomfort. Not only does this setting optimize your heating needs, but it also allows you to lower your thermostat, leading to notable energy savings. Embrace the benefits of clockwise rotation and enjoy a more comfortable winter season in your home.
Timing for Direction Adjustments
Adjusting your ceiling fan's direction at the right time is essential for maximizing comfort and energy efficiency during winter.
To guarantee you're making the most effective adjustments, consider these key timing strategies:
- Daylight Savings Time: Change the ceiling fan direction during the shift to winter, specifically when you "fall back." This serves as a helpful reminder to adjust your fan to clockwise, which will circulate warm air effectively.
- Early Winter Adjustments: Set your fan to rotate clockwise at the beginning of winter. This will help maintain a cozy indoor temperature while allowing you to lower your thermostat settings, leading to energy savings.
- Preemptive Changes: Make certain your ceiling fan direction is adjusted before significant drops in temperature.
This proactive measure can contribute to energy savings of up to 10% on your heating costs.
Energy Savings From Proper Use
Making sure your ceiling fan runs in the right direction during winter can lead to significant energy savings. When you set your fan to spin clockwise, it creates a gentle updraft that pushes warm air, which collects near the ceiling, back down into the room.
This simple adjustment can save you up to 15% on heating bills by redistributing warm air more efficiently. By maintaining a consistent temperature without drafts, you'll feel more comfortable and can lower your thermostat settings by about 4 degrees Fahrenheit.
That's a smart way to cut costs! Plus, ceiling fans are energy-efficient, consuming only 15 to 90 watts, whereas traditional heating systems can use thousands of watts.
This means that while the fan blades are spinning gently, you're optimizing your heating system and reducing your reliance on costly heating methods.
Frequently Asked Questions
How Can You Tell if a Fan Is Going Clockwise or Counterclockwise?
To tell if your fan's spinning clockwise or counterclockwise, stand directly underneath it.
If you feel a gentle updraft of warm air, it's moving clockwise. Alternatively, if you notice a noticeable breeze, that means it's spinning counterclockwise.
You can also check the blade movement: clockwise blades will seem to move from the top right to the bottom left.
If you're unsure, use the reversing switch or your fan's app for confirmation.
What Direction Do I Rub My Ceiling Fan in the Winter?
You wouldn't believe how much a simple ceiling fan can change your winter experience!
To maximize warmth and comfort, you should set your fan to spin clockwise. This magical motion creates an updraft, pushing the warm air down where you need it most.
Just flip that reversing switch, and you're good to go! Running it on low speed keeps the cozy vibes flowing without any chilly drafts ruining your winter bliss.
What Is the Best Ceiling Fan Setting for Winter?
To optimize your comfort during winter, set your ceiling fan to rotate clockwise at a low speed.
This creates an updraft that pushes warm air down into your living space, enhancing warmth without creating drafts.
You'll notice a gentle breeze when standing beneath it, confirming effective heat distribution.
Do Ceiling Fans Make a Difference in Winter?
Do ceiling fans really make a difference in winter? Absolutely!
When you run your ceiling fan in the right direction, it helps circulate warm air that rises, keeping your space cozy and comfortable. By using the fan on a low setting, you can evenly distribute heat throughout the room without creating drafts.
This simple adjustment can save you money on heating costs while maintaining a pleasant indoor environment. It's a smart, energy-efficient choice!
Conclusion
So, as the winter chill sets in, remember to switch your ceiling fan to spin clockwise. This simple adjustment helps circulate warm air that rises, keeping your space cozy without cranking up the heat—like finding a hidden treasure in your attic! By using your fan wisely, you'll not only stay comfortable but also save on energy costs. It's a win-win! Don't let winter catch you off guard; make that change today and enjoy the warm vibes all season long.
Guides
How Much Is Ceiling Fan Installation
Budgeting for ceiling fan installation can be tricky; discover the factors that influence costs and how to save money on your project.
Ceiling fan installation usually costs between $144 and $353. This range can vary based on factors like whether you need new wiring or how complex the installation is. For example, standard fans might cost $50 to $300, while outdoor or specialized fans can push costs higher. If you're considering features like built-in lights or remote control, expect to add another $100 to $300 each. It's important to budget for possible extra expenses, too. If you're curious about ways to keep costs manageable, there's more information available to help you make informed decisions.
Key Takeaways
- Ceiling fan installation costs typically range from $144 to $353, with an average cost of $248.
- Complex installations or features like built-in lights can increase costs by $100-$300 each.
- Professional installation fees generally fall between $100 and $500, depending on complexity and local rates.
- Existing wiring can reduce installation costs to $100-$300, while new wiring may elevate costs to $500-$1,500.
- DIY installation can save $50 to $200 on labor but requires electrical knowledge and tools for safety.
Cost Overview of Installation
When considering the cost of ceiling fan installation, you'll find that prices typically range from $144 to $353, with the average installation landing around $248.
If you already have existing wiring, you might reduce your ceiling fan installation costs to between $100 and $300. However, if you need new wiring, be prepared to potentially spend up to $2,000.
Standard ceiling fans generally cost between $50 and $300 for installation.
But if you opt for more complex designs, like directional or hanging propeller fans, the average cost to install can rise to between $150 and $800.
Don't forget about additional features, either. Built-in lights or extra switches can add anywhere from $100 to $300 each to your overall installation cost.
For outdoor ceiling fans, installation prices can vary greatly, ranging from $70 to over $4,000, depending on specific requirements and specifications.
To guarantee you're getting the best results, consider hiring a professional installation service to handle the complexities, especially if you're dealing with new wiring or unique fan designs.
This way, you can enjoy your new ceiling fan without any hassle.
Factors Influencing Costs
When you're considering ceiling fan installation, labor rates can vary greatly based on where you live.
Additionally, the wiring requirements play an essential role in determining your overall costs, especially if you need new wiring.
Understanding these factors can help you budget more effectively for your installation project.
Labor Rate Variations
Understanding the variations in labor rates for ceiling fan installation can save you money and guarantee you get the best service. Labor costs typically range from $50 to $200, influenced by factors like the professional's expertise, the complexity of the installation, and the accessibility of the installation site. Urban areas usually see higher rates than rural regions.
Here's a breakdown of key factors affecting labor rates:
Factor | Impact on Labor Costs |
---|---|
Professional Expertise | Higher rates for licensed electricians |
Installation Complexity | More intricate setups increase costs |
Installation Site Accessibility | Difficult access raises labor fees |
Additional Features | Extra switches can add $100-$200 |
Bulk Installations | Discounts may apply for multiple fans |
Hiring a licensed electrician can elevate your costs, but their expertise guarantees safety and compliance. If you need multiple fans installed, scheduling them at once could help minimize overall labor costs by reducing travel fees. Understanding these variations allows you to make informed decisions and potentially save on your installation project.
Wiring Requirements Impact
Wiring requirements play an essential role in determining the overall cost of ceiling fan installation. If you're using existing wiring, your installation costs can be quite manageable, averaging between $100 and $300.
However, if new wiring is necessary, you might find yourself facing considerably higher expenses, ranging from $500 to $1,500, depending on the complexity of your project.
The presence of ceiling boxes is also important. If your home lacks a fan-rated junction box and brace, you'll need to factor in these additional costs.
Additionally, if you want separate controls for your lights and fan, be prepared for extra installation costs between $100 and $200 for switches.
If you're considering an outdoor ceiling fan, specialized wiring is often required. This can further inflate your budget, with total costs potentially exceeding $4,000 based on your specific needs.
Ultimately, understanding these wiring requirements will help you plan your budget effectively and guarantee a smooth ceiling fan installation process.
Types of Ceiling Fans
Ceiling fans come in various types, each designed to suit specific needs and spaces. Among the most common are standard ceiling fans, which range from $50 to $300 and often come with light fixtures. They're versatile, making them a great choice for most rooms.
If you have low ceilings, consider low-profile ceiling fans, also priced between $50 and $300. These fans provide efficient airflow without being obtrusive.
For areas requiring adjustable airflow, directional ceiling fans are a solid option. Priced from $150 to $800, they can adapt to various room layouts.
If you have high ceilings, hanging propeller fans are ideal, offering powerful airflow for larger spaces at a cost of $150 to $550.
When it comes to outdoor spaces, you'll want outdoor ceiling fans, designed to withstand the elements. Their prices can range considerably, starting around $250 and going over $3,000, depending on durability and features.
Understanding the types of ceiling fans available will help you choose the right one for your needs, ensuring comfort and style in your home or outdoor area.
Installation Process
Before you start installing your ceiling fan, you'll want to assess the existing wiring and ceiling height to make sure everything's compatible.
Grab essential tools like a screwdriver, drill, and wire stripper, as you'll need them for mounting the fan and connecting the wires.
Taking these pre-installation steps will set you up for a smoother installation process.
Pre-Installation Assessment Steps
A thorough pre-installation assessment is essential for a successful ceiling fan setup. Start by checking the existing wiring's condition and compatibility with your new fan. This guarantees both safety and functionality during operation.
Next, measure the ceiling height; this will help you determine the appropriate type of fan and whether you need any downrods for proper installation.
Don't forget to inspect the ceiling joists. They must be sturdy enough to support the weight of the fan, especially if you've chosen a larger model or one with additional features like lights.
Additionally, take a moment to assess the room's layout and airflow patterns. This can greatly influence your choice of fan size and placement for ideal air circulation.
Finally, review local building codes and regulations. Confirming compliance during your pre-assessment can save you from potential issues later on.
Essential Tools Required
With all the pre-installation assessments complete, it's time to gather the tools you'll need for the ceiling fan installation.
Start by picking up a screwdriver and a drill, as these are vital for securing the fan to the mounting bracket. You'll also need a wire stripper to prepare the electrical connections, and a voltage tester to guarantee safety before you start working with wires.
Don't forget a sturdy ladder to help you reach the ceiling safely, especially if the fan is mounted high.
Electrical tape is essential for insulating and securing wire connections, preventing any accidental contact. A level will help make sure your fan hangs straight, which is important for effective operation and to avoid wobbling.
If your installation requires additional support, a fan-rated junction box and fan brace may be necessary.
Be certain to have the specific tools for these components on hand. Gathering these tools ahead of time will streamline your installation process and help guarantee everything goes smoothly.
Preparing properly sets you up for a successful ceiling fan installation.
Additional Installation Considerations
When planning your ceiling fan installation, it's essential to evaluate several factors that could impact the overall cost. One of the key additional installation considerations is whether you need to remove an old fan or make ceiling modifications. This can add between $100 and $300 to your installation costs.
If you're considering replacing a ceiling fan, think about installing multiple fans at once. This approach can minimize travel fees and provide a more cost-effective solution for larger spaces.
You should also check local building codes before you start. Compliance might require adjustments that could affect your overall costs. Additionally, keep in mind that seasonal pricing fluctuations can influence installation costs, with better deals often available during off-peak times.
Finally, verify your ceiling box can support the weight and operation of the fan. If it isn't adequate, you might need to purchase a fan-rated junction box and brace, which can add an extra $50 to $100 to your total expenses. Moreover, consider consulting with an expert to ensure your installation meets energy-efficient technology standards, which can enhance performance and reduce long-term costs.
Cost Breakdown
Understanding the cost breakdown for ceiling fan installation is essential for budgeting your project. The average ceiling fan installation cost typically falls between $144 and $353, with most jobs averaging around $248.
If you already have existing wiring, you might find installation costs as low as $100 to $300. However, if new wiring is required, expect the cost to soar up to $2,000.
Additional features can further impact your budget. For instance, built-in lights or switches can add anywhere from $100 to $300 each to your total.
If you're considering remote control options for your ceiling fan, those typically range from $150 to $300, which can greatly raise the overall cost.
For outdoor installations, prices fluctuate widely, starting at $70 and potentially exceeding $4,000, depending on the specifications and complexity.
Budget Management Tips
Managing your budget effectively for ceiling fan installation can save you significant money in the long run. Start by establishing a clear budget that estimates your total installation costs, typically ranging from $144 to $353 for professional services.
Don't forget to factor in additional expenses for features like built-in lighting or remote controls, which can add $100-$300 each.
Consider installing multiple ceiling fans at once. This can help you reduce hourly contractor rates and minimize travel fees, leading to greater overall savings.
If possible, utilize existing wiring to lower installation costs to between $100-$300, instead of the up to $2,000 it could cost for new wiring.
It's also wise to plan for unexpected costs by setting aside an additional 10-20% of your budget. This way, you won't be caught off guard by unforeseen expenses during the installation process.
Finally, keep an eye on local pricing trends and seasonal sales to purchase your ceiling fans and installation services at a discount. Additionally, improving indoor air quality can enhance the overall comfort of your living space after installation.
Hiring Professionals vs. DIY
Choosing between hiring a professional or taking the DIY route for ceiling fan installation can considerably impact your budget and overall experience.
If you opt for a professional, you'll typically spend between $100 and $500, depending on the complexity of the installation. Professionals guarantee that everything complies with local codes, especially for ceiling fan replacement that requires new wiring or complex setups. They usually take 1-2 hours for basic installations, which can save you from potential safety hazards.
On the other hand, going the DIY route can save you $50 to $200 on installation labor, but it comes with its own set of challenges. You'll need some level of electrical knowledge, and purchasing tools or materials can add to your expenses.
While it might seem appealing to save money, improper installation could lead to safety risks or even damage to your home.
Ultimately, weigh your skills and the complexity of the job against your budget. If you're confident in your abilities and the installation seems straightforward, DIY might be a good option. However, for peace of mind and safety, hiring a professional is often the better choice.
Frequently Asked Questions
How Much Should I Expect to Pay to Have a Ceiling Fan Installed?
When you're looking to install a ceiling fan, the costs can vary widely.
If you have existing wiring, you might pay between $100 and $300. For new wiring, expect costs to rise considerably.
Additional features like lights or remotes can add $100 to $300 each.
Labor costs also depend on where you live and the complexity of the job, typically ranging from $50 to $200.
Always get multiple quotes to find the best deal.
How Much Does Home Depot Charge to Install a Fan?
When you're considering having a fan installed at Home Depot, you can expect charges to range from $144 to $353, with an average fee around $248.
If you've got existing wiring, it might lower your costs to between $100 and $300.
Keep in mind that adding features like built-in lights can add $100 to $300 each, and if new wiring's needed, costs can skyrocket, potentially reaching up to $2,000.
Should You Hire an Electrician to Install a Ceiling Fan?
You might think installing a ceiling fan is a breeze, but it's wise to take into account the hidden complexities involved.
Hiring an electrician guarantees your installation's not just quick but also safe and up to code. They can handle tricky wiring and specialized features like separate controls effortlessly.
While DIY may seem tempting, it could lead to unexpected headaches if you're not experienced with electrical work.
Do You Need an Electrician to Fit a Ceiling Fan?
You don't always need an electrician to fit a ceiling fan, especially if you're using existing wiring and have some DIY skills.
However, if your installation involves new wiring, complex setups, or features like remote controls, it's wise to consult a licensed electrician. They guarantee safety, compliance with local codes, and ideal placement.
Even if you feel confident, a professional can help avoid potential hazards and guarantee everything functions correctly.
Conclusion
To sum up, installing a ceiling fan can be as invigorating as a cool breeze on a hot summer day. By understanding the costs involved and the factors that influence them, you can make an informed decision that fits your budget. Whether you choose to hire a professional or tackle the installation yourself, being prepared will guarantee a smooth process. So, take your time, weigh your options, and enjoy the comfort a ceiling fan brings to your space!
-
Guides4 weeks ago
Does Having the Ceiling Fan on Waste Electricity
-
Guides4 weeks ago
What Direction Ceiling Fan in Summer
-
Guides4 weeks ago
Where Is the Switch on a Ceiling Fan
-
Guides4 weeks ago
Do Ceiling Fans Save Energy
-
Guides4 weeks ago
Why Is My Ceiling Fan Not Spinning Fast
-
Guides4 weeks ago
Which Direction Ceiling Fan for Summer
-
Guides4 weeks ago
How Much Electricity Does a Ceiling Fan Use per Hour
-
Guides4 weeks ago
What Direction Should a Ceiling Fan Turn in the Summer