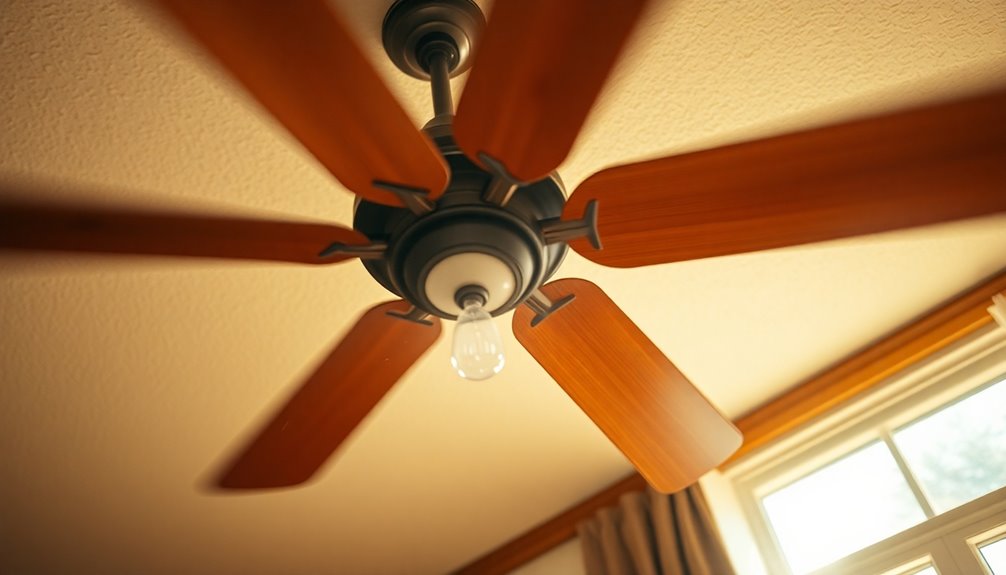

The red wire in a ceiling fan is essential for controlling the light kit separately from the fan motor. This allows you to turn on and off the lights without affecting the fan's operation, maximizing your comfort and convenience. By connecting the red wire to the appropriate light fixture, you can even utilize dimmer switches for enhanced lighting options. It's important to guarantee all connections are secure and correctly matched for safety. If you're looking to understand more about wiring options and connections, you'll find additional insights that can help optimize your ceiling fan setup.
Key Takeaways
- The red wire in a ceiling fan is used for powering the light kit independently from the fan motor.
- It allows for separate control of the fan and light, enhancing user convenience.
- The red wire facilitates the use of dimmer switches for adjustable lighting without affecting fan speed.
- Keeping the red wire available allows for future modifications or upgrades to the ceiling fan system.
- Properly connecting the red wire to the blue wire from the fan enables effective light control.

Akahttbn Ceiling Fan Light Kit,Twin Light Bulb Socket Compatible with Hunter Fan Black
Zing Ear ZE-310D ceiling fan dual lampholder can hold up to two standard base light bulbs, Includes ZE-109M…
As an affiliate, we earn on qualifying purchases.
As an affiliate, we earn on qualifying purchases.
Ceiling Fan Wiring Basics

Understanding ceiling fan wiring is important for a safe and efficient installation. When you look at your ceiling fan's wires, you'll typically see four main colors: black, white, blue, and green.
The black wire is the hot wire, powering the ceiling fan's motor. This is the wire you'll connect to the power source to get the fan spinning.
Next, you have the white wire, which serves as the neutral wire. It's essential for completing the electrical circuit, allowing the fan to operate smoothly.
The blue wire typically controls the light kit, letting you turn the light on and off independently from the fan. Finally, the green wire acts as the ground wire, a critical safety feature that protects you from electrical shocks or surges.
In some configurations, you might encounter a red wire. While we won't explore its purpose just yet, it's worth noting that it can allow for independent control of the light without affecting the fan's operation.
Familiarizing yourself with these wires will help guarantee you connect everything correctly, making your ceiling fan both safe and functional.
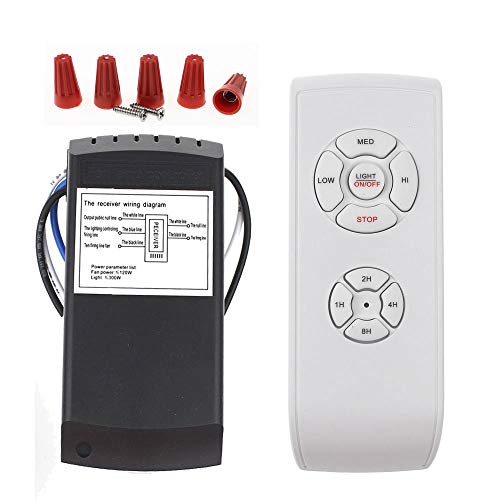
LPHUMEX Universal Ceiling Fan Remote Control Kit, 3-in-1 AC Motor Ceiling Fan Light Timing & Speed Remote, for Hunter/Harbor Breeze/Westinghouse/Honeywell/Other Ceiling Fan lamp
☞Easy Installation – Installation of the Universal Ceiling Fan Remote Controls Kit is a breeze and the looks…
As an affiliate, we earn on qualifying purchases.
As an affiliate, we earn on qualifying purchases.
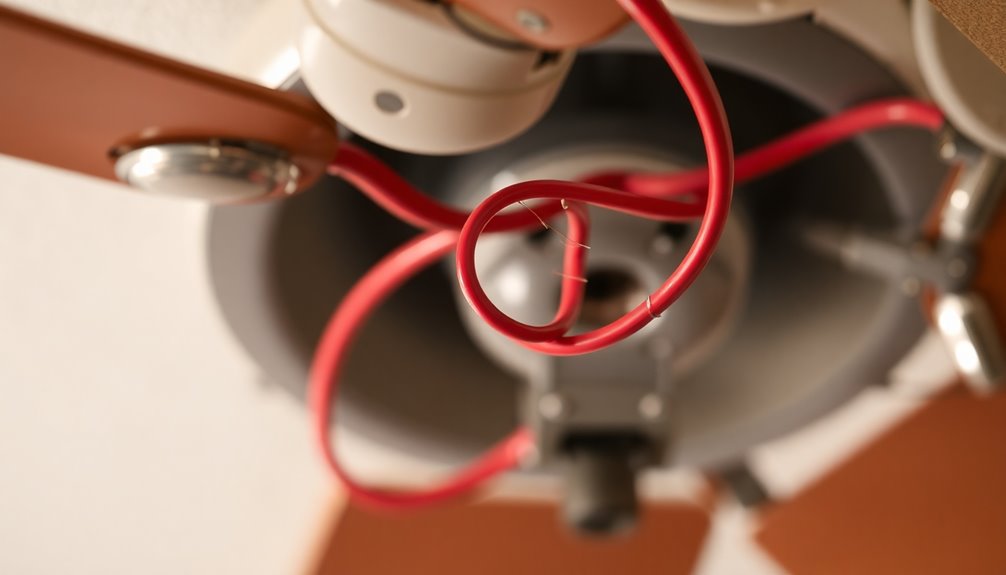
Purpose of the Red Wire

The red wire in your ceiling fan installation gives you the ability to control the light independently from the fan.
This wiring flexibility enhances your overall lighting options, especially if you're using dimmer switches or multiple light fixtures.
If you don't need separate control, you can simply cap off the red wire to keep things safe and tidy.
Independent Light Control
Independent light control enhances the overall functionality of your ceiling fan setup, making it a valuable feature for any homeowner. The red wire is essential for providing independent power to the light kit, allowing you to operate the light and the fan with separate controls. This means you can enjoy flexibility in your lighting and cooling options, as you won't be forced to use a single switch for both functions.
By connecting the light to the red wire, you can easily integrate dimmer switches, letting you adjust the brightness of the light without affecting how the ceiling fan controls the fan speed. This is especially useful during cozy evenings or gatherings, where ambiance matters.
If you're using a ceiling fan remote, the red wire can also simplify the wiring process, enabling multiple switches for added convenience.
Without the red wire, your light and fan would typically operate simultaneously, limiting your control over each function. So, if you want to maximize your ceiling fan's benefits, confirm you're utilizing the red wire for independent light control.
Wiring Flexibility Benefits
Often overlooked, the red wire in your ceiling fan setup plays a crucial role in enhancing wiring flexibility. This wire enables you to control the light kit independently from the fan motor, which means you can customize your lighting to suit your needs.
By utilizing the red wire, you gain the following benefits:
- Independent control: Operate the fan and light on separate switches, enhancing convenience.
- Compatibility with dimmer switches: Enjoy independent dimming of the light without affecting the fan speed.
- Easier installations: Integrate additional features without extensive rewiring.
With the red wire, you can easily manage multiple switches in your home, allowing for a more tailored experience.
If you don't need the red wire right away, capping it guarantees safety while keeping future upgrades or modifications in mind. This flexibility can greatly improve your living space, whether you're entertaining guests or just relaxing at home.
Fundamentally, the red wire isn't just a component; it's a pathway to a more adaptable and enjoyable environment. Embrace the benefits of the red wire in your ceiling fan setup, and enjoy the ease it brings!

ENERLITES 3 Speed Ceiling Fan Control and LED Dimmer Light Switch, 2.5A Single Pole Light Fan Switch, 300W Incandescent Load, No Neutral Wire Required, 17001-F3-W, White
Compatible with dimmable LED, incandescent, and halogen lights. For mechanical fans with pull string speed control.
As an affiliate, we earn on qualifying purchases.
As an affiliate, we earn on qualifying purchases.
When to Use the Red Wire

You should use the red wire when you want independent control of your ceiling fan's light kit.
This is especially important if you're installing multiple switches or dimmers, as it gives you the flexibility to adjust each function separately.
Without it, your light and fan would only operate together, limiting your options.
Independent Light Control
When wiring a ceiling fan, using the red wire can greatly enhance your control over the light fixture. This wire provides independent power to the light kit, allowing you to control the light separately from the fan. By utilizing the red wire, you can enjoy more flexibility in your electrical installation.
Here are some key benefits:
- You can use separate switches for the fan and light, making it easier to adjust settings to your liking.
- This setup is particularly useful in rooms with multiple switch controls, allowing for independent operation of different fixtures.
- If you want to install dimmer switches, the red wire is essential for allowing independent dimming of the light without affecting fan operation.
In setups that lack a red wire, the fan and light operate together from a single switch, limiting your control options.
By incorporating the red wire into your installation, you'll enhance your overall experience, allowing for a more customized ambiance in your space.
Circuit Flexibility Benefits
One major benefit of using the red wire in your ceiling fan installation is the enhanced circuit flexibility it offers. With the red wire, you can achieve independent control of the light fixture and fan motor, allowing you to customize your comfort easily. This setup is particularly advantageous when you want to add a light kit since it simplifies wiring a ceiling without extensive rewiring.
If you're using dimmer switches, the red wire becomes essential, enabling you to dim the light independently while the fan operates at full speed. This feature not only enhances your control over the ambiance but also improves energy efficiency.
In homes equipped with multiple switches, the red wire provides the flexibility to configure different circuits for various needs. You can have a switch for the light and another for the fan, making it convenient to adjust them separately according to your preferences.
If you decide not to use the red wire, remember to cap it off properly for safety. This practice helps prevent accidental connections in the future, ensuring a secure and functional installation.

Harbor Breeze 54-in Ceiling Fan Wire Extension Cord
Downrod wire extension kit
As an affiliate, we earn on qualifying purchases.
As an affiliate, we earn on qualifying purchases.
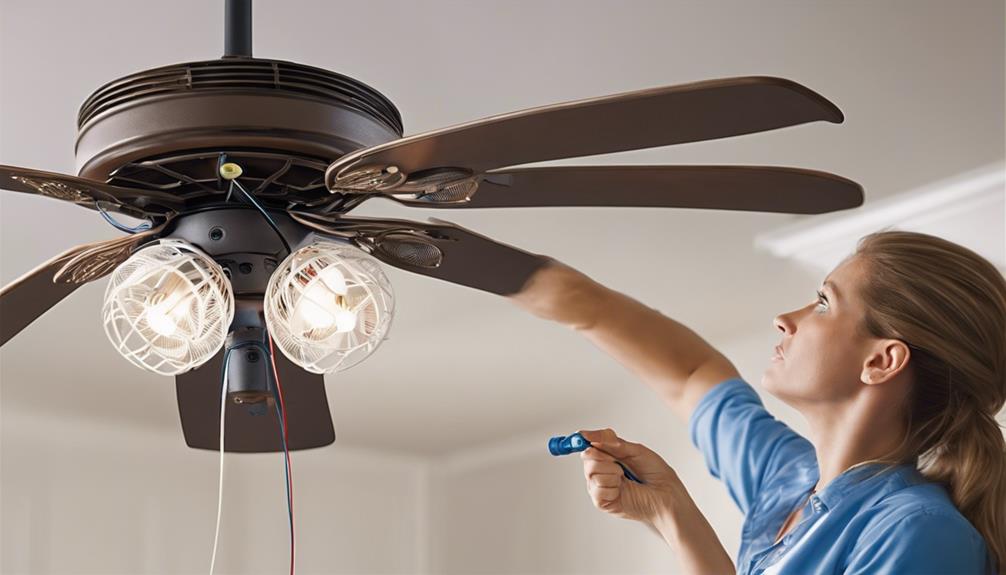
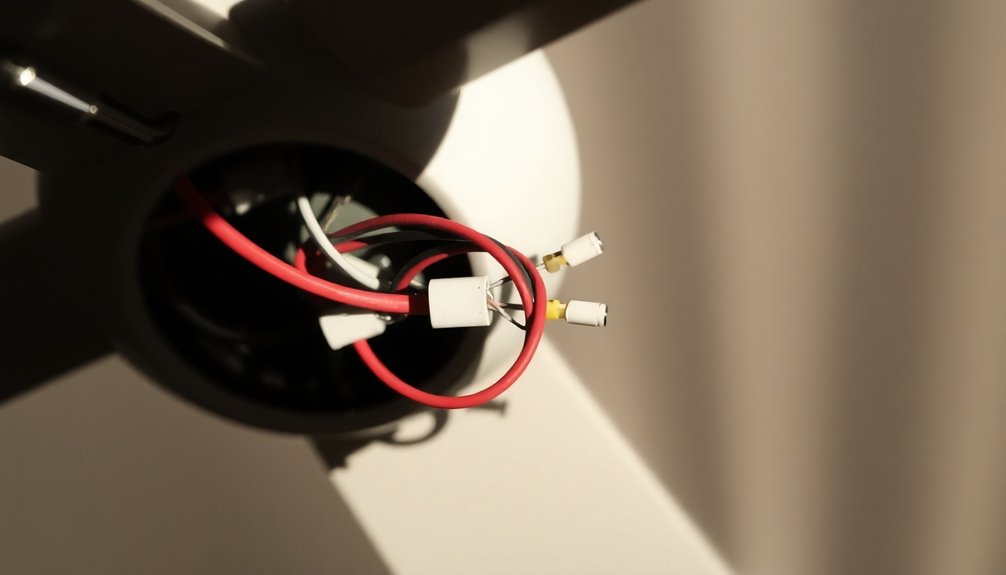
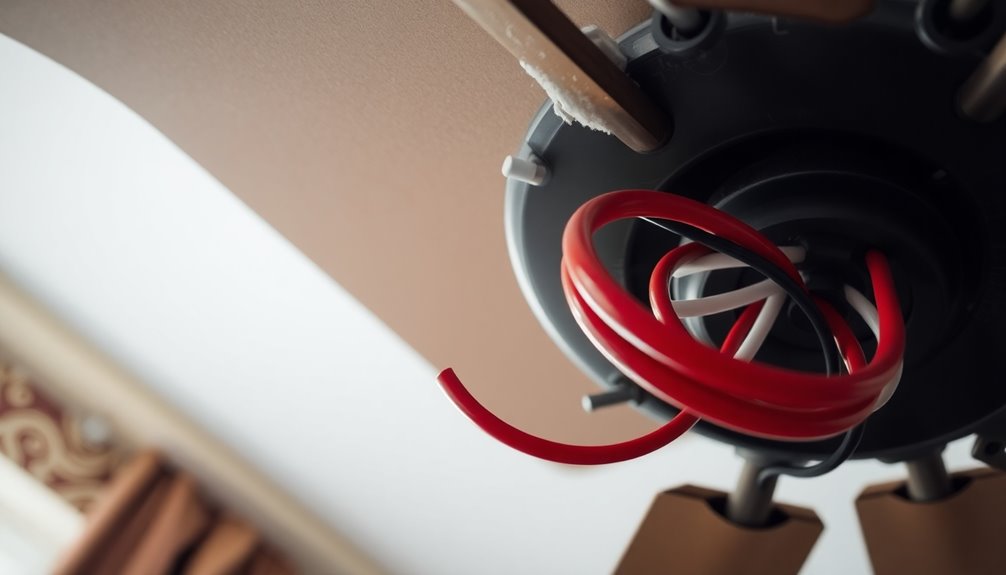
Connecting the Red Wire

Connecting the red wire is essential for enabling independent control of the ceiling fan's light kit. This allows you to operate the light separately from the fan, enhancing your flexibility and functionality.
Here's how to connect the red wire properly:
- Attach the red wire from the electrical box to the blue wire from the ceiling fan, which typically controls the light fixture.
- Verify all wire connections, including the red wire, are secure and properly insulated to prevent electrical shorts.
- If you find a red wire that isn't needed, cap it off with a wire nut to guarantee safety and prevent accidental contact.
When you connect the red wire, you're taking an important step in enhancing the usability of your ceiling fan setup. By confirming independent control of the light kit, you can adjust the lighting to suit your mood or needs without affecting the fan's operation.
Always prioritize safety during installation to enjoy your ceiling fan and light without worry. Following these steps will help you create a reliable and functional ceiling fan setup that meets your specific preferences.
Wiring Diagrams for Control
Wiring diagrams for ceiling fan control simplify the installation process by clearly illustrating how each wire connects to guarantee proper functionality. In these diagrams, the red wire typically acts as a hot wire, allowing for independent control of the light kit. This means you can operate the light separately from the fan, which is especially useful in setups with multiple switches.
Here's a quick reference table for understanding the connections:
| Wire Color | Function |
|---|---|
| Red | Hot wire for light kit |
| Blue | Controls the fan light |
| Black | Power to the ceiling fan |
| White | Neutral wire |
When using wiring diagrams, proper identification of the red wire is essential. It connects to the blue wire of the ceiling fan, ensuring your light operates as intended. If you have a remote control feature, you may not need the red wire, as the fan and light can work wirelessly. Understanding these diagrams helps you achieve the desired control over your ceiling fan and light kit setup, enhancing your room's ambiance.
Tips for Safe Wiring

Safety should always be your top priority when tackling any electrical project, including installing a ceiling fan. Before you begin, make sure to turn off the power at the circuit breaker. This simple step greatly reduces the risk of electrical shock. Use a voltage tester to confirm there's no live current in the wires, particularly in the ceiling box.
Here are some essential tips for safe wiring:
- Wear safety goggles and insulated gloves to protect yourself from electrical hazards.
- Carefully cap any unused wires, like the red wire if it's not needed, with wire nuts to prevent accidental contact.
- Follow local electrical codes and manufacturer instructions to guarantee safe connections.
When connecting the hot and neutral wires, always double-check your connections to make sure they're secure. Additionally, consider using a best home security system to monitor your home while you work on electrical projects.
Understanding Other Wire Functions
Understanding the different functions of wires in a ceiling fan system can enhance your installation experience. The red wire plays a key role in providing independent control for your light kit, allowing you to operate the light fixture separate from the fan motor. If you're utilizing multiple switches, the red wire enables you to control both the light and fan from different locations without the hassle of rewiring the entire system.
Typically, when you connect the red wire, it links to the blue wire of the fan, which is designated for the light kit. This setup guarantees that your light can function independently.
Meanwhile, the black wires usually connect to the fan motor, powering the fan itself. Don't forget about the neutral wire; you'll need to connect the white wire to it for the whole system to work correctly.
If you find that the red wire isn't necessary for your setup, cap it off with a wire nut to prevent accidental contact. Understanding these wire functions will make your ceiling fan installation smoother and give you more flexibility with lighting options, especially if you're considering dimmer switches in the future.
Troubleshooting Wiring Issues

When you encounter issues with your ceiling fan or light kit, troubleshooting can often feel overwhelming, but addressing the red wire specifically can simplify the process. The red wire typically provides power to the light kit, allowing the light to be controlled separately from the fan. If the red wire isn't connected, the fan and light may only operate together from a single switch.
To effectively troubleshoot wiring issues, follow these steps:
- Verify that the red wire is connected: Confirm it's securely attached to the corresponding light kit wire.
- Check connections: Look for any loose or damaged connections that could affect power.
- Cap with a wire nut if unnecessary: If you don't need the red wire for your setup, cap it to prevent accidental contact and potential shorts.
If you notice flickering lights or no power to the fan, double-check all connections to confirm everything is securely attached and correctly matched.
Maintenance and Safety Guidelines

After troubleshooting any wiring issues, regular maintenance is key to keeping your ceiling fan functioning safely and efficiently. Start by inspecting the wiring connections regularly to verify they're secure and free from wear or damage. This step is vital in preventing electrical hazards that could lead to malfunctions or accidents.
Before you begin any maintenance or wiring adjustments, always turn off the power at the circuit breaker. This precaution minimizes the risk of electric shock while you work. When handling the fan, use insulated tools to protect yourself further, and don't forget to wear safety goggles and gloves for additional safety.
Make certain all wiring complies with local electrical codes. This not only enhances safety but also helps you avoid potential legal issues during inspections.
If you make any changes to your wiring configurations, document them for future reference. This documentation will aid in troubleshooting and promote safety during future maintenance tasks.
Frequently Asked Questions
Do I Need to Connect the Red Wire on a Ceiling Fan?
You mightn't need to connect the red wire on your ceiling fan if you don't have a light kit or plan to control both the fan and light from a single switch.
However, if you want separate control for the fan and light, connecting the red wire is essential.
Always check your fan's manual for specific wiring instructions, as different models can label wires differently.
Don't overlook this detail for peak functionality!
What Do I Connect the Red Wire To?
When it comes to wiring, "measure twice, cut once" applies here too.
To connect the red wire, attach it to the blue wire from your ceiling fan, which typically controls the light. This setup lets you operate the light and fan independently.
If you don't have a light kit or want both to work together, just cap off the red wire with a wire nut.
Always verify your connections are secure for safety!
Can I Connect the Red and Black Wires Together?
You shouldn't connect the red and black wires together.
Doing so can cause both the fan and light to operate from a single switch, limiting your control. If your ceiling fan is designed for separate switches, combining these wires might lead to circuit overload or malfunction.
Always check the manufacturer's wiring diagram before making connections. If the red wire isn't needed, cap it off with a wire nut for safety.
Where Does Red Wire Go on a Ceiling Fan With a Remote?
When wiring a ceiling fan with a remote, you'll typically connect the red wire to the light kit for independent control.
Make sure to attach the red wire from the ceiling to the black wire from the remote receiver. This setup allows you to operate the light separately from the fan.
If your system doesn't need the red wire, just cap it off with a wire nut for safety.
Always follow the manufacturer's instructions.
Conclusion
In conclusion, understanding the purpose of the red wire in your ceiling fan is like knowing the secret ingredient in your favorite recipe—it can make all the difference. Whether you're using it for a light fixture or a dual-switch setup, connecting it correctly guarantees your fan operates smoothly. Always prioritize safety by following proper wiring guidelines, and don't hesitate to troubleshoot if things don't work as expected. Your ceiling fan will thank you for it!