Connect with us

Guides

The Uniqueness of Flush Mount Ceiling Fans

Wander into the world of flush mount ceiling fans for a stylish, space-saving solution that offers efficient airflow and integrated lighting options.

Published

on

sleek modern ceiling designs

Discover the uniqueness of flush mount ceiling fans, offering a stylish design, efficient airflow, and space-saving benefits that make them a practical choice for any room. These fans are ideal for spaces with low ceilings, providing energy-saving features and integrated lighting options. The installation process is straightforward, making them suitable for DIY enthusiasts, while their maintenance ensures optimal airflow and prolonged fan life. With noise levels varying based on motor quality and proper installation reducing sound, these fans enhance overall comfort. Explore how these fans combine functionality and style to create a comfortable living space.

Key Takeaways

  • Ideal for low ceilings or limited overhead clearance, providing efficient air circulation.
  • Energy-saving technology with LED fixtures and efficient motors for optimal airflow.
  • Stylish designs with integrated lighting feature for a modern look.
  • Hassle-free installation suitable for DIY enthusiasts, enhancing room comfort.
  • Quiet operation with proper installation, maintenance, and balance for optimal performance.
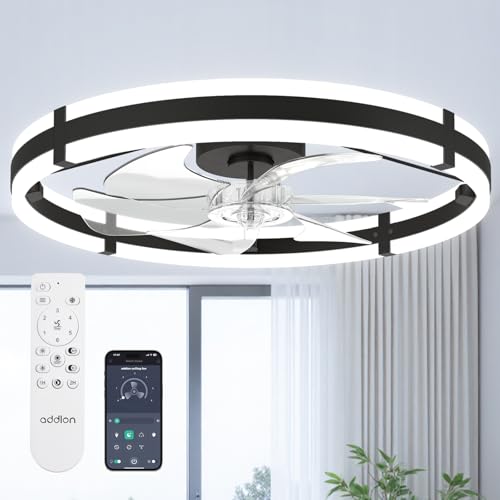
Benefits of Flush Mount Ceiling Fans

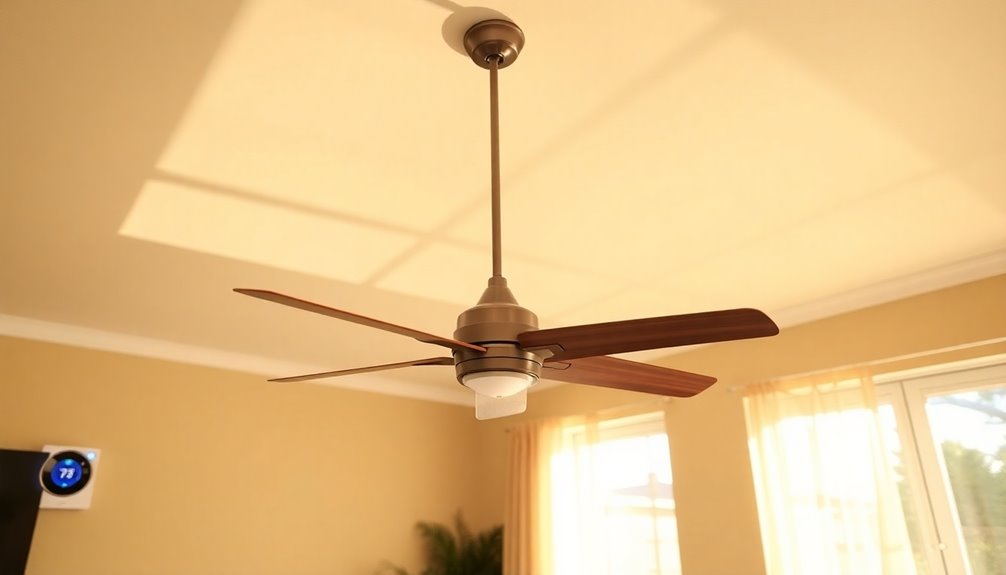
Flush mount ceiling fans are a practical choice for rooms with low ceilings or limited overhead clearance due to their efficient air circulation and energy-saving benefits. The low-profile design of these fans ensures they don't hang too low, making them ideal for spaces with lower ceiling heights. Additionally, their energy efficiency not only helps to reduce utility costs but also minimizes environmental impact, providing a sense of eco-friendliness and cost-effectiveness.

When considering the room size, flush mount ceiling fans are versatile enough to fit in various spaces without overpowering the room visually. Their stylish design options allow them to blend seamlessly with different décor styles, enhancing the overall aesthetics of the room. Furthermore, the integrated lighting feature in some flush mount fans adds a practical touch by offering both cooling and illumination in one fixture, making them a convenient choice for any space. The combination of efficient air circulation, energy savings, and stylish design makes flush mount ceiling fans a valuable addition to any home.

Energy Efficiency in Flush Fans

efficient flush fan design

Flush mount ceiling fans are designed with energy-saving technology that ensures efficient power consumption. These fans offer an eco-friendly cooling solution by optimizing airflow and reducing electricity usage.

LED light fixtures in flush fans provide bright illumination while consuming minimal energy, contributing to overall energy savings in a home.

Energy-Saving Technology

Efficient motors and LED light fixtures in energy-saving flush mount ceiling fans significantly reduce electricity usage, making them a practical choice for environmentally conscious homeowners.

  • ENERGY STAR certification ensures high efficiency and optimal performance.
  • Energy-efficient motors circulate air effectively while using minimal electricity.
  • LED light fixtures contribute to energy savings compared to traditional bulbs.

Choosing an energy-efficient flush mount ceiling fan not only lowers utility bills but also helps reduce your carbon footprint, aligning with environmental conservation efforts. By opting for these fans, you can enjoy a comfortable living space while making a positive impact on the environment.

Efficient Power Consumption

With their efficient power consumption, flush mount fans offer a cost-effective and eco-friendly cooling solution for homeowners. These fans are energy efficient, using less electricity than air conditioners, which helps reduce utility bills.

Advertisement

ENERGY STAR certified flush mount fans adhere to strict energy efficiency standards, decreasing electricity usage and lessening the environmental impact. Incorporating LED light kits, these fans contribute to energy savings and have a longer lifespan compared to traditional bulbs.

The efficient motor designs in flush mount fans ensure optimal airflow while consuming minimal energy, making them a practical choice for those looking to save on energy costs and promote sustainability in their homes.

Eco-Friendly Cooling Solution

Investing in an energy-efficient flush mount ceiling fan can significantly reduce electricity bills and promote sustainability in your home.

These fans are eco-friendly, with some models being ENERGY STAR certified for optimal energy efficiency. They operate with minimal power consumption, making them a sustainable cooling option that helps lower costs and reduces the environmental impact.

The energy-efficient motors and blade designs in flush mount fans ensure effective air circulation without excessive energy usage, maintaining a comfortable indoor environment.

Advertisement

Choosing an ENERGY STAR certified flush mount ceiling fan not only saves you money in the long run but also contributes to a greener living space by providing a cost-effective and environmentally friendly cooling solution.

Installation Process of Flush Fans

installing flush ceiling fans

Installing flush mount ceiling fans is a straightforward process that involves basic wiring and mounting procedures. You'll need common tools like a screwdriver and possibly a ladder to complete the installation.

Following the easy steps outlined for wiring and mounting will have your flush mount fan up and running in no time.

Easy Installation Steps

I found that mounting flush ceiling fans directly against the ceiling is a straightforward process that involves securing the fan to the ceiling bracket, wiring it, and attaching the blades. When installing a flush mount ceiling fan, remember these key points:

  • Ideal for rooms with low ceilings or limited overhead space
  • Hassle-free installation suitable for DIY enthusiasts
  • Efficient air circulation and comfortable airflow without additional clearance

Flush mount fans with their compact design offer easy installation, making them a practical choice for those seeking a quick and simple setup. Whether you're looking to enhance airflow in a cozy space or tackle a DIY project, these fans provide a seamless solution for your comfort needs.

Wiring and Mounting

When wiring and mounting flush mount ceiling fans, ensure a secure attachment to the ceiling bracket for stability and safety during installation.

Flush mount fans are designed for seamless integration into your ceiling, making them perfect for rooms with low ceilings. The installation process involves connecting the fan wires to the corresponding ceiling wires following the manufacturer's instructions.

Advertisement

By securely fastening the mounting bracket to the ceiling, you guarantee a stable foundation for your fan. With no need for a downrod, flush mount fans provide a sleek and untrusive look while efficiently circulating air in your space.

Follow the provided guidelines carefully to ensure a successful and hassle-free installation of your flush mount ceiling fan.

Tools Required for Installation

Securing the mounting bracket to the ceiling is a crucial step in the installation process of flush mount ceiling fans. When installing a flush mount ceiling fan, the following tools are typically required:

  • Screwdriver
  • Wire strippers
  • Wire nuts

These tools are essential for wiring the fan to the electrical system, ensuring a safe and secure installation. It's particularly important to have the right tools when working in rooms with low ceilings to guarantee proper clearance and stability.

Following safety guidelines and the manufacturer's instructions is key to a successful installation, whether you're a DIY enthusiast with basic electrical knowledge or opt for professional installation for more complex setups.

Noise Levels in Flush Fans

regulating fan sound levels

Noise levels in flush mount ceiling fans can vary based on factors such as the quality of the motor, blade design, and installation. High-quality motors and efficient blade designs play a crucial role in ensuring quiet operation. Proper installation is also essential to minimize noise and create a comfortable environment.

Additionally, considering room acoustics can help in managing how sound is perceived from flush mount ceiling fans. When selecting a flush mount ceiling fan, it's advisable to choose one known for its quiet operation to enhance overall comfort in the room.

Advertisement

Maintenance Tips for Flush Fans

flush fan care advice

To keep flush mount ceiling fans in top shape, it's crucial to regularly clean the fan blades to prevent dust accumulation. This helps maintain optimal airflow and prevents any buildup that could affect the fan's performance.

Another important maintenance task is to lubricate the motor parts. Proper lubrication reduces friction, ensuring the motor runs smoothly and efficiently. This step is essential for prolonging the life of the fan and preventing any potential issues.

Additionally, checking for any wobbling in the fan is important. Wobbling can indicate imbalances or loose parts, which can impact the fan's operation and cause unnecessary wear and tear. Addressing wobbling promptly helps maintain the fan's stability and performance.

Cleaning Fan Blades

When maintaining flush mount ceiling fans, it's crucial to regularly clean the fan blades using a soft cloth or a vacuum with a brush attachment to ensure optimal performance.

  • Use a soft cloth or vacuum with a brush attachment to clean dust and debris off the fan blades.
  • Regular cleaning of fan blades helps maintain optimal airflow efficiency and prevents dust buildup that can affect performance.
  • Inspect the blades for any signs of damage or warping that may impact the balance and operation of the fan.

Cleaning the fan blades periodically is essential for ensuring the longevity and effectiveness of your flush mount ceiling fan. Remember to turn off the fan and wait for the blades to stop before cleaning to ensure safety.

Lubricating Motor Parts

Lubricating the motor parts of flush mount ceiling fans is essential for ensuring smooth and quiet operation, prolonging the fan's lifespan, and preventing premature wear and tear. Regular maintenance tasks like lubrication can significantly impact the fan's performance. Using the recommended lubricant specified by the manufacturer is crucial to maintain optimal performance. Neglecting this simple task could lead to potential motor damage over time, resulting in increased noise levels and decreased airflow. By incorporating this maintenance routine into your fan care schedule, you can enjoy a quieter and more efficient fan for years to come.

Motor PartsLubricationLifespan
RecommendedMaintenance TaskOptimal Performance
LubricantPotential Motor Damage

Checking for Wobbling

Ensuring your flush mount ceiling fan remains stable and balanced is crucial for optimal performance and safety. When checking for wobbling, start by turning off the fan and observing any irregular movement to identify the source of imbalance.

Advertisement

Next, consider using balancing kits with weights to correct issues with unbalanced blades, promoting smoother operation. Proper installation and regular maintenance are key to preventing wobbling in flush mount ceiling fans, ensuring not only a quieter operation but also prolonging the fan's lifespan and enhancing safety.

Regularly inspecting your fan for wobbling and addressing it promptly will contribute to its proper function and your peace of mind.

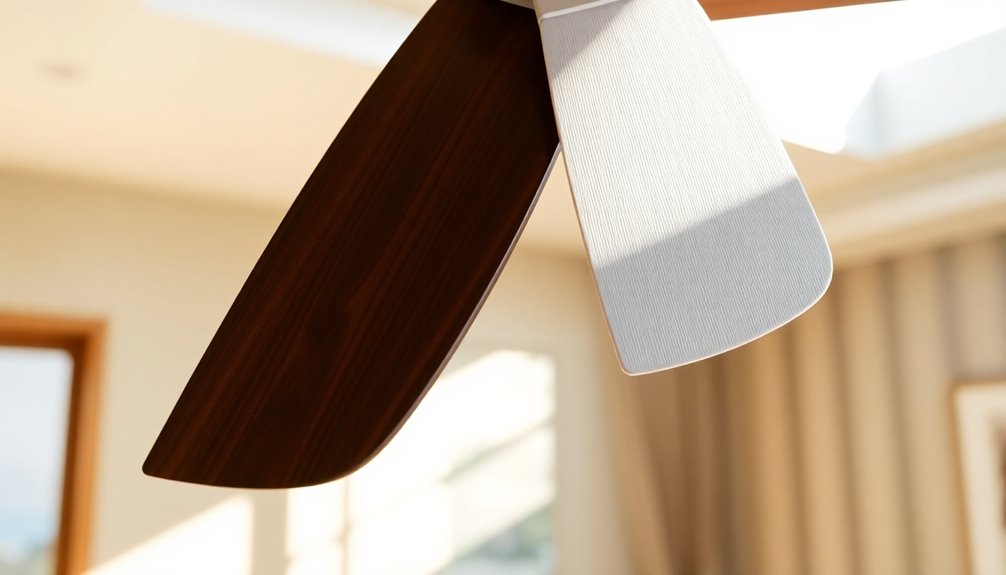
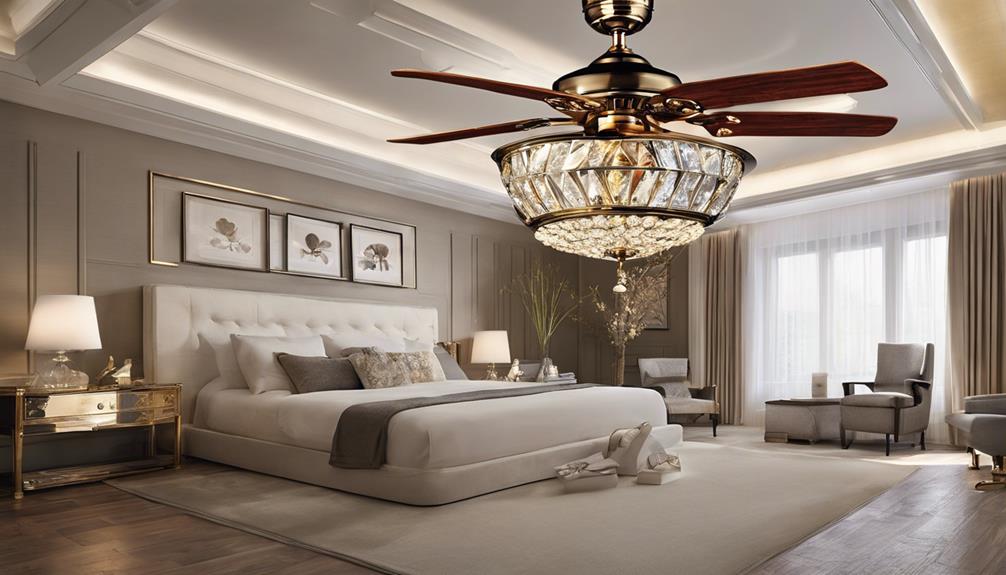
Design Diversity in Flush Fans

variety of flush fans

Flush mount ceiling fans showcase a wide array of design options, ranging from sleek and modern to intricately traditional styles. These fans not only provide a functional cooling solution but also serve as a stylish addition to any room. Let's explore the design diversity in flush fans through a table highlighting some key features:

Design FeatureDescriptionExample
Blade DesignsUnique patterns like carved wood or geometric shapes add flair to the fan.Carved wooden blades
Fan Body FinishChoose from finishes like brushed nickel or matte black to match your decor.Matte black finish
Light Fixture StylesIntegrated light fixtures come in various styles, from frosted glass to contemporary LED panels.Industrial cage design

The beauty of flush mount ceiling fans lies in their customizable features, allowing you to tailor the fan to your preferences. Whether you prefer a modern aesthetic or a more traditional look, there's a design to suit every taste and style.

Remote Control Functionality

advanced tv remote features

Exploring the convenience of remote control functionality in flush mount ceiling fans enhances the overall user experience by providing easy access to various fan and light settings at the touch of a button. Remote controls for these fans offer convenient operation without the need for manual adjustments, allowing users to change fan speed, adjust lighting, and program timers effortlessly. Some remote controls also come with dimming capabilities, enabling customization of the brightness of the integrated lights.

Remote controls for flush mount ceiling fans may include:

  • Reverse airflow settings for versatile air circulation options.
  • Sleep mode feature for energy efficiency and nighttime comfort.
  • Fan speed memory function for easy access to preferred settings.

The integration of these features not only simplifies the operation of the fan but also enhances the overall user experience, making it more enjoyable and user-friendly.

Space-Saving Flush Fan Options

compact fan installation solutions

When considering space-saving flush fan options, one can appreciate their practical design for rooms with low ceilings or limited overhead clearance. These efficient fans are specifically tailored to work well in areas with restricted height, ensuring both safety and comfort.

Their space-saving designs make them ideal for smaller rooms where traditional ceiling fans mightn't fit. With a variety of blade designs and finishes available, flush mount ceiling fans can complement a range of room aesthetics.

Advertisement

Whether you're looking to maximize airflow in a cozy bedroom or keep air circulating in a compact office space, these fans offer a stylish and functional solution. By choosing a flush mount fan, you not only save space but also enhance the overall look and feel of your room.

Consider the practical benefits of these fans for your low-ceilinged or smaller spaces where every inch matters.

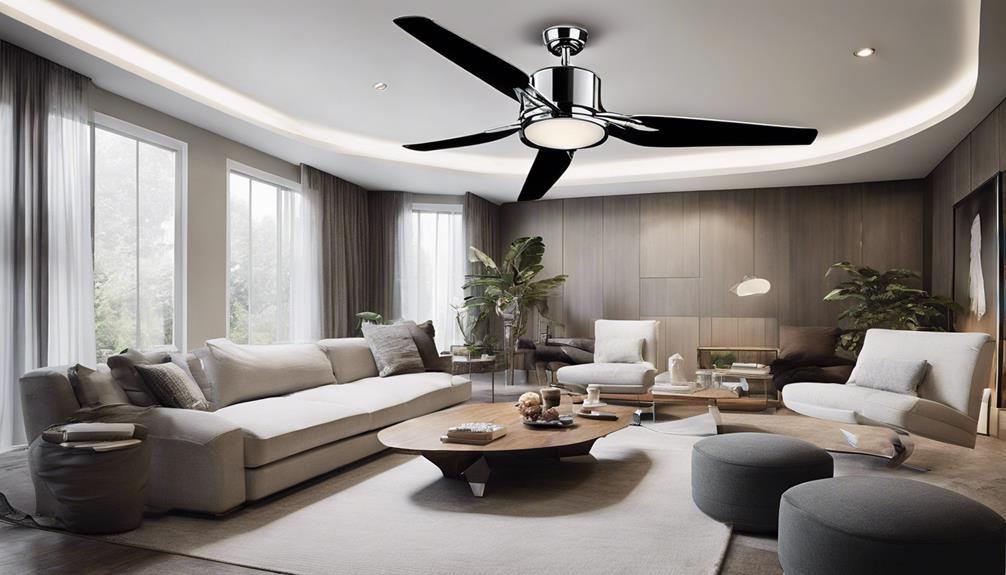
Stylish Finish Choices

stylish furniture finish options

Considering the variety of stylish finish choices available for flush mount ceiling fans, homeowners can easily personalize their space and enhance the room's aesthetic appeal. The finish options range from modern designs like brushed nickel to more traditional choices like wood grain, providing a perfect match for any interior style. Here are some reasons why the stylish finish choices for efficient flush mount ceiling fans are a great decorative option:

  • The finishes, such as matte black and bronze, offer a sleek and contemporary look that can elevate the overall ambiance of the room.
  • Traditional ceiling fans with white or wood grain finishes provide a timeless and classic touch, blending seamlessly with various decor themes.
  • The variety of styles available ensures that you can find the perfect finish to complement your existing fixtures and furniture, creating a cohesive and stylish look in your space.

Enhanced Air Circulation

optimal airflow and cooling

Enhancing airflow efficiency is a key feature of flush mount ceiling fans, particularly in rooms with low ceilings. The compact structure of these fans allows for efficient air circulation while being positioned close to the ceiling. This proximity of the blades ensures enhanced ventilation without compromising safety or functionality. In rooms with limited overhead clearance, such as those with low ceilings, flush mount ceiling fans excel at distributing air evenly throughout the space. Their ability to push air efficiently contributes to a comfortable environment for all occupants.

The strategic design of flush mount fans not only improves airflow but also enhances the overall ventilation in smaller spaces. By properly installing these fans, you can significantly boost the air circulation in your room without taking up valuable headroom. The blend of safety, functionality, and efficient air movement makes flush mount ceiling fans a practical choice for those seeking optimal airflow in rooms with low ceilings.

Year-Round Comfort With Flush Fans

efficient cooling for all

Flush mount ceiling fans not only provide enhanced airflow efficiency but also offer year-round comfort by circulating air to create a cooling effect in warmer months and distributing heat for warmth in colder seasons. These fans are energy-efficient, helping to reduce heating and cooling costs throughout the year. The compact structure of flush mount ceiling fans makes them ideal for rooms with low ceilings or limited overhead clearance. With proper installation and maintenance, flush mount ceiling fans can enhance air circulation and comfort in any room.

When looking for a stylish and practical way to maintain year-round comfort, flush mount ceiling fans are a great choice. Their ability to circulate air effectively ensures a pleasant atmosphere in your living space regardless of the season. Whether you need a cooling breeze during summer or a gentle warmth in winter, these fans are designed to keep you comfortable throughout the year.

Frequently Asked Questions

What Are the Benefits of a Flush Mount Ceiling Fan?

I love my flush mount ceiling fan for so many reasons!

Advertisement

It's energy efficient, has a sleek modern design, and comes with a convenient remote control.

The low profile fits perfectly in my space, and it operates quietly.

Installation was a breeze, and I can place it anywhere in the room.

It's a versatile and stylish addition to my home, keeping me cool and comfortable without breaking the bank on air conditioning costs.

What Is the Difference Between Flush Mount and Hugger Ceiling Fans?

When comparing flush mount and hugger ceiling fans, the key differences lie in:

Advertisement
  • Installation: Flush mount fans attach directly to the ceiling, perfect for low clearance rooms, while hugger fans sit slightly below, ideal for ceilings up to 9 feet.
  • Design: Huggers may have a small gap for airflow, differing from flush mounts that are flush to the ceiling for a sleek look.
  • Room compatibility: Both types cater to different ceiling heights, with flush mounts being better for very low ceilings and hugger fans for ceilings up to 9 feet.
  • Air circulation: Hugger fans may have a slight advantage due to the small gap for air movement, while flush mounts are more compact and close to the ceiling.
  • Height restrictions: Flush mounts are great for rooms with height restrictions, while huggers can accommodate slightly higher ceilings.
  • Energy efficiency: Both types can be energy efficient, but hugger fans may have better airflow efficiency due to the slight gap.
  • Noise levels: Flush mounts, being closer to the ceiling, may produce less noise compared to hugger fans.

Do I Need a Flush Mount Ceiling Fan?

I need a flush mount ceiling fan if my room has low ceilings or limited overhead space. These fans offer various design options and fit well in rooms with ceiling heights between 7 to 8 feet. They are easy to install directly against the ceiling. They're energy-efficient, come with remote controls, and operate quietly.

Do Flush Mount Fans Move Less Air?

I can assure you that flush mount fans do move less air compared to larger ceiling fans. The smaller blade spans in flush mount fans limit their airflow capacity. This can affect air circulation in the room, especially in larger spaces.

When considering a flush mount fan, it's essential to factor in room size and airflow requirements to ensure adequate comfort. Keep this in mind when deciding on the best fan for your space.

Are Smart Ceiling Fans as Unique as Flush Mount Ceiling Fans?

Smart ceiling fan technology has revolutionized the way we cool our homes. While both smart ceiling fans and flush mount ceiling fans serve the same purpose, smart ceiling fans offer unique features such as remote control and energy efficiency. They can be programmed to operate based on your schedule and preferences.

Conclusion

In conclusion, flush mount ceiling fans are like a gentle breeze on a hot summer day, providing efficient cooling and a stylish touch to any room.

With their space-saving design, energy efficiency, and easy installation process, flush fans offer year-round comfort and enhanced air circulation.

Advertisement

By choosing a flush mount ceiling fan, you can elevate your space while staying cool and comfortable all year long.

Advertisement

Guides

Can You Fix a Ceiling Fan Pull Chain

Open the door to ceiling fan repair secrets—discover how to fix a pull chain and prevent future issues, but there’s more you need to know!

Published

on

By

repairing ceiling fan chain

Yes, you can fix a ceiling fan pull chain, whether it's an external break or an internal issue. If it's an external break, you can easily replace the chain with a new extension chain. For internal breaks, you might need to replace the pull chain switch itself. Always turn off the power at the circuit breaker first and use proper tools like screwdrivers and a voltage tester. Regular maintenance, like checking for wear and cleaning, is key to preventing future problems. If you'd like to understand the entire process and tips for repairs, there's more to cover.

Key Takeaways

  • Yes, a ceiling fan pull chain can be fixed by replacing the broken switch or extending the chain if damaged.
  • Ensure safety by turning off power at the circuit breaker and using a voltage tester before starting repairs.
  • Disassemble the fan carefully to access the pull chain mechanism, inspecting for damage or wear during the process.
  • Gather necessary tools like screwdrivers, wire strippers, and a replacement pull chain switch for efficient repair.
  • Regular maintenance and inspection can prevent future pull chain issues and extend the lifespan of the ceiling fan.

Types of Chain Breaks

chain breaks classification types

When it comes to ceiling fan pull chains, you'll encounter two main types of breaks: external and internal.

An external break is often visible and easily accessible, meaning you can quickly spot that the chain has broken. Typically, all you need is an extension chain for a rapid fix.

On the other hand, an internal break hides within the fan housing, requiring more extensive disassembly. If the chain's missing, you might need a complete replacement of the pull chain switch.

Common causes for these breaks include excessive wear from frequent use, friction at the housing opening, and dust accumulation that disrupts smooth operation.

When a chain has broken, it can hinder your fan's functionality greatly, potentially leading to complete operational failure if you don't address it promptly.

Advertisement

Regular inspection and maintenance of the pull chain mechanism can help prevent these issues, ensuring your ceiling fan remains in good working order.

Safety Precautions

essential risk management measures

Before diving into any ceiling fan repairs, it's vital to prioritize safety. First and foremost, turn off the power at the circuit breaker. This step is important to prevent electrical shock. Once you've done that, grab a voltage tester to confirm that the power is indeed off before touching any electrical components of the fan.

Next, make sure you have a stable ladder ready for the job. It's a good idea to have an assistant hold the ladder for support to prevent any falls while you work on the fan. Safety goggles are another must-have; wear them to protect your eyes from debris or components that might fall during the disassembly process.

Finally, as you work with the electrical connections, make certain that everything is properly insulated and secured. This will help you avoid short circuits or electrical hazards when you reassemble the fan.

Required Tools

essential equipment needed

To successfully fix your ceiling fan pull chain, you'll need a few essential tools and safety gear.

Having the right equipment not only makes the job easier but also keeps you safe from potential hazards.

Let's go over what you'll require and the recommended replacement parts to get started.

Advertisement

Essential Tools Overview

Equipping yourself with the right tools is fundamental for a successful ceiling fan pull chain repair. Having the necessary items on hand can make the process straightforward and efficient.

Here's a quick overview of the fundamental tools you'll need:

  1. Voltage Tester: Before you start, verify the power is off. This tool helps you confirm that it's safe to work on your ceiling fan pull chain.
  2. Step Ladder: A 6-foot step ladder is essential for safely accessing the ceiling fan during your repair.
  3. Screwdrivers: You'll need both flathead and Phillips screwdrivers to remove screws securing the fan components. This is critical for disassembly.
  4. Wire Strippers: If you're preparing new switch wires, wire strippers are required. You might also need wire cutters for any electrical connections.

Don't forget to wear safety goggles to protect your eyes from any debris while disassembling and working on the fan.

With these tools ready, you'll be well-equipped to tackle your ceiling fan pull chain repair with confidence.

Safety Gear Importance

Safety gear is essential when tackling a ceiling fan pull chain repair. It not only guarantees your safety but also makes the process smoother. Here's a quick overview of the necessary tools and their importance:

Tool Importance Safety Benefit
Safety Goggles Protects your eyes from debris Prevents eye injuries
Stable Ladder Provides safe access to the fan Reduces the risk of falls
Voltage Tester Confirms power is off before starting work Minimizes electrical shock risk
Insulated Tools Helps prevent accidental electrical contact Enhances safety while working
Manual Screwdriver Set Essential for disassembling and reassembling Guarantees proper fit and function

Using safety goggles will shield your eyes from any flying debris. A stable ladder is vital to safely reach the fan without risking a fall. Always use a voltage tester to confirm the power is disconnected before you start. Insulated tools add an extra layer of protection against electrical shocks. Finally, keep a manual screwdriver set handy for efficient disassembly and reassembly. Prioritizing these safety measures makes your repair process much safer and more effective.

Advertisement

Recommended Replacement Parts

When replacing a ceiling fan pull chain, having the right replacement parts is vital for a successful repair.

You'll need specific items to guarantee everything fits and works properly. Here's a quick list of recommended replacement parts and tools you should gather:

  1. Replacement Pull Chain Switch: Make sure it's compatible with your fan model; you can find these at your local hardware store or online.
  2. Extension Chain: This may be necessary if your existing chain is too short or damaged.
  3. Voltage Tester: This is essential for confirming the power is off before you start working, keeping you safe from electrical hazards.
  4. Tools: Gather manual screwdrivers (both flathead and Phillips), wire strippers, wire nuts for securing connections, safety goggles, and a 6-foot step ladder for access.

With these parts and tools ready, you'll be well-equipped to tackle your ceiling fan pull chain repair.

Step-by-Step Repair Process

detailed repair instructions provided

Now that you have your tools ready, you can start the repair process.

Begin by disassembling the fan fixture to access the pull chain mechanism.

Once you've made the necessary repairs, you'll reassemble everything and test the fan to guarantee it works properly.

Required Tools Overview

Before diving into the repair of your ceiling fan pull chain, it's essential to gather the right tools for the job. Having the appropriate tools won't only make the process smoother but also guarantee your safety.

Advertisement

Here's what you'll need:

  1. Voltage Tester: To confirm that all electrical components are de-energized before you start working on the ceiling fan pull switch.
  2. Screwdrivers: You'll need both flathead and Phillips screwdrivers to remove the fan's cover and access the internal components.
  3. Wire Strippers: Essential for any necessary electrical connections during the repair process.
  4. Safety Goggles: Protect your eyes while you're working, especially when handling small parts or working in awkward positions.

Additionally, a 6-foot step ladder will help you reach the fan easily, and wire cutters may be necessary in case you encounter damaged wires.

It's also important to note that using a ceiling fan can lead to lower energy bills, enhancing the overall efficiency of your home.

Keeping your workspace organized and having someone to hold the ladder can enhance your safety and efficiency. With these tools on hand, you're well-prepared to tackle the ceiling fan pull chain repair.

Disassembly of Fan Fixture

To begin disassembling the fan fixture, first turn off the power at the circuit breaker to guarantee your safety. Use a voltage tester to confirm the fan is de-energized before proceeding. Start by removing any light bulbs to prevent breakage, then unscrew the lower section of the ceiling fan from the motor base to access the interior components.

Next, locate and unscrew the metal collar that secures the pull switch in place. Keep all screws organized for easy reassembly later. Carefully detach the pull switch from the housing, making sure to note the orientation of the wires for accurate reconnection.

Advertisement

While you're in there, inspect the internal components for any damage or wear, ensuring all parts are accounted for before you proceed with repairs or replacements.

Here's a quick overview of the disassembly steps:

Step Action
1 Turn off power at the circuit breaker
2 Remove light bulbs
3 Unscrew lower section from motor base
4 Unscrew metal collar for pull switch
5 Detach pull switch and inspect parts

Reassembly and Testing Steps**

Reassembling the ceiling fan after replacing the pull chain and switch requires careful attention to detail. Follow these steps to guarantee a successful reassembly and testing:

  1. Reinsert the switch back into the fixture housing, making sure all wires are properly tucked away to avoid damage.
  2. Replace any light bulbs and decorative globes that were removed during disassembly. Be sure to secure them in place as they were originally.
  3. Restore power at the circuit breaker to allow electricity to flow back to the fan. This step is essential for testing the functionality of the new components.
  4. Check all electrical connections to verify they're tight and that the switch is receiving power. If the fan doesn't operate as expected, revisiting this step may solve the issue.

After completing these steps, clean up your workspace by disposing of any old parts and putting away your tools.

Don't forget to document the repair process for future reference. This will help you remember what was done and assist anyone else, if needed, in the future.

Your ceiling fan is now ready for use!

Advertisement

Identifying the Problem

recognizing the issue clearly

A broken pull chain can create significant frustration for anyone trying to operate their ceiling fan. To identify the problem, start by examining the chain itself. If it's visibly detached or hanging outside the fan, you likely have a simple external break. In this case, an extension chain may be all you need for a quick fix.

However, if the fan still won't operate, the issue might be more complex. You should also inspect the pull switch assembly. This can help you determine whether the broken chain is the culprit or if there's a malfunction with the switch.

Internal damage can be trickier to diagnose, often requiring you to disassemble the fan housing. Look for wear and tear at connection points, as frequent use can lead to jamming or breaking.

If you suspect internal damage, assess the condition of both the chain and the switch mechanism to guide your repair approach. By systematically checking these components, you'll be better equipped to understand what's gone wrong and how best to proceed with repairs.

Common Issues

frequent problems encountered

After identifying the problem with your ceiling fan, it's important to recognize the common issues that can arise with pull chains.

Here are four frequent problems you might encounter:

  1. Stuck or Jammed: Over time, the pull chain can become stuck or jammed due to wear and tear, making it difficult to operate the fan.
  2. Chain is Broken: Sometimes, the chain links can break, which might require you to replace the entire pull chain or switch to restore functionality.
  3. Faulty Pull Chain Switch: The pull chain switch itself can fail, preventing your fan from turning on or off properly, which is a common issue.
  4. Dust and Debris Accumulation: Dust and debris can build up around the chain mechanism, affecting the fan's operation and necessitating regular cleaning.

Addressing these common issues promptly can help you avoid needing to replace a ceiling fan before it's necessary.

Keep an eye out for these problems, and with a bit of maintenance, you can keep your ceiling fan running smoothly.

Advertisement

Replacing Components

component replacement process

When you need to replace components of your ceiling fan, it's important to follow a systematic approach to guarantee everything functions properly afterward.

First, disconnect the power to the ceiling fan to ensure your safety. Next, you'll need to remove the light fixture to access the pull switch mechanism. Carefully detach the old switch by removing the screws and disconnecting the wires, taking note of their configuration for proper reconnection.

Once you have the old switch out, it's time to install the new switch. Strip approximately 0.5–0.75 inches of insulation from the new switch wires before connecting them to the corresponding wires from the fan. Make sure the connections are secure, using wire nuts to tighten them.

After that, secure the new switch in place, and reattach the light fixture along with any other components you removed earlier.

Finally, restore power to the fan and test the functionality of the new pull chain. This confirms that you've successfully replaced the ceiling fan components and that everything is working as it should.

Maintenance Tips

essential upkeep suggestions provided

Maintaining your ceiling fan is just as important as replacing its components. Regular upkeep not only enhances the fan's performance but also extends its lifespan. Here are some essential maintenance tips you should follow:

  1. Clean the Blades: Dust buildup can hinder functionality, so be certain to clean the fan blades regularly. A damp cloth works wonders.
  2. Inspect the Pull Chain: Check the pull chain every few months for signs of fraying or damage. Catching issues early can prevent bigger problems down the line.
  3. Avoid Yanking: When using the pull chain, avoid yanking or using excessive force. This can weaken the links, leading to breakage and more costly repairs.
  4. Lubricate Moving Parts: To guarantee smooth operation, lubricate the moving parts of the fan, including the pull chain assembly. This reduces friction and wear, keeping everything running smoothly.

Additionally, consider using a longer pull chain to make it easier to reach, reducing strain on the mechanism.

When to Call a Professional

seek expert help promptly

Sometimes, DIY repairs just don't cut it. If you're still facing issues with your ceiling fan after your attempts, it's time to contemplate calling a professional. Safety should be your priority, especially if you've noticed any electrical concerns or frayed wiring during your inspections. These issues can pose serious risks, so don't hesitate to seek expert help.

Complex fan designs, like those with integrated lighting or advanced controls, often require specialized knowledge for repairs. If you lack the necessary tools or experience, involving a professional can prevent potential hazards and further damage.

Advertisement

Additionally, check if your fan is still under warranty. Attempting repairs yourself might void the coverage, leading to extra costs down the line.

Here's a quick guide to help you decide:

Situation Action Needed Reason
Persistent issues post-DIY Call a professional Guarantee proper functionality
Electrical concerns detected Call a professional Mitigate safety risks
Complex fan design Call a professional Requires specialized knowledge
Warranty coverage applies Call a professional Avoid voiding warranty

In these cases, getting help is the best way to go.

Understanding the Pull Chain Mechanism

exploring pull chain functionality

The pull chain mechanism in your ceiling fan is a simple yet essential component that lets you control its speed and lighting with ease. This mechanism consists of a chain connected to a switch, allowing you to adjust settings with just a pull. Understanding how it works can help you fix issues when they arise.

Here are some key points to keep in mind:

  1. Chain Types: Pull chains can break externally, where they're visible, or internally, hidden within the fan housing.
  2. Common Breaks: Friction at the housing opening often causes internal chain breaks, which might need you to disassemble the fan.
  3. DIY Fix: Replacing a broken pull chain is usually straightforward. You'll typically need to remove the fan's lower section to install a new chain or switch.
  4. Maintenance Tips: Regularly inspect the pull chain to prevent issues and extend your ceiling fan's lifespan.

Frequently Asked Questions

Can a Ceiling Fan Pull Be Fixed?

Yes, you can fix a ceiling fan pull. If the chain's broken externally, adding an extension chain is easy.

For internal breaks, you'll need to disassemble the fan and might've to replace the pull chain switch, which involves reconnecting wires.

Advertisement

Regular maintenance can help prevent these issues, so keep an eye on the chain and switch.

You can find replacement parts at hardware stores or online, making it a manageable DIY project.

What to Do if a Chain Breaks on a Ceiling Fan?

When it rains, it pours, especially when a ceiling fan chain breaks.

First, check if the break's external or internal. If it's external, you can easily add an extension chain.

For internal breaks, turn off the power at the circuit breaker and disassemble the fan to inspect the pull chain switch.

Advertisement

Replace any broken parts, securely reassemble everything, and then restore power to guarantee your fan's back in business.

How Much Does It Cost to Replace a Pull Chain on a Ceiling Fan?

Replacing a pull chain on a ceiling fan usually costs between $10 and $30 for parts, depending on your fan's model and chain type.

If you hire a professional, labor can add another $50 to $100.

However, if you tackle the repair yourself, you can find pull chain switch kits online or at hardware stores for under $20.

Just remember, if there are other issues, total repair costs could rise considerably.

Advertisement

Can a Chain Be Replaced on a Ceiling Fan?

Yes, you can replace a chain on your ceiling fan.

First, you'll need to access the pull chain switch inside the fan housing. Make sure you have the right replacement chain, which you can find at hardware stores or online.

Disassemble the fan, remove the damaged chain, and install the new one by threading it through the switch mechanism.

Just remember to use proper tools and safety gear while you work.

Conclusion

Fixing a ceiling fan pull chain isn't rocket science; with the right tools and a bit of patience, you can tackle it yourself. Remember, safety's key—turn off the power before starting any repairs. Whether you need to replace a broken chain or just give it a little TLC, maintaining your fan guarantees it runs smoothly for years. So, roll up your sleeves and get to it—don't let a small issue leave you feeling like you're stuck in the Stone Age!

Advertisement

Continue Reading

Guides

How Are Ceiling Fan Sizes Measured

Sizing ceiling fans correctly is crucial for optimal airflow, but do you know the best methods for measuring their blade span?

Published

on

By

ceiling fan size measurement

Ceiling fan sizes are primarily measured by the blade span, which is the distance from tip to tip of the blades. To get this measurement, you simply measure across the widest point of the blades. If your fan has an odd number of blades, double the distance from the center to a blade tip. Recommended sizes vary based on room size: up to 36 inches for small rooms and up to 60 inches for larger spaces. Remember, ensuring proper installation height and clearance can enhance airflow even more. Stick around to discover additional insights on selecting and installing your fan.

Key Takeaways

  • Ceiling fan size is measured by the blade span, which is the distance from tip to tip of the blades.
  • For even-bladed fans, measure the full length from one tip to the other; for odd-bladed fans, double the center measurement.
  • Recommended fan sizes vary based on room size, ranging from 29-36 inches for small rooms to 50-60 inches for larger spaces.
  • Ensure at least 30 inches of clearance between the fan blades and walls for optimal airflow and circulation.
  • Measure ceiling height to determine the appropriate downrod length for effective fan installation and airflow efficiency.

Measuring Room Dimensions

calculating space measurements accurately

To measure your room dimensions accurately, grab a tape measure and start by finding the length and width in feet. Position one end of the tape against one wall and stretch it to the opposite wall, ensuring you're measuring straight across.

Once you have both measurements, calculate the square footage by multiplying the length by the width. For instance, if your room measures 12 feet by 15 feet, you'll get 180 square feet.

If you're dealing with an L-shaped room, divide the space into two rectangles, measure each section's length and width, and then sum their square footage for the total.

Don't forget to take into account ceiling height when selecting your ceiling fan size, as this can impact airflow. Additionally, keep an eye out for any obstructions like furniture or beams that could disrupt airflow and affect the fan's efficiency.

Calculating Room Square Footage

room area measurement guide

Calculating room square footage is a straightforward process that starts with the measurements you've taken. First, you need to measure the length and width of the room in feet. Multiply these two measurements together to calculate the square footage. For example, if a room is 12 feet long and 15 feet wide, its square footage is 180 sq ft.

If you're dealing with an L-shaped room, divide the space into two rectangles. Measure each section, calculate the square footage of each section separately, and then sum the results for the total area.

Advertisement

If you're measuring in inches, just multiply the length and width, then divide by 144 to convert to square feet.

Accurate room measurements are essential for selecting the appropriate ceiling fan size. This guarantees ideal air circulation and comfort.

Don't forget to take into account any obstructions or irregular shapes in the room that may affect the usable area; these factors should be included in your square footage calculation.

Understanding Ceiling Fan Size

choosing the right size

Ceiling fan size plays a significant role in guaranteeing effective air circulation and comfort in your space. The most important measurement to take into account is the blade span, which is the diameter from one blade tip to the opposite tip.

When measuring a ceiling fan, if it has an even number of blades, simply measure from tip to tip. For fans with an odd number of blades, measure from the tip to the center and double that measurement.

Understanding ceiling fan sizes is vital for proper fan sizing based on your room square footage. For instance, a fan size of 29-36 inches is ideal for rooms up to 75 square feet, while larger spaces up to 400 square feet benefit from fan sizes of 50-60 inches. This correlation guarantees optimal air circulation throughout your room.

Advertisement

Don't forget about clearance! Make sure there's at least 30 inches from the fan blades to the walls. This spacing is important for effective airflow and safety during operation.

Measuring Blade Span

blade span measurement techniques

When measuring blade span, you need to take into account whether your fan has an odd or even number of blades.

This measurement is essential for ensuring your fan fits well in the room and provides ideal air circulation.

Don't forget to account for clearance around the fan to avoid any obstacles.

Measuring Blade Length Accurately

To accurately measure the blade length of a ceiling fan, start by ensuring the fan is turned off and completely stopped, prioritizing your safety.

Once it's safe, you can proceed with measuring blade length, which is vital for determining the appropriate ceiling fan size for effective air circulation.

Advertisement

If your ceiling fan has an even number of blades, measure from the tip of one blade to the tip of the opposite blade. This will give you the full blade span, an essential measurement that directly impacts the fan's cooling efficiency.

On the other hand, for fans with an odd number of blades, you'll need to take a different approach. Measure from the tip of one blade to the center of the fan and then double that measurement. This will provide you with the accurate measurement of the blade span.

Odd vs. Even Blades

Understanding the difference between odd and even blades can help you measure the blade span of your ceiling fan accurately. When you're dealing with ceiling fan blades, the measurement process varies based on whether you have an even or odd number of blades.

For fans with an even number of blades, simply measure from the tip of one blade directly across to the tip of the opposite blade to determine the full span. This method provides a straightforward measurement that's easy to follow.

However, if your fan features an odd number of blades, the process is a bit different. You'll need to measure from the tip of one blade to the center of the fan. After getting that measurement, multiply it by two to find the diameter.

Advertisement

Knowing the blade span is essential for selecting a ceiling fan that's the right size for your room. Accurate measurements guarantee ideal air circulation and comfort in your space.

Always check the product packaging or webpage for the blade span measurement to make the best choice for your needs.

Importance of Clearance

Adequate clearance around your ceiling fan is fundamental for ideal performance and safety. You'll want to guarantee that the fan blades maintain at least 30 inches of space from walls or any surrounding objects. This clearance is essential for efficient air circulation, preventing airflow obstruction that could reduce the fan's effectiveness.

To measure blade span accurately, start from the tip of one blade to the tip of the opposite blade, giving you the overall diameter. For even-bladed fans, this full measurement is straightforward. However, for odd-bladed fans, measure from the tip to the center and double that figure.

Selecting the right fan size based on your room dimensions is critical. A fan with a larger blade span is typically more effective in larger spaces, enhancing both efficiency and comfort.

Advertisement

If the fan size doesn't match the room's dimensions, you may not achieve the desired cooling effect, which could lead to discomfort during warmer months. By understanding the importance of clearance and accurately measuring blade span, you can maximize your ceiling fan's performance and guarantee a comfortable living environment.

Determining Ceiling Height

measuring room vertical space

Determining the height of your ceiling is essential for selecting the right ceiling fan and guaranteeing ideal performance. To do this accurately, measure from the floor to the highest point of the ceiling, keeping in mind any irregularities or slopes.

Ideally, ceiling fans should be installed at heights above the floor between 7 to 9 feet to promote maximum airflow and maintain safety.

If your ceiling height is lower than 8 feet, it's best to opt for a low-profile ceiling fan. These fans hug the ceiling, maximizing headroom and preventing obstruction.

On the other hand, if your ceiling exceeds 9 feet, you may need a downrod to lower the fan to an appropriate height for effective air circulation.

Always guarantee there's at least 8 inches of clearance between the ceiling and the fan blades. This space not only promotes proper airflow but also reduces the risk of potential damage to the blades.

Advertisement

Calculating Downrod Length

determining downrod measurement accurately

Once you've established your ceiling height, the next step is calculating the downrod length for your ceiling fan. This downrod connects the fan to the mounting bracket and is essential for achieving ideal airflow.

To determine the appropriate downrod length, subtract the combined height of the fan motor and light kit from your ceiling height. Remember to allow at least 8 inches of clearance from the ceiling to the fan blades.

Here are some key things to take into account while measuring:

  • Guarantee at least 7 to 9 feet of hanging height for effective air circulation.
  • For ceilings over 9 feet, a downrod is often necessary.
  • Be aware of any obstacles like light fixtures or cabinetry that could impact clearance.
  • Standard downrod lengths typically range from 6 inches to 72 inches.
  • Aim for a balance between aesthetics and functionality for your space.

Selecting the Right Fan Size

choosing appropriate fan dimensions

When you're choosing a ceiling fan, it's essential to evaluate the size of your room first.

For smaller spaces, a fan with a 29-36 inch blade span will do, while larger areas may need fans with a 50-60 inch span or even multiple units for proper airflow.

Always keep in mind any obstructions that might affect how well your fan circulates air.

Room Size Guidelines

Choosing the right ceiling fan size is essential for maximizing comfort and airflow in any room. To guarantee peak performance, start by measuring your room's square footage. Multiply the length and width in feet; for instance, a 10' x 12' room equals 120 sq ft.

Advertisement

Here are some guidelines to help you select the appropriate fan size based on room size:

  • For rooms up to 75 sq ft, choose fans with a 29 to 36-inch blade span.
  • For 76 to 144 sq ft, select fans with a 36 to 44-inch blade span.
  • Rooms measuring 145 to 225 sq ft require fans with a 44 to 54-inch blade span.
  • Spaces between 226 to 400 sq ft need fans that are 50 to 60 inches in size.
  • For rooms larger than 400 sq ft, consider using multiple fans or oversized fans with a blade span of 65 inches or more.

Always guarantee at least 30 inches of clearance from walls for peak airflow and efficiency.

Blade Span Specifications

Understanding blade span specifications is vital for selecting the right ceiling fan size that suits your space. Blade span, or sweep, refers to the diameter of a ceiling fan measured from the tip of one blade to the tip of the opposite blade. To measure accurately, if your fan has an even number of blades, simply measure straight across from tip to tip. For fans with an odd number of blades, measure from the tip to the center and double that measurement.

Selecting the appropriate fan size is important for effective cooling, as recommended sizes depend on room dimensions. For example, fans with a blade span of 29-36 inches work well in rooms up to 75 square feet, whereas those with a span of 50 inches or larger are better for spaces over 100 square feet.

Don't forget about clearance! You'll need a minimum of 30 inches from the blade tips to any wall or obstruction to guarantee excellent airflow and efficiency.

Multiple Fan Considerations

Selecting the right ceiling fan size isn't just about aesthetics; it's vital for maximizing airflow and comfort in your space. The blade span directly correlates to the room size, guaranteeing effective air circulation.

Advertisement

Here's what to take into account when measuring your needs:

  • Room dimensions: Knowing your room size helps you pick the right fan size.
  • Fan size guidelines: Use recommended sizes for ideal airflow—29 to 36 inches for rooms up to 75 square feet, and larger sizes for bigger spaces.
  • Energy efficiency: A fan that's too small will work harder, increasing energy costs.
  • Multiple fans: In larger areas, don't hesitate to install multiple fans or oversized ones for better circulation.
  • Comfort: A well-sized ceiling fan can make a huge difference in your comfort level.

For rooms greater than 226 square feet, think about fans with blade spans of 50 inches or more.

In spaces exceeding 400 square feet, installing multiple fans may be necessary to guarantee effective circulation.

Choosing the right ceiling fan not only enhances your comfort but also boosts energy efficiency, allowing you to enjoy your space without worry.

Installation Guidelines

installation procedure instructions

When it comes to installing ceiling fans, proper guidelines guarantee both safety and efficiency in airflow.

First, measure the blade span accurately; for even-numbered blade fans, measure from tip to tip directly. For odd-numbered fans, measure from the tip to the center and double that length.

Confirm there's at least 30 inches of clearance between the fan blades and any walls or obstructions to facilitate ideal airflow.

Advertisement

The fan height is also critical; it should be at least 7 feet above the floor for effective air circulation and should be mounted at least 8 inches from the ceiling for proper airflow.

If you're working with sloped ceilings, follow specific installation guidelines. If the slope exceeds 32 degrees, use an angled ceiling mount adapter to keep the fan operating efficiently and safely.

By adhering to these installation guidelines, you'll not only enhance the effectiveness of your ceiling fan but also confirm a safe environment.

Additional Considerations

further important factors

When picking a ceiling fan, you can't overlook clearance requirements; ideally, blades should have at least 30 inches of space from the walls.

Additionally, think about how the fan's design and color will fit your room's aesthetic.

These factors will help you achieve both ideal airflow and a stylish look.

Advertisement

Fan Blade Clearance Requirements

Maintaining proper clearance around ceiling fan blades is essential for both safety and efficiency. You need to verify that your ceiling fan adheres to specific clearance requirements to promote ideal airflow and prevent any hazards.

Here are some key considerations for fan blade clearance:

  • Minimum clearance of 18 inches from walls for unobstructed airflow
  • Fan blades should be at least 7 feet above the floor to avoid head impacts
  • At least 8 inches of clearance from the ceiling to reduce noise and enhance airflow
  • For sloped ceilings, maintain a minimum of 30 inches from the nearest wall for efficient air movement
  • Consider nearby furniture and obstacles, as they can hinder the necessary blade clearance

Aesthetic Considerations for Fans

Choosing the right ceiling fan goes beyond just functionality; aesthetics play an important role in creating a harmonious space. When selecting a fan, consider the overall style of your room to guarantee it complements your existing decor.

Whether your space is modern, traditional, or adaptable, the fan's design should blend seamlessly. The finish of your fan—like brushed nickel, oil-rubbed bronze, or white—should coordinate with other hardware and fixtures for a cohesive look.

Don't overlook the fan blades; their colors and designs can greatly impact the visual appeal. Lighter blades may brighten up a room, while darker blades can add a dramatic touch.

It's crucial to assess the size of the fan in relation to your room. Larger spaces benefit from fans that are 60 inches or more to avoid a disproportionate appearance.

Advertisement

Additionally, customizable options, such as interchangeable blades or light kits, allow you to adapt the fan's appearance to suit changing tastes or seasonal decor. By considering these aesthetic factors, you can choose a ceiling fan that not only cools your space but also enhances its overall beauty.

Practical Tips for Fans

fan engagement strategies explained

To make the most out of your ceiling fan, it's important to size it correctly for your space. Choosing the right fan size enhances air circulation and guarantees comfort.

Start by measuring your room square footage; larger spaces require larger fans. Here are some practical tips to keep in mind:

  • Measure a ceiling fan's blade span accurately, from tip to tip.
  • For rooms under 75 sq ft, opt for a fan with a 29 to 36-inch span.
  • Guarantee at least 30 inches of clearance from walls for ideal airflow.
  • If your ceiling height exceeds 9 feet, consider using a downrod to maintain the perfect height of 7 to 9 feet above the floor.
  • Don't overlook the aesthetic; a well-sized fan can elevate your room's design. Additionally, selecting a fan with energy star ratings can ensure improved energy efficiency and savings potential.

Frequently Asked Questions

Is a 52 Inch Fan Too Big for a 12X12 Room?

Yes, a 52-inch fan is too big for a 12×12 room. It can overwhelm the space and lead to poor air circulation.

You might feel uncomfortable drafts, especially if you're sitting directly under it. Ideally, you should opt for a fan with a blade span of 36 to 44 inches, which will provide better airflow without compromising the room's aesthetics and comfort.

Consider using multiple smaller fans for even better results.

How to Check Ceiling Fan Size?

Imagine standing in a breezy paradise, feeling the perfect airflow.

Advertisement

To check your ceiling fan size, measure the blade span, which is the distance from one blade tip to the opposite blade tip. If your fan has an even number of blades, measure straight across; if it has an odd number, measure to the center and double it.

This'll help you guarantee your fan fits your room just right!

What Size Ceiling Fan for 13X13 Room?

For a 13×13 room, you'll want a ceiling fan with a blade span between 44 to 54 inches.

This size guarantees ideal air circulation and cooling.

Make sure there's at least 30 inches of clearance between the fan blades and the walls for efficient airflow.

Advertisement

If your ceiling is lower than 8 feet, consider a flush mount fan to maintain safety and proper clearance.

Don't forget to check the fan's design and motor efficiency too!

How to Measure a Ceiling Fan With an Odd Number of Blades?

To measure a ceiling fan with an odd number of blades, start by turning off the fan and waiting for it to stop completely.

Grab a tape measure and find the distance from the tip of one blade to the center of the fan motor; this gives you the radius.

Double that measurement to get the diameter.

Advertisement

Conclusion

Now that you know how to measure for the perfect ceiling fan, you're ready to create your own breeze like a summer's day in a Shakespearean play. By selecting the right size and understanding your space, you can turn any room into a cool, comfortable retreat. So, don't just let the air sit still—embrace the dance of the blades overhead. With these tips, you'll have the ideal fan in no time, bringing harmony to your home.

Continue Reading

Guides

How Long Can a Ceiling Fan Run Continuously

Many wonder how long a ceiling fan can run continuously; discover the surprising facts and tips to ensure its optimal performance.

Published

on

By

ceiling fan continuous operation duration

You can run a ceiling fan continuously for over eight hours, which makes it perfect for providing consistent airflow and comfort. Most high-quality fans are equipped with safety features like thermal protection, ensuring safe operation even during extended use. Regular maintenance is key, so make sure to clean the blades and check for loose parts every few months. Not only do ceiling fans enhance indoor air quality, but they also offer an energy-efficient alternative to more power-hungry air conditioning units. Keep exploring to uncover more tips on maximizing your ceiling fan's performance and longevity.

Key Takeaways

  • High-quality ceiling fans can operate continuously for 8+ hours without issues, thanks to their durable design.
  • Built-in safety features, like thermal protection systems, prevent overheating during extended use.
  • Regular maintenance, including cleaning and lubrication, enhances performance and longevity of continuous operation.
  • Ceiling fans are energy-efficient, consuming significantly less power than air conditioning units during prolonged use.
  • Unusual noises or performance issues during operation indicate a need for immediate maintenance or servicing.

Ceiling Fan Safety Features

ceiling fan safety precautions

When it comes to your ceiling fan's safety features, you can rest easy knowing that high-quality models are built with your protection in mind. These ceiling fans are engineered to guarantee safe continuous operation, often running for hours—sometimes up to eight or more—without any overheating risks.

One of the standout safety features is the thermal protection system, which automatically shuts off the motor if it exceeds safe temperature limits. This mechanism greatly reduces the risk of fire hazards in your home.

Additionally, reputable brands often boast safety certifications, like UL or ETL listings, which confirm their compliance with strict safety standards for electrical appliances.

Moreover, high-quality ceiling fans incorporate durable components, such as heavy-duty motors and reinforced wiring, which enhance their ability to function without malfunction during extended use. This durability can also contribute to lower energy bills, as efficient fans require less power to operate continuously.

To maximize safety and longevity, regular maintenance—like cleaning and inspecting electrical connections—is essential. By choosing a ceiling fan with these important safety features, you can confidently enjoy the cool air it provides, knowing your safety is a top priority.

Advertisement

Guidelines for Continuous Operation

continuous operation best practices

Understanding the safety features of your ceiling fan sets the stage for knowing how to use it effectively for extended periods. Most high-quality ceiling fans can run continuously for about eight hours without any issues. Many homeowners even run their fans 24/7 during the hotter summer months for comfort.

You'll find that these fans are equipped with built-in safety features to prevent overheating, making it safe to leave them running.

To guarantee peak performance while your ceiling fan is running, regular maintenance is essential. Dust the blades and motor frequently to keep everything clean. This simple task helps maintain effective air circulation, especially during those extended periods of use.

Keep an ear out for any unusual noises or performance issues, as they can indicate maintenance needs. Addressing these issues promptly will guarantee your fan remains safe and efficient during extended use.

Benefits of Extended Use

advantages of prolonged utilization

Running your ceiling fan continuously offers several benefits that can greatly enhance your home's comfort and efficiency. One of the primary advantages is improved air circulation, which helps maintain better indoor air quality. By keeping the air moving, ceiling fans create a cooling effect that makes your space feel more pleasant without relying heavily on air conditioning.

Moreover, ceiling fans are a cost-effective cooling alternative, consuming only 15-90 watts compared to the over 3500 watts used by AC units. This significant difference in energy consumption translates to lower energy bills, especially during hot months.

You'll also appreciate the gentle breeze they provide, which can help improve your sleep quality by offering a soothing white noise that masks disruptive sounds. Additionally, using ceiling fans can complement your HVAC system, similar to how air purifiers significantly reduce allergens by enhancing overall indoor comfort.

Advertisement

Utilizing ceiling fans year-round, including reversing their direction in winter to push warm air down, enhances heating efficiency and comfort during colder months. Regular operation can also prolong the lifespan of your ceiling fans, ensuring they continue to circulate air efficiently.

Maintenance Tips for Longevity

extend lifespan with care

Proper ceiling fan maintenance is essential for guaranteeing longevity and ideal performance. Regular care keeps your fan running efficiently and prevents unnecessary wear. Here are some simple tips to help you maintain your ceiling fan:

Task Frequency
Clean blades and motor Monthly
Check for loose parts Every 3 months
Lubricate moving components Biannually
Turn off when leaving a room Every time you exit

Start by cleaning the blades and motor housing to remove dust buildup that can hinder performance and lead to overheating. Make sure your fan is installed at the recommended height of 2.1 to 2.7 meters to maximize efficiency and air circulation. Periodically checking for loose parts and lubricating components will reduce noise and extend the fan's lifespan. Additionally, maintaining efficient air circulation can help reduce the need for additional cooling methods, saving energy in the long run.

Don't forget to turn off the fan when you leave a room to save energy and lessen wear on the motor. Following manufacturer guidelines for maintenance schedules and cleaning practices will guarantee your fan operates safely and effectively for years to come.

Energy Efficiency Considerations

maximizing energy usage effectiveness

Ceiling fans are a cost-effective alternative to air conditioning, consuming between 15 to 90 watts, which is drastically less than the 3500 watts used by most AC units. This significant difference in energy consumption makes ceiling fans an attractive option for improving energy efficiency in your home. By ensuring your living spaces are organized and decluttered, you can help facilitate mindful energy usage and create a more peaceful environment. Additionally, using energy-efficient heat pumps alongside ceiling fans can further enhance your home's overall energy savings.

Moreover, choosing models with high CFM ratings can significantly improve air circulation and cooling efficiency in your space. Regularly cleaning your ceiling fans can prevent dust buildup, which can otherwise decrease their efficiency and impact indoor air quality.

However, running a ceiling fan continuously can increase your energy costs if it's left on when no one is in the room.

Advertisement

To truly maximize operational costs, consider investing in high-quality ceiling fans with Energy Star ratings. These models are designed to provide better airflow while consuming less power.

You can further optimize your energy usage by pairing ceiling fans with programmable thermostats, allowing you to maintain a comfortable environment without solely relying on your air conditioner.

Regular maintenance of your ceiling fans also plays an important role in energy efficiency. By ensuring they operate smoothly, you can minimize energy waste and prolong their lifespan. Additionally, understanding power requirements for gas lines can help ensure that your ceiling fan and other appliances operate safely and efficiently together.

Being mindful of how and when you use your ceiling fans will help you achieve the perfect balance between comfort and efficiency, ultimately keeping your energy bills in check.

Alternatives to Ceiling Fans

cooling options without fans

If you're looking for energy-efficient cooling options, there are plenty of alternatives to ceiling fans.

Smart home integration can enhance your comfort by automatically adjusting temperatures with programmable thermostats.

Advertisement

Consider bladeless fans or tower fans for effective airflow without the energy drain of continuous ceiling fan use. Additionally, using air purifiers can improve indoor air quality while keeping your space cool and comfortable.

Energy-Efficient Cooling Options

There are several energy-efficient cooling options that can serve as effective alternatives to ceiling fans. Exhaust fans, for instance, are a smart choice for kitchens and bathrooms, using less power while effectively circulating air.

You'll find they help maintain a comfortable environment without straining your energy bill.

Another option is a programmable thermostat. By automatically adjusting your home's temperature based on occupancy, it helps reduce cooling costs while keeping your space comfortable.

If you prefer a more modern approach, consider bladeless fans. They use internal blades to create airflow and are designed to be more energy-efficient than traditional bladed fans.

Advertisement

While air conditioning units tend to consume more energy, you can optimize their efficiency by using ceiling fans in tandem, allowing for higher thermostat settings without sacrificing comfort.

Additionally, look for Energy Star-rated appliances and smart home devices, as they considerably lower overall energy consumption when paired with traditional cooling methods.

Incorporating these energy-efficient options can provide effective cooling while keeping your energy costs in check, making your home comfortable without the unnecessary expense.

Smart Home Integration

Many homeowners are discovering the benefits of smart home integration as an alternative to traditional ceiling fans. Smart home systems can enhance your cooling experience by integrating with advanced cooling solutions like smart thermostats and air conditioning units. These systems allow for automated temperature adjustments based on occupancy and your personal preferences, ensuring ideal comfort with minimal effort. Additionally, high protein options like crab cakes can make for a great snack while enjoying your cooling solutions.

Smart ceiling fans, equipped with mobile app controls and voice command features, provide an added layer of convenience and energy efficiency. You can easily adjust their speed, direction, and scheduling to meet your specific needs. Additionally, the integration of smart lighting systems can further enhance the ambiance and comfort of your living space while reducing energy use.

Advertisement

Moreover, smart air purifiers not only improve indoor air quality but also circulate air throughout your space, making them a viable alternative to ceiling fans. Incorporating stress management techniques into your daily routine can further enhance your overall comfort and well-being.

Frequently Asked Questions

Is It OK to Run a Ceiling Fan 24 7?

Yes, it's generally okay to run a ceiling fan 24/7, especially during hot summer months.

These fans are designed for extended use, and most manufacturers don't restrict continuous operation.

However, you should consider turning it off when you don't need it to save energy and extend its lifespan.

Remember to perform regular maintenance, like dusting the blades, to guarantee it runs efficiently and safely.

Advertisement

Enjoy the comfort while being mindful of energy use!

How Many Days Can a Ceiling Fan Run Continuously?

Imagine your ceiling fan as a tireless guardian, tirelessly keeping your space cool. You can actually let your ceiling fan run for days without worry.

Many high-quality fans are built for continuous operation, often lasting years with minimal issues. However, keep an ear out for any strange noises or performance drops.

Can a Ceiling Fan Overheat?

Yes, a ceiling fan can overheat, especially if it's not properly maintained.

You should check for excessive heat or any unusual noises while it's running. If you notice these signs, turn it off immediately.

Advertisement

Regularly clean the blades and motor housing to prevent dust accumulation, which can cause overheating.

Most modern fans have safety features to protect against this, but it's always smart to stay vigilant for potential issues.

What Happens if a Fan Runs Continuously?

If you let a fan run continuously, it can generate heat, which is normal, but you should keep an eye out for signs of overheating.

Over time, extended use can lead to wear and tear, potentially shortening the fan's lifespan.

Regular maintenance, like cleaning and listening for unusual noises, is essential to guarantee it operates safely and efficiently.

Advertisement

Turning it off when you don't need it can also save energy and prolong its life.

Conclusion

Running your ceiling fan continuously is generally safe, but it's important to take into account maintenance and energy efficiency. You might worry about wear and tear, but regular checks and cleaning can keep your fan running smoothly for years. Plus, the benefits of consistent airflow and energy savings far outweigh the concerns. Embrace the comfort and efficiency of your ceiling fan, knowing that with a little care, it can enhance your space without hassle.

Continue Reading

Affiliate disclaimer

As an affiliate, we may earn a commission from qualifying purchases. We get commissions for purchases made through links on this website from Amazon and other third parties.

Advertisement

Vetted

Trending