Electricians usually charge between $100 and $300 to install a ceiling fan, depending on the existing wiring and setup complexity. If you've got existing wiring, it'll likely be on the lower end of that scale. More complex installations, especially those requiring new wiring or special mounting, can push costs upwards of $700. Don't forget to factor in additional expenses like mounting boxes or junction boxes, which can also add to your total. Understanding these details can help you prepare for a smooth installation, and there's more to explore on choosing the right fan and hiring a professional.
Key Takeaways
- Electricians typically charge between $50 to $130 per hour for ceiling fan installation services.
- Basic installation costs range from $100 to $300 when using existing wiring.
- Total installation costs can vary from $200 to over $1,000 based on wiring status and complexity.
- Labor for replacing existing fans can range from $50 to $200, depending on the installation's complexity.
- Additional expenses may include mounting boxes ($50-$150) and junction boxes ($100-$300), influencing overall costs.
Understanding Labor Costs

When you're considering having a ceiling fan installed, understanding labor costs is essential, as they can vary widely based on several factors.
Electricians typically charge between $50 to $130 per hour, depending on their experience and location. If you opt for a handyman, you might pay lower rates of $50 to $80 per hour, but keep in mind they can only work with existing wiring.
The complexity of your installation plays a big role in determining costs. For a basic installation using current wiring, expect to pay around $100 to $300. However, if new wiring or extra features are involved, you could see costs soar to $1,000 or more. Outdoor installations often fall into the higher range too. High-end ceiling fans may require specialized installation, which can further increase your overall expenses.
Additional expenses can also add up quickly. Running new wiring might set you back $5 to $17 per square foot, while adding a junction box could cost between $100 and $300.
Always remember to factor in permits and inspection fees, as they can vary based on local regulations. Understanding these elements will help you budget effectively for your ceiling fan installation.
Installation Time Estimates

When you're planning to install a ceiling fan, understanding the factors that affect installation time is essential. If you have a complex setup, like needing new wiring or additional supports, it can take considerably longer than a standard install. Average installation time ranges from 1 to 5 hours, depending on the specifics of the job. Let's break down what influences the time and how different scenarios can impact your project.
Factors Affecting Installation Time
Several factors can considerably influence the time it takes to install a ceiling fan.
First, your ceiling height plays a significant role; higher ceilings usually mean longer installation times. If there's existing wiring, that can speed things up, but if your electrician needs to make adjustments or add new wiring, expect delays.
The presence of a mounting box is essential—if there isn't one, additional time will be required to install it.
The complexity of your switch and outlet configurations can also add time to the process. An experienced electrician may finish the job faster, but local rates and labor efficiency can affect overall costs and timelines as well. Additionally, effective project scheduling can help streamline the overall installation process, reducing potential delays.
Structural conditions like beams or ductwork might slow down progress, especially in tight spaces. If your ceiling type is angled or specialized, that'll also extend the installation.
Finally, if you're opting for a fan with advanced features, such as lighting or remote controls, or need an extended downrod, those components will take extra time to install.
Understanding these factors will help you set realistic expectations for your ceiling fan installation timeline.
Time for Complex Installations
For complex ceiling fan installations, you can expect the process to take anywhere from 2 to 5 hours, depending on various factors.
Here's a breakdown of what influences the installation time:
- Wiring Needs: If new wiring is required, you might spend 2-3 hours for simpler setups, while more intricate systems can take 3-4 hours.
- Access and Conditions: Attic access and wall conditions can greatly affect timing. Higher ceilings often mean more time needed.
- Installation Tasks: The work involves several detailed tasks, such as running wiring, boring holes, installing breakers, splicing wires, and securely assembling the fan. Additionally, complexity of installation can significantly impact the overall time required for the project.
Keep in mind that if your installation requires additional features like remote controls or fan-rated electrical boxes, it might push the time closer to that 5-hour mark.
Ultimately, the electrician's experience and the specific ceiling fan model also play vital roles in determining how long the job will take.
Costs With Existing Wiring

Installing a ceiling fan with existing wiring can save you both time and money. When you opt for this route, you're looking at labor costs ranging from $50 to $200, depending on your electrician's experience and local rates.
For a standard installation, you can expect to pay between $75 and $195, which typically covers 1-2 hours of work.
Choosing a basic ceiling fan will keep your installation costs lower, generally between $100 and $300. If you pick a mid-range fan, the cost remains similar, while high-end decorative fans can push the total to $500 or more.
Add-ons like remote controls or smart features could increase costs by $50 to $100.
Since you're using existing wiring, the process is simplified, eliminating the need for new wiring or junction boxes. However, if your ceiling is higher than the standard 8-foot height, additional labor and equipment might be required.
Keep in mind that local building codes and potential permit requirements could affect the final price, but compatibility with existing wiring means you avoid extra fees, making it a cost-effective choice overall. Existing wiring can significantly lower installation costs to as low as $100 to $300.
Costs Without Existing Wiring

When you don't have existing wiring for your ceiling fan, expect the installation to be more complex and costly. This process involves running new wiring, which can take time and might require additional electrical circuits or a new junction box. Be prepared for labor costs that can range from $50 to $130 per hour, depending on your location.
Here are three key factors affecting your installation costs:
- Wiring Costs: Running new wiring typically costs between $5 and $17 per square foot, so larger spaces can greatly raise the price.
- Junction Box Installation: If your setup needs a new junction box, you can expect to pay between $100 and $300.
- Circuit Additions: Installing a new circuit usually costs around $150 to $300, which adds to your overall expenses.
In total, you might spend anywhere from $300 to $2,000 for the installation without existing wiring. Professional installation ensures safety and compliance with building codes, which is especially important in situations involving new wiring.
Additional Costs and Accessories

After addressing the complexities and costs of installing a ceiling fan without existing wiring, it's important to contemplate the additional costs and accessories that can influence your final bill.
Labor rates vary considerably, ranging from $50 to $130 per hour for electricians, while handymen may charge $50 to $80 if existing wiring is usable. Installing new components, like a mounting box, can add $100 to $300 to your total. If you're considering a fan speed control switch, expect to pay between $100 to $200. Additionally, you might want to purchase a hanging kit for $19.99, which can facilitate the installation process. Energy-efficient heat pumps can also provide better climate control in your space, similar to how a ceiling fan enhances airflow. Proper ventilation is crucial for maintaining indoor air quality, especially in areas where fans are installed.
Additional junction boxes might also cost $100 to $300, depending on accessibility.
Don't forget about accessories like downrods, control systems, and hanging kits, which can vary in price based on brand and features.
You could also incur extra fees for patching and painting the ceiling, or travel fees if multiple visits are necessary.
Complex installations requiring rewiring can further increase costs. If you're installing multiple fans at once, this could help lower your overall expenses.
Always verify that your wiring is done properly and up to code, as this might lead to additional fees.
Average Total Installation Cost

When you're considering the average total installation cost for a ceiling fan, several factors come into play. The type of fan you choose, along with the complexity of the installation, can greatly impact your final bill. It's important to break down these expenses to understand what you're really paying for. The average installation cost is approximately $249, but it can vary based on the specific requirements of your project.
Factors Affecting Costs
Understanding the factors affecting ceiling fan installation costs can help you budget effectively for your project. Several elements influence the final price, and being aware of these can lead to smarter choices.
Here are three key factors you should consider:
- Type of Ceiling Fan: Standard fans are usually cheaper, while energy-efficient or smart models come at a premium. Additional features like remote controls or integrated lighting further increase costs. Ceiling fans add value and comfort to homes, acting as decorative pieces.
- Installation Complexity: If your home already has a pre-wired ceiling box, installation will be less expensive. However, if new wiring or a junction box is necessary, expect to pay more. Ceiling height and room size can also add to labor costs.
- Location and Labor: Labor rates vary by region, with urban areas typically charging more than rural locations. Additionally, electricians charge more than handymen, and any required permits can further increase your overall expense.
Breakdown of Expenses
Knowing the factors that affect ceiling fan installation costs sets the stage for a clearer picture of what you might pay in total.
The price of the ceiling fan itself ranges from $50 to $1,400, depending on the type you choose. Basic fans generally cost between $50 and $150, while mid-range options are usually priced between $100 and $300. If you're looking for something high-end, expect to spend $500 or more.
Labor costs also vary greatly. For a basic installation, labor averages $75 to $195, with new installations costing $200 to $400. If you're replacing an existing fan, labor might only set you back $50 to $200.
Overall, the average total installation cost lands between $200 and $700, depending on whether you have existing wiring.
Don't forget about additional expenses. Items like a mounting box can cost $50 to $150, while running new wiring adds $100 to $500. If you want switches or remote controls, budget an extra $100 to $300.
Factors Affecting Installation Price

Several key factors can greatly influence the installation price of a ceiling fan. Understanding these elements can help you budget effectively and avoid surprises when the bill arrives.
- Existing Wiring and Box Setup: If your home already has an electrical box ready for a ceiling fan, installation costs will be lower. Proper expert intervention ensures the existing wiring is safe and compliant with local codes, reducing potential hazards.
- Complexity of the Installation: Simple installs typically range from $75 to $195, while more complex setups can soar to $700 or more. High ceilings or outdoor installations demand additional labor and equipment, raising costs.
- Location and Accessibility: Labor costs vary by location, influenced by local demand and the cost of living. Expect to pay anywhere from $50 to $200 for installation, especially if your ceiling type complicates access.
Choosing the Right Ceiling Fan

When choosing the right ceiling fan, you'll want to contemplate the size, style, and energy efficiency ratings that best suit your space.
A fan that's too small or too large can affect airflow and aesthetics, while the right design can enhance your room's decor. Plus, energy-efficient models can save you money on utility bills over time. Additionally, installation costs can vary based on the complexity of the project and whether you have existing wiring.
Fan Size Considerations
Choosing the right ceiling fan involves understanding the size and dimensions of your room. To guarantee you select the appropriate fan, consider these key factors:
1. Room Dimensions: Measure your room's length and width in feet to determine the square footage. For example, a 12×15 foot room is 180 square feet and requires a specific fan size.
2. Fan Size Guidelines:
- Small rooms (up to 75 square feet): 29-36 inch fans
- Medium rooms (76-144 square feet): 36-42 inch fans
- Large rooms (145-225 square feet): 44-50 inch fans
3. Ceiling Height: Your Ceiling Height considerably influences fan choice. For low ceilings (under 8 feet), opt for low-profile fans. Standard ceilings (8-10 feet) accommodate most fans, while high ceilings may need longer downrods to maintain proper clearance. Properly sized fans can reduce reliance on air conditioning to enhance energy efficiency.
Style and Design
Finding the perfect ceiling fan goes beyond just functionality; it's about enhancing your room's style and atmosphere. When you're choosing a fan, consider modern designs featuring sleek lines and minimal ornamentation. These fans not only look great but also come with advanced features like smart home integration and remote controls.
Look at the finishes available—silver, rose gold, black, and white can all set the right tone for your space. If you're leaning towards specific styles, flush-mount fans work well for low ceilings, while farmhouse fans add a rustic charm.
For a more eclectic vibe, boho fans with leaf-style blades can bring a unique twist. Additionally, many models offer energy-efficient LED lighting that enhances both functionality and charm.
Don't overlook the materials and lighting options. You can opt for fans with elegant fine wood blades or energy-efficient LED lighting with customizable settings.
Confirm the fan harmonizes with your room's aesthetic; it should complement your decor while meeting functional needs.
Ultimately, with so many styles and finishes to choose from, you can find a ceiling fan that elevates your space and reflects your personal taste.
Energy Efficiency Ratings
Understanding energy efficiency ratings is essential for selecting the right ceiling fan for your home. Choosing an efficient ceiling fan not only helps you save on energy costs but also contributes to a more sustainable environment.
Here are three key factors to evaluate:
- Energy Star Certification: Look for fans that are Energy Star certified. These fans use more-efficient motors and lighting, potentially saving you 40% or more on energy compared to standard models.
- CFEI Ratings: The Department of Energy (DOE) requires a minimum CFEI rating of 1.00 at high speed. Fans with higher ratings usually offer better performance and energy savings, reflecting the enhanced performance standards established by the Ceiling Fan Improvement Act.
- Motor Type: Assess fans with DC motors, like the Craftmade Pireos. They're generally more efficient and quieter than traditional AC motors, enhancing your comfort without breaking the bank on energy bills.
Hiring a Qualified Electrician
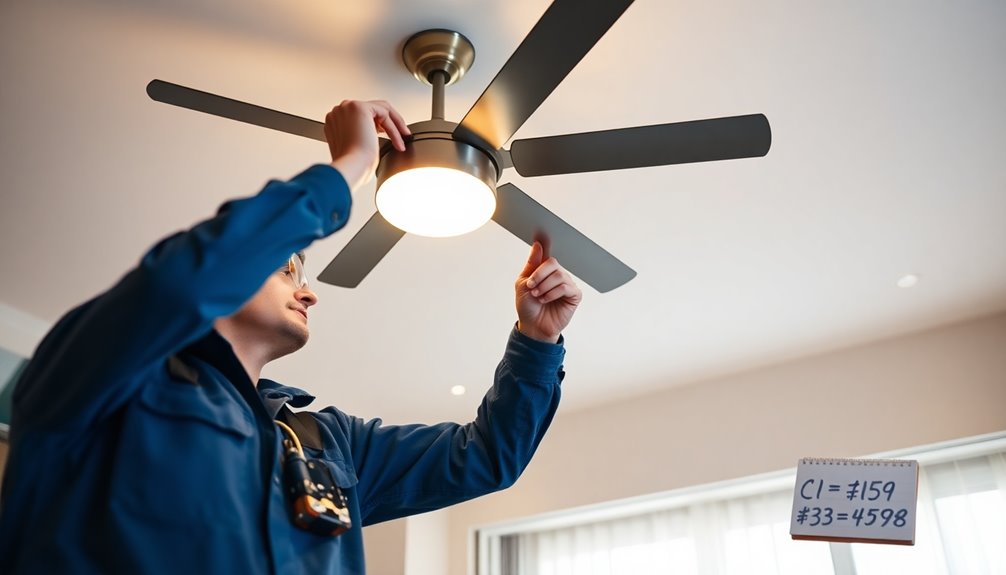
Hiring a qualified electrician can make all the difference in guaranteeing a safe and efficient ceiling fan installation. To start, you'll want to verify that the electrician holds a valid journeyman or master electrician license. This often requires 4-8 years of experience and passing a licensing exam. Don't hesitate to ask about their work history and credentials.
Next, make sure your electrician carries the necessary insurance. This is essential for protecting both you and the electrician during the installation process. Liability insurance will cover potential damages or injuries, while workers' compensation may be required based on your state laws. Additionally, ensure that your electrician has completed the required continuing education hours for license maintenance, as this demonstrates their commitment to staying updated on industry standards.
It's also important that the electrician is familiar with local codes and regulations. Compliance with these standards guarantees that the installation is safe and legal. Ask about their experience with ceiling fan installations, particularly in situations that may present unique challenges, like high ceilings or new wiring.
Lastly, check reviews and ask for references to confirm their expertise. A reputable electrician should have a track record of successful installations, giving you peace of mind as you proceed with your project.
Tips for Reducing Installation Costs
To keep your ceiling fan installation costs manageable, consider planning and researching thoroughly before you begin. This preparation can help you avoid unexpected expenses and guarantee a smoother process.
Here are some tips to reduce those costs:
- Define Your Project Scope: Know exactly what you need. Research reputable suppliers to compare prices and look for discounts or bulk purchase options. This helps you save on materials and can lead you to energy-efficient products that may have higher upfront costs but offer long-term savings.
- Obtain Multiple Quotes: Don't settle for the first electrician you find. Request detailed quotes that outline the scope of work, materials, and costs. Compare electricians based not just on price, but also on their qualifications and reputation.
- Optimize Installation: If possible, install multiple fans at once to take advantage of lower hourly rates. Choose areas with existing wiring to cut down on labor, and make sure the installation site is clear and accessible to save preparation time.
Frequently Asked Questions
Do I Need a Permit for Ceiling Fan Installation?
You might need a permit for ceiling fan installation if you're doing new electrical work or installing it in a location where no fan existed before.
If you're just replacing an existing fan without any electrical modifications, you usually won't need one.
However, it's essential to check local regulations, as they can vary.
Not obtaining a required permit can lead to fines or the need to redo your work later.
Can I Install a Ceiling Fan Myself?
Sure, you can totally install a ceiling fan yourself, but it's no walk in the park!
Picture yourself wrestling with wires and battling gravity while balancing on a ladder. If you've got some electrical knowledge and the right tools, go for it! Just be ready for potential headaches if things go wrong.
But remember, if you're unsure, it's smart to call in a pro to keep your home safe and sound.
What Types of Ceiling Fans Are Best for Low Ceilings?
If you've got low ceilings, low-profile fans are your best bet.
These flush-mount or hugger fans sit directly against the ceiling, making them perfect for rooms under 8 feet high. You'll find them in a variety of designs, often including light fixtures, and they don't require downrods.
This keeps your space looking sleek while minimizing head injury risks. Plus, they're highly customizable to fit your room's style!
How Do I Choose the Right Size Ceiling Fan?
Did you know that choosing the right ceiling fan can improve energy efficiency by up to 30%?
To select the perfect size, measure your room. For small spaces (up to 100 sq. ft.), pick a fan with a 24-36 inch blade span.
For medium rooms (100-200 sq. ft.), go for 36-42 inches.
Large rooms (200-400 sq. ft.) need 42-52 inches, while very large rooms require fans over 52 inches.
Consider ceiling height too!
What Warranty Options Are Available for Ceiling Fans?
When it comes to warranty options for ceiling fans, you've got a few choices.
Kichler Lighting offers a Lifetime Limited Warranty, covering various parts like motors and electrical components.
Alternatively, American Home Shield provides home warranty plans that include ceiling fan coverage, allowing unlimited service requests.
Just remember, maintenance is key to keeping your warranty valid, and the specifics of coverage can vary, so check your plan agreement for details.
Conclusion
So, there you have it! Installing a ceiling fan can cost you a small fortune, or at least the price of a fancy dinner. But hey, who needs a meal when you can enjoy a gentle breeze while contemplating your life choices? By understanding the costs involved and choosing wisely, you can avoid breaking the bank—or your ceiling. Remember, it's not just about air circulation; it's about making a statement… about your budget!


