Connect with us

Guides

Do Ceiling Fan Filters Work

How do ceiling fan filters improve air quality and reduce allergens? Discover the surprising benefits that could transform your home environment.

Published

on

ceiling fan filter effectiveness

Yes, ceiling fan filters work effectively to enhance indoor air quality. They trap airborne dust, pollen, and allergens as the air circulates through your fan. Made from activated coconut carbon, these filters operate silently and require no extra energy, making them a convenient option for cleaner air. By installing and regularly replacing the filters, you'll notice a significant reduction in harmful particles and improved air quality in your home. Plus, user feedback shows they're easy to install and maintain. If you want to discover more about their benefits and how to use them, keep exploring further information.

Key Takeaways

  • Ceiling fan filters effectively capture airborne dust, pollen, allergens, and pet dander, improving indoor air quality.
  • Made from activated coconut carbon, they trap odors and pollutants without synthetic fragrances.
  • Filters operate silently, enhancing air quality without disrupting comfort or requiring extra energy.
  • Regular replacement every 30 days maintains optimal filtration performance and reduces indoor air pollution.
  • User feedback indicates significant improvements in air quality, with an average rating of 4.3 out of 5 stars.
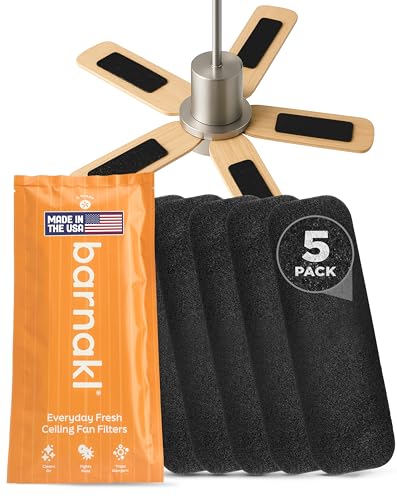
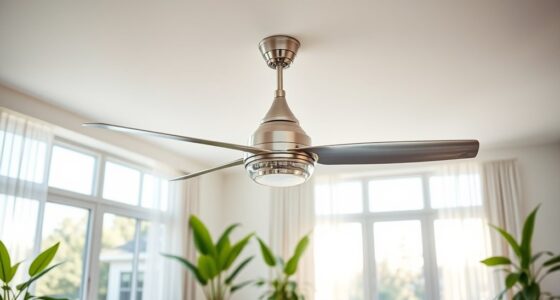
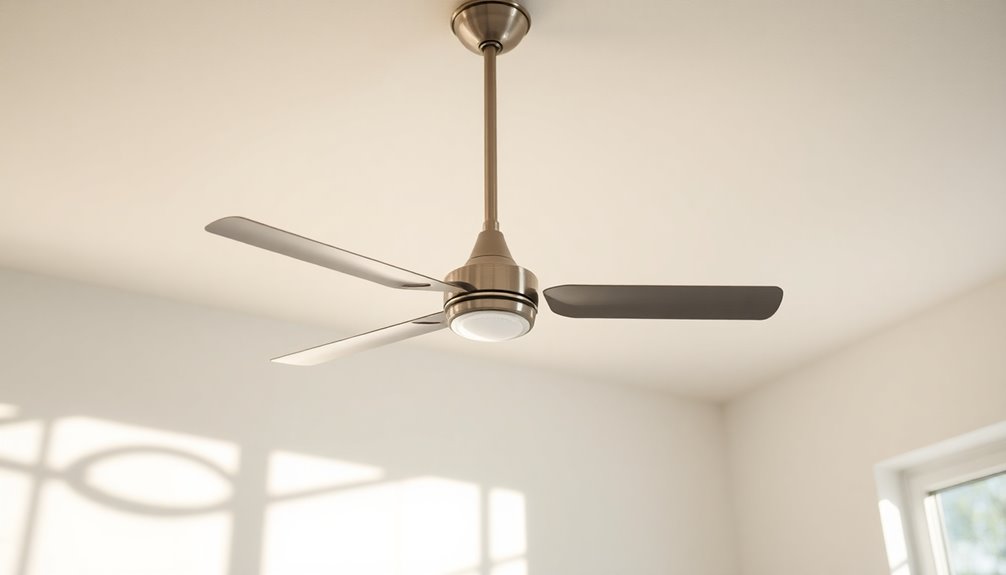
Overview of Ceiling Fan Filters

ceiling fan filter overview

Ceiling fan filters are a clever solution for anyone looking to enhance their indoor air quality. Made from activated coconut carbon, these filters efficiently trap airborne dust, pollen, allergens, and pet dander, making your home a healthier place.

They're designed for easy installation, attaching directly to the top of your ceiling fan blades. Once in place, they operate silently, providing continuous air filtration without adding to your energy bill.

No matter the size of your ceiling fan—whether it has 3, 4, or 5 blades—these filters are compatible and come in packs that typically include multiple filters for your convenience.

Customers rave about their effectiveness, with an impressive average rating of 4.3 out of 5 stars based on 680 reviews. Regular use of ceiling fan filters can greatly reduce the negative health impacts associated with poor indoor air quality, which is often worse than outdoor air.

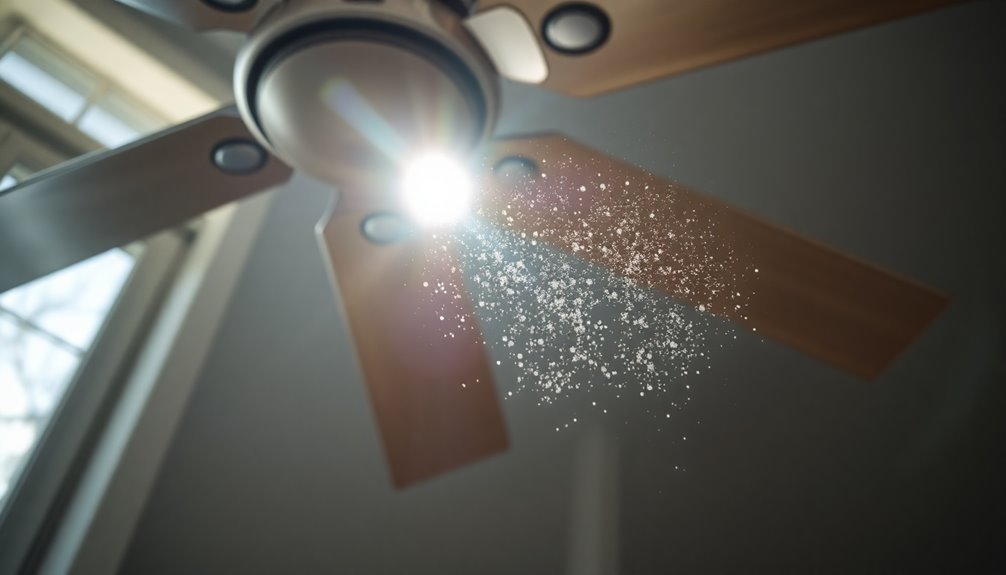
How Ceiling Fan Filters Work

ceiling fan filter mechanism

Ceiling fan filters work by attaching securely to the top of your fan blades, using an adhesive backing that keeps them in place as the fan spins.

As air circulates, these filters effectively capture dust, pollen, allergens, and pet dander, enhancing your indoor air quality.

Advertisement

Plus, their design allows for silent operation, so you won't even notice they're working while enjoying cleaner air.

Filtration Mechanism Explained

By attaching filters to the top of your fan blades, you can harness the airflow generated during operation to capture airborne dust, pollen, allergens, and pet dander. These filters are made from activated coconut shell carbon, providing a high surface area that enhances their ability to trap contaminants efficiently. As the blades spin, the filters silently purify the air without adding noise or energy consumption.

Here's a breakdown of how ceiling fan filters operate:

Feature Description
Material Activated coconut shell carbon
Airflow Utilization Captures airborne particles through movement
Noise Level Operates silently during fan operation
Installation Distance Secured 3-5 inches from the fan motor
Air Quality Improvement Reduces harmful air pollutants considerably

Regular use of these filters can lead to a healthier living environment. By efficiently trapping various allergens and dust, you'll notice an improvement in indoor air quality, making your space more comfortable and safe.

Installation Benefits Overview

Installing ceiling fan filters brings a host of benefits that enhance your indoor air quality without hassle.

Advertisement

These filters attach easily to the top of your fan blades, effectively trapping airborne dust, pollen, and allergens as the fan circulates air throughout your space. You'll notice cleaner air almost immediately, thanks to the activated coconut carbon used in these filters. This material has a high surface area that greatly improves contaminant trapping, ensuring your home stays fresh and healthy.

One of the best parts? The filters operate silently, providing continuous air filtration without creating additional noise or using extra energy.

Installation is simple—just place the filters 3-5 inches from the motor for easy attachment and removal when needed. You'll appreciate the convenience, especially since regular use will lead to noticeably cleaner air, contributing to your overall health and comfort.

With ceiling fan filters, you're not just enhancing air quality; you're also taking a proactive step toward a healthier living environment.

Installation Guide

setup instructions manual

To successfully install ceiling fan filters, start by verifying your fan blades are clean, as this helps the filters stick properly. Use alcohol wipes to clean the blades thoroughly, removing any dust or residue. Once the blades are ready, remove the backing tape from each filter.

Place the filters 3-5 inches from the motor for ideal performance. Stick them onto the blades in alternating positions, ensuring they adhere securely. This prevents detachment during operation and maximizes the effectiveness of the air filters.

Advertisement

Here's a quick installation guide:

Step Action Notes
1. Clean Blades Use alcohol wipes Confirm no residue remains
2. Remove Backing Take off the tape from filters Prepare for sticking
3. Position Filters Stick filters 3-5 inches from motor Alternate positions on blades

Remember to replace the filters every 30 days to maintain effective air filtration and improve air quality. The installation process is designed to be hassle-free, allowing you to easily attach and remove the filters as needed.

Performance and Benefits

efficiency and advantages delivered

When you use ceiling fan filters, you'll notice a significant improvement in your indoor air quality.

These filters effortlessly trap dust, pollen, and pet dander, all while keeping odors at bay.

Plus, with their simple installation process, you can enjoy fresher air in no time.

Air Quality Improvement

Ceiling fan filters play an essential role in enhancing indoor air quality by capturing airborne pollutants like dust, pollen, and pet dander. By attaching to the top of your fan blades, these filters operate silently while the fan runs, providing continuous air filtration without any extra energy usage. This means you can enjoy a breeze while knowing that you're actively improving the air you breathe.

Advertisement

Research shows that maintaining good air quality can boost your cognitive performance and promote better sleep, making ceiling fan filters a proactive health measure. The use of activated coconut carbon in these filters is particularly effective due to its high surface area, allowing it to trap contaminants efficiently. This sustainable choice not only benefits your health but also the environment.

To guarantee ongoing protection against indoor air pollutants—often higher than outdoor levels—it's vital to replace your filters regularly, ideally every 30 days. By doing so, you'll maintain peak air quality in your home, helping you and your family breathe easier and live healthier.

Easy Installation Process

Installing ceiling fan filters is a breeze, making it easy for anyone to enhance their indoor air quality. You don't need to be a DIY expert; just follow these simple steps:

  1. Clean the ceiling fan blades: Start by wiping down the blades to remove any dust and debris.
  2. Remove the backing: Peel off the adhesive backing from the filter to prepare it for attachment.
  3. Attach the filters: Securely place the filters within 3-5 inches from the fan's motor to guarantee peak performance.

Once installed, you'll appreciate how the filters stay in place without noticeable detachment during operation. They work silently, allowing your ceiling fan to function normally while improving air quality without adding extra noise or energy consumption.

Regularly replacing the filters every 30 days is recommended for maintaining peak air purification performance.

Users have shared positive feedback about the easy installation process and the noticeable improvement in air quality. By taking these simple steps, you can create a healthier living environment with minimal effort.

Advertisement

Odor Control Benefits

Odor control is one of the standout benefits of using ceiling fan filters. These filters, made from activated coconut carbon, effectively trap odors and airborne pollutants, making your indoor environment fresher. As your fan runs, the filters continuously work to neutralize unpleasant smells, enhancing your home's overall air quality.

Here's a quick look at some key aspects of odor control with carbon filters:

Feature Benefit
Activated Coconut Carbon Traps odors and pollutants
Natural Filtration No synthetic fragrances
Pleasant Coconut Scent Refreshes air while filtering
Regular Replacement Maintains ideal performance
Safe for Families and Pets Non-toxic and family-friendly

Customer Experiences

enhancing user satisfaction journey

Many customers have shared their experiences with ceiling fan filters, and the feedback is largely positive. Many users report a significant improvement in indoor air quality, noting that these filters help reduce dust accumulation in their homes. The filters have received an impressive rating of 4.3 out of 5 stars based on 680 reviews, highlighting their effectiveness in trapping dust and allergens.

Here are some common points from customer feedback:

  1. Ease of Installation: Users appreciate how straightforward it's to attach the filters to the fan blades, making it a hassle-free process. Additionally, professional installation of other home systems can sometimes be complex, but ceiling fan filters are designed for easy DIY setup.
  2. Air Filtration Efficiency: Many customers have noticed a remarkable reduction in dust, contributing to cleaner air and fewer allergy issues, similar to the effectiveness of HEPA filters in trapping airborne pollutants.
  3. Silent Operation: The filters work quietly alongside the ceiling fan, allowing for comfort without disruptive noise.

However, some customers raised concerns about the adhesive's durability, emphasizing that the filters must cover the entire blade for best performance. Additionally, using ceiling fan filters can complement other air purification methods, such as HEPA filter technology, to enhance overall air quality in the home.

Comparison With Other Filters

filter performance evaluation analysis

While traditional air filters play an essential role in maintaining indoor air quality, ceiling fan filters offer a unique advantage by targeting airborne particles directly where they circulate.

Unlike standard HVAC filters, ceiling fan filters can be easily installed on fan blades, providing localized air purification without consuming extra energy. This means you can enjoy fresher air in rooms where ceiling fans are frequently used. Regular cleaning of these filters is essential for optimal performance, as dust and debris accumulation can hinder effectiveness.

Ceiling fan filters excel at capturing dust, pollen, allergens, and pet dander. For example, those made from activated coconut carbon are particularly effective, thanks to their high surface area and renewable material composition.

Advertisement

When you compare these filters to traditional options, you'll find that ceiling fan filters enhance air quality in specific areas, complementing whole-house filtration systems rather than replacing them.

Customer feedback suggests that these filters can considerably improve indoor air quality, especially in spaces where airflow is concentrated. However, keep in mind that their effectiveness may vary depending on the coverage area on the fan blades.

Ultimately, incorporating ceiling fan filters into your air filtration strategy can enhance your home's overall air quality. Additionally, these filters can be especially beneficial for individuals with hearing loss who may be more sensitive to airborne irritants that can affect their well-being.

Maintenance and Replacement Tips

essential care and upkeep

To keep your ceiling fan filters working effectively, establish a regular cleaning schedule and replace them every 30 days.

This routine not only guarantees ideal air quality but also maximizes the performance of your fan.

Regular Cleaning Schedule

Keeping your ceiling fan filters in prime shape requires a regular cleaning schedule to guarantee peak performance. To maintain superior air quality and filtration efficiency, we highly recommend following these steps:

Advertisement
  1. Monthly Cleaning: Replace your filters every 30 days. This keeps dust and allergens at bay and guarantees your fan operates smoothly.
  2. Pre-Cleaning: Before installing new filters, use alcohol wipes to clean the fan blades. This helps the filters adhere securely and function effectively.
  3. Monitor Performance: Regularly check for visible dust accumulation on the filters. If you notice significant buildup, consider replacing them sooner than the 30-day mark.

Additionally, alternate the positioning of the filters on the fan blades during installation. This enhances air circulation and guarantees more efficient filtration across the entire surface area.

Keep track of any changes in air quality or odors, as these can indicate when maintenance or replacement is needed. Establishing this regular cleaning schedule not only extends the lifespan of your ceiling fan filters but also enhances the air quality in your home.

Replacement Frequency Guidelines

Understanding the right replacement frequency for your ceiling fan filters is essential for maintaining perfect air quality. To guarantee superior air filtration performance and efficiency, you should replace your air filter every 30 days. This consistent schedule helps keep your indoor environment fresh and healthy.

Before installing new filters, it's a good idea to clean your fan blades with alcohol wipes. This step enhances the adhesion and effectiveness of the filters, ensuring they work at their best.

Make sure the filters are securely attached to the fan blades; this prevents any detachment during operation and guarantees continuous air purification.

Don't forget to monitor the condition of your filters regularly. If you notice visible dust accumulation, it might be time for an earlier replacement. Keeping an eye on your filters not only improves the air quality but also contributes to the overall health of your home.

Advertisement

Environmental Impact

sustainable practices for future

When you consider the environmental impact of ceiling fan filters, it's clear they play a significant role in enhancing indoor air quality. When your fan runs, these filters trap allergens and pollutants, reducing indoor air pollution that can be much higher than outdoor levels.

Here are three key benefits:

  1. Lower Energy Consumption: By trapping dust and allergens, ceiling fan filters reduce your reliance on traditional air purifiers. This leads to less energy use and a smaller carbon footprint.
  2. Sustainable Materials: Many filters use renewable resources like activated coconut carbon. This supports eco-friendly practices and promotes sustainability in the air filtration market.
  3. Reduced Chemical Use: Regular use of these filters means you'll clean less often, minimizing the need for chemical cleaning products that can harm the environment.

Health Benefits of Clean Air

clean air enhances well being

Breathing clean air is essential for your health and well-being, especially in indoor spaces where we spend most of our time. Clean air considerably improves respiratory health, reducing the risk of asthma and other respiratory issues. The quality of air you breathe can directly impact your body's ability to function effectively. Additionally, the use of energy-efficient heat pumps can enhance air quality by effectively regulating indoor temperatures and reducing pollutants. Furthermore, maintaining an optimal contrast ratio in home environments can positively influence overall visual comfort, indirectly supporting a healthier atmosphere.

Better indoor air quality is linked to enhanced cognitive performance, with research showing that cleaner air can boost focus and productivity by up to 20%. With the average person consuming around 11,000 liters of air daily, it's vital to prioritize effective air filtration to avoid chronic health problems from long-term exposure to pollutants. Additionally, using air purifiers with HEPA filters can further ensure the removal of harmful particles from the air.

Additionally, healthier air quality contributes to better sleep. Improved ventilation and reduced allergens lead to fewer disturbances, enhancing your overall well-being. Regular use of air purifiers can significantly improve indoor air quality, making them a worthwhile investment for health-conscious individuals.

Mental health also benefits, as studies indicate that improved air conditions correlate with lower anxiety and depression levels.

Final Thoughts on Effectiveness

evaluating overall effectiveness strategies

Ceiling fan filters prove to be an effective solution for improving indoor air quality, capturing airborne particles like dust, pollen, and pet dander.

Customer feedback indicates that these filters considerably enhance your living environment, with an average rating of 4.3 out of 5 stars. Here's why you should consider them:

Advertisement
  1. Silent Operation: They filter air continuously while the fan runs, ensuring your daily activities aren't disrupted by noise or extra energy costs.
  2. Easy Installation: Installing the filters is a breeze. You simply remove the backing and place them 3-5 inches from the motor, making it accessible for regular maintenance.
  3. Effective Dust Capture: Users report that these filters effectively trap dust and allergens, contributing to a cleaner home atmosphere.

However, it's worth noting that some users have raised concerns about the adhesive durability and recommend covering the entire blade for best performance.

While the filters are a straightforward solution for cleaner air, ensuring full blade coverage might enhance their effectiveness even further. Additionally, regular maintenance, such as monitoring filter indicators, can help maintain optimal air quality in your home.

Frequently Asked Questions

Do Filters for Ceiling Fans Work?

When you ask if filters for ceiling fans work, consider their design and purpose.

These filters trap dust, pollen, and allergens effectively, improving your indoor air quality. They're made from activated coconut carbon, which enhances their ability to eliminate odors.

Installation is simple, so you can easily attach them to your fan blades. Many users report a noticeable decrease in dust accumulation, leading to a healthier home environment for you and your family.

Do Air Filters Really Make a Difference?

Yes, air filters really do make a difference.

Advertisement

When you use them, you're actively improving your indoor air quality by capturing dust, pollen, and allergens. This can lead to better sleep and enhanced focus.

It's easy to install filters, and they work continuously without using extra energy.

How Do I Keep My Ceiling Fan Dust Free?

Keeping your ceiling fan dust-free is like maintaining a clean canvas for a masterpiece.

Start by wiping down the blades regularly with a damp cloth or microfiber cloth—aim for every couple of weeks. When you clean, turn off the fan and guarantee the blades are dry to prevent dust from flying.

Consider using a vacuum with a brush attachment for a deeper clean. Establish a cleaning schedule that matches your home's dust levels, especially during high-pollen seasons.

Advertisement

Is It Okay to Leave Ceiling Fans on All Night?

Leaving ceiling fans on all night can be beneficial for improving air circulation and keeping your room comfortable, especially in warm weather.

You'll enjoy a cooler environment and reduced humidity, which helps prevent mold.

However, consider the potential increase in your electricity bill from continuous use.

If you decide to run the fan overnight, make sure it's set to rotate counterclockwise for ideal cooling effects.

Enjoy your restful sleep!

Advertisement

Conclusion

In the grand scheme of your indoor environment, ceiling fan filters can be a game-changer—much like the invisible hand guiding a well-tuned machine. They help keep your air fresh and reduce dust accumulation, enhancing your comfort. While they might not be a silver bullet for all air quality issues, using them is a step toward a healthier home. So, if you're looking to breathe easier, consider these filters as your trusty sidekick in the battle against airborne nuisances.

Advertisement

Guides

Can You Replace Ceiling Fan Blades With Longer Ones

By replacing ceiling fan blades with longer ones, you may enhance airflow, but potential risks await—discover what you need to know before making changes.

Published

on

By

longer blades for fans

You can replace ceiling fan blades with longer ones, but it's not without risks. Longer blades can stress the motor, leading to overheating, noise, or vibrations. They may also create imbalances that affect airflow efficiency. It's essential to stick to the manufacturer's specifications when considering modifications. Ignoring these guidelines could void warranties and cause safety hazards. Also, installing longer blades often requires new holes, complicating the process. Make sure you have the right tools and check your fan's performance after installation. If you're curious about the best practices and options for improving airflow, there's more to explore.

Key Takeaways

  • Replacing ceiling fan blades with longer ones is generally not recommended due to potential motor stress and overheating risks.
  • Longer blades may require modifications like drilling new holes, which can impact balance and performance.
  • Increased weight and size of longer blades can lead to vibrations, noise, and motor burnout during extended use.
  • Always consult the manufacturer's specifications before attempting any blade replacements to ensure safety and warranty coverage.
  • Monitor motor temperature and airflow after installation to ensure optimal performance and identify any potential issues.

Understanding Ceiling Fan Blade Sizes

ceiling fan blade measurements

When you're replacing ceiling fan blades, understanding their sizes is fundamental to secure peak performance. Ceiling fan blades come in various lengths, with common options being 42 inches and 52 inches.

When you consider replacing your blades, it's important to select ones that match the size of your existing blades. If you choose blades that are too long, you risk stressing the fan motor, which can lead to overheating or malfunction.

While longer blades might seem like they could improve air distribution, they don't greatly enhance airflow; the efficiency of the motor plays a more critical role. Manufacturers often advise against using longer blades than originally designed for your fan, underscoring the importance of sticking to specified blade sizes for safety and ideal performance.

Modifying blade size by drilling new holes for attachment can create balance issues, leading to unwanted noise and vibrations.

It's essential to confirm that your new ceiling fan blades are precisely aligned and securely attached during installation. By understanding ceiling fan blade sizes, you can make informed choices that keep your fan running smoothly and efficiently.

Advertisement

Factors to Consider for Replacement

replacement consideration factors list

Before replacing your ceiling fan blades, it's vital to take into account several key factors to guarantee proper functionality and safety. First, check your fan's manufacturer's specifications. Many brands, like Hampton Bay, warn against using longer blades than originally designed for your fan model. Doing so can strain the motor and lead to overheating or failure.

When you consider longer blades, you might need to drill new holes for alignment, which can affect the fan's balance. A poorly balanced fan can wobble or create noise, detracting from its efficiency.

Additionally, while longer blades can enhance airflow, they also add weight, which could compromise motor efficiency if the motor isn't designed for it.

It's wise to maintain the same weight and size as your original blades to guarantee peak performance. If you're uncertain or considering modifications, consult ceiling fan specialists or manufacturers.

This step is essential not only for safety but also to avoid voiding any warranties. Remember, making informed decisions will help keep your ceiling fan running smoothly and safely, so weigh these factors carefully before proceeding.

Importance of Manufacturer Specifications

manufacturer specifications matter significantly

When you're replacing ceiling fan blades, sticking to the manufacturer's specifications is essential.

Not only does this guarantee peak performance, but it also keeps you safe from potential issues like overheating or motor malfunctions.

Advertisement

Ignoring these guidelines can even void your warranty, so always double-check before making any changes.

Adhering to Guidelines

Adhering to manufacturer specifications is vital for anyone considering replacing ceiling fan blades. When you replace the blades, it's important to stick to the recommended sizes. Manufacturers often advise against using longer blades than specified, as this can lead to motor strain and potential malfunction.

Straying from these guidelines not only jeopardizes your fan's performance but can also void your warranty, leaving you responsible for costly repairs.

Additionally, extended blade sizes can greatly alter the fan's airflow and overall efficiency, which are fine-tuned for the original blade dimensions. If you choose incorrectly, you might face issues like wobbling and increased noise, compromising the fan's structural integrity.

To avoid these pitfalls, always consult the manufacturer or a ceiling fan specialist before making any changes. They can provide valuable insights into the proper blade sizes and guarantee adherence to safety codes.

Advertisement

Safety and Performance Risks

Ignoring manufacturer specifications when replacing ceiling fan blades can lead to significant safety and performance risks. If you opt for longer blades than recommended, you might strain the motor, which can cause overheating and eventual malfunction.

The manufacturer's guidelines are there for a reason—they emphasize keeping blade size compatible to maintain the fan's structural integrity and performance.

Using longer blades may also result in an unbalanced fan, leading to excessive noise and vibration. Over time, this can further damage the motor and create unsafe conditions.

Additionally, altering the blade size can void any warranties you might have, highlighting the importance of sticking to manufacturer specifications for both safety and continued coverage.

Before making any changes, it's essential to consult with manufacturers or professionals. They can help guarantee that you meet safety and performance standards.

Advertisement

Remember, sticking to the recommended blade size isn't just about aesthetics; it's about preserving the functionality and longevity of your fan.

Don't take unnecessary risks—following the guidelines will keep your ceiling fan running smoothly and safely.

Risks of Using Longer Blades

longer blades increased risks

Using longer blades than recommended can put a serious strain on your fan's motor, leading to overheating and potential failure.

You'll also need to take into account balance and stability; improper alignment can cause annoying vibrations and noise.

It's essential to weigh these risks before making any changes to your ceiling fan blades.

Motor Strain Risks

Longer ceiling fan blades might seem like a simple upgrade for improved air circulation, but they can impose significant strain on the fan motor. When you use longer blades, you're likely to increase the load on the motor, which can lead to overheating and even burnout during extended use.

Advertisement

Manufacturers like Hampton Bay explicitly advise against this modification to avoid motor strain risks and guarantee the durability of the fan.

Additionally, the extra weight of longer blades can negatively impact the fan's performance. This added weight may create vibrations or imbalances that put further stress on the motor, increasing the likelihood of malfunction.

If you alter the blade size beyond the manufacturer's specifications, you might also void any existing warranties, leaving you liable for any cumulative damage to the motor.

It's essential to monitor the motor temperature when using longer blades. Overheating can pose serious hazards, including potential fire risks.

Balance and Stability Issues

Modifying a ceiling fan by adding longer blades can lead to significant balance and stability issues. If the longer blades aren't properly aligned with the existing blade arms, you'll likely notice wobbling or noise during operation. This imbalance can't only be annoying but can also put extra strain on the fan motor.

Advertisement

Over time, this strain may cause overheating and eventually lead to motor failure, especially if your fan wasn't designed to handle the added weight.

Moreover, changing the blade size affects the fan's center of gravity, requiring you to perform careful adjustments and balance checks to guarantee stable operation without vibrations.

Manufacturer specifications typically suggest specific blade sizes for ideal airflow and efficiency, so deviating from these guidelines can compromise both performance and safety.

To mitigate risks, it's essential to monitor the fan's performance and motor temperature after installing longer blades. Overheating can pose fire hazards and lead to malfunction.

Keeping all these factors in mind will help you maintain the balance and stability of your ceiling fan, making sure it operates safely and efficiently.

Advertisement

Tools Needed for Blade Replacement

blade replacement tool list

When replacing ceiling fan blades, you'll need a few essential tools to guarantee the process goes smoothly. First, grab a screwdriver, as it's important for removing and installing the screws that secure the fan blades to the motor and housing.

You'll also need a ladder or step stool to safely reach the ceiling fan, especially if it's mounted high up.

Next, don't forget a measuring tape. This tool is essential for ensuring that your new blades match the required dimensions for proper fit and compatibility with your fan.

Before you start the replacement, use a cleaning cloth or duster to remove any dust and debris from the fan blades and housing. This step will help maintain your fan's performance and appearance.

If your new blades require drilling new holes for installation, you'll need a drill and the appropriate drill bits.

Make sure you have everything ready before you begin the replacement process. With these tools in hand, you'll be well-equipped to tackle the task of replacing your ceiling fan blades successfully.

Advertisement

Step-by-Step Replacement Process

gradual substitution methodology

Start by making sure you've got your tools ready and your workspace clear.

Grab a ladder or step stool to safely access your ceiling fan. Before you begin, clean the existing blades to make it easier to spot the attachment points for removal.

Carefully unscrew the existing blades from the fan motor, keeping the screws organized for easy reinstallation. It's vital to guarantee that your new fan blades are the same size as the old ones to avoid any motor strain or overheating issues.

Once you've removed the old blades, take your new fan blades and install them one at a time using the existing screws.

Make sure each blade is securely attached and check for stability and alignment as you go along.

After you've installed all the new fan blades, give everything a once-over to confirm everything looks good and is properly fitted.

Advertisement

This step is essential to prevent wobbling or noise once you start using the fan again.

With everything in place, you're now ready to test your fan's performance in the next step!

Testing Your Ceiling Fan After Change

ceiling fan functionality assessment

After you've replaced the ceiling fan blades, it's essential to test the fan thoroughly.

Start by running it at low, medium, and high speeds to check for smooth performance and any unwanted wobbling.

Pay attention to any unusual noises, as they could indicate a problem with the installation or blade balance.

Performance Evaluation Post-Installation

Once you've swapped out the ceiling fan blades, it's crucial to put your new setup to the test. Start by checking the fan at various speeds. Note improvements in airflow and rotation speed, and keep an eye on any wobbling or unusual noise, which can indicate balance issues.

Advertisement

Here's a quick checklist to guide your evaluation:

Test Element Action Observation
Speed Test Run the fan at low, medium, and high speeds
Motor Temperature Check the motor temperature after prolonged use
Airflow Distribution Compare airflow in the room with previous performance

After testing, verify the motor isn't overheating, as longer blades can put extra strain on it. It's also important to note that any unusual noise could indicate mechanical failure, which may lead to more significant issues. Evaluate the overall airflow distribution to see if it meets your expectations. Finally, record any changes in noise levels. The goal is to achieve a quieter, more efficient fan experience with your new blades. By following these steps, you'll gain a clear understanding of your ceiling fan's performance post-installation.

Noise and Vibration Check**

It's important to conduct a thorough noise and vibration check following the blade replacement. This step guarantees your ceiling fan operates safely and efficiently. Here's what you should focus on:

  • Test the fan at low, medium, and high speeds.
  • Listen for any rattling or grinding noises.
  • Observe the fan's oscillation for excessive wobbling.
  • Check that the blades are securely attached and aligned.
  • Consider using a balance kit if vibrations are present.

As you test the fan, monitor it closely. Any unusual noises or vibrations can indicate an imbalance or that the new blades may be too heavy for the motor.

Rattling sounds often suggest improper mounting, while grinding noises might point to friction issues. Watch for wobbling, as this can lead to serious mechanical problems or safety concerns.

If you notice any vibrations, don't ignore them. A balance kit can help adjust the blade position, reducing both noise and instability.

Advertisement

Alternative Options for Improved Airflow

enhanced airflow solutions available

While simply replacing ceiling fan blades might seem like a quick fix for improving airflow, there are several alternative options that can yield better results.

For instance, installing a larger ceiling fan with a steeper blade pitch can greatly enhance airflow in your room. Instead of just swapping blades for longer ones, consider lowering the mounting height of your existing fan; this can improve air circulation and make it more effective at distributing cool air throughout the space.

If you're dealing with a larger area, utilizing multiple fans can offer more consistent cooling than relying on a single fan with modified blades.

Regular maintenance is also essential—cleaning your fan blades and ensuring they're balanced can optimize performance without needing to replace the blades at all. Additionally, consider investing in the best home security systems to ensure that your home remains safe and comfortable while you enjoy improved airflow.

Finally, if you're looking for a more permanent solution, explore new fan models specifically designed for larger spaces. These models can provide better airflow solutions than attempting to modify current fan blades.

Expert Recommendations for Safety

safety guidelines and tips

Safety should be your top priority when replacing ceiling fan blades. It's vital to follow expert recommendations to guarantee a safe and efficient operation. Here are some key points to take into account:

  • Always consult your ceiling fan manufacturer before making changes.
  • Choose blades that match the original specifications to prevent motor overload.
  • Limit new blade length to no more than 2-3 inches longer than the originals.
  • Verify proper installation by securing blades tightly and checking for wobbling.
  • Regularly monitor the fan's performance for signs of motor strain or overheating.

Ignoring these safety guidelines can lead to serious hazards, including overheating and potential fire risks. Experts strongly advise sticking to blades that adhere to the fan's original design to maintain balance and avoid additional strain on the motor.

Proper installation is vital; loose blades can create dangerous wobbling. Additionally, after replacement, keep an eye on your fan's performance—any unusual noises or excessive heat could signal a serious issue.

Advertisement

Customer Experiences and Insights

understanding customer perspectives better

Gathering insights from customers who've replaced their ceiling fan blades reveals a wealth of information that can guide your decision-making. Many users primarily inquire about blade replacements for aesthetic upgrades, but they often express concerns regarding airflow efficiency and noise levels.

You'll find that a significant number of satisfied customers—7,588 to be exact—report positive experiences specifically about their fan blade replacement inquiries, highlighting a strong service reputation.

Customer experiences also show that 12,024 individuals shared insights on the effectiveness of these modifications. You'll notice that feedback often emphasizes improved airflow and reduced noise, which are critical factors in your overall comfort.

High customer retention rates suggest that people trust the services that assist with ceiling fan modifications, indicating reliability.

With a staggering 169,357 satisfied customers seeking guidance on ceiling fan blade modifications, it's clear there's a robust demand for this kind of home improvement. Engaging with this wealth of customer experiences can help you make an informed choice, ensuring your ceiling fan not only looks great but functions efficiently too. Additionally, many customers recommend considering the impact of airflow efficiency when selecting new blades to maximize performance.

Frequently Asked Questions

Do Longer Ceiling Fan Blades Work Better?

Longer ceiling fan blades might seem like they'd work better, but that's not always the case.

Advertisement

While they can provide wider air distribution, they don't necessarily improve airflow without a strong motor. You could end up straining the motor, risking overheating or even malfunction.

Plus, if you're considering modifications to fit those blades, you might compromise the fan's balance.

Sticking to the manufacturer's recommendations usually guarantees peak performance and longevity.

Can You Just Change the Blades on a Ceiling Fan?

Yes, you can change the blades on a ceiling fan, but you need to guarantee they match the original size.

Using blades that are too long can stress the motor and lead to issues like overheating.

Advertisement

Always check your fan's manual for compatibility and installation instructions, as proper alignment is essential to avoid wobbling and noise.

What Is the Difference Between a 42 Inch and 52 Inch Ceiling Fan?

Choosing between a 42-inch and a 52-inch ceiling fan is like picking a brush for your canvas.

The 42-inch fan's more compact design suits smaller rooms, offering gentle airflow.

On the other hand, the 52-inch fan sweeps across larger spaces, providing a stronger breeze and a bolder presence.

If you want efficient air movement and style, consider the dimensions of your room before making your choice.

Advertisement

Is a 5 Blade Ceiling Fan Better Than a 3 Blade?

When you compare a 5-blade ceiling fan to a 3-blade model, you'll likely notice several advantages.

The 5-blade fan provides better airflow and quieter operation, thanks to the increased number of blades distributing the load. It also tends to wobble less, enhancing stability during use.

While it may consume slightly more energy, the improved airflow efficiency makes it suitable for larger spaces.

Plus, the traditional look of a 5-blade fan can add charm to your room.

Conclusion

In summary, replacing your ceiling fan blades with longer ones can feel like trying to fit a square peg in a round hole—it might not work as you hoped. Always keep manufacturer specifications in mind to guarantee safety and performance. If you're looking to improve airflow, consider other options like a more efficient fan design. Trust your instincts, and remember that sticking to guidelines can keep your space comfortable and breezy without unnecessary risks.

Advertisement

Continue Reading

Guides

What Direction Should Ceiling Fan Go in Winter

Stay cozy this winter by learning the best ceiling fan direction; discover how a simple adjustment can enhance your heating efficiency!

Published

on

By

clockwise for warm air

In winter, you should set your ceiling fan to spin clockwise. This creates an updraft that pushes cold air up and circulates warm air down toward the floor, keeping your space cozy. By running the fan on a low speed, you can enhance comfort and even reduce heating costs by up to 15%. Just remember to turn off the fan first before changing the direction using the switch or remote. Making this simple adjustment can greatly optimize your heating efficiency, especially when temperatures drop. Stick around to learn more tips on maximizing your home's warmth and comfort this winter!

Key Takeaways

  • Set your ceiling fan to rotate clockwise in winter to create an updraft and circulate warm air downwards.
  • Clockwise rotation prevents drafts and reduces cold spots in your living space for enhanced comfort.
  • Adjusting the fan direction can save up to 15% on heating bills by improving energy efficiency.
  • Change the fan direction at the start of winter or during Daylight Savings Time for optimal warmth.
  • Use low-speed operation for the fan to maintain a gentle updraft while consuming minimal energy.

Importance of Fan Direction in Winter

winter fan direction matters

When winter rolls around, it's crucial to pay attention to your ceiling fan's direction. Setting your fan to rotate clockwise creates an updraft that pulls cold air upwards, allowing warm air trapped near the ceiling to be pushed down towards the floor. This simple adjustment greatly enhances your comfort during the colder months.

Running your ceiling fan at low speed in a clockwise direction can also boost energy efficiency. By maintaining a steady temperature, you can reduce heating costs by up to 10%, meaning you won't have to rely as heavily on your heating system.

You'll find that comfortable indoor temperatures can be achieved while allowing for lower thermostat settings.

Most ceiling fans come equipped with a ceiling fan switch that lets you easily reverse the fan's direction. This feature is typically located near the fan base, making it convenient to adjust as the seasons change.

How to Change Fan Direction

adjust ceiling fan direction

To change your ceiling fan's direction for winter, start by turning it off and letting it come to a complete stop for safety.

If you have a ceiling fan with a pull chain, locate the reverse switch on the fan body. Pull that switch to change the fan direction to clockwise.

Advertisement

For remote-controlled fans, make certain your remote is paired, turn off the fan, and press and hold the fan button until you see a light blinking. This indicates that the direction has been successfully changed to clockwise.

If you own smart fans, you can easily adjust the direction using compatible mobile apps or voice commands. This makes switching to clockwise rotation for winter a breeze.

Once you've changed the direction, don't forget to turn the fan back on at a low speed. This will guarantee warm air circulates downwards, making your space more comfortable.

By following these steps, you'll keep your ceiling fan energy efficient and maximize its effectiveness during winter months.

With the right adjustments, your ceiling fan can make a significant difference in your home's warmth and comfort.

Advertisement

Benefits of Clockwise Rotation

enhanced efficiency and organization

Changing your ceiling fan's direction to clockwise for winter offers several advantages that can enhance your home's comfort. By creating an updraft, the clockwise rotation pulls cold air upwards and pushes warm air down towards your living space. This helps distribute heat evenly throughout the room, reducing cold spots and maintaining a cozy environment.

Benefit Description
Updraft Pulls cold air up, allowing warm air to circulate.
Energy Savings Low speed operation can save up to 15% on heating bills.
Heat Distribution Guarantees even warmth, enhancing overall comfort.
Comfort Prevents drafts that can come from higher speeds.
Easy Adjustment Use the reversing switch to quickly change direction.

With your ceiling fan set to low speed, you'll enjoy the gentle updraft that enhances warmth without creating discomfort. Not only does this setting optimize your heating needs, but it also allows you to lower your thermostat, leading to notable energy savings. Embrace the benefits of clockwise rotation and enjoy a more comfortable winter season in your home.

Timing for Direction Adjustments

timing for adjusting directions

Adjusting your ceiling fan's direction at the right time is essential for maximizing comfort and energy efficiency during winter.

To guarantee you're making the most effective adjustments, consider these key timing strategies:

  1. Daylight Savings Time: Change the ceiling fan direction during the shift to winter, specifically when you "fall back." This serves as a helpful reminder to adjust your fan to clockwise, which will circulate warm air effectively.
  2. Early Winter Adjustments: Set your fan to rotate clockwise at the beginning of winter. This will help maintain a cozy indoor temperature while allowing you to lower your thermostat settings, leading to energy savings.
  3. Preemptive Changes: Make certain your ceiling fan direction is adjusted before significant drops in temperature.

This proactive measure can contribute to energy savings of up to 10% on your heating costs.

Energy Savings From Proper Use

efficient energy consumption practices

Making sure your ceiling fan runs in the right direction during winter can lead to significant energy savings. When you set your fan to spin clockwise, it creates a gentle updraft that pushes warm air, which collects near the ceiling, back down into the room.

This simple adjustment can save you up to 15% on heating bills by redistributing warm air more efficiently. By maintaining a consistent temperature without drafts, you'll feel more comfortable and can lower your thermostat settings by about 4 degrees Fahrenheit.

That's a smart way to cut costs! Plus, ceiling fans are energy-efficient, consuming only 15 to 90 watts, whereas traditional heating systems can use thousands of watts.

This means that while the fan blades are spinning gently, you're optimizing your heating system and reducing your reliance on costly heating methods.

Advertisement

Frequently Asked Questions

How Can You Tell if a Fan Is Going Clockwise or Counterclockwise?

To tell if your fan's spinning clockwise or counterclockwise, stand directly underneath it.

If you feel a gentle updraft of warm air, it's moving clockwise. Alternatively, if you notice a noticeable breeze, that means it's spinning counterclockwise.

You can also check the blade movement: clockwise blades will seem to move from the top right to the bottom left.

If you're unsure, use the reversing switch or your fan's app for confirmation.

What Direction Do I Rub My Ceiling Fan in the Winter?

You wouldn't believe how much a simple ceiling fan can change your winter experience!

Advertisement

To maximize warmth and comfort, you should set your fan to spin clockwise. This magical motion creates an updraft, pushing the warm air down where you need it most.

Just flip that reversing switch, and you're good to go! Running it on low speed keeps the cozy vibes flowing without any chilly drafts ruining your winter bliss.

What Is the Best Ceiling Fan Setting for Winter?

To optimize your comfort during winter, set your ceiling fan to rotate clockwise at a low speed.

This creates an updraft that pushes warm air down into your living space, enhancing warmth without creating drafts.

You'll notice a gentle breeze when standing beneath it, confirming effective heat distribution.

Advertisement

Do Ceiling Fans Make a Difference in Winter?

Do ceiling fans really make a difference in winter? Absolutely!

When you run your ceiling fan in the right direction, it helps circulate warm air that rises, keeping your space cozy and comfortable. By using the fan on a low setting, you can evenly distribute heat throughout the room without creating drafts.

This simple adjustment can save you money on heating costs while maintaining a pleasant indoor environment. It's a smart, energy-efficient choice!

Conclusion

So, as the winter chill sets in, remember to switch your ceiling fan to spin clockwise. This simple adjustment helps circulate warm air that rises, keeping your space cozy without cranking up the heat—like finding a hidden treasure in your attic! By using your fan wisely, you'll not only stay comfortable but also save on energy costs. It's a win-win! Don't let winter catch you off guard; make that change today and enjoy the warm vibes all season long.

Advertisement

Continue Reading

Guides

How Much Is Ceiling Fan Installation

Budgeting for ceiling fan installation can be tricky; discover the factors that influence costs and how to save money on your project.

Published

on

By

ceiling fan installation cost

Ceiling fan installation usually costs between $144 and $353. This range can vary based on factors like whether you need new wiring or how complex the installation is. For example, standard fans might cost $50 to $300, while outdoor or specialized fans can push costs higher. If you're considering features like built-in lights or remote control, expect to add another $100 to $300 each. It's important to budget for possible extra expenses, too. If you're curious about ways to keep costs manageable, there's more information available to help you make informed decisions.

Key Takeaways

  • Ceiling fan installation costs typically range from $144 to $353, with an average cost of $248.
  • Complex installations or features like built-in lights can increase costs by $100-$300 each.
  • Professional installation fees generally fall between $100 and $500, depending on complexity and local rates.
  • Existing wiring can reduce installation costs to $100-$300, while new wiring may elevate costs to $500-$1,500.
  • DIY installation can save $50 to $200 on labor but requires electrical knowledge and tools for safety.

Cost Overview of Installation

installation cost breakdown summary

When considering the cost of ceiling fan installation, you'll find that prices typically range from $144 to $353, with the average installation landing around $248.

If you already have existing wiring, you might reduce your ceiling fan installation costs to between $100 and $300. However, if you need new wiring, be prepared to potentially spend up to $2,000.

Standard ceiling fans generally cost between $50 and $300 for installation.

But if you opt for more complex designs, like directional or hanging propeller fans, the average cost to install can rise to between $150 and $800.

Don't forget about additional features, either. Built-in lights or extra switches can add anywhere from $100 to $300 each to your overall installation cost.

Advertisement

For outdoor ceiling fans, installation prices can vary greatly, ranging from $70 to over $4,000, depending on specific requirements and specifications.

To guarantee you're getting the best results, consider hiring a professional installation service to handle the complexities, especially if you're dealing with new wiring or unique fan designs.

This way, you can enjoy your new ceiling fan without any hassle.

Factors Influencing Costs

cost determinants and influencers

When you're considering ceiling fan installation, labor rates can vary greatly based on where you live.

Additionally, the wiring requirements play an essential role in determining your overall costs, especially if you need new wiring.

Understanding these factors can help you budget more effectively for your installation project.

Advertisement

Labor Rate Variations

Understanding the variations in labor rates for ceiling fan installation can save you money and guarantee you get the best service. Labor costs typically range from $50 to $200, influenced by factors like the professional's expertise, the complexity of the installation, and the accessibility of the installation site. Urban areas usually see higher rates than rural regions.

Here's a breakdown of key factors affecting labor rates:

Factor Impact on Labor Costs
Professional Expertise Higher rates for licensed electricians
Installation Complexity More intricate setups increase costs
Installation Site Accessibility Difficult access raises labor fees
Additional Features Extra switches can add $100-$200
Bulk Installations Discounts may apply for multiple fans

Hiring a licensed electrician can elevate your costs, but their expertise guarantees safety and compliance. If you need multiple fans installed, scheduling them at once could help minimize overall labor costs by reducing travel fees. Understanding these variations allows you to make informed decisions and potentially save on your installation project.

Wiring Requirements Impact

Wiring requirements play an essential role in determining the overall cost of ceiling fan installation. If you're using existing wiring, your installation costs can be quite manageable, averaging between $100 and $300.

However, if new wiring is necessary, you might find yourself facing considerably higher expenses, ranging from $500 to $1,500, depending on the complexity of your project.

Advertisement

The presence of ceiling boxes is also important. If your home lacks a fan-rated junction box and brace, you'll need to factor in these additional costs.

Additionally, if you want separate controls for your lights and fan, be prepared for extra installation costs between $100 and $200 for switches.

If you're considering an outdoor ceiling fan, specialized wiring is often required. This can further inflate your budget, with total costs potentially exceeding $4,000 based on your specific needs.

Ultimately, understanding these wiring requirements will help you plan your budget effectively and guarantee a smooth ceiling fan installation process.

Types of Ceiling Fans

varieties of ceiling fans

Ceiling fans come in various types, each designed to suit specific needs and spaces. Among the most common are standard ceiling fans, which range from $50 to $300 and often come with light fixtures. They're versatile, making them a great choice for most rooms.

If you have low ceilings, consider low-profile ceiling fans, also priced between $50 and $300. These fans provide efficient airflow without being obtrusive.

Advertisement

For areas requiring adjustable airflow, directional ceiling fans are a solid option. Priced from $150 to $800, they can adapt to various room layouts.

If you have high ceilings, hanging propeller fans are ideal, offering powerful airflow for larger spaces at a cost of $150 to $550.

When it comes to outdoor spaces, you'll want outdoor ceiling fans, designed to withstand the elements. Their prices can range considerably, starting around $250 and going over $3,000, depending on durability and features.

Understanding the types of ceiling fans available will help you choose the right one for your needs, ensuring comfort and style in your home or outdoor area.

Installation Process

setup procedure guidelines

Before you start installing your ceiling fan, you'll want to assess the existing wiring and ceiling height to make sure everything's compatible.

Grab essential tools like a screwdriver, drill, and wire stripper, as you'll need them for mounting the fan and connecting the wires.

Advertisement

Taking these pre-installation steps will set you up for a smoother installation process.

Pre-Installation Assessment Steps

A thorough pre-installation assessment is essential for a successful ceiling fan setup. Start by checking the existing wiring's condition and compatibility with your new fan. This guarantees both safety and functionality during operation.

Next, measure the ceiling height; this will help you determine the appropriate type of fan and whether you need any downrods for proper installation.

Don't forget to inspect the ceiling joists. They must be sturdy enough to support the weight of the fan, especially if you've chosen a larger model or one with additional features like lights.

Additionally, take a moment to assess the room's layout and airflow patterns. This can greatly influence your choice of fan size and placement for ideal air circulation.

Advertisement

Finally, review local building codes and regulations. Confirming compliance during your pre-assessment can save you from potential issues later on.

Essential Tools Required

With all the pre-installation assessments complete, it's time to gather the tools you'll need for the ceiling fan installation.

Start by picking up a screwdriver and a drill, as these are vital for securing the fan to the mounting bracket. You'll also need a wire stripper to prepare the electrical connections, and a voltage tester to guarantee safety before you start working with wires.

Don't forget a sturdy ladder to help you reach the ceiling safely, especially if the fan is mounted high.

Electrical tape is essential for insulating and securing wire connections, preventing any accidental contact. A level will help make sure your fan hangs straight, which is important for effective operation and to avoid wobbling.

Advertisement

If your installation requires additional support, a fan-rated junction box and fan brace may be necessary.

Be certain to have the specific tools for these components on hand. Gathering these tools ahead of time will streamline your installation process and help guarantee everything goes smoothly.

Preparing properly sets you up for a successful ceiling fan installation.

Additional Installation Considerations

installation guidelines and tips

When planning your ceiling fan installation, it's essential to evaluate several factors that could impact the overall cost. One of the key additional installation considerations is whether you need to remove an old fan or make ceiling modifications. This can add between $100 and $300 to your installation costs.

If you're considering replacing a ceiling fan, think about installing multiple fans at once. This approach can minimize travel fees and provide a more cost-effective solution for larger spaces.

You should also check local building codes before you start. Compliance might require adjustments that could affect your overall costs. Additionally, keep in mind that seasonal pricing fluctuations can influence installation costs, with better deals often available during off-peak times.

Advertisement

Finally, verify your ceiling box can support the weight and operation of the fan. If it isn't adequate, you might need to purchase a fan-rated junction box and brace, which can add an extra $50 to $100 to your total expenses. Moreover, consider consulting with an expert to ensure your installation meets energy-efficient technology standards, which can enhance performance and reduce long-term costs.

Cost Breakdown

expense allocation overview

Understanding the cost breakdown for ceiling fan installation is essential for budgeting your project. The average ceiling fan installation cost typically falls between $144 and $353, with most jobs averaging around $248.

If you already have existing wiring, you might find installation costs as low as $100 to $300. However, if new wiring is required, expect the cost to soar up to $2,000.

Additional features can further impact your budget. For instance, built-in lights or switches can add anywhere from $100 to $300 each to your total.

If you're considering remote control options for your ceiling fan, those typically range from $150 to $300, which can greatly raise the overall cost.

For outdoor installations, prices fluctuate widely, starting at $70 and potentially exceeding $4,000, depending on the specifications and complexity.

Advertisement

Budget Management Tips

effective budgeting strategies today

Managing your budget effectively for ceiling fan installation can save you significant money in the long run. Start by establishing a clear budget that estimates your total installation costs, typically ranging from $144 to $353 for professional services.

Don't forget to factor in additional expenses for features like built-in lighting or remote controls, which can add $100-$300 each.

Consider installing multiple ceiling fans at once. This can help you reduce hourly contractor rates and minimize travel fees, leading to greater overall savings.

If possible, utilize existing wiring to lower installation costs to between $100-$300, instead of the up to $2,000 it could cost for new wiring.

It's also wise to plan for unexpected costs by setting aside an additional 10-20% of your budget. This way, you won't be caught off guard by unforeseen expenses during the installation process.

Finally, keep an eye on local pricing trends and seasonal sales to purchase your ceiling fans and installation services at a discount. Additionally, improving indoor air quality can enhance the overall comfort of your living space after installation.

Advertisement

Hiring Professionals vs. DIY

expert assistance or self help

Choosing between hiring a professional or taking the DIY route for ceiling fan installation can considerably impact your budget and overall experience.

If you opt for a professional, you'll typically spend between $100 and $500, depending on the complexity of the installation. Professionals guarantee that everything complies with local codes, especially for ceiling fan replacement that requires new wiring or complex setups. They usually take 1-2 hours for basic installations, which can save you from potential safety hazards.

On the other hand, going the DIY route can save you $50 to $200 on installation labor, but it comes with its own set of challenges. You'll need some level of electrical knowledge, and purchasing tools or materials can add to your expenses.

While it might seem appealing to save money, improper installation could lead to safety risks or even damage to your home.

Ultimately, weigh your skills and the complexity of the job against your budget. If you're confident in your abilities and the installation seems straightforward, DIY might be a good option. However, for peace of mind and safety, hiring a professional is often the better choice.

Frequently Asked Questions

How Much Should I Expect to Pay to Have a Ceiling Fan Installed?

When you're looking to install a ceiling fan, the costs can vary widely.

Advertisement

If you have existing wiring, you might pay between $100 and $300. For new wiring, expect costs to rise considerably.

Additional features like lights or remotes can add $100 to $300 each.

Labor costs also depend on where you live and the complexity of the job, typically ranging from $50 to $200.

Always get multiple quotes to find the best deal.

How Much Does Home Depot Charge to Install a Fan?

When you're considering having a fan installed at Home Depot, you can expect charges to range from $144 to $353, with an average fee around $248.

Advertisement

If you've got existing wiring, it might lower your costs to between $100 and $300.

Keep in mind that adding features like built-in lights can add $100 to $300 each, and if new wiring's needed, costs can skyrocket, potentially reaching up to $2,000.

Should You Hire an Electrician to Install a Ceiling Fan?

You might think installing a ceiling fan is a breeze, but it's wise to take into account the hidden complexities involved.

Hiring an electrician guarantees your installation's not just quick but also safe and up to code. They can handle tricky wiring and specialized features like separate controls effortlessly.

While DIY may seem tempting, it could lead to unexpected headaches if you're not experienced with electrical work.

Advertisement

Do You Need an Electrician to Fit a Ceiling Fan?

You don't always need an electrician to fit a ceiling fan, especially if you're using existing wiring and have some DIY skills.

However, if your installation involves new wiring, complex setups, or features like remote controls, it's wise to consult a licensed electrician. They guarantee safety, compliance with local codes, and ideal placement.

Even if you feel confident, a professional can help avoid potential hazards and guarantee everything functions correctly.

Conclusion

To sum up, installing a ceiling fan can be as invigorating as a cool breeze on a hot summer day. By understanding the costs involved and the factors that influence them, you can make an informed decision that fits your budget. Whether you choose to hire a professional or tackle the installation yourself, being prepared will guarantee a smooth process. So, take your time, weigh your options, and enjoy the comfort a ceiling fan brings to your space!

Advertisement

Continue Reading

Affiliate disclaimer

As an affiliate, we may earn a commission from qualifying purchases. We get commissions for purchases made through links on this website from Amazon and other third parties.

Advertisement

Vetted

Trending