To set up and use your ceiling fan remote, first guarantee the power is off, then connect the receiver inside the fan canopy following the wiring diagram. Install fresh batteries in the remote, and pair it with the receiver within three minutes of turning on the fan. Make sure dip switches match and troubleshoot by resetting if needed. Keeping the batteries fresh and checking connections helps ensure smooth operation—continue to master the process for reliable control.
Key Takeaways
- Ensure the remote and receiver are properly paired within three minutes of fan power-up for seamless operation.
- Install batteries correctly, using recommended types, and replace them regularly to maintain strong signal strength.
- Follow manufacturer instructions to set dip switches and confirm wiring connections inside the fan canopy.
- Use the remote to control fan speed, light, and direction after completing the initial setup and pairing process.
- Troubleshoot issues by resetting remote and receiver, checking for interference, and verifying wiring and battery condition.
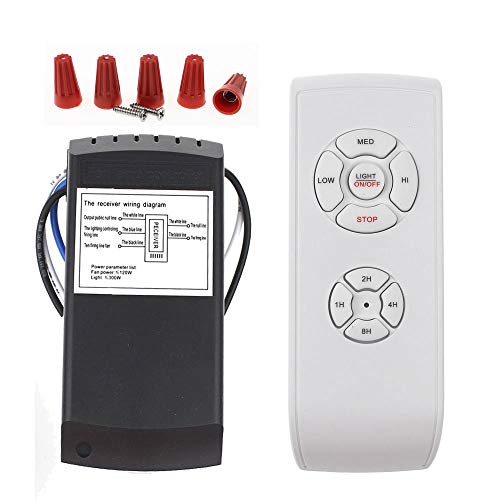
LPHUMEX Universal Ceiling Fan Remote Control Kit, 3-in-1 AC Motor Ceiling Fan Light Timing & Speed Remote, for Hunter/Harbor Breeze/Westinghouse/Honeywell/Other Ceiling Fan lamp
☞Easy Installation – Installation of the Universal Ceiling Fan Remote Controls Kit is a breeze and the looks…
As an affiliate, we earn on qualifying purchases.
As an affiliate, we earn on qualifying purchases.
Understanding Your Ceiling Fan Remote System

Understanding your ceiling fan remote system is essential for smooth operation and troubleshooting. Your remote acts as the control, sending signals to the receiver installed inside the fan canopy.
Most remotes come pre-paired, but if you lose the remote or add a new one, pairing becomes necessary. During remote installation, you’ll typically install the receiver and sync the remote control by pressing specific buttons within a set time.
Many remotes operate on batteries like AA, AAA, or coin cells, which must be properly installed for reliable use.
Troubleshooting pairing issues often involves resetting the remote, verifying dip switch settings, and ensuring all wiring connections are secure.
Familiarity with how your remote works helps you operate your fan smoothly and resolve issues quickly.
LPHUMEX Universal Ceiling Fan Remote Control Kit, 3-in-1 AC Motor Ceiling Fan Light Timing & Speed Remote, for Hunter/Harbor Breeze/Westinghouse/Honeywell/Other Ceiling Fan lamp
☞Easy Installation – Installation of the Universal Ceiling Fan Remote Controls Kit is a breeze and the looks…
As an affiliate, we earn on qualifying purchases.
As an affiliate, we earn on qualifying purchases.
Preparing for Installation and Initial Setup

Before you start installing your ceiling fan remote, make certain the power is completely turned off at both the circuit breaker and the wall switch. This step ensures your safety during setup.
Next, set the fan to high speed and turn on the light with the pull chain to prepare the fan wiring. Properly understanding fan wiring concepts can help prevent issues during installation.
Use a step ladder to access the fan canopy and remove it by unfastening the screws with a screwdriver.
Before handling any electrical wires, confirm that all power is off with a voltage meter. Familiarity with Electrical safety protocols can further reduce risks during the process.
Gather essential tools, including a Phillips screwdriver, wire cutters, wire nuts, and a voltage tester, to facilitate a smooth installation process.
Proper preparation helps ensure your ceiling fan remote setup goes smoothly and safely. Additionally, understanding remote control setup procedures can assist in troubleshooting or optimizing your fan’s operation.
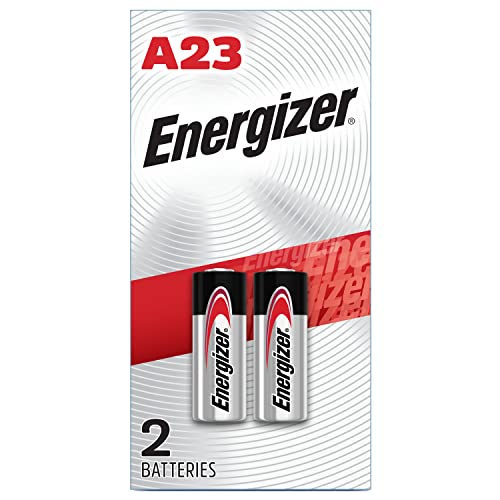
Energizer A23 Batteries, A23 Battery Alkaline, 2 Count
2 pack of Energizer A23 Batteries, 12V Miniature Alkaline Specialty Batteries
As an affiliate, we earn on qualifying purchases.
As an affiliate, we earn on qualifying purchases.
Installing the Receiver in Your Ceiling Fan

To install the receiver in your ceiling fan safely, start by turning off the power at the circuit breaker to prevent any electrical hazards. Remove the fan’s canopy with a screwdriver to access the wiring and mounting area. During installing the receiver in your ceiling fan, make sure you follow the manufacturer’s wiring diagram carefully. Connect the receiver’s wires to the fan and ceiling wires, typically matching white to white, black to black, and blue to blue wires. Secure the receiver inside the canopy or housing, ensuring it’s properly positioned to avoid interference with the ceiling fan makes or the light fixture. Proper placement of the receiver can also help mitigate electrical interference, ensuring smoother remote operation. To further ensure optimal performance, consider the location of the receiver within the fan to minimize potential signal disruption. Additionally, choosing an appropriate installation height can help improve remote signal strength and reliability. Proper placement can also prevent signal obstruction caused by objects or structural elements in the room. Once everything is connected, reattach the canopy, restore power, and test the remote control functions to verify proper installation. Additionally, ensuring proper placement of the receiver can help prevent interference with other devices and ensure smooth operation of your ceiling fan remote.

Hunter 18-24 inch DC Accessory Extension Wire Kit for Ceiling Fans – 99696
The 18-24 inch wire kit makes adding a downrod simple with our easy-to-follow instructions
As an affiliate, we earn on qualifying purchases.
As an affiliate, we earn on qualifying purchases.
Connecting and Wiring the Remote Receiver

Connecting and wiring the remote receiver is a straightforward process that requires careful attention to safety.
First, turn off power at the circuit breaker to prevent electrical shock. Remove the fan’s canopy by unfastening screws to access the internal wiring.
Start by connecting the white (neutral) wires from the ceiling, fan, and remote receiver with a wire nut, ensuring a secure connection.
Next, attach the black (hot) wire from the ceiling to the receiver’s black wire.
Connect the blue wire from the receiver to the fan’s blue wire for lighting control.
Once wiring is complete, secure the remote receiver inside the fan’s mounting bracket or electrical box. Proper wiring techniques help ensure safety and reliable operation.
A thorough understanding of industry trends can help you troubleshoot and optimize your ceiling fan setup more effectively.
Finally, reattach the canopy to finish wiring the ceiling fan properly.
Installing Batteries in the Remote Control

Installing batteries in your remote control is a simple task that guarantees your fan responds promptly to commands. First, remove the remote control’s battery compartment cover, which may require a Phillips screwdriver. Once the cover is off, insert the batteries, making sure to match the polarity markings (+ and –) inside the compartment. Use the correct type and size of batteries specified in your owner’s manual, such as AAA or coin cell batteries. Be sure the batteries are fully seated and make proper contact with the metal terminals for reliable power. Proper battery installation ensures your remote functions smoothly. After installing the batteries, replace the battery compartment cover securely to ensure proper connection and prevent batteries from falling out. Proper installation of the batteries ensures your remote functions smoothly. DE – Patchology.ORG can provide additional tips on maintaining your devices and accessories to ensure long-term performance. Additionally, battery lifespan can be extended by removing batteries if the remote will not be used for an extended period.
Pairing the Remote With the Fan Receiver

Most Hunter fan remotes are pre-paired with their receivers, so you usually don’t need to manually pair them unless the remote is lost or a new remote is added. To pair the remote with the fan receiver, turn on the fan and press the pairing button within three minutes of cycling power. For some models, you might need to press buttons like ‘FAN’ and ‘SPEED 3’ or hold the ‘PAIR’ button. Confirm pairing by turning on the fan and testing remote functions like speed, light, and direction. If pairing fails, turn off power, wait a minute, then repeat the process, keeping the remote and receiver close during setup. Additionally, ensuring the remote and receiver are within range helps facilitate a successful pairing. Proper signal transmission is essential for reliable operation.
Troubleshooting Common Remote Control Issues

If your remote isn’t responding, start by checking the batteries—they should be fresh and installed correctly. Signal interference from other devices can also disrupt communication, so try moving closer to the fan or removing potential sources of interference. If issues persist, resetting or re-pairing the remote often resolves common problems quickly. Additionally, understanding AI discoveries and their impact on technology can help troubleshoot advanced remote controls that may incorporate AI features. Staying informed about industry transformations can provide insights into innovative remote control designs and functionalities. Being aware of advanced remote technology can further aid in diagnosing complex issues, especially as newer models integrate smart home compatibility features that enhance user experience.
Remote Not Responding
When your ceiling fan remote isn’t responding, it can be frustrating, but many issues are simple to troubleshoot. First, check that the remote batteries are fresh, correctly installed, and match the specified type in your manual.
Next, verify that the dip switches on the remote and receiver are properly aligned to establish a successful connection. If that doesn’t work, reset both the remote and receiver by turning off power, waiting at least one minute, then reattempt pairing according to your model’s instructions.
Also, inspect all wiring inside the fan canopy for loose or disconnected wires that could interfere with communication.
If your remote still doesn’t respond after these steps, consult your manufacturer’s troubleshooting guide or contact customer support for further assistance.
Weak Remote Batteries
Weak remote batteries are a common culprit behind unresponsive or inconsistent ceiling fan operation. When your remote batteries are low or dead, the remote may not send signals properly, causing delays or complete failure to control the fan or lights.
Using batteries with low voltage or incorrect polarity can also prevent the remote from pairing correctly with the fan’s receiver. To fix this, replace the remote batteries with fresh, high-quality, manufacturer-recommended types.
Keep an eye out for signs of weak batteries, like dim lights, flickering, or delayed responses. Regularly checking and replacing remote batteries ensures reliable control and prevents troubleshooting headaches.
Proper maintenance of your remote batteries keeps your ceiling fan functioning smoothly and avoids frustrating control issues.
Signal Interference Issues
Signal interference is a common cause of remote control problems with your ceiling fan. It can occur when other electronic devices, like Wi-Fi routers or cordless phones, disrupt the signal.
Metallic objects or thick walls between the remote and fan may also weaken the signal, making the remote unresponsive or inconsistent.
Using incompatible remotes or trying to operate multiple fans with one remote can lead to signal conflicts.
Additionally, low or poorly connected batteries can reduce signal strength, causing delays or failure to respond.
To fix these issues, try relocating the remote and fan to improve line-of-sight or reset and re-pair the remote with the receiver.
Eliminating interference sources usually restores reliable control over your ceiling fan.
Resetting Your Ceiling Fan Remote

To reset your ceiling fan remote, find the reset button, which is often inside the remote or on the circuit board.
If you can’t see it, open the battery compartment or casing to locate the switch.
After pressing it, follow the pairing instructions to reconnect your remote to the fan.
Reset Button Location
The reset button on a ceiling fan remote is usually found inside the battery compartment or on the back of the remote. You may need to remove the battery cover to locate it.
Some remotes have a dedicated reset button labeled “Reset” or “Factory Reset,” which you press and hold for several seconds.
In certain models, the reset involves removing the batteries, pressing a specific button combination, or using a small pinhole reset button with a paperclip.
To reset your remote:
- Open the battery compartment or check the back.
- Locate the reset button or pinhole.
- Follow the instructions for your model to complete the reset process.
Always consult your remote’s user manual for exact reset procedures to ensure proper operation.
Troubleshooting Connection Issues
When your ceiling fan remote isn’t pairing properly or seems unresponsive, resetting the connection can often resolve the issue. Start by pressing the dedicated reset button or removing and reinserting the batteries to re-establish communication with the receiver.
Ensure the dip switches on both the remote and receiver are matching and correctly set, as mismatched switches can prevent proper pairing.
Turning off power to the fan for at least one minute before turning it back on helps reset the system and clear any glitches.
If accessible, disassemble the canopy to check that all wiring connections to the receiver are secure and undamaged.
If these troubleshooting steps don’t work, consult your manufacturer’s instructions or contact customer support for model-specific reset procedures.
Installing a Wall-Mounted Remote Cradle

Installing a wall-mounted remote cradle is a straightforward process that keeps your remote easily accessible.
First, remove two screws from the wall switch plate without fully detaching it to access the mounting area.
Next, align the cradle’s holes with the switch plate’s, and if you have rocker switches, remove the cradle’s tabs before mounting.
Then, secure the cradle with screws, ensuring you don’t overtighten to avoid damage.
For adhesive options, peel off the backing and press the cradle firmly against the wall for at least 30 seconds.
Alternatively, drill holes into the wall, insert drywall anchors if needed, and fasten the cradle.
This setup provides easy access to your ceiling fan control receiver, especially if your fan includes a light or has pull chains for fan speed.
Tips for Maintaining Reliable Remote Operation

To keep your ceiling fan remote working reliably, start by checking the batteries regularly and replacing them if needed.
Make sure the remote stays clear of metal objects and electronic devices that could interfere with the signal.
Finally, verify that the remote and receiver are properly paired to ensure a consistent connection.
Check Batteries Regularly
Regularly checking your remote batteries is essential for reliable ceiling fan control. Over time, Batteries can corrode, leak, or weaken, reducing signal strength.
To keep your remote functioning smoothly, follow these steps:
- Inspect Batteries for corrosion or leaks, and clean contacts if needed.
- Use the recommended battery type, such as CR2032 coin cells or AAA batteries, for ideal performance.
- Replace Batteries immediately if you notice decreased responsiveness or weak signals, and keep spare Batteries on hand.
Keep Remote Clear
Keeping your remote clear of obstructions and interference is key to making sure it operates reliably. Keep the remote away from metal objects and electronic devices that may disrupt the signal.
Regularly replace the remote batteries to maintain consistent power, preventing signal loss.
Store the remote in a designated, easily accessible spot to avoid misplacement or accidental damage.
Clean the remote’s buttons and surface periodically with a soft, dry cloth to ensure proper contact and functionality.
Avoid exposing the remote to extreme temperatures or moisture, as these conditions can affect its internal components and disrupt signal transmission.
Verify Proper Pairing
Ensuring your remote is properly paired with the ceiling fan is essential for reliable operation. Proper pairing allows you to control fan speed, direction, and lighting effectively.
If your remote becomes unresponsive, re-pairing might be necessary. Here are key steps to verify proper pairing:
- Confirm that dip switches match on both the remote and receiver.
- Make sure batteries are correctly installed and have sufficient charge.
- Follow the manufacturer’s pairing instructions within three minutes of turning on the fan.
If controls still don’t respond, turn off power, wait a minute, and then re-pair the remote by following the specific pairing procedure.
Proper pairing prevents control issues and ensures consistent operation.
Frequently Asked Questions
How to Set Ceiling Fan Remote Control?
To set your ceiling fan remote control, first verify the batteries are installed correctly with the positive side facing up.
Turn off the fan and circuit breaker for safety.
Match the dip switches on the remote and receiver, then press and hold the remote’s pairing button within the specified time.
Test the functions like fan speed and light control to confirm everything works properly.
Why Is My Ceiling Fan Not Responding to the Remote Control?
If your ceiling fan isn’t responding to the remote, check the batteries first—dead ones can prevent communication. Verify the remote and receiver are in sync; you might need to re-pair them.
Inspect wiring inside the fan and receiver for loose connections. Also, avoid interference from other electronics or metal objects nearby.
Adjusting these factors often restores proper control, letting you enjoy your fan again.
How Do Ceiling Fans With Remotes Work?
Ceiling fans with remotes work through a wireless receiver inside the fan that communicates with your remote control. When you press a button, it sends radio frequency or infrared signals to the receiver.
The receiver then adjusts the fan’s speed, light, or direction. You control the fan by pressing buttons on the remote, and it processes these signals to operate the fan components securely and efficiently.
How Do I Know What Setting My Ceiling Fan Is On?
You want to know what setting your ceiling fan is on, right? First, check the remote for indicator lights or a digital display that shows the current speed, like Low, Medium, or High.
Alternatively, turn on the fan and observe the blades’ movement, which indicates the speed. Some models have LED screens, so press the fan button on the remote to see the current setting clearly.
Conclusion
Now that you’re equipped with the knowledge to set up and troubleshoot your ceiling fan remote, remember—your comfort depends on it. Like a trusted companion, your remote ensures a breeze whenever you need it. Keep it well-maintained, and it’ll serve you faithfully. So, take control of your space and enjoy seamless cooling—because a well-functioning remote isn’t just a gadget, it’s your ticket to effortless comfort. Stay connected, stay cool.