To balance your ceiling fan for ideal performance, turn off the power and clean the blades of dust and debris. Use a balancing kit with clips or adhesive weights to identify which blades are causing wobble—attach clips to the center of each blade’s trailing edge and observe the change. Adjust by attaching additional weights gradually until the wobbling stops. For more detailed steps, explore the full methods to guarantee your fan functions smoothly and quietly.
Key Takeaways
- Turn off the fan and verify all blade screws and brackets are tight and properly aligned.
- Use a balancing kit or adhesive weights to identify and correct the wobbling blade.
- Attach balancing clips to each blade’s center, observe wobble changes, and mark the most problematic blade.
- Add small weights or clips to the wobbling blade, adjusting their position until the wobble diminishes.
- Regularly clean blades and inspect for damage to maintain proper balance and optimal fan performance.
Understanding Common Causes of Ceiling Fan Wobbling

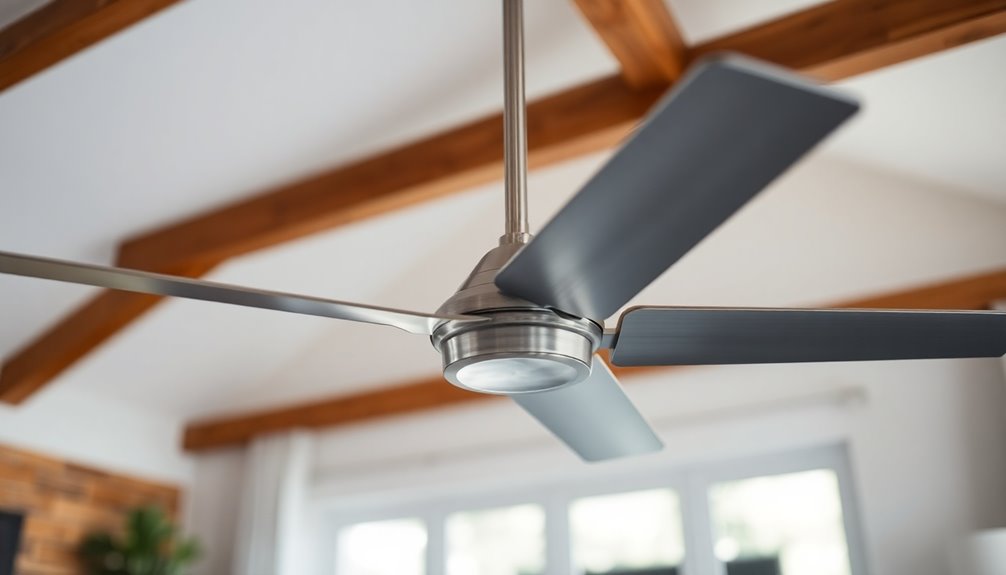
Wobbling in your ceiling fan often stems from simple issues that can be easily addressed. A common cause of fan wobble is blade imbalance, which happens when blades are uneven or damaged. Dust, dirt, or debris on blades can throw off the balance, causing the fan to vibrate during operation. Using a Paint Sprayer Zone to clean blades can help maintain proper balance. Warped, bent, or damaged blades also create uneven airflow, leading to instability. Additionally, improper installation of blade brackets or misaligned blade holders can make blades sit unevenly, increasing wobbling. Furthermore, blade imbalance detection can help identify specific issues with blade weight distribution. Loosened blade screws or mounting hardware can cause blades to shift or wobble. Sometimes, a bent motor shaft or incorrect installation of fan components causes persistent imbalance. Regular maintenance and inspection of the fan structure are essential for effective balancing and smooth fan operation. Ensuring that the fan mounting is secure and properly aligned can also prevent wobbling issues over time.
Preparing Your Tools and Materials for Balancing

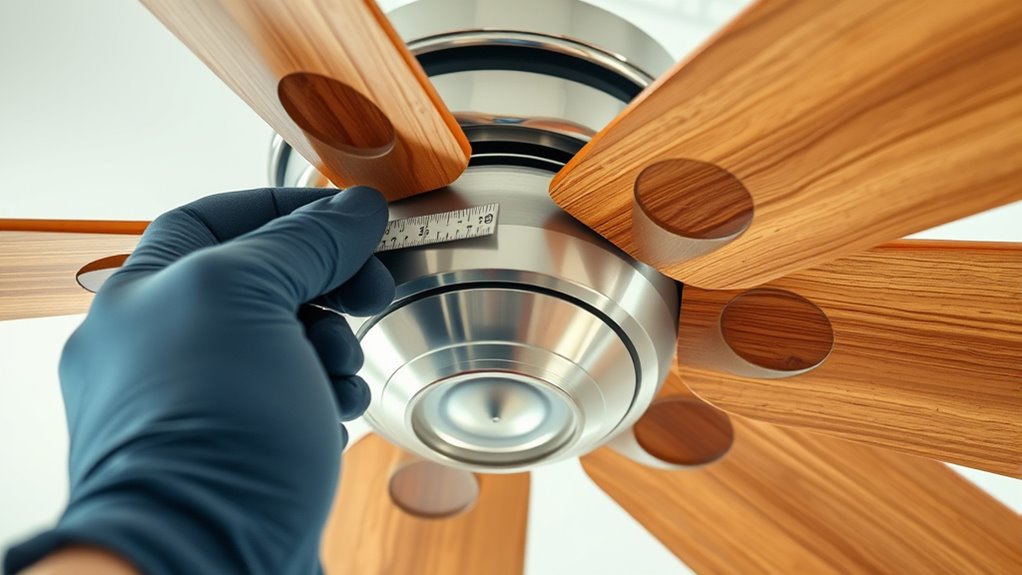
Start by gathering essential tools like a stepladder, screwdriver, cleaning cloth, ruler, and masking tape to inspect and prepare your fan. Next, pick up a ceiling fan balancing kit with plastic clips, adhesive weights, and instructions for accurate adjustments. Keep extra weights or adhesive nearby in case you need additional help during the balancing process. Additionally, understanding the dynamic contrast ratio of your projector can help you optimize your home cinema setup for the best image quality.
Essential Tools Needed
Before you begin balancing your ceiling fan, gather the essential tools and materials to guarantee a smooth process. You’ll need a variety of tools and supplies to make precise adjustments. Here’s what to have on hand:
- A stepladder for safe access to the fan
- A screwdriver to tighten or loosen screws
- A cleaning cloth for removing dust from blades
- A ruler or yardstick to measure blade height
- A balancing kit with plastic clips, adhesive weights, and instructions
Additionally, keep extra weights or clips nearby for stubborn wobble issues. Having these tools ready ensures you can efficiently identify imbalances and make effective adjustments. Properly balancing your fan can extend its lifespan and improve performance. Incorporating AI-driven balance detection can further optimize the process for precision and efficiency. Being familiar with industry trends in fan balancing techniques can also help you achieve better results.
Gathering Balancing Supplies
Have you gathered all the necessary supplies to balance your ceiling fan effectively? Start with balancing supplies like adhesive weights and clips, which are usually included in a fan balancing kit available at hardware stores like Home Depot or Ace. These supplies help you add or adjust weight on the blades to reduce wobbling. Additionally, using self-watering plant pots can inspire you to consider long-term maintenance and consistent performance, similar to how these planters maintain moisture with minimal effort. Also, pick up basic tools such as a screwdriver for tightening blade screws and a ruler or yardstick to measure blade height and pitch. Before starting, use cleaning supplies like a damp cloth to remove dust and dirt from the blades. It’s helpful to have a smartphone with a leveling app or a bubble level to assess blade levelness and alignment during inspection. Incorporating quality assurance principles can help you ensure your balancing process is thorough and effective. Being aware of essential oil safety can also remind you to handle your tools carefully and avoid hazards during the process. Remember to verify the vibrational energy of your workspace to help maintain proper alignment and focus throughout the task. Proper balancing techniques are essential to achieving optimal fan performance. Follow the instructions provided in your kit for best results.
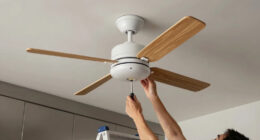
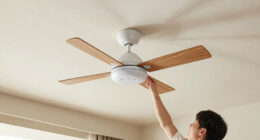
How to Safely Turn Off and Clean Your Ceiling Fan

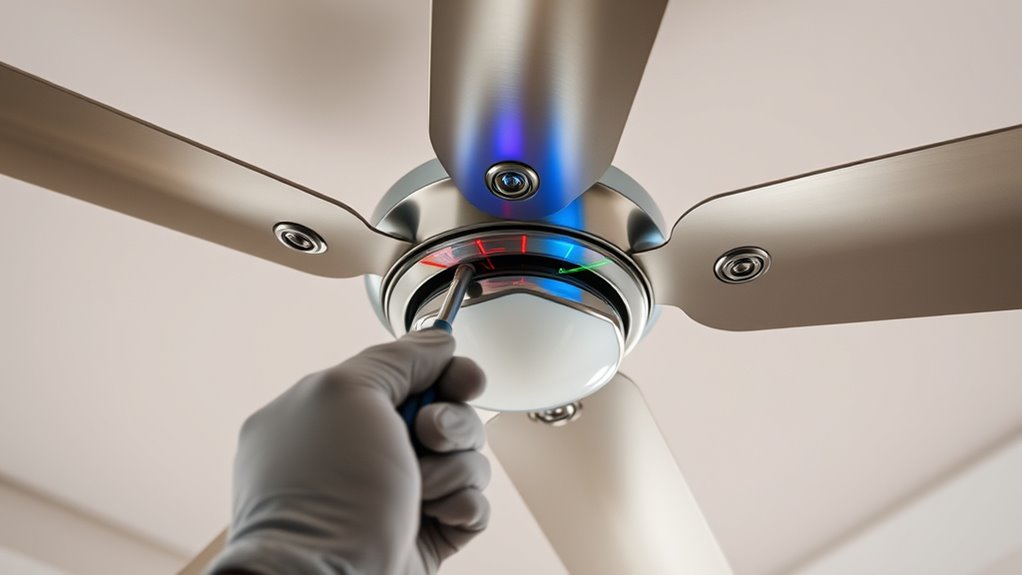
To clean your ceiling fan safely, you first need to turn off the fan completely and make certain the blades have stopped moving. This prevents injury and guarantees a safe cleaning process. Use a sturdy ladder or step stool to reach the blades, making sure it’s stable on an even surface. Before cleaning, switch off the fan at the wall switch and, if possible, turn off the circuit breaker for extra safety. Gently wipe the blades with a damp cloth or microfiber duster to remove dust, dirt, and grease buildup. Regular cleaning every few months helps maintain fan efficiency and prevents dust from causing wobbling or noise. Additionally, incorporating home maintenance routines can prolong the lifespan of your ceiling fan and ensure optimal performance. – Turn off the fan at the switch and breaker – Wait until blades stop moving – Use a stable ladder or step stool – Gently wipe blades with damp cloth – Avoid harsh chemicals during cleaning. Ensuring proper fan balancing can further enhance performance and reduce wobbling, making your fan operate smoothly and quietly.
Inspecting and Tightening Blade and Mounting Fasteners

Inspecting and tightening your ceiling fan’s blade and mounting fasteners is vital for safe and smooth operation. First, check that all blade screws are properly tightened to prevent wobbling and vibrations. Confirm the blade brackets are correctly aligned and not bent or warped, which can cause uneven weight distribution. Additionally, regularly monitoring for loose fasteners can help prevent potential safety hazards. Examine the mounting bracket to verify it’s securely attached to a fan-rated electrical box using proper lag screws or bolts. Tighten any loose fasteners on the downrod and mounting hardware, ensuring they’re snug and properly seated. Regular inspection of components can help identify early signs of wear or damage that may compromise stability. Incorporating sector performance evaluation techniques can also aid in maintaining optimal operational efficiency. Ensuring the proper alignment of blades is essential for balanced performance. Proper alignment of blades and stability of the mounting system are essential for balanced performance. Regular inspecting of these fasteners helps prevent issues and keeps your ceiling fan functioning efficiently and quietly. Additionally, conducting periodic vibration analysis can help detect imbalance issues before they become severe.
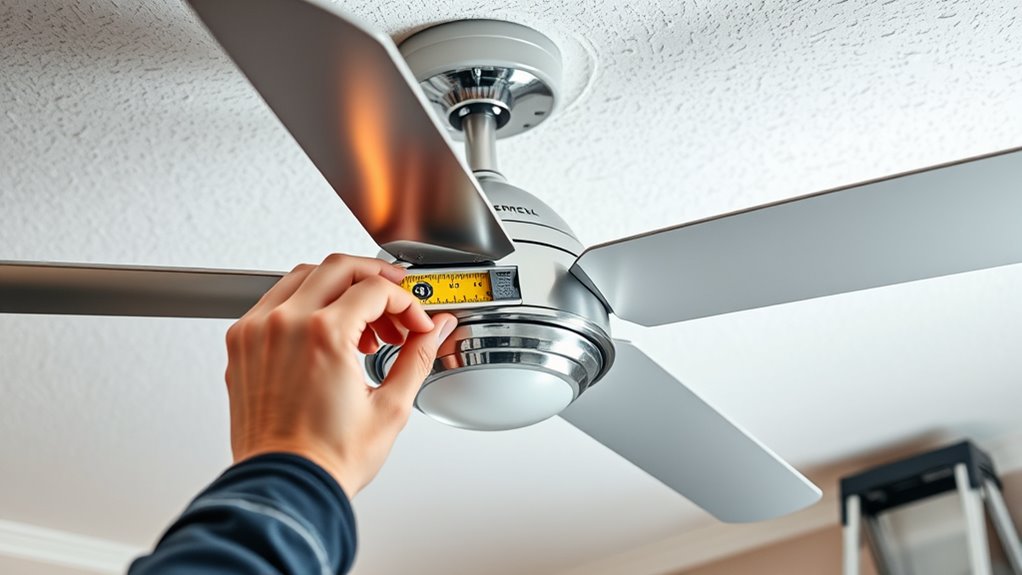
Measuring Blade Heights and Checking for Warped or Damaged Blades
Ensuring your ceiling fan operates smoothly begins with accurately measuring blade heights and checking for damage. Use a measuring tape or ruler to verify that each blade is the same distance from the ceiling, ideally within 1/8 inch. Proper bedroom lighting can also influence the overall ambiance and functionality of the space. Inspect the blades for warping by placing a straightedge or level along their edges to spot any bends or curves. Examine each blade closely for cracks, chips, or other signs of damage that could affect balance. Check the pitch angle of the blades with a blade pitch gauge or level to ensure they’re installed uniformly. If you find warped or damaged blades, replace them to promote even rotation and reduce wobbling. Regular maintenance and inspection can also help prevent issues caused by automation in business that might lead to neglecting equipment upkeep.
Using a Balancing Kit to Identify the Problematic Blade
Start by attaching the plastic clip from the balancing kit to the center of each blade’s trailing edge, moving from the middle outward.
Turn on the fan and watch how the wobble shifts with the clip’s position, noting where it improves.
Mark the blade or spot that causes the most wobble to identify the problematic blade.
Attach the Clip Correctly
To attach the balancing clip correctly, place it about halfway along the trailing edge of the suspect blade, usually near the midpoint. Make sure the clip is securely fastened to avoid slipping or tilting, which could give false readings.
Position the clip on the rear or underside of the blade to see how the wobble responds to added weight. Before attaching weights, test each blade individually by repositioning the clip to identify the problematic one.
Remember these key points:
- Use the clip to determine which blade causes imbalance
- Attach it firmly to prevent movement during testing
- Place it at the blade’s midpoint for accurate results
- Test each blade separately for precise identification
- Always turn off the fan before moving or removing the clip
Proper placement helps you find the right balance and ensures safe, effective adjustment.
Observe Wobble Changes
Attaching the balancing clip to different blades allows you to see how each one affects the fan’s wobble. As you move the clip along the trailing edge of each blade, observe any changes in wobble. If the wobble lessens when the clip is on a specific blade, that blade is likely out of balance and needs adjustment. Placing the clip near the center helps determine if uneven weight distribution causes the imbalance. To assist your process, consider this quick reference:
| Blade Position | Wobble Change | Action Needed |
|---|---|---|
| Front Left | Decreases | Add weight or adjust blade |
| Center Blade | No change | Likely balanced |
| Rear Right | Worsens | Recheck installation |
Repeating this on all blades ensures you identify the problematic one accurately.
Mark the Problematic Blade
When using a balancing kit, begin by attaching the clip to the middle of each blade’s trailing edge and turning on the fan.
Observe how the wobble changes with each placement to help mark the problematic blade.
Move the clip systematically from one blade to another, noting which one shows the most significant reduction in wobble.
This process helps you identify the blade that causes imbalance.
- Mark the blade with the greatest improvement when weighted
- Use the clip to pinpoint the problematic blade
- Observe which blade’s wobble decreases most visibly
- Record your findings for future reference
- Focus on balancing or replacing the marked blade for maximum performance
This method ensures you accurately identify the problematic blade, guiding effective balancing.
Applying Weights and Adjusting for Optimal Balance

Start by attaching adhesive weights or clips to the blades where you notice the most wobble. To balance your fan, focus on one blade at a time.
Begin balancing your fan by attaching weights to the wobbling blades one at a time.
Place small weights on the edge or center of the fan blades, then observe how the wobble changes. Move the weights incrementally along the blade’s length and around the perimeter to find the best position that reduces vibration.
Use trial-and-error: attach small weights, run the fan at different speeds, and watch for improvements. Once you find the ideal placement, secure the weights permanently with epoxy or strong adhesive for long-lasting balance.
Adjusting weights on each fan blade individually ensures smooth operation and minimizes wobble, helping your fan perform at its best.
Troubleshooting Persistent Wobbling and When to Replace Your Fan

Persistent wobbling despite balancing efforts usually signals underlying issues such as warped blades, damage, or improper installation. If your fan remains wobbly after using a fan balancing kit, it’s time to contemplate replacing the fan.
Fans over 10 years old or with recurring wobble and motor noise are often less reliable and should be replaced to ensure safety and performance.
When weights keep falling off or balancing efforts fail, it indicates manufacturing defects or improper mounting.
You should also consider replacing the fan if:
- The wobble persists despite balancing adjustments
- Blades appear warped or damaged
- The fan makes unusual motor noise
- It’s an older, unreliable model
- The wobbling affects airflow or safety
Replacing your fan with a high-quality unit can resolve persistent wobbling issues and improve efficiency.
Tips for Preventing Future Wobbling Issues
To keep your ceiling fan running smoothly and prevent future wobbling, regular maintenance is key. Start by cleaning the fan blades to remove dust buildup, which can cause imbalance and wobbling over time.
Make sure the blades are securely fastened and properly aligned during installation—loose or misaligned blades are common wobbling culprits. Use high-quality, well-balanced blades with consistent weight and pitch to maintain stability.
Periodically inspect the mounting hardware and tighten any loose screws or brackets to prevent shifting that leads to wobbling. If needed, utilize balancing kits to fine-tune the fan’s balance.
Choosing fans with precise manufacturing tolerances and quality components can also minimize future balancing issues, keeping your fan steady and quiet for years to come.
Choosing High-Quality Fans to Minimize Balancing Challenges

Choosing high-quality ceiling fans is essential if you want to minimize balancing challenges. These fans from reputable brands like Casablanca and Hunter are crafted with precise blade angles and balanced manufacturing, reducing wobble.
Premium fans often feature built-in balancing tools or factory-tested blades, cutting down on post-installation adjustments. Better materials and strict quality control ensure consistent blade weights and alignment, leading to smoother operation.
Investing in high-quality ceiling fans can prevent issues like warped blades or misaligned blade holders common in cheaper models. While they cost more initially, these fans typically require less maintenance and deliver quieter, more reliable performance over time.
- Superior blade design and materials
- Accurate blade alignment
- Factory testing for balance
- Reduced wobbling and noise
- Enhanced overall performance
Frequently Asked Questions
What Is the Best Way to Balance a Ceiling Fan?
You want to balance your ceiling fan for smooth operation, so start by checking that all blades are at the same height and have the same pitch.
Use a balancing kit with clip-on weights to find the wobbling blade. Move the clip along the blade to identify the exact spot needing weight.
Attach adhesive weights or epoxy there, and regularly check to keep your fan functioning quietly and efficiently.
How to Fix Fan Imbalance?
If your ceiling fan’s dance feels a bit off, it’s time for a tune-up. First, check for uneven blades or loose screws—tighten or replace as needed.
Use a balancing kit to add small weights for smooth spinning. Inspect the mounting to confirm stability.
With a little patience and these steps, you’ll restore harmony, making your fan run silently and efficiently once again.
Which Way Should the Ceiling Fan Turn in Summer?
In summer, your ceiling fan should turn counterclockwise when you look up at it. This direction pushes air downward, creating a cooling breeze that helps lower indoor temperatures.
Make sure your fan’s switch is set to “forward” or “summer” mode to achieve this. Running it this way improves air circulation and evaporative cooling on your skin, making your space feel cooler and more comfortable.
How Do I Know Which Fan Blade Is Out of Balance?
Imagine the fan as a dancer losing rhythm; you’ll notice wobbling or vibration. To find the out-of-balance blade, observe which blades cause more wobbling when spun at high speed.
Use a balancing clip or weight on each blade, noting which reduces wobble. Mark those blades, measure their height and pitch, and swap or remove suspect blades.
This detective work helps restore smooth, balanced performance.
Conclusion
Balancing your ceiling fan might seem like a small act, but it keeps your space feeling just right. With patience and care, you can restore harmony to your room’s gentle breeze. Remember, a well-tuned fan isn’t just about quiet operation – it’s about creating comfort and peace in your home. Embrace the process, and soon you’ll enjoy a serene, wobble-free breeze that feels like a warm hug on a cool day.