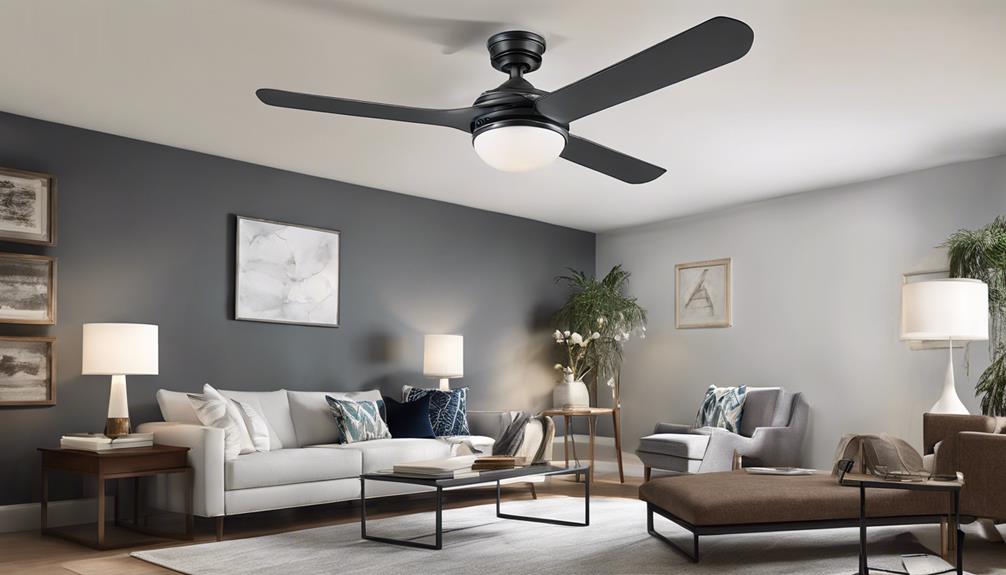
To fix a stuck ceiling fan pull chain, start by turning off the power at the circuit breaker for safety. Next, unscrew the fan cover carefully to access the internal components. Locate the pull chain assembly inside the fan housing, assessing any sticking issues like dirt or damage. If needed, replace the stuck chain with a new one, ensuring you match its size and type. Test the new chain's functionality before reassembling the fan. By following these steps, you can efficiently resolve the issue and ensure proper fan operation.
Key Takeaways
- Power off the ceiling fan for safety.
- Remove the fan cover without causing damage.
- Locate the pull chain assembly inside.
- Identify and address the sticking issue.
- Replace the stuck pull chain carefully.

4 Pack Bronzed Ceiling Fan Pull Chain Extension, 12 Inches Classic Drop Shaped Pendant Pull Chains for Ceiling Fans and Lights, Decorative Fan Pulls Extenders with Connector (2 light and 2 fan)
4 Pack Nice Ceiling Fan Pull Chains : Package included: (4 pulls, 2 light and 2 fan). Durable…
As an affiliate, we earn on qualifying purchases.
As an affiliate, we earn on qualifying purchases.
Power Off the Ceiling Fan
To ensure safety, the first step is to power off the ceiling fan at the circuit breaker before fixing the stuck pull chain. It's essential to prioritize safety when dealing with electrical appliances like ceiling fans.
By cutting off the power source at the circuit breaker, we eliminate the risk of potential electrical accidents while working on the stuck pull chain. Always remember that safety comes first when troubleshooting any issues with ceiling fans.
Confirming that the fan is completely powered down is crucial in preventing shocks or other mishaps during the repair process. Taking the time to ensure the electricity is switched off not only protects you but also allows you to focus on resolving the problem with the stuck pull chain effectively.

Ceiling Fan Light Switch Zing Ear Pull Chain ZE-109 Fan Light Switch, On-Off Speed with Pull Chain Compatible with Ceiling Fans, Lamps and Wall Lights (1, Bronze)
Zing Ear ZE-109 Two-wire pull chain switch, activates canopy lamps by gently tugging the beaded chain, compatible with…
As an affiliate, we earn on qualifying purchases.
As an affiliate, we earn on qualifying purchases.
Remove Fan Cover

To remove the fan cover, start by unscrewing the screws holding it in place.
Once the screws are off, carefully lift the cover off the ceiling fan.
This step will give you access to the internal components for further troubleshooting.
Unscrew Fan Cover
I carefully unscrew the screws holding the fan cover in place to access the internal components of the ceiling fan. Before proceeding, it's important to handle the fan cover removal process with care to prevent any damage.
Here are some key points to keep in mind:
- Make sure to locate and remove all screws securing the fan cover.
- Place the screws in a safe location to avoid losing them.
- Check the fan cover design for any specific removal instructions.
- Gently lift off the fan cover once all screws are removed.
- Be cautious not to force the cover to prevent any accidental breakage.
These steps will help you safely remove the fan cover for troubleshooting the pull chain issue.
Lift off Cover
Carefully lifting the fan cover off reveals the internal components of the ceiling fan for troubleshooting the pull chain issue. To remove the cover, locate the screws or clips holding it in place and gently release them.
Once the cover is off, you'll have access to the fan motor, pull chain mechanism, and wiring connections. This step is crucial in inspecting and troubleshooting the stuck pull chain. Take care when handling the cover to avoid damage and ensure a safe process.
Ceiling Fan Light Switch Zing Ear Pull Chain ZE-109 Fan Light Switch, On-Off Speed with Pull Chain Compatible with Ceiling Fans, Lamps and Wall Lights (1, Bronze)
Zing Ear ZE-109 Two-wire pull chain switch, activates canopy lamps by gently tugging the beaded chain, compatible with…
As an affiliate, we earn on qualifying purchases.
As an affiliate, we earn on qualifying purchases.
Locate Pull Chain Assembly
After removing the fan cover or canopy, the pull chain assembly is typically found inside the fan housing near the light fixture. When locating the pull chain assembly, keep in mind these key points:
- The pull chain mechanism controls fan speed or light settings.
- Access the assembly by removing the fan cover or canopy.
- The pull chain connects to a switch that activates different functions.
- Understanding the assembly's location is crucial for troubleshooting.
- Internal components near the light fixture house the pull chain mechanism.
Knowing where to find the pull chain assembly is essential for fixing any issues with the ceiling fan pull chain. It enables you to identify the components involved in the mechanism and tackle any sticking problems effectively. By familiarizing yourself with the location and function of the pull chain assembly, you'll be better equipped to address any pull chain-related issues that may arise.
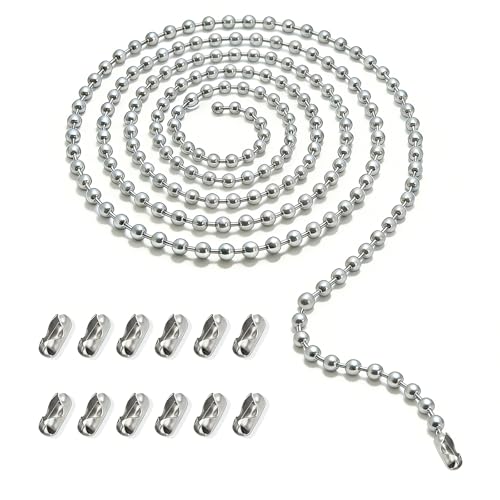
PAKVROM Ceiling Fan Pull Chain Extension, 120 In Ball Chain With 12 Connetors, Adjustable Length Ceiling Fan Chain, Fan Pull Chain Set For Ceiling Light Lamp Chain (3mm Bead Diameter)
【What You Get】PAKVROM 120-Inch Bead Chain Ceiling Fan Pull Chain Extension with 12 Matching Connectors – Easily Cut…
As an affiliate, we earn on qualifying purchases.
As an affiliate, we earn on qualifying purchases.
Assess Chain Sticking Issue

Upon inspection of the ceiling fan pull chain, it's essential to assess the potential causes of the sticking issue.
Inspect the chain for any dirt, debris, or lack of lubrication that might be hindering its movement. Check if there are bends, kinks, or tangles in the chain that could lead to sticking.
Examine the chain mechanism to identify the issue, ensuring it isn't damaged or worn out. Evaluate the smooth movement of the chain when adjusting the fan or light settings.
Make sure the pull chain is in proper alignment and seated correctly within the switch mechanism to prevent sticking problems. By thoroughly assessing these factors, you can pinpoint the root cause of the sticking issue and proceed to address it effectively in the upcoming steps.
This examination will help in understanding the underlying issues causing the pull chain to stick, enabling you to resolve the problem efficiently.
Replace the Stuck Pull Chain

To replace a stuck pull chain on a ceiling fan, accessing the fan's internal components may be necessary. Here are some steps to replace the stuck pull chain effectively:
- Disconnecting Wires: Before starting, make sure to turn off the power to the fan to avoid any electrical hazards.
- Removing the Old Chain: Carefully open the fan housing to access the pull chain mechanism.
- Installing a New Chain: Replace the old chain with a new one that matches the size and type needed for your ceiling fan.
- Testing: After installing the new pull chain, turn the power back on and test the functionality of the chain to ensure it operates smoothly.
- Ensuring Proper Functionality: Confirm that the pull chain can turn the fan on and off correctly before proceeding to reassemble the fan.
Reassemble and Test Fan

Let's now reattach the fan blades securely and check the smooth function of the pull chain.
It's important to ensure all components are properly assembled to prevent any issues.
After reassembly, test the fan by turning it on and confirming that it runs smoothly without any hitches.
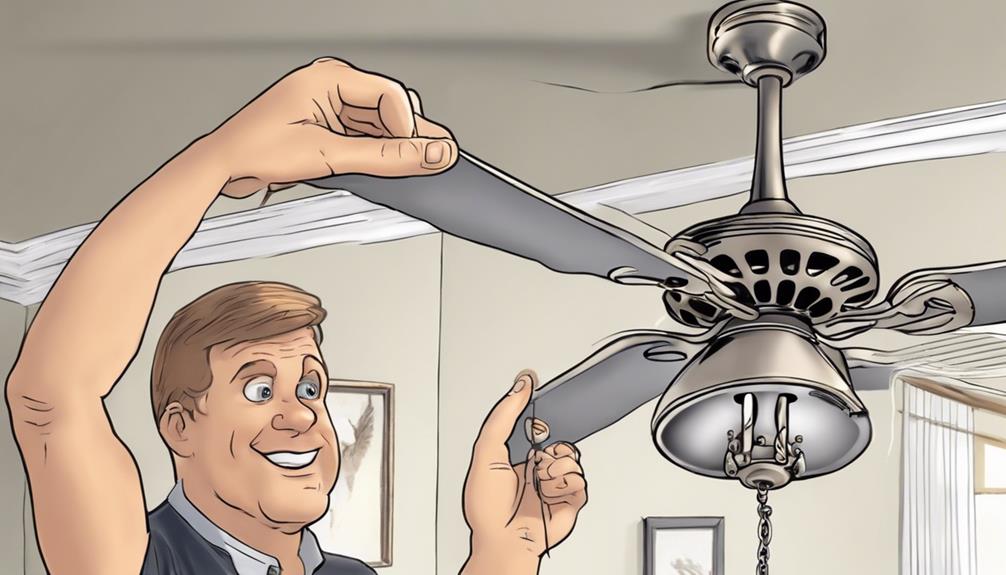
Reattach Fan Blades
Securing the fan blades properly is crucial to ensure smooth and balanced operation of the ceiling fan.
When reattaching the fan blades, follow these steps:
- Use the manufacturer's instructions or markings to align and secure each fan blade correctly.
- Tighten the blade screws evenly to maintain balance and prevent noise or vibration.
- Test the fan by turning it on and observing for smooth rotation.
- Confirm all blades are functioning correctly before reassembling the fan cover.
- Ensure blades are securely reattached to prevent wobbling or imbalance.
Check Chain Function
After fixing the pull chain, I ensure the ceiling fan cover is securely reassembled before testing the chain function for smooth operation.
I gently pull the chain to activate different speed settings, checking for any unusual noise or resistance that could indicate issues requiring adjustments. It's crucial to verify that the fan responds correctly to the pull chain adjustments to confirm the repair is complete.
Testing the fan after reassembly is essential to ensure the pull chain switch is working properly and the fan operates smoothly. By conducting this test, I can guarantee that the fan is functioning correctly and that any issues with the pull chain have been successfully resolved.
Frequently Asked Questions
Why Is the Pull Chain on My Ceiling Fan Stuck?
The pull chain on my ceiling fan might be stuck due to dust, dirt, or dry lubrication in the switch mechanism. Wear and tear, improper installation, or exposure to moisture can also cause it to jam.
To fix it, regular maintenance and cleaning can help. Troubleshooting steps may involve adjusting alignment or replacing worn components.
DIY solutions and preventative measures like keeping the area dry can prevent future issues.
Can a Pull Chain on a Ceiling Fan Be Fixed?
Yes, a pull chain on a ceiling fan can typically be fixed with some simple DIY solutions. Common causes of a stuck pull chain include dirt and lack of lubrication. Quick fixes like using WD40 can help loosen the chain.
Regular maintenance, such as cleaning and lubricating, can prevent future issues. If problems persist, seeking professional help may be necessary for a long-term solution.
Can You Use Wd40 on a Ceiling Fan Pull Chain?
Yes, you can use WD40 on a ceiling fan pull chain to lubricate the mechanism and improve its function. It's a simple DIY troubleshooting step that can help with common issues like stiffness or sticking.
Alternatively, if the problem persists, seek professional repair. Remember to apply WD40 in moderation and follow safety precautions.
This cost-effective solution can enhance your fan's performance without much hassle.
Can You Bypass a Pull Chain Switch on a Ceiling Fan?
When it comes to a stuck ceiling fan pull chain, bypassing it can be just the trick. By doing an electrical bypass and directly wiring the fan to a wall switch or remote control, you can skip dealing with that pesky chain altogether.
This simple switcheroo can make your life a whole lot easier and give your ceiling fan a new lease on life. Just remember safety first and maybe consult a pro if you're unsure about the wiring process.
Can Removing a Ceiling Fan Remote Help Fix a Stuck Ceiling Fan Pull Chain?
If your ceiling fan pull chain is stuck, try removing the ceiling fan remote following these ceiling fan remote removal steps. Sometimes a malfunctioning remote can cause the pull chain to get stuck. By eliminating the remote, you may be able to troubleshoot and fix the issue with the pull chain.
Conclusion
In the end, fixing a stuck ceiling fan pull chain is a simple task that anyone can tackle. Just remember to power off the fan, remove the cover, locate the assembly, assess the issue, replace the chain, reassemble, and test the fan.
It's like untangling a knot – with a bit of patience and know-how, you can get things running smoothly again in no time. So don't let a stuck chain leave you hanging – fix it and enjoy a cool breeze once more.