Yes, you can add a light to a ceiling fan to improve both functionality and style. First, verify your fan is compatible with a light kit by checking for a housing cap and appropriate wiring. Turn off the power at the circuit breaker before starting. Connect the light fixture wires accordingly and secure it to the fan. Once everything is in place, restore power and test both the fan and light for proper operation. If you encounter any issues, take a moment to troubleshoot the connections. You'll find more tips and considerations to verify a successful installation ahead.
Key Takeaways
- Ensure your ceiling fan is compatible with a light kit by checking the model number and attachment point diameter.
- Verify that the fan is pre-wired for a light kit by looking for a housing cap.
- Follow safety precautions, including turning off the circuit breaker and using insulated tools during installation.
- Connect the light fixture wires correctly: black to black and white to white, then secure the assembly to the fan.
- Test the light and fan functionality after installation to confirm everything is working properly.

Hunter Three Light Bronze Fitter for Ceiling Fan – Ceiling Fan Light Kit Base & Replacement, Compatible Casablanca – 99134, New Bronze
CEILING FAN LIGHT FITTER: Upgrade your ceiling fan's lighting with this 3 light fitter, providing a stylish base…
As an affiliate, we earn on qualifying purchases.
As an affiliate, we earn on qualifying purchases.
Safety Precautions for Installation

When it comes to adding a light to a ceiling fan, safety should always be your top priority. Start by confirming you turn off power at the circuit breaker before you begin any installation. This simple step can prevent electric shock and make the process safer.
Next, grab insulated tools to minimize any risks during the installation.
Before you install the light fixture, check the ceiling fan to confirm it's off and inspect the wiring for signs of wear or damage. If you notice anything unusual, it's better to consult a licensed electrician. They can help you avoid potential safety issues that could arise from faulty wiring or improper installation.
When you're ready to install, use a sturdy ladder or step stool to access the ceiling height safely. This will give you the stability you need while working.

Ceiling Fans with Lights,Socket Fan Light with Remote Control,Dimmable Brightness 3000K-6500K Memory,4 Fan Speeds,2200 Lumens LED Quiet Ceiling Fans Perfect for Small Spaces, Bedrooms, Home Offices
☘【Multifunctional Ceiling Fan with Lighting】The light intensity of this ceiling fan can be adjusted according to your needs,…
As an affiliate, we earn on qualifying purchases.
As an affiliate, we earn on qualifying purchases.
Choosing the Right Light Kit

Choosing the right light kit for your ceiling fan involves more than just picking a pretty design; you need to ensure compatibility and functionality. Start by measuring the fan's attachment point diameter and noting the model number to avoid fit issues. Not all light kits are created equal, so make certain you select one that's compatible with your specific ceiling fan brand and model.
When considering wattage, keep in mind that different kits provide varying levels of illumination, which can affect the ambiance of your space. For larger rooms, you might need a light kit with higher wattage for adequate brightness.
Light kits typically range in price from $20 to $50, so consider your budget while also factoring in features like energy-efficient LED options or decorative styles. Additionally, ensure that the light kit you choose has high suction power to maintain a comfortable atmosphere while using your fan.
Don't forget to check that the light kit includes necessary mounting hardware and installation instructions. Popular brands like Hampton Bay, Hunter, and Minka-Aire offer a variety of light kits designed for their ceiling fans, guaranteeing a cohesive look.
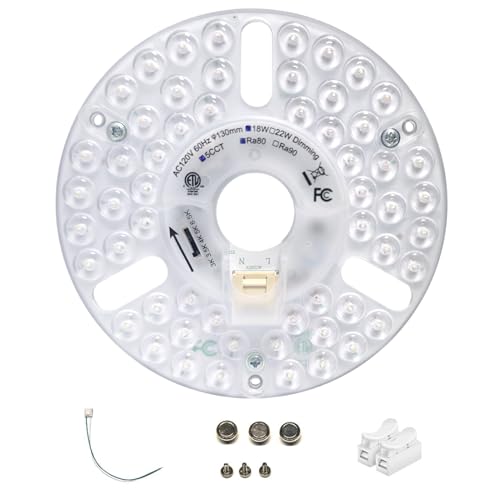
DPXMYG 5" LED Ceiling Fan Light Retrofit Kit,18W,5CCT 3000K/3500K/4000K/5000K/6000K Adjustable,120VAC ETL Light Kit for Ceiling Fan
Bright&Energy Efficient: 5 inch, 18 watt. over 50000 hours, any problem for free replacement.
As an affiliate, we earn on qualifying purchases.
As an affiliate, we earn on qualifying purchases.
Installation Steps Overview

Once you've selected the right light kit for your ceiling fan, it's time to install it. First, verify the power is turned off at the circuit breaker to prevent electrical shock. Next, remove the decorative center plate from the ceiling fan to access the wiring and confirm that a housing assembly is available for the light kit.
Here's a quick overview of the installation steps:
| Step | Action |
|---|---|
| 1. Prepare | Turn off power and remove the screws. |
| 2. Connect Wires | Connect the light fixture wires: black to black and white to white. |
| 3. Secure Light Assembly | Attach a light to the ceiling fan, tightening all screws securely. |
After you've connected everything, restore power and test the light and fan to confirm successful installation and proper connections. Following these steps will verify your new light fixture is safely and securely installed, enhancing both the functionality and aesthetics of your ceiling fan. Enjoy your upgraded lighting!

Harbor Breeze 54-in Ceiling Fan Wire Extension Cord
Downrod wire extension kit
As an affiliate, we earn on qualifying purchases.
As an affiliate, we earn on qualifying purchases.
Connecting the Light Fixture

Before you connect the light fixture to your ceiling fan, make certain the power is off at the circuit breaker to avoid any electrical hazards.
Start by identifying the wiring for the ceiling fan light kit. You'll typically find a black wire for power and a white wire for neutral, which should match the corresponding wires in your ceiling fan assembly.
Next, take the black wire from the light fixture and securely connect it to the fan's black wire using wire nuts. Then, connect the white wire from the light fixture to the fan's white wire in the same manner. It's essential that these connections are tight to prevent any issues down the line.
Once you've connected the wires, carefully align the light fixture with the mounting bracket. Secure it in place using the provided screws to guarantee stability.
After everything's properly connected and secured, you can restore power at the circuit breaker. Finally, test the light fixture to confirm it operates correctly. This step guarantees that your ceiling fan light kit is fully functional and ready to illuminate your space.
Finalizing the Installation

Now that you've connected the light fixture, it's time to finalize the installation.
Turn the circuit breaker back on and test the light and fan to verify everything's working properly.
Make sure all components are secure and check for any loose connections or unusual noises before cleaning up the workspace.
Power Restoration Steps
After you've wrapped up the installation of your light kit, it's time to restore power to your ceiling fan and light fixture. Start by locating your circuit breaker. Flip the switch back to the "on" position to guarantee power is restored. This is an essential step in the power restoration steps, allowing your newly installed light fixture to function properly.
Before you proceed, it's wise to check for any loose parts or improper connections. These can lead to safety hazards or malfunctioning equipment.
Make sure your light bulbs are securely installed and that the shades are in place. This will help prevent any issues down the line.
Once everything appears secure, you're ready to test the functionality of both the ceiling fan and the light. Use the pull chain or the wall switch to see if everything operates correctly. If you've followed each step during the installation, you should be good to go.
Finally, don't forget to clean up the installation area. Dispose of any packaging or debris to maintain a tidy workspace after your project is complete.
Testing Light Functionality
To guarantee your newly installed light kit is functioning correctly, start by testing its operation. First, restore power at the circuit breaker and prepare to check the light's functionality. Pull the chain or use the wall switch to confirm the light turns on and off as intended.
If the light doesn't respond, inspect the fixture closely. Make certain the light bulbs are properly seated in their sockets. Loose bulbs can easily prevent the light from working.
Next, look for any flickering or dimming when you turn on the light. This could indicate loose wiring or compatibility issues between the light kit and the fan.
If everything seems in order but the light still isn't functioning, it's time to double-check all wiring connections. Ascertain that each wire is securely connected and that the circuit breaker isn't tripped or faulty.
Proper testing is vital for a safe and effective installation, so take your time to confirm everything is set up correctly. Once you've verified the light works, you can move on to securing all components properly for peak performance.
Securing Components Properly
Once you've confirmed that the light is functioning properly, it's time to secure all components for a safe and effective installation.
First, make sure the light fixture is aligned correctly with the ceiling fan's mounting bracket to prevent any misalignment that could lead to hazards. Next, use the provided screws or mounting hardware to firmly attach the light assembly. Tighten them securely to withstand vibrations during operation.
After you connect the wiring, carefully reattach any decorative plates or coverings. These will conceal the electrical work while ensuring they don't interfere with the light's functionality.
If your setup includes pull chains or switches, install and secure them now, making sure they operate smoothly without obstructing the light fixture.
Before you wrap things up, perform a final check of all connections and components. This step is essential to confirm that everything is securely fastened and functioning properly.
Once you've done this, you can confidently restore power to your ceiling fan and enjoy your newly added light fixture, knowing you've completed the installation safely and effectively.
Troubleshooting Common Issues

When installing a light kit on a ceiling fan, you might encounter a few common issues that can disrupt its functionality. If the light doesn't work after installation, the first step is to check the circuit breaker. Confirm it's functioning properly and that power is being supplied to the light fixture.
If you notice flickering lights, this may indicate loose wiring connections or an incompatible light fixture. Be sure to double-check that all connections are secure and correctly matched.
In cases where there's no power to the light, inspect the ceiling fan's electrical box for any issues or disconnections that may have occurred during installation.
Noise from the fan after adding the light kit could suggest that the mounting isn't stable. Verify that all screws and connections are tight and secure to prevent vibrations.
Finally, always confirm that the light fixture and ceiling fan components are compatible. This helps avoid performance issues or electrical hazards during operation.
Additional Considerations and Tips

Before you start, make certain the light fixture you choose is compatible with your ceiling fan.
Pay close attention to safety installation practices, as secure wiring connections are essential for preventing any hazards. Additionally, consider the type of system you are installing, as it may influence the complexity of the wiring required.
Fixture Compatibility Check
Confirming compatibility between your ceiling fan and the light kit is vital for a successful installation. Start by checking if your ceiling fan is pre-wired for light kits. Look for a housing cap and dedicated wiring, typically labeled for easy identification. Measure the diameter of the fan's attachment point and note the model number to find a compatible light fixture.
Next, verify that the light fixture's electrical load falls within the ceiling fan's capacity to prevent overheating or short circuits. Refer to the manufacturer's specifications for these details. If you have a universal ceiling fan, compatibility is often less of an issue, but it's still important to confirm the specifications.
Consider how you want to control the light—whether through a wall switch or pull chains—as this will impact the wiring and installation process. Additionally, check your existing electrical box ratings to confirm it can support the added weight of the light fixture. By taking these steps, you'll set yourself up for a smooth installation and enjoy the added light without any worries. Ensure you also consider using fixtures with HEPA filter technology to maintain indoor air quality while illuminating your space.
Safety Installation Practices
Once you've confirmed compatibility between your ceiling fan and light kit, it's time to focus on safety during installation. Always turn off the power at the circuit breaker to prevent electrical shock. Use a voltage tester to verify the breaker is off before you start working on any wires.
Using insulated tools can further reduce the risk of electric shock. Make sure all connections are secure to prevent short circuits that could damage your light fixtures. If you're using a ladder, have someone assist you and make certain it's stable on a flat surface.
To help you remember key safety practices, here's a quick reference table:
| Action | Purpose | Reminder |
|---|---|---|
| Turn off the breaker | Prevents electrical shock | Double-check with tester |
| Use insulated tools | Reduces risk of electric shock | Always wear rubber gloves |
| Secure connections | Prevents short circuits | Tighten all screws and wires |
Lastly, always follow local electrical codes during installation. If you're unsure about any step, consult a professional to verify safety and compliance.
Frequently Asked Questions
Can You Add a Light Fixture to an Existing Ceiling Fan?
Yes, you can definitely add a light fixture to your existing ceiling fan, provided it's compatible.
Most fans come with a central housing that allows for this addition. Just make sure you connect the wires correctly—black to black, white to white.
Before you start, turn off the electricity at the breaker for safety.
Check the fan's model to find a suitable light kit, and enjoy your enhanced lighting!
How Do You Add a Light Kit to a Ceiling Fan?
Picture your room transformed, bathed in warm light as you add a light kit to your ceiling fan.
Start by ensuring safety—flip off the circuit breaker. Check for a housing assembly and compatible wiring.
Buy a light kit that fits your fan, then connect the wires; white to white and black to black.
Secure everything with wire nuts, restore power, and watch your space glow with new life.
You're creating magic!
How Do I Know if My Ceiling Fan Is Light Kit Compatible?
To determine if your ceiling fan's compatible with a light kit, start by checking the center housing for a mounting assembly.
Inspect the wiring to see if there are labeled wires, usually black and white, indicating it's pre-wired.
Measure the diameter of the attachment point to guarantee a proper fit for the light kit.
Finally, review the manufacturer's guidelines to confirm compatibility and make sure your electrical box can handle the added weight.
How to Get More Light From a Ceiling Fan?
Imagine trying to illuminate a room with a single candle; it just doesn't cut it.
To get more light from your ceiling fan, consider switching to brighter LED bulbs. If your fan supports it, add a multi-light fixture for broader coverage.
You can also install a dimmer switch, giving you control over the ambiance. Just be sure the total wattage stays within the fan's capacity to avoid any safety risks.
Conclusion
As you stand at the crossroads of illumination, remember that adding a light to your ceiling fan is like planting a seed in a garden. With the right care and attention, it'll blossom into a beautiful source of brightness. Embrace the process, stay safe, and soon you'll watch your space transform, much like a sunrise breaking the dawn. So, take that step, and let your creativity light the way!