To replace ceiling fan blades, start by turning off the power and carefully accessing the blades with a sturdy ladder. Remove the mounting screws and organize all parts, then measure your old blades to find exact replacements. Install the new blades securely, tightening screws gradually and evenly to guarantee proper balance. Confirm the blades are aligned and wobble-free. If you’re ready to learn detailed steps and tips for a safe, smooth replacement, keep exploring this guide.
Key Takeaways
- Turn off power and safely access blades using a sturdy ladder or step stool.
- Remove existing blades carefully, organizing screws for reinstallation.
- Measure and compare new blades to original dimensions, ensuring proper fit and balance.
- Attach new blades securely with recommended screws, tightening evenly to prevent wobbling.
- Spin blades manually and check for wobble or noise, adjusting for proper balance if needed.

Yaocom 10 Pack 20.47" Ceiling Fan Replacement Blades and Blade Arms Kit for 52 inch Ceiling Fan, 5 Blades and 5 Blade Arms with Mounting Hardware for Bedroom Living Room(Pointed Toe,Chestnut Brown)
- Complete Replacement Set: Includes blades, arms, and hardware
- Easy Installation: Compatible with select 52-inch fans
- Versatile Decor Match: Fits traditional, farmhouse, casual styles
As an affiliate, we earn on qualifying purchases.
As an affiliate, we earn on qualifying purchases.
Assessing the Need for Replacement and Selecting Compatible Blades

To determine if your ceiling fan blades need replacing, start by inspecting them for damage, cracks, or drooping, which can compromise both safety and performance. Damaged blades may wobble or make noise, indicating they’re no longer effective. When selecting new blades, match their size—usually 42-inch or 52-inch—to your original blades for proper balance and airflow. Use the fan’s manual, original packaging, or model number to find compatible blade dimensions and mounting hardware. Make sure the replacement blades are made from the same material and style to keep the aesthetic consistent and guarantee safety. Also, verify whether the blades are rated for indoor or outdoor use, depending on your fan’s location, to ensure durability and proper performance. Additionally, consider the material quality of the blades, as higher-quality materials can extend the lifespan and maintain performance over time. Properly matching the blade size is essential for optimal operation and to prevent unnecessary wobbling or noise. Incorporating automation technology in manufacturing processes can also improve consistency and quality control for replacement blades, ensuring better performance and safety. Regularly checking the blade balance can help maintain smooth operation and reduce wear on the fan components. Furthermore, being mindful of common pitfalls can prevent improper installation and potential hazards.
Measuring and Confirming Proper Blade Dimensions
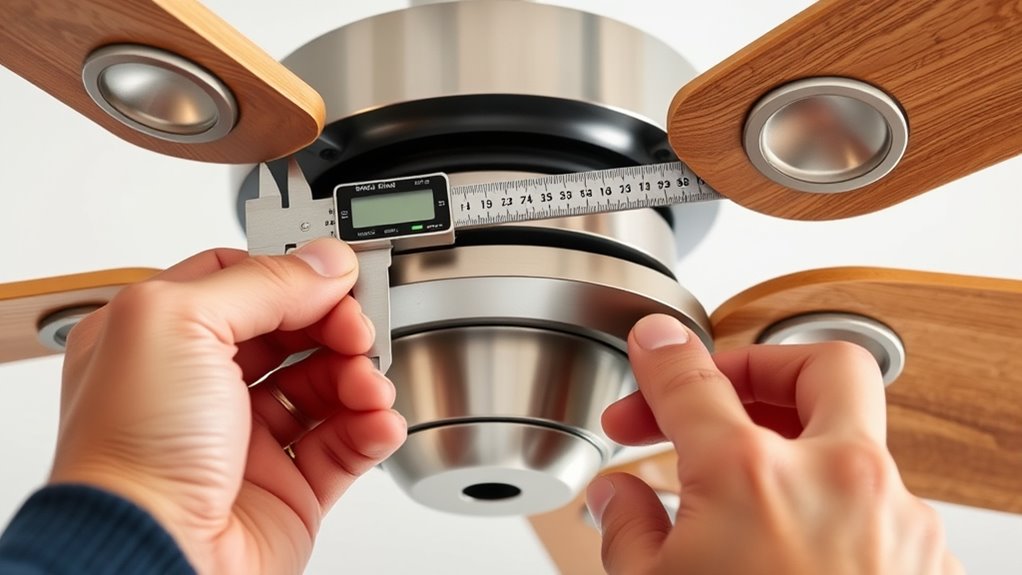
Make sure you use a sturdy ladder or step stool to reach the fan blades safely. Carefully measure from the center of the mounting hole to the tip of each blade for an accurate length, usually 42 or 52 inches. Double-check that all blades you intend to replace match in size, width, and thickness to guarantee proper fit and balance. For optimal results, ensure that the essential oil properties of the replacement blades are compatible with your ceiling fan’s material to prevent damage or imbalance. Additionally, verifying blade material compatibility can help maintain the fan’s overall performance and longevity. Consulting industry trends can also provide insights into selecting blades that minimize vibrations and noise during operation. Considering preppy dog names or other breed-inspired options can sometimes inspire creative and fitting choices for customizing your fan or surrounding decor.
Use a Ladder Safely
When measuring ceiling fan blades, make certain you use a sturdy ladder that puts you at a comfortable height without overstretching. A secure ladder helps you reach the blades safely and keeps you stable during the process. Before measuring, clean the blades with a cloth to remove dust, ensuring accurate readings. Locate the attachment points near the motor, usually with two screws per blade, to remove and measure safely. Use a tape measure or ruler to determine the length from the center of the blade to the tip, noting this measurement for correct replacement. Always ask someone to assist or stabilize the ladder while you’re working to prevent slips or falls. Prioritizing ladder safety ensures a smooth, accident-free measuring process. Additionally, ensure your headphone connections are secure if you’re listening to instructions or music during the task to maintain focus and safety. Remember that remote work setups often involve ergonomic considerations, so adjusting your workspace for comfort can help prevent fatigue during tasks like this. Incorporating proper ergonomic practices can further reduce strain and improve safety during such activities.
Measure Blade Length Accurately
Accurately measuring your ceiling fan blades is crucial to guarantee you select the correct replacements. To measure the blade length, use a ruler or tape measure to determine the distance from the center of the fan’s mounting point to the tip of the blade, keeping the measurement straight along the blade’s edge or centerline. Diverse designs available for indoor planters highlight the importance of matching your specific fan blade dimensions with the right style and size. You can remove one blade carefully to confirm its size or refer to the fan’s manual or packaging if available. Typically, ceiling fan blades are 42, 52, or over 60 inches long, so double-check your specific model. Always record your measurement and keep the original blade or documentation handy. Proper measurement techniques are essential for safety and compatibility, especially considering the AI security implications of installing and maintaining electrical appliances. Additionally, following proper safety precautions during measurement and replacement helps prevent accidents or damage to the fan.
Confirm Blade Size Consistency
To make certain your replacement blades fit correctly, verify that they match the original size by measuring and comparing them carefully.
First, use a ladder or step stool to reach the blades safely. Remove one blade from the fan and measure from the center of the mounting hole to the tip of the blade. Confirm blade size by checking these measurements against the original, which are typically 42 inches, 52 inches, or larger for bigger fans. Always check the fan’s manual, original packaging, or warranty info to verify the exact dimensions before purchasing replacements. Remember, matching the original size is vital because longer blades won’t considerably increase airflow and can stress the motor. Ensuring proper blade dimensions helps maintain fan efficiency and safety. Ensure the blades are compatible with the fan’s motor specifications to maintain proper operation and safety. Confirm blade size to guarantee proper fit, balance, and ideal fan performance. Additionally, consider the advancements in AI entertainment which have led to innovations in multimedia experiences, highlighting the importance of precise measurements and compatibility in modern technology integrations.
Safely Accessing and Removing Existing Fan Blades
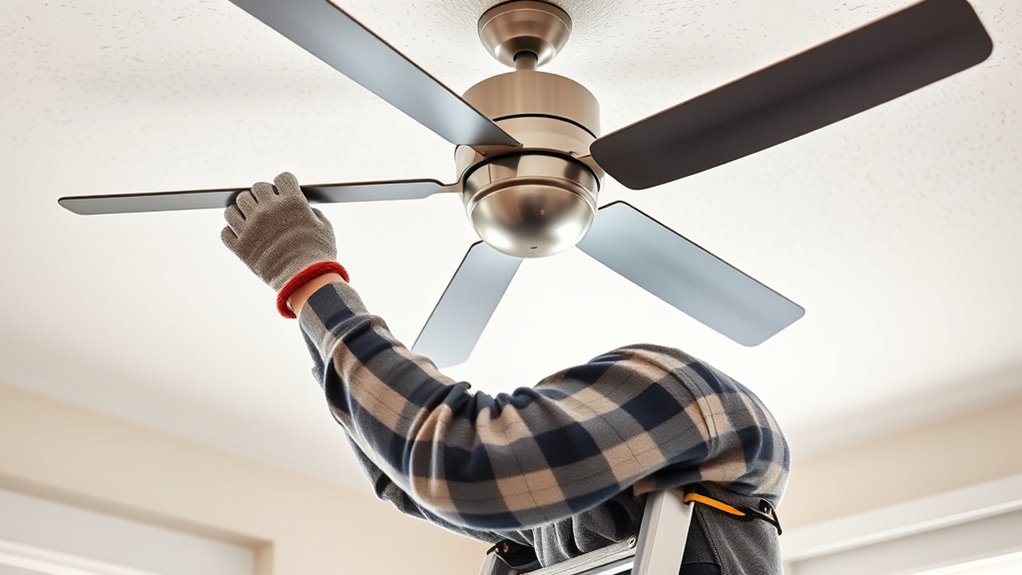
Before removing the fan blades, make sure the power is turned off at the main electrical panel to prevent shocks.
Always turn off the power at the main panel before removing ceiling fan blades to ensure safety.
Carefully position a sturdy ladder or step stool beneath the fan housing to reach the blades comfortably and safely.
Once you’re at a safe height, inspect the fan housing to locate the screws attaching each blade. Typically, there are two screws per blade, securing it to the motor.
Before handling the blades, wipe them with a cloth to remove dust and debris, which helps prevent messes during removal.
Keep all screws organized in a safe container for easy reinstallation later.
Additionally, consider reviewing the fan blade materials to ensure proper handling and cleaning methods during replacement.
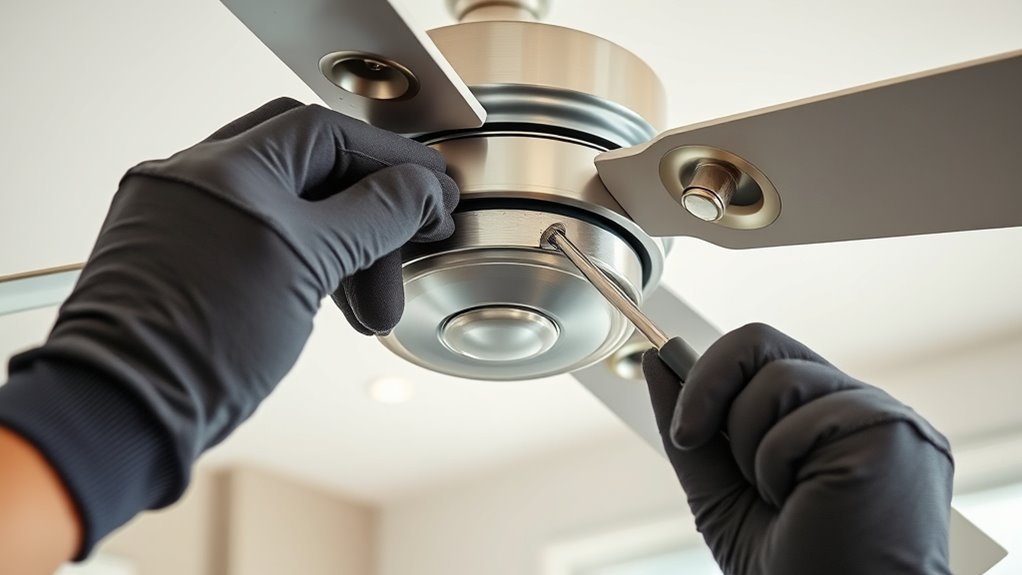
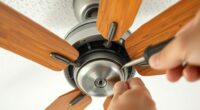
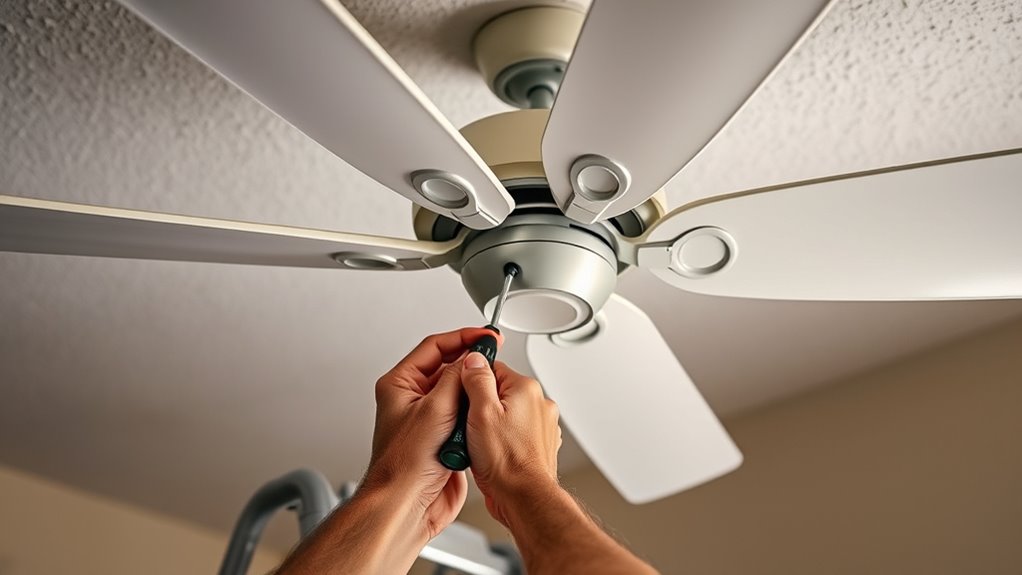
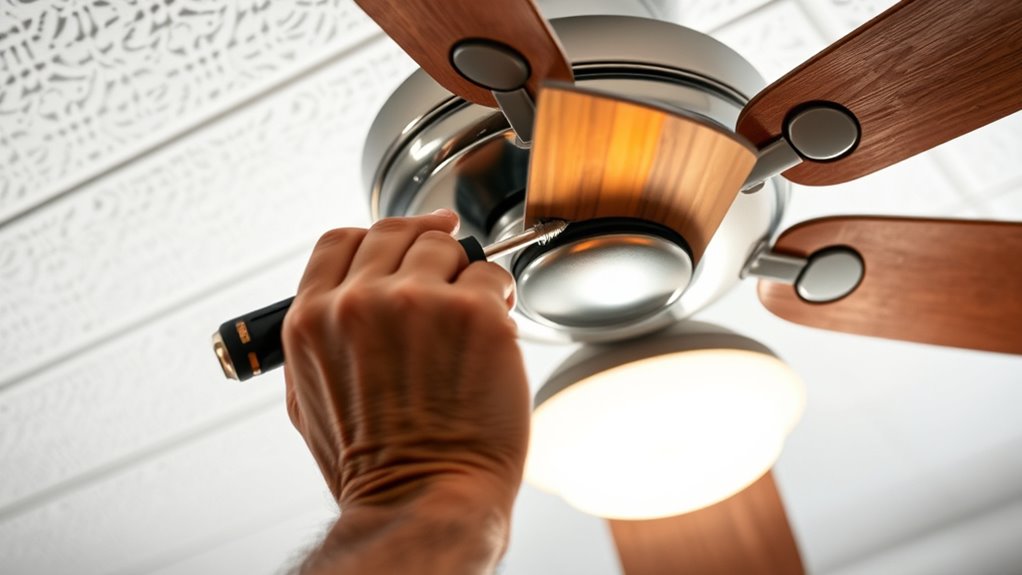
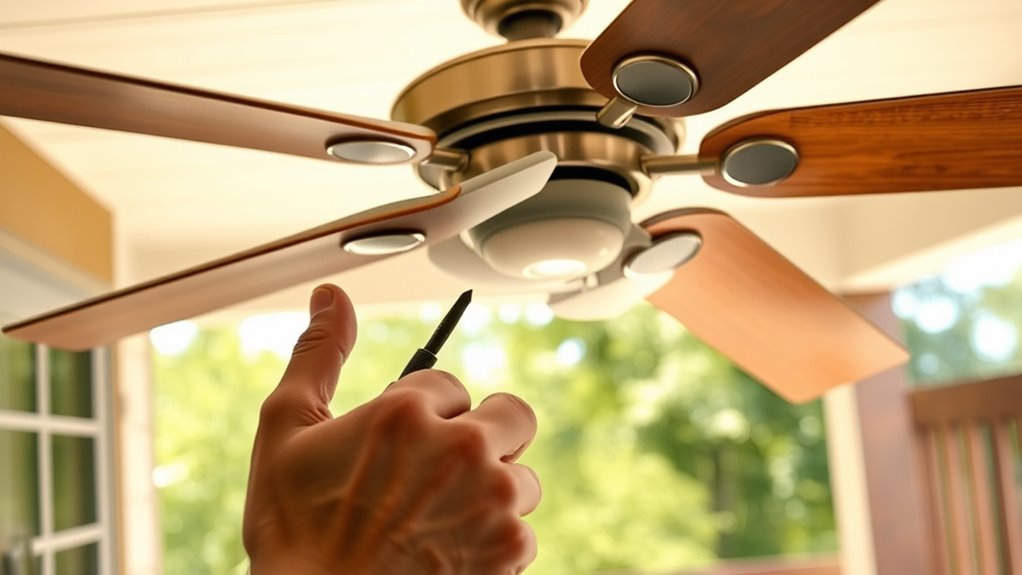
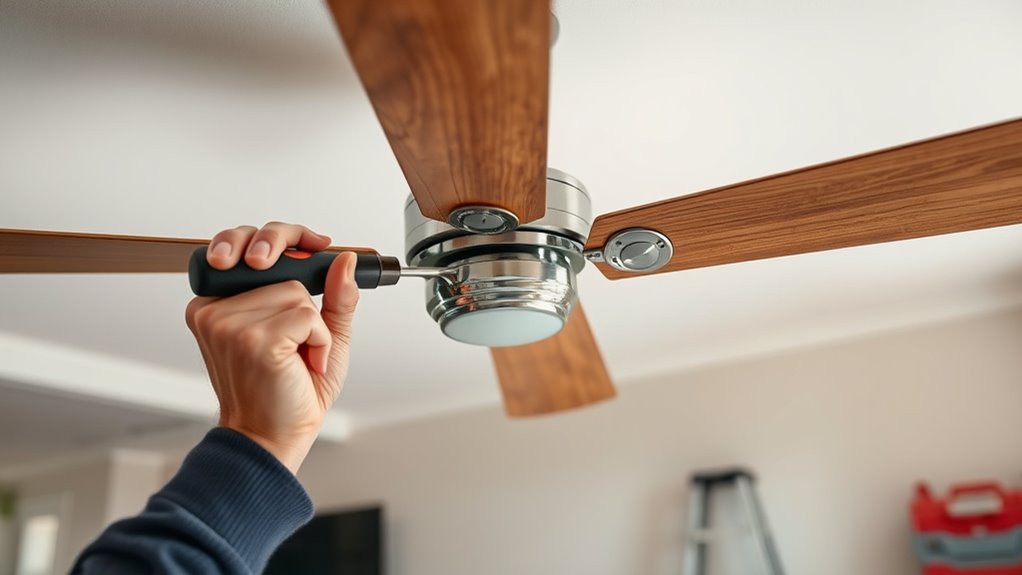
Identifying and Loosening Mounting Screws

Once you have safe access to the fan blades, locate the screws that attach each ceiling fan blade to the motor or mounting bracket. Make sure to identify the two screws near the base of each blade, as they secure the blade to the arm.
Use a screwdriver to gently loosen and remove these screws, applying steady pressure to avoid stripping them. Keep the screws organized in a container so you can easily find them later when you replace the blades or reassemble the entire fan.
If you’re installing a new fan or need to replace ceiling fan blades, this step is vital. We’ll take care to avoid damaging the hardware or wires, and remember, proper blade replacement helps guarantee optimal fan performance and correct fan direction.
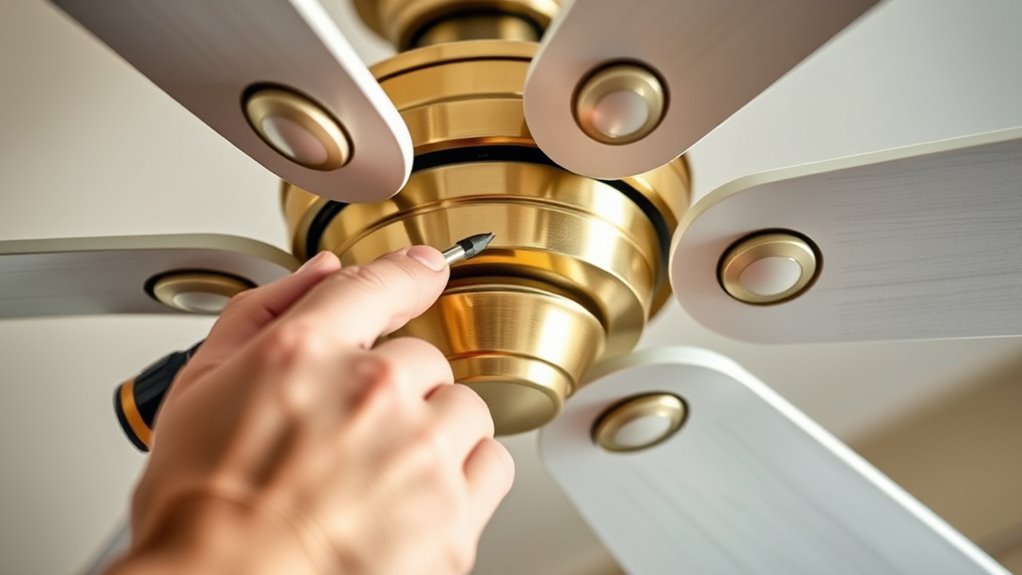
Preparing and Installing New Fan Blades Correctly
To guarantee your new fan blades fit perfectly, start by measuring the length of your existing blades accurately.
Use the correct screws and tighten them securely to prevent wobbling or noise.
Double-check the alignment after installation to confirm everything is stable and balanced.
Proper Measurement Techniques
For accurate measurement of your ceiling fan blades, start by setting up a stable ladder or step stool to reach the blades comfortably and safely.
Before measuring, clean the blades with a cloth to remove dust that could skew your readings.
Remove one blade and keep its mounting screws in a safe place to ensure accuracy.
Measure from the center of the mounting hole to the tip of the blade, as this length determines the correct size for replacement blades.
Always verify the original blade dimensions using the fan’s manual, box, or manufacturer specifications to guarantee a proper fit.
Precise measurement helps you select blades that match the original, ensuring balanced operation and safety when installing your new ceiling fan blades.
Secure Fastening Methods
Proper fastening is essential to guarantee your ceiling fan operates smoothly and safely. To do this, use the original screws or matching new ones to securely attach each blade. Tighten the screws gradually in a cross pattern to distribute pressure evenly and prevent damage.
Be sure each screw is snug but not over-tightened, as too much force can strip threads or crack the blade. Check that all blades are mounted at the same height and angle for balanced operation and to reduce strain on the motor.
After installation, manually spin the blades gently to confirm they’re firmly attached and don’t wobble or catch. Proper fastening ensures safe, quiet operation and extends the lifespan of your fan.
Verifying Secure Attachment and Balanced Operation
Ensuring your ceiling fan blades are securely attached and balanced is essential for smooth operation and safety. Start by tightening all blades with the original screws, following the manufacturer’s torque specifications to prevent wobbling. After securing them, gently spin each blade by hand to check for smooth, balanced movement without wobble or resistance.
Use a level or a blade balancing kit to verify that blades are aligned and evenly spaced. Adjust weights or clips as needed to achieve proper balance. Confirm that all blades are at the same angle to promote ideal airflow and minimize vibration.
Over time, periodically inspect the attachments, tightening screws or realigning blades if you notice looseness or imbalance. Proper verification keeps your fan running quietly and safely.
Addressing Common Challenges With Blade Replacement
Replacing ceiling fan blades can present challenges, especially if the new blades don’t match the original size or shape. Drooped blades indicate wear or damage that can impact stability and efficiency.
To avoid wobbling or motor strain, ensure the replacement blades match the original in size, weight, and shape. Non-standard blades can cause increased motor wear and reduce the fan’s lifespan.
Different blade types, like curved or flat, affect airflow and may require hardware adjustments. Compatibility with existing mounting hardware is essential to prevent installation issues.
- Confirm the blades’ size and weight match the original
- Check for compatibility with your fan’s mounting hardware
- Adjust hardware if replacing with different blade types
- Inspect for signs of wear or damage before installation
Upgrading to Outdoor-Rated Fan Blades for Exterior Fans
Upgrading to outdoor-rated fan blades is vital if you want your ceiling fan to withstand the elements. These blades are made from weather-resistant materials like treated wood, plastic, or metal, designed to handle moisture, UV rays, and temperature swings.
When replacing blades for outdoor fans, make sure the new blades match the original’s mounting hole pattern and size for proper fit. Using outdoor-rated blades helps prevent warping, cracking, and corrosion, which can shorten your fan’s lifespan.
It’s essential to verify that the blades are specifically rated for outdoor use, as indoor blades won’t endure exterior conditions. Many manufacturers label their outdoor blades as weatherproof or suitable for outdoor installation, so look for those to ensure durability and safety.
When to Seek Professional Assistance for Fan Repairs
While many ceiling fan issues can be addressed with basic troubleshooting, certain repairs require professional expertise to guarantee safety and proper function. If you need to disconnect electrical wires or remove the entire housing, it’s best to hire a licensed electrician.
Complex electrical repairs, like rewiring or troubleshooting wiring problems, should always be handled by experts. When you’re unsure about safety procedures or lack the proper tools, consulting a professional helps prevent accidents.
Additionally, if the fan has broken or damaged components beyond simple blade replacement, an expert can prevent further damage.
- Disconnecting electrical wires or removing housing
- Rewiring or troubleshooting wiring issues
- Handling broken or damaged components
- Performing repairs under warranty or requiring specialized tools
Frequently Asked Questions
How Do I Know What Size Ceiling Fan Blade I Need?
To know what size ceiling fan blade you need, measure your current blades from the center to the tip. Check the fan’s manual or packaging for the exact dimensions, usually 42 or 52 inches.
Make sure the replacement blades match the original size for proper balance and airflow. If your blades are over 60 inches, they’re likely for larger fans and might need special mounting hardware.
Do All Ceiling Fans Use the Same Mounting Bracket?
Think of ceiling fan mounting brackets like puzzle pieces—each one is unique. Not all fans use the same bracket; it depends on the brand, model, and design.
Some use standard shapes, while others are custom-fit. To stay safe and guarantee stability, you need to verify your fan’s specific requirements or manual.
Using the wrong bracket is like trying to fit a square peg into a round hole—it just won’t work.
What Type of Ceiling Fan Blades Move the Most Air?
If you want ceiling fan blades that move the most air, look for larger blades over 52 inches with a wider pitch angle of 12 to 15 degrees.
Choose lightweight materials like plastic or composites, which spin faster and circulate more air.
Blades with curved or airfoil designs also boost airflow.
Combining longer, wider, and properly angled blades guarantees maximum air movement in your space.
Is a 3 Blade or 4 Blade Ceiling Fan Better?
When deciding if a 3-blade or 4-blade ceiling fan is better, consider your needs.
A 4-blade fan offers smoother airflow and quieter operation, ideal for larger spaces or those wanting a more balanced look.
On the other hand, a 3-blade fan is more energy-efficient, easier to clean, and has a modern style.
Think about your room size, aesthetic, and efficiency preferences to choose the right fan for you.
Conclusion
Replacing your ceiling fan blades is a straightforward way to refresh your space and improve airflow. Did you know that properly balanced blades can reduce energy costs by up to 10%? By following these steps, you guarantee a safe, effective upgrade that keeps your fan running smoothly. Remember, if you’re ever unsure or face persistent issues, don’t hesitate to call a professional—it’s a small investment for long-lasting comfort and peace of mind.