
To upgrade your ceiling fan motor, first turn off the power at the circuit breaker and confirm it’s off with a voltage tester. Remove the fan from the ceiling, disconnect the wiring, and carefully note or photograph all connections. Select a compatible new motor, attach and secure it to the fan frame, then reconnect the wiring matching colors and ensuring solid connections. Finally, reassemble the fan, turn the power back on, and test its operation. If you want to learn the detailed steps, keep going.
Key Takeaways
- Turn off power at the circuit breaker and verify no electrical current before handling wiring or components.
- Remove the fan and support it securely before disconnecting wiring and detaching the motor.
- Document wiring connections with labels or photos, then disconnect the existing motor carefully.
- Select a compatible replacement motor, then mount and secure it following manufacturer instructions.
- Reconnect wiring, ensure all connections are secure, and test the fan to confirm proper operation.

Universal Bathroom Fan Motor Replacement – SM550 Electric Vent Fan Motor Kit – Replacement for Nu-Tone Br-oan 50 CFM 120V 3000 RPM – Replace C01575 65100 EM550 EM750, Upgraded by PANDEELS
UNIVERSAL BATHROOM FAN MOTOR – High quality universal bathroom exhaust fan motor SM550 with blower wheel, 120V(with plug),…
As an affiliate, we earn on qualifying purchases.
As an affiliate, we earn on qualifying purchases.
Turn Off Power and Prepare the Workspace
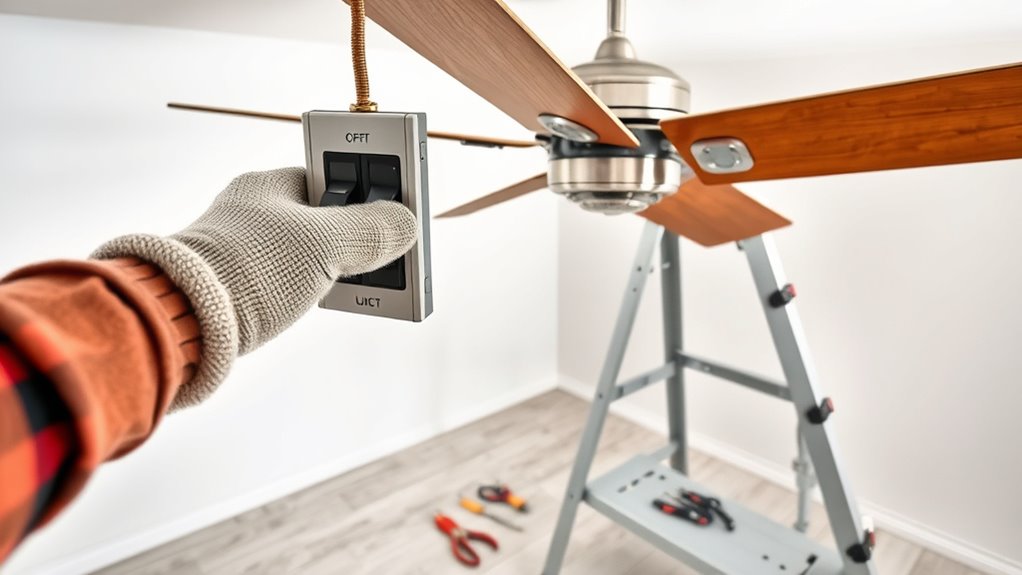
Before beginning any work on your ceiling fan, you must turn off the circuit breaker to cut power completely. This step is vital for your safety and to prevent electrical shocks. Once the power is off, use a voltage tester to verify that the fan’s wires aren’t live before handling any electrical components. Additionally, understanding Glycolic Acid benefits can help you appreciate the importance of proper skincare routines, similar to how safety precautions protect you during electrical work. Clear the area around the fan, removing furniture or decorations, and lay down a cloth or drop cloth to protect your flooring and furniture from dust and debris. Gather all the necessary tools—screwdrivers, a ladder, and protective gear—so you won’t need to make multiple trips. Checking tuning shop credentials can ensure you work with experienced professionals when replacing or upgrading parts. It’s also helpful to review the manufacturer’s instructions beforehand to familiarize yourself with your specific fan model’s disassembly and motor upgrade procedures. Being aware of common electrical hazards can further enhance your safety during the upgrade process. Additionally, inspecting the air purifier maintenance dos and don’ts can help ensure safety and efficiency during the upgrade. Finally, read the manufacturer’s instructions and safety warnings to familiarize yourself with your specific fan model’s disassembly and motor upgrade procedures.
Universal Bathroom Fan Motor Replacement – SM550 Electric Vent Fan Motor Kit – Replacement for Nu-Tone Br-oan 50 CFM 120V 3000 RPM – Replace C01575 65100 EM550 EM750, Upgraded by PANDEELS
UNIVERSAL BATHROOM FAN MOTOR – High quality universal bathroom exhaust fan motor SM550 with blower wheel, 120V(with plug),…
As an affiliate, we earn on qualifying purchases.
As an affiliate, we earn on qualifying purchases.
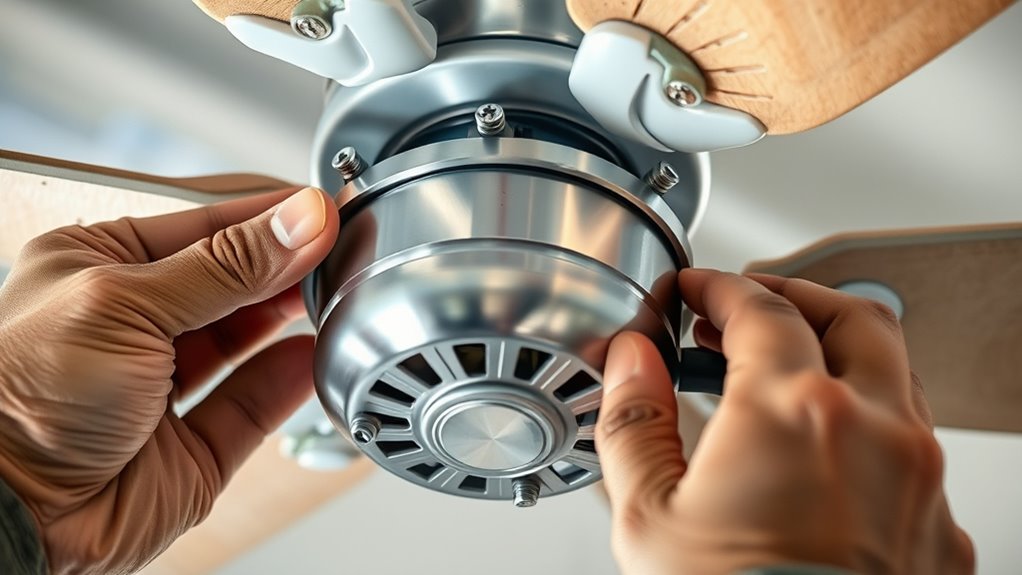
Remove the Ceiling Fan From the Ceiling
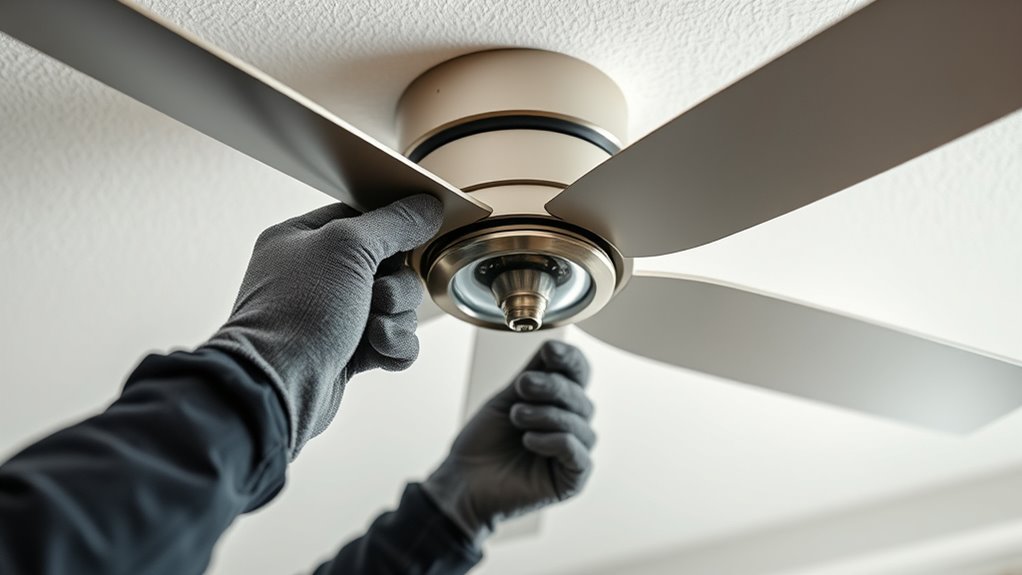
Once you’ve turned off the power, start by removing any light kits and accessories from the fan.
Support the motor as you unscrew the mounting bracket from the ceiling.
Then carefully disconnect the wiring.
With everything detached, you can safely lower the fan for removal or replacement.
Turn Off Power
To safely remove your ceiling fan, start by turning off the power at the circuit breaker or removing the fuse that supplies electricity to the fan. Turning off power is vital to prevent electrical shock.
Once you’ve done that, confirm the fan is de-energized by testing the switch or using a voltage tester on the fan wires. This step guarantees no current is running through the wires.
If the fan is hardwired, carefully disconnect the ceiling mounting bracket and wiring connectors to detach the fan from the ceiling. Use a sturdy ladder and consider having a helper support the fan’s weight during removal.
Keep all screws, hardware, and electrical connectors organized for easy reinstallation or future upgrades. Turning off power is the essential first step to a safe removal process.
Detach Fan Components
After turning off the power at the circuit breaker, you can begin detaching the fan components. Start by removing the fan blades and ceiling fan light kits to lighten the load and prevent damage. If your old ceiling has painted the motor housing, be careful when detaching it to avoid chipping paint. Unscrew the mounting brackets that hold the fan to the electrical box, using a screwdriver. Disconnect the electrical wiring by unscrewing the wire nuts, keeping track of their connections for reassembly. Supporting the fan, gently lower the entire assembly from the ceiling. Removing the light fixtures and blades is a good idea before installing a new fan or updating your ceiling to match your living room décor. Fans need proper handling to avoid damage, especially in a home ceiling setting. Understanding the importance of sound vibrations can help in troubleshooting and ensuring a smooth upgrade process. Being aware of digital literacy programs can also assist in understanding modern fan control systems and safety features. Additionally, familiarizing yourself with automation technologies can aid in selecting compatible smart controls for your upgraded fan. Recognizing the role of proper handling techniques can further prevent accidental damage during installation or removal. Rights Reserved.
Support and Remove Fan
Before removing the ceiling fan, make sure the power supply is turned off at the circuit breaker to prevent electrical shock. Use a sturdy ladder to reach the fan safely. If the fan is particularly heavy or installed in a high ceiling, consider support and removal techniques to ensure safety during the process. Carefully disconnect the wiring connectors attached to the electrical box, ensuring you keep track of all wires. Support the weight of the fan while removing mounting screws or brackets to prevent it from falling unexpectedly. When handling precious metals like gold during removal or reinstallation, ensure proper handling to avoid damage or loss of assets. Detach the fan canopy from the ceiling by unscrewing the mounting screws, exposing the mounting bracket and electrical connections. Once the fan is fully supported and disconnected, gently lower it from the ceiling, keeping all mounting hardware together for reinstallation or replacement. Proper planning and safety precautions are essential for a smooth removal process. Additionally, reviewing the installation instructions can help clarify specific steps or requirements for your fan model. Taking these steps ensures a safe and efficient removal process.

Harbor Breeze 54-in Ceiling Fan Wire Extension Cord
Downrod wire extension kit
As an affiliate, we earn on qualifying purchases.
As an affiliate, we earn on qualifying purchases.
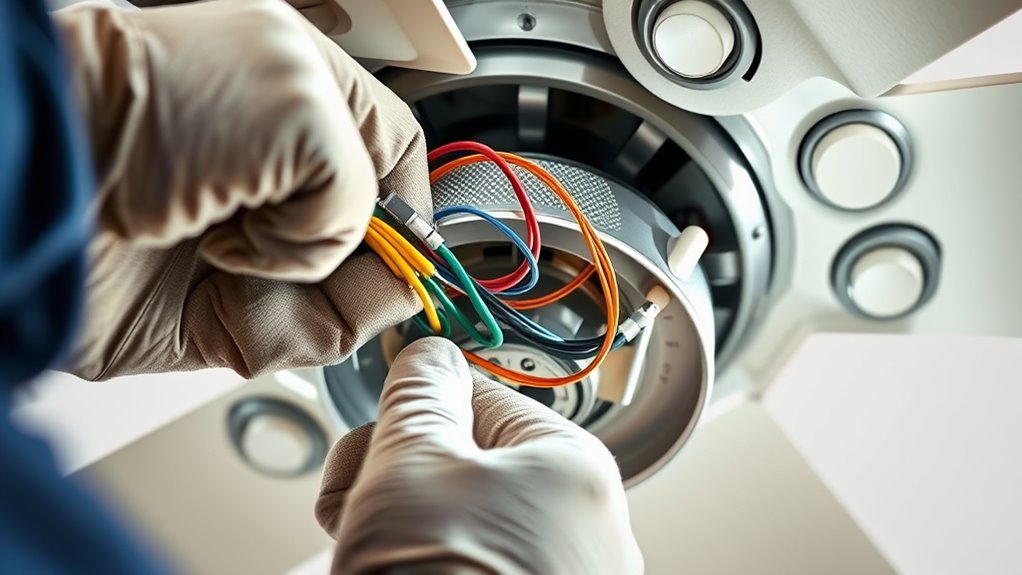
Disconnect the Existing Motor and Note Wiring Connections
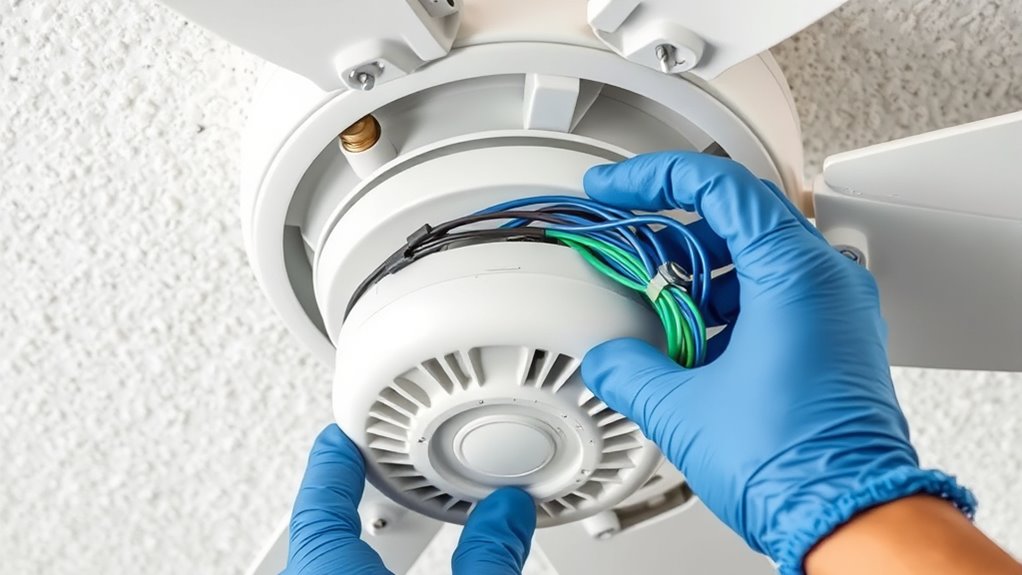
First, turn off the circuit breaker to cut power and prevent shocks.
Then, carefully observe and label all wiring connections with tape or a camera, noting wire colors and positions.
Next, disconnect the wires gently, making sure to record the wiring setup for a smooth motor replacement. Proper wiring documentation is crucial to ensure compatibility when installing the new motor. Additionally, understanding electrical safety procedures helps prevent accidents during the process.
Furthermore, consulting trusted brand information can help verify that the replacement motor meets quality and safety standards. Considering the importance of water safety principles, especially when working near pools or water-related environments, can also be beneficial for overall safety. For added assurance, consider reviewing AI ethics in technology to understand the importance of safety standards in electrical work.
Turn Off Power
To safely disconnect the existing motor, turn off the circuit breaker or remove the fuse to cut power to the ceiling fan. Use a voltage tester to confirm that no electrical current is present before working on the wiring. This step guarantees your safety and prevents electrical shocks. Ensuring proper user consent management helps protect your privacy during this process. After verifying power is off, carefully note or photograph the wiring connections, including wire colors and terminal placement, to make reassembly easier. Next, disconnect all wire nuts and screws securing the motor, allowing you to safely remove the existing unit from the ceiling mount. To protect against accidental contact, cap any exposed wires with wire nuts and wrap them with electrical tape. Proper wiring techniques are essential to ensure the new motor functions correctly and safely. Additionally, security system can provide added safety during DIY projects by alerting you to any unexpected issues or intrusions. Being aware of local electrical codes and guidelines can further help ensure that your upgrade complies with safety standards and reduces potential hazards.
Identify Wiring Connections
Once you’ve turned off the power and verified there’s no electrical current, proceed to carefully disconnect the wiring from the existing motor. Use a voltage tester to confirm power is off before touching any wires. Note or photograph the wiring connections, including wire colors and terminal positions, to make reinstallation easier. Label each wire with tape or a marker to prevent confusion later. When disconnecting, loosen the terminal screws or connectors gently to avoid damaging the wires or terminals. Keep track of the wires with this simple reference:
| Wire Color | Terminal Position | Notes |
|---|---|---|
| Red | Top terminal | Power supply wire |
| Black | Bottom terminal | Fan control wire |
| White | Neutral | Neutral wire |
| Green | Ground | Ground connection |
| Blue | Optional | Light kit wire |
This helps ensure a seamless transition during reassembly.
Document Wiring Setup
How can you guarantee a smooth wiring disconnection when upgrading your ceiling fan motor? First, turn off the power supply at the circuit breaker to stay safe. Use a screwdriver to remove the motor wiring cover or access panel, exposing the electrical connections.
Carefully note or photograph the wiring, including wire colors and terminal positions, to ensure correct reassembly. Gently disconnect each wire, keeping track of which wire connects to each terminal. It’s helpful to label or document the wiring setup clearly, so you won’t get confused later.
Store all screws and components safely. Confirm that you’ve recorded every connection properly. This approach minimizes mistakes, speeds up reinstallation, and ensures your new motor is wired correctly and safely.

Westinghouse 0110000 Saf-T-Brace for Ceiling Fans, 3 Teeth, Twist and Lock,Silver(Pack of 1)
Saf-T-Brace allows safe, simple installation of fans and fixtures
As an affiliate, we earn on qualifying purchases.
As an affiliate, we earn on qualifying purchases.
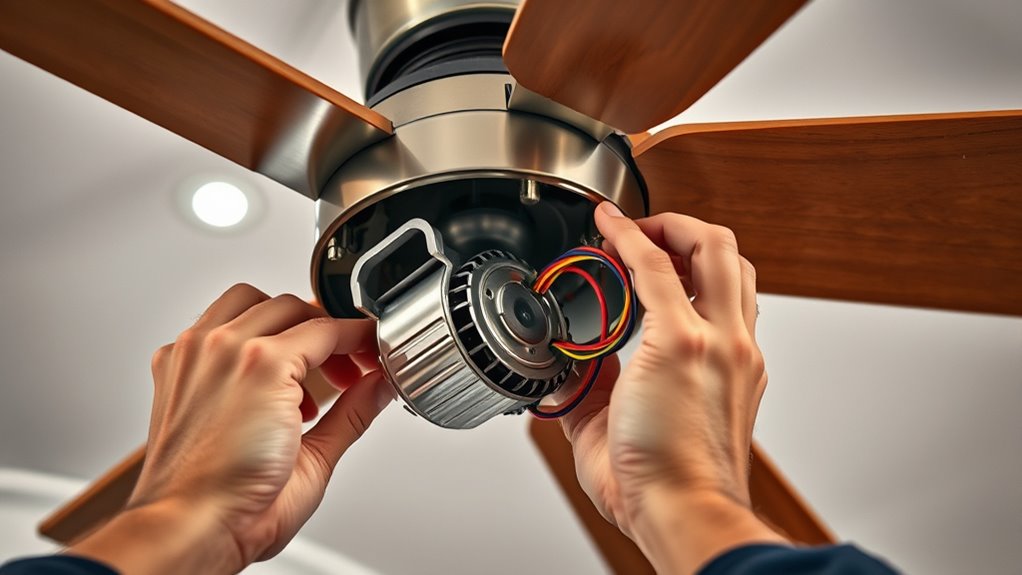
Select and Prepare the New Motor for Installation
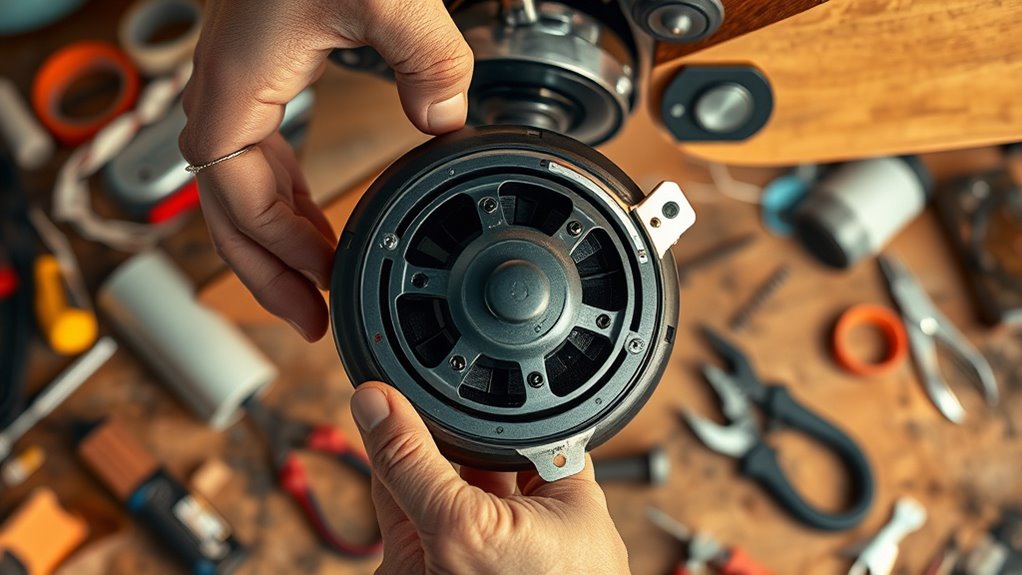
Before installing the new motor, you need to carefully select one that matches your ceiling fan’s specifications. Measure the existing motor’s voltage, horsepower, and mounting type to confirm compatibility. Check that the new motor’s mounting plate and hole spacing align with your fan’s frame to avoid fitting issues.
Disconnect the fan from power and remove the old motor, noting wiring connections and mounting brackets for reference. Inspect the wiring harness and terminal connections for corrosion or damage; replace any worn components.
Prepare the new motor by attaching necessary brackets or hardware, ensuring all electrical connections are clean and secure. Proper preparation guarantees a safe and efficient installation, helping your ceiling fan operate smoothly with the upgraded motor.
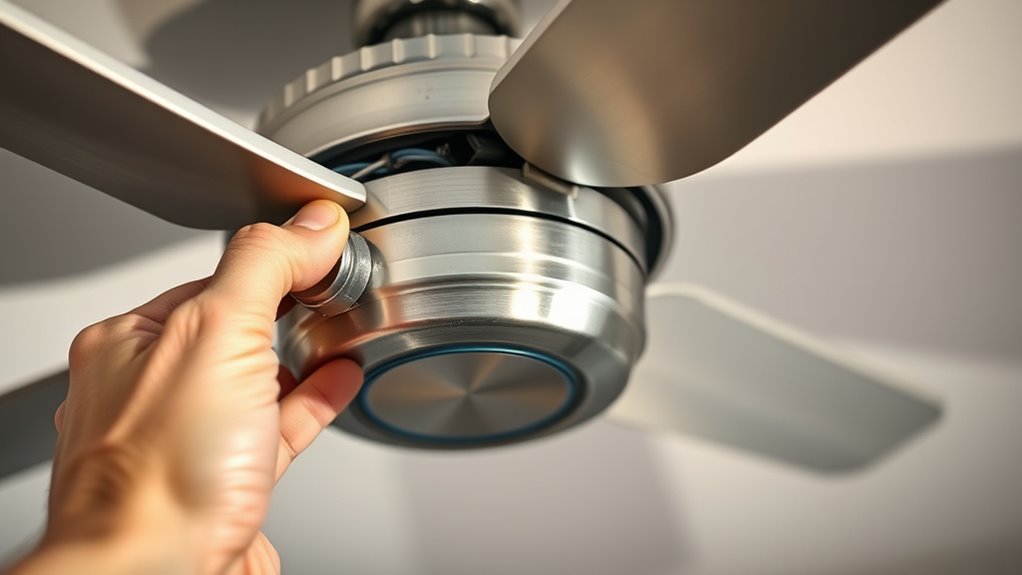
Mount the New Motor Securely to the Fan Frame
To guarantee your ceiling fan operates smoothly, you must securely mount the new motor to the fan frame. Ensure the motor’s mounting bracket matches the fan frame’s specifications for a proper fit.
Securely mounting the motor ensures smooth operation and proper fit with the fan frame.
Use a level to verify the motor is aligned correctly before tightening screws—this prevents wobbling during operation.
Tighten all mounting screws and bolts to the manufacturer’s recommended torque to avoid loosening.
Attach the motor securely with the provided hardware, making sure all connections are snug but not over-tightened.
Double-check that the motor is properly grounded and electrical connections are insulated before finalizing the mount.
- Match the mounting bracket to frame specs
- Use a level for proper alignment
- Tighten screws to recommended torque
- Ensure all connections are snug
- Verify grounding and insulation
Reconnect Wiring and Secure All Connections
Make sure the power is turned off before handling any wiring, and use a voltage tester to verify that no electricity is flowing. Once confirmed, carefully reconnect the wires, matching them by color—black or red for hot, white for neutral, and green or copper for ground.
Guarantee all connections are tight and properly insulated to prevent electrical faults or short circuits. Use wire nuts and tighten terminal screws according to the manufacturer’s specifications.
Double-check for any loose or exposed wires before proceeding. Confirm that no stray wires are present and that all connections are secure.
Properly secured wiring ensures safe operation and reliable performance of your upgraded ceiling fan. Once everything is checked, you can proceed to reattach the fan housing or covers.
Attach the Fan Blades and Other Components
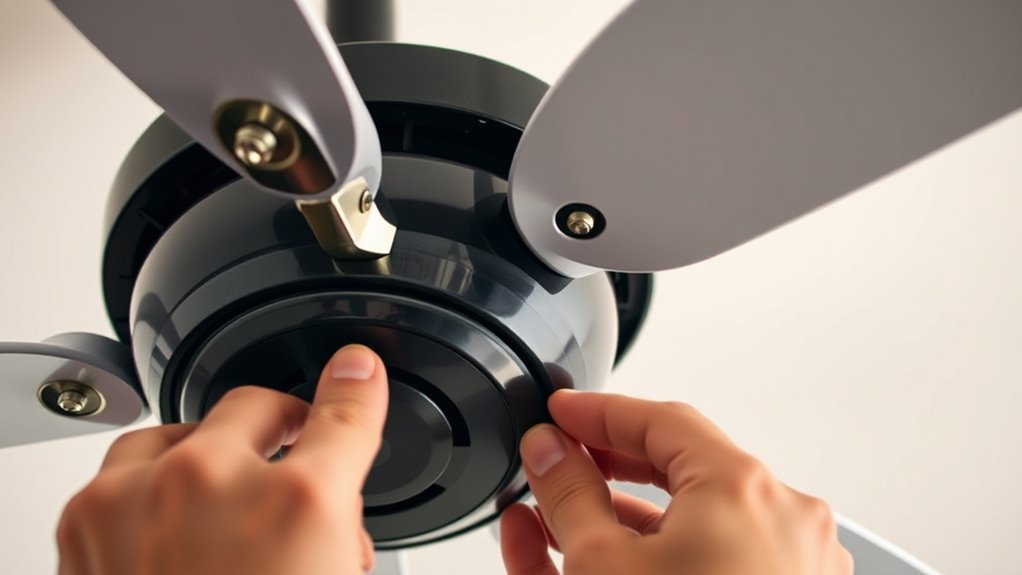
Begin by aligning the fan blades with the mounting brackets on the motor hub, ensuring each blade sits flush and matches the designated slots. Secure each blade using the screws provided, tightening them firmly to prevent wobbling.
Attach the blade connectors to the motor hub, making sure each clicks into place and is properly aligned for balanced operation. If your fan has a light kit or additional components, reconnect them following the manufacturer’s wiring instructions.
Double-check that all screws and connectors are tight and that the blades are evenly spaced to maintain proper balance. Before finishing, gently spin the blades by hand to check for wobbling or resistance. This step guarantees everything is securely attached and ready for testing.
Test the Fan at Low Speed and Confirm Proper Operation
Once you’ve reassembled the fan, turn it on and set it to the lowest speed. Observe if the motor runs smoothly without unusual noises or vibrations. Watch the blades to ensure they rotate steadily and evenly, which indicates proper motor function and balance.
Listen carefully for any grinding, squeaking, or humming sounds that could signal motor issues or loose parts. Confirm that the fan responds correctly to the low-speed control or remote, verifying that the electrical connections are working properly.
Keep the fan running at this slow speed for several minutes, ensuring it maintains a steady, gentle rotation. If everything operates smoothly and quietly, your motor upgrade has been successful, and the fan is ready for higher speeds.
Finalize and Restore Power for Full Use
Before restoring power to your ceiling fan, make sure that all paint and adhesive have fully dried to prevent any damage or safety issues. This step guarantees the components are secure and safe to operate.
Next, double-check all wiring connections to confirm they’re secure and correctly placed, which helps prevent electrical shorts or malfunctions.
Carefully reinstall the fan blades, light fixtures, and other parts, ensuring everything is balanced for smooth operation.
When turning the circuit breaker back on, do so gradually to avoid sudden power surges.
After restoring power, test the fan at various speeds to verify proper functionality.
Finally, observe the fan during initial operation to spot any wobbling or noise, addressing issues early for safe, efficient performance.
- Ensure paint and adhesive are fully dry
- Double-check wiring connections
- Reinstall components carefully
- Turn circuit breaker on gradually
- Monitor fan for wobbling or noise
Frequently Asked Questions
How Can I Make My Ceiling Fan More Powerful?
To make your ceiling fan more powerful, start by upgrading to a high-performance motor with higher RPM and CFM ratings.
Balance and align your blades properly to reduce strain, and install a compatible, high-capacity capacitor to boost speed.
Regularly clean the motor and replace worn bearings to maintain peak performance.
These steps will guarantee your fan operates more efficiently and delivers greater airflow.
How Do I Modernize My Ceiling Fan?
Did you know a modern ceiling fan can reduce energy bills by up to 30%? To modernize your fan, start by replacing the old motor with a sleek, energy-efficient model.
Opt for one with smart technology for remote control and scheduling. Add variable speed settings for quieter, more precise airflow.
Regular cleaning and lubrication will keep it running smoothly, giving your space a fresh, contemporary look and feel.
How Do I Increase the Rpm of My Ceiling Fan?
To increase your ceiling fan’s RPM, start by adjusting the speed settings with the pull chain or wall switch.
Make sure the blades are balanced and free of obstructions to prevent wobbling and speed loss.
Regularly clean the motor and electrical contacts to guarantee peak performance.
If you want a bigger boost, consider upgrading the motor or replacing the capacitor with a higher-capacity one, but always consult a professional first.
How Can I Improve the Airflow in My Ceiling Fan?
To improve airflow in your ceiling fan, start by cleaning and balancing the blades for maximum efficiency.
Consider installing larger or additional blades to move more air.
Increase the fan speed to a higher setting for better circulation.
If that’s not enough, upgrading to a fan with a higher CFM rating or a more powerful motor can considerably boost airflow.
Finally, make certain all leaks are sealed and the motor is well-maintained for peak performance.
Conclusion
Upgrading your ceiling fan motor is a smart way to extend its lifespan and improve performance. Did you know that a well-maintained ceiling fan can save you up to 40% on cooling costs? By following these steps, you guarantee safe and efficient installation. With just a little effort, you’ll enjoy a quieter, more reliable fan that cools your space better—all while saving money and energy in the long run.