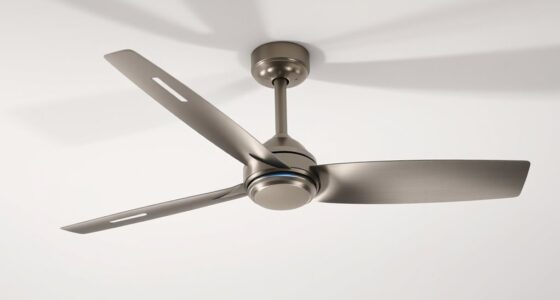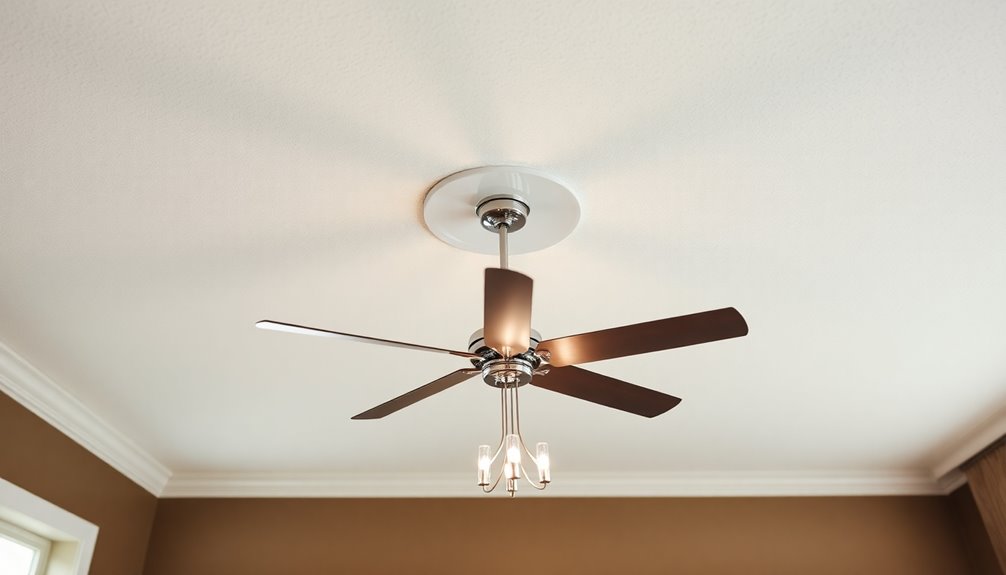
Yes, you can install a ceiling fan where a recessed light is, but you'll need to guarantee proper compatibility and structural support. Recessed lights typically lack the necessary support for a ceiling fan, so you must replace the fixture with a fan-rated electrical box securely anchored to ceiling joists. Additionally, take care of the wiring, ensuring it meets local codes for fan load. Always prioritize safety by turning off power before starting. If you want to know more about installation methods and cost considerations, there's plenty more to discover!
Key Takeaways
- Yes, a ceiling fan can be installed where a recessed light is, but proper structural support is essential.
- You must remove the recessed fixture and install a fan-rated junction box for safe mounting.
- Ensure the electrical wiring meets local codes to handle the ceiling fan's load.
- Regular inspections post-installation are recommended to maintain stability and safety.
- Consult local building codes to ensure compliance with fan installation requirements.

Southwire Electrical Box for Ceiling Fan, Light Fixture, 50lb Ceiling Fan and 75lb Light Fixture Support, Depth Adjustable, Gray, MSBFAN
Adjustable & Secure Installation: The Southwire Electrical Box offers quick setup and strong support as a durable electrical…
As an affiliate, we earn on qualifying purchases.
As an affiliate, we earn on qualifying purchases.
Understanding Compatibility Requirements

When installing a ceiling fan, understanding compatibility requirements is vital for a safe and effective setup. If you're considering replacing recessed lighting with a ceiling fan, keep in mind that recessed lighting fixtures typically lack the structural support needed for fans. Ceiling fans require fan-rated mounting brackets for stability, so you can't skip this step. Before you proceed, check local building codes to determine if a fan-rated electrical box or additional support is necessary.
If your existing recessed housing isn't rated for ceiling fan support, you'll need to either remove it or install a fan-rated electrical box to guarantee safety. Proper blocking between ceiling joists is also recommended to enhance stability. Additionally, make sure the ceiling fan's compatibility with your existing electrical wiring meets local codes and can handle the fan's electrical load. This is vital for both functionality and safety. Remember to consider the potential impact of flushing frequency on your overall electrical load when planning your fan installation. Regular inspection of safety equipment can significantly enhance system longevity and overall performance. Ensure that your ceiling fan installation adheres to safety standards to prevent potential hazards.

Westinghouse 0110000 Saf-T-Brace for Ceiling Fans, 3 Teeth, Twist and Lock,Silver(Pack of 1)
Saf-T-Brace allows safe, simple installation of fans and fixtures
As an affiliate, we earn on qualifying purchases.
As an affiliate, we earn on qualifying purchases.
Installation Methods Explained

When you're ready to install your ceiling fan, understanding the different methods can make the process smoother.
You'll need to evaluate whether to remove the recessed fixture or install a junction box nearby, and get familiar with wiring connections.
Each method has its own steps and benefits, so let's break them down.
Removal of Recessed Fixture
Removing a recessed light fixture is a straightforward process that requires careful attention to safety and detail. Start by turning off the power to the fixture at your circuit breaker to avoid any electrical hazards.
Once the power is off, carefully remove the trim from the recessed light can. This gives you access to the fixture and wiring.
Next, use tin snips to cut the metal can into smaller pieces, making it easier to extract from the ceiling cavity. Afterward, locate the junction box attached to the frame of the recessed fixture.
Disconnect the wires feeding the socket, ensuring you've turned off the power beforehand. If necessary, cut the wires and secure the ends with electrical tape to prevent accidental contact during the removal.
With the recessed fixture fully removed, you can now prepare for the installation of a fan-rated junction box in the opening left behind.
Make sure this new junction box is securely anchored, as it will need to support the weight of the ceiling fan. Following these steps will set you up for a successful conversion from a recessed light to a ceiling fan.
Junction Box Installation
Typically, you'll need to install a fan-rated junction box to safely support your new ceiling fan, as standard recessed lighting fixtures aren't up to the task.
To replace a recessed light, you can either remove the recessed can and patch the hole or leave it in place and install the junction box nearby. Whichever method you choose, proper alignment and centering of the junction box in the opening left by the can light are vital for effective fan installation and operation.
If you opt to remove the can, make sure the junction box is firmly secured between ceiling joists. Using adjustable brackets can help anchor it properly. This step is imperative, as the ceiling fan's weight demands a sturdy support system.
You'll also need to route the existing wiring from the recessed light into the newly installed junction box. Make certain all connections comply with local electrical codes to guarantee safety and functionality.
Once your junction box is installed correctly, you'll be ready to wire your ceiling fan with confidence!
Wiring Connections Overview
Connecting the wiring for your ceiling fan is essential for its performance and safety. When replacing recessed lights with a ceiling fan, start by connecting the white wire from your house to the fan's white wire for neutral. This secure connection is critical for proper operation.
Next, connect the black wire from the ceiling fan to the house's black wire to provide power. Don't forget to link the green wire from the fan to the bare house wire for grounding purposes.
If your ceiling fan includes a light kit, you'll need to connect the blue wire from the fan to the black wire from the house to enable the light operation. If you want separate switches for the fan and light, additional wiring is necessary. In this case, connect the light kit's blue wire to a different power source.
Always verify that all wiring connections are tight and properly insulated with electrical tape. This step is essential to prevent electrical shorts and guarantee safety during operation.
Following these guidelines will help you enjoy your new ceiling fan with peace of mind.

Enhon Light Bulb Changer for High Ceilings and Recessed Lights, Suction Cup Light Bulb Changer Attachment Kit Compatible with DocaPole and Other Standard Threaded Extension Pole (Pole Not Included)
[Replacing a Ceiling Light Bulb is So Easy]: Enhon suction cup bulb changer is compatible with Docapole and…
As an affiliate, we earn on qualifying purchases.
As an affiliate, we earn on qualifying purchases.
Cost Implications of Conversion

When you're converting a recessed light to a ceiling fan, you'll face some cost considerations.
Hiring a professional can set you back around $250, while a DIY approach might save you some cash but still requires careful budgeting for materials and potential complications.
It's crucial to weigh these factors to get a clear picture of your total expenses.
Professional Installation Costs
Converting a recessed light to a ceiling fan can add a significant cost to your project, with professional installation usually falling between $200 and $300. This price can vary based on the job's complexity and local labor rates. You might also face additional expenses, especially if the conversion requires a conversion kit, new ceiling wiring, or a fan-rated box.
Here's a breakdown of potential costs:
| Item | Estimated Cost | Notes |
|---|---|---|
| Professional Installation | $200 – $300 | Depends on complexity |
| Drywall Repair & Repainting | $100 – $200 | May be necessary after installation |
| New Wiring or Fan-rated Box | $50 – $150 | Required for safe operation |
Keep in mind that if attic access is necessary, electricians may charge extra, adding to the total. Budgeting for potential complications, like unexpected structural issues, is wise, as these can lead to additional expenses exceeding your initial estimates. Always plan ahead to avoid surprises! Additionally, ensuring proper installation can greatly enhance energy efficiency and overall performance of the ceiling fan.
DIY Savings Potential
Opting for a DIY approach to converting a recessed light into a ceiling fan can lead to significant savings. By handling the installation yourself, you could save between $100 to $250, which is the typical cost of professional installation.
You'll need a fan-rated junction box, which usually costs between $10 and $30—much less than hiring an electrician for the job. Additional materials like wiring and mounting brackets might add another $20 to $50, yet this is still a fraction of the average $250 charged by professionals.
If you're considering a ceiling fan without breaking the bank, use conversion kits designed for this purpose, ensuring everything is compatible. Plus, you can find decorative ceiling plates to cover any openings left behind, which can save you from costly drywall repairs.
However, it's wise to budget for potential complications, like unexpected electrical work, to keep your total conversion cost manageable. By being proactive and resourceful, you can tap into the full DIY savings potential of your project while enjoying a cool breeze in your space. Additionally, incorporating energy-efficient designs can further enhance your home's sustainability while keeping utility costs down.
Westinghouse 0110000 Saf-T-Brace for Ceiling Fans, 3 Teeth, Twist and Lock,Silver(Pack of 1)
Saf-T-Brace allows safe, simple installation of fans and fixtures
As an affiliate, we earn on qualifying purchases.
As an affiliate, we earn on qualifying purchases.
Ensuring Structural Support

Guaranteeing proper structural support is vital for safe ceiling fan installation. When you're installing a ceiling fan, you'll need a fan-rated electrical box that can withstand the fan's weight and movement. This box must be securely anchored to structural supports such as joists or blocking between joists.
A minimum 2×4 piece of lumber can be installed between joists, providing adequate support for the fan-rated box and helping to distribute the weight evenly. Make sure to mount the fan-rated box using screws that securely attach it to the blocking or joists.
This step is critical, as it prevents potential failure and accidents while the fan is in use. After installation, regular inspections of the structural support are recommended to confirm that everything remains secure and can handle the weight of your ceiling fan.
Also, keep in mind that local building codes may have specific requirements regarding the structural support needed for ceiling fans. It's a good idea to consult with local officials before you begin your installation to guarantee compliance and safety.
Proper support not only enhances functionality but also gives you peace of mind.
Tools and Materials Needed

Once you've secured the structural support for your ceiling fan, it's time to gather the necessary tools and materials for the installation. Having the right items on hand will streamline the process and guarantee safety.
Here's what you'll need:
- Ceiling Fan Brace: This is vital for securely mounting your fan, especially when converting from recessed lights.
- Fan-rated Junction Box: This box is fundamental for safely connecting the fan to the existing wiring and providing proper support.
- Wire Cutters and Strippers: These tools will help you manage and prepare the electrical wiring for the installation.
- Screwdrivers: You'll need both flathead and Phillips screwdrivers to tighten screws for the fan and junction box installation.
Additionally, don't forget electrical tape. This is significant for insulating wire connections, preventing electrical hazards during and after the installation. It's also wise to consider smart toilet features that can enhance your overall home experience by promoting convenience and hygiene.
With these tools and materials at your side, you'll be well-equipped to tackle the ceiling fan installation efficiently.
Safety and Troubleshooting Tips

Safety is paramount when installing a ceiling fan, so it is vital to take the right precautions to avoid accidents. Start by confirming the power is turned off at the circuit breaker. This action prevents electrical shocks during installation. Next, check that the existing recessed light fixture hasn't been modified, as alterations can violate safety codes.
Inspect the junction box and wiring for any signs of damage or wear. Proper electrical connections are fundamental for the safe operation of your ceiling fan. Use a fan-rated electrical box that complies with local building codes, as standard junction boxes may not support the weight and movement of a ceiling fan.
Finally, regularly check the stability of the fan and its connections after installation to guarantee ongoing safety. Below is a handy troubleshooting table:
| Issue | Possible Cause | Solution |
|---|---|---|
| Fan wobbles | Loose connections | Tighten screws and bolts |
| No power to fan | Power not turned on | Check circuit breaker |
| Fan makes noise | Improper mounting | Verify all parts are secured |
| Light flickers | Faulty wiring or connections | Inspect wiring and junction boxes |
Frequently Asked Questions
Can You Put a Ceiling Fan Where a Recessed Light Was?
You can definitely install a ceiling fan in place of a recessed light.
Just make certain the existing housing is compatible or swap it out for a fan-rated junction box to support the fan's weight.
You might need to run new wiring if you want separate controls for the fan and light.
Also, be prepared for some drywall repairs after removing the recessed fixture.
Always check local codes to ascertain everything's safe and compliant.
Can I Install a Ceiling Fan Where a Light Fixture Is?
Yes, you can install a ceiling fan where a light fixture is, but you'll need to take a few steps.
First, verify the existing junction box can support the fan's weight. If it can't, you'll need to replace it with a fan-rated box.
You may also need to modify the wiring since ceiling fans have different electrical requirements.
Always turn off the power before you start, and check local codes for safety compliance.
How Far Should Ceiling Fan Be From Recessed Lights?
Think of your ceiling fan and recessed lights like dancers in a performance; they need space to shine.
Ideally, you should keep your ceiling fan at least 8-10 feet away from recessed lights. This distance prevents overheating and allows airflow to circulate freely.
If they're too close, you might notice flickering or dimming effects.
Always check local codes and manufacturer guidelines to guarantee a safe and effective installation for both fixtures.
Can You Put a Light Fixture Where a Recessed Light Is?
Yes, you can definitely put a light fixture where a recessed light is. Just guarantee the existing housing can support the new fixture's weight.
If it can't, you'll need to install a fan-rated junction box or brace for safety.
Be ready to patch any holes left behind and make the proper electrical connections.
Always turn off the power before starting any work and check local building codes for specific requirements.
Conclusion
In summary, swapping a recessed light for a ceiling fan can be a game-changer for your space. It's funny how a simple change can transform a room's ambiance, isn't it? Just make certain you check compatibility, guarantee proper support, and gather the right tools. With some planning and care, you can enjoy a cool breeze where once there was just light. Who knew such a small switch could lead to such a revitalizing upgrade?