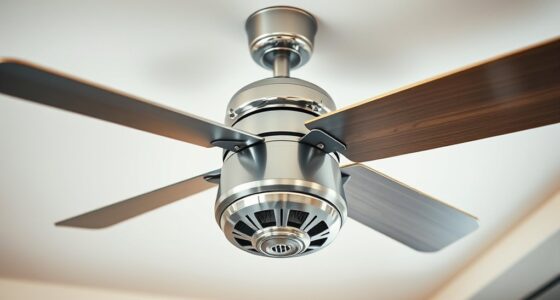

To install a ceiling fan yourself, start by verifying the electrical box supports the fan’s weight and wiring requirements, then turn off power and gather tools. Assemble the fan on the ground following manufacturer instructions, making certain all screws are tight. Securely mount the fan to a sturdy electrical box, connect wiring correctly, and verify alignment with a level. After powering up to test operation, double-check that all hardware is tight and the fan runs smoothly; more details follow to ensure a safe, successful installation.
Key Takeaways
- Verify electrical box support and match wiring to fan requirements before installation.
- Assemble the fan components on the ground following manufacturer instructions for easier mounting.
- Mount the electrical box securely, level it, and connect wiring correctly with wire nuts and tape.
- Carefully lift and secure the fan to the mounting bracket, then balance blades to prevent wobbling.
- Test fan operation at all speeds, ensure smooth functioning, and double-check all hardware and wiring.

Installing a ceiling fan requires careful planning and precise execution to guarantee safety and ideal performance. Before beginning, verify that the electrical box is rated to support the weight and operational forces of a ceiling fan. Use a sturdy, fan-rated electrical box that is securely attached to a ceiling joist or a mounting bracket designed to withstand the fan’s weight. Confirm the electrical wiring matches the fan’s requirements, typically involving a hot wire, neutral wire, and ground. Turn off the circuit breaker to eliminate any risk of electrical shock, and double-check with a voltage tester to ensure power is disconnected before proceeding.
Next, gather all necessary tools and components, including a ladder, screwdriver, wire strippers, voltage tester, mounting bracket, fan blades, and hardware. Carefully unpack the fan, inspecting all parts for damage or missing components. Follow the manufacturer’s instructions explicitly, as installation procedures vary among models. Begin by assembling the fan motor and mounting hardware on the ground, ensuring all screws and connectors are tightened to manufacturer specifications. This initial assembly simplifies the process once the fan is lifted into position.
Gather tools, inspect parts, and assemble the fan on the ground for easier installation.
When mounting the fan, elevate the electrical box to the appropriate height, ensuring it is securely fastened and capable of supporting the fan’s weight. Attach the mounting bracket to the electrical box, aligning it with the fan’s mounting plate. Use a level to verify proper alignment, as an unlevel fan can cause wobbling and noise during operation. Connect the wiring according to the color codes: typically, black or red for hot, white for neutral, and green or copper for ground. Use wire nuts to secure connections, and wrap them with electrical tape for added safety. Ensure there are no loose strands or exposed wires.
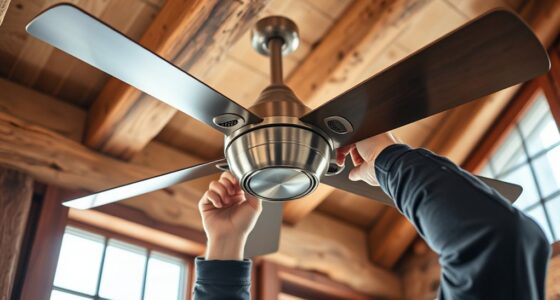
Once wiring is complete, carefully lift the fan assembly onto the mounting bracket, aligning it as per the manufacturer’s instructions. Secure the fan housing with the provided screws, ensuring it is snugly fastened without over-tightening. Balance the blades after installation by following the manufacturer’s balancing procedure to prevent wobbling and ensure smooth operation. Testing the wiring connections by temporarily restoring power and operating the fan at all speed settings, listening for unusual noises or vibrations, is a crucial step. Turn the power off again before finalizing any adjustments or installing light fixtures if applicable.
Additionally, understanding the importance of fan support and safety standards can help prevent accidents and ensure longevity. Finally, perform a thorough inspection to confirm all hardware is tight, wiring is secure, and the fan operates smoothly. Confirm that the fan blades are level and balanced, and that any light fixtures are properly installed and functional. Once satisfied with the installation, restore power and enjoy your newly installed ceiling fan, confident that you followed a precise and safe procedure tailored for top performance.

Klein Tools ET310KIT AC Circuit Breaker Finder Kit, Electric Tester, GFCI Tester, Leads, Adapters and Case
ACCURATE CIRCUIT BREAKER IDENTIFICATION: Quickly locate the correct breaker with precision using the transmitter and receiver of the...
As an affiliate, we earn on qualifying purchases.
Frequently Asked Questions
Can I Install a Ceiling Fan Without an Existing Electrical Box?
No, you can’t install a ceiling fan without an existing electrical box unless you replace or reinforce it. The electrical box must support the fan’s weight and electrical load. If there’s no box, you’ll need to install a new rated electrical box designed for ceiling fans, secure it properly to a ceiling joist or support, and make sure it meets electrical codes before wiring the fan.
What Tools Are Essential for Ceiling Fan Installation?
You’ll need a screwdriver, voltage tester, adjustable wrench, ladder, wire strippers, and possibly a drill with bits. Use the screwdriver to secure mounting brackets and fan components, while the voltage tester guarantees power is off before working on electrical connections. The ladder provides access to ceiling height, and wire strippers prepare wires for connections. An adjustable wrench tightens mounting hardware, ensuring a safe, secure installation.
How Do I Ensure the Fan Is Balanced After Installation?
To guarantee your ceiling fan is balanced, turn on the fan and observe its movement. If it wobbles, attach a balancing kit or small weight to the blades’ center with the adhesive provided. Alternatively, rotate the blades slightly to identify the unbalanced one and adjust its position or add weight. Repeat this process until the fan operates smoothly without wobbling, confirming proper balance for maximum performance and safety.
Is It Safe to Install a Ceiling Fan on a Sloped Ceiling?
Installing a ceiling fan on a sloped ceiling is safe if you use a sloped ceiling adapter, much like a ship’s mast adapts to changing winds. Make certain the fan’s mounting bracket accommodates the slope’s angle, typically up to 30 degrees. Verify that the electrical wiring meets safety standards, and secure all components firmly. Proper tools and adherence to manufacturer instructions are essential to prevent wobbling and guarantee stable operation.
How Do I Troubleshoot Common Ceiling Fan Wiring Issues?
You troubleshoot ceiling fan wiring issues by first turning off the power at the breaker. Use a multimeter to verify voltage at the wires, ensuring the power is off before handling. Check all wire connections for tightness and proper color coding—black or red for hot, white for neutral, green or copper for ground. If the fan still malfunctions, inspect for damaged wires or loose connectors, and replace or repair as needed.
Klein Tools ET310 AC Circuit Breaker Finder, Electric and Voltage Tester with Integrated GFCI Outlet Tester
ACCURATE CIRCUIT BREAKER IDENTIFICATION: Quickly locate the correct breaker with precision using our circuit breaker finder, ensuring efficient...
As an affiliate, we earn on qualifying purchases.
Conclusion
By following this checklist, you guarantee a safe, efficient ceiling fan installation that works flawlessly. Attention to detail transforms a challenging task into a manageable project—like assembling a puzzle piece by piece. Double-check connections, secure mounting, and test the operation thoroughly. Remember, precision is your best tool; it assures performance and safety. Trust this systematic approach to bring comfort and efficiency to your space, turning a simple task into a well-executed achievement.

Klein Tools 80016 Circuit Breaker Finder Tool Kit with Accessories, GFCI Outlet Tester, 2-Piece Set, Includes Cat. No. ET310 and Cat. No. 69411
SMART BUY: A complete, high-performance kit that offers convenience and value
As an affiliate, we earn on qualifying purchases.

KAIWEETS Circuit Breaker Finder with LCD Display, GFCI Outlet Tester, Electrical Circuit Tracer Tool with NCV Test & Flashlight, Includes Carrying Case and Adapters- KT301P
All-in-One Circuit Diagnosis: KT301P circuit breaker finder Easily locate breakers, check outlet wiring, and test GFCI protection—all with...
As an affiliate, we earn on qualifying purchases.