To remove and replace a ceiling fan downrod safely, first turn off the power at the circuit breaker and test for voltage. Support the fan weight, then disconnect wiring by unscrewing wire nuts or connectors. Loosen the set screws holding the downrod, then detach it from the motor bracket. Confirm the new downrod matches specifications, secure it with set screws, reconnect the wiring, and reassemble the canopy. Proper procedures guarantee safety and ideal fan operation; continue to learn the detailed steps.
Key Takeaways
- Turn off power at the circuit breaker and verify de-energization before starting removal.
- Support the fan and disconnect wiring connections before loosening the downrod set screws.
- Carefully detach the downrod from the fan motor bracket, holding the fan steady during removal.
- Attach the new downrod by aligning it properly and tightening set screws securely.
- Reassemble the canopy, restore power, and test the fan to ensure proper operation and safety.

Removing and replacing a ceiling fan downrod is a straightforward process that requires careful attention to safety and proper tools. Before beginning, ensure the power supply to the fan is completely turned off at the circuit breaker to prevent electrical shock. Confirm the circuit is de-energized by testing the fan using a voltage tester. Gather necessary tools, including a ladder, adjustable wrench, Allen wrenches, and possibly pliers. Wearing safety glasses is advisable to protect your eyes from falling debris or accidental slips.
Always turn off power at the circuit breaker and test with a voltage tester before working on your ceiling fan.
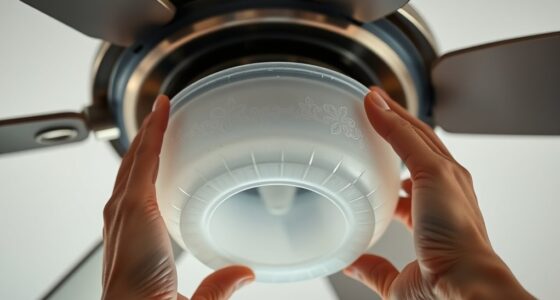
Start by positioning the ladder securely beneath the fan to provide stable access. Climb carefully, maintaining three points of contact at all times. Locate the canopy cover at the ceiling, which houses the mounting bracket and wiring connections. Use an adjustable wrench or screwdriver to loosen the canopy screws and gently lower the canopy to expose the mounting hardware and downrod connection. Be mindful of the wires, which remain connected until the downrod is fully detached. It’s also important to understand the electrical wiring connections to ensure safe disconnection and reattachment.
Next, disconnect the fan’s wiring. Carefully separate the electrical wires by unscrewing the wire nuts or connectors, noting their configuration for reassembly. It’s helpful to take a picture for reference. Once the wiring is disconnected, support the weight of the downrod and fan motor assembly as you loosen the set screws securing the downrod to the fan motor bracket. Use the appropriate Allen wrench or socket, depending on the fan model, to remove these screws. Hold the fan assembly steady to prevent it from falling once the downrod is detached.
With the downrod free, inspect the mounting area and the new downrod’s compatibility. Confirm the new downrod’s length, diameter, and threading match the existing hardware and fan specifications. Attach the new downrod by aligning it with the fan motor bracket and tightening the set screws securely. Reconnect the wiring, ensuring each wire is properly secured with a wire nut or connector, following the original wiring configuration. Double-check all connections for tightness and safety.
Finally, lift the canopy cover back into position and secure it with the mounting screws. Once the canopy is reattached, restore power at the circuit breaker and test the fan to ensure proper operation. Confirm that the fan operates smoothly and that no wiring connections are loose or visible. Throughout the process, prioritize safety, precision, and adherence to manufacturer instructions to ensure a successful and secure installation.

AICWIOO 4 Inch Matte Black Ceiling Fan Downrod with Hanger Ball, 1" OD (Fits 3/4" ID Mounts) Universal Threadless Extension Pole with Pin Kit
【True Gauge Rigid Carbon Steel】Do not be fooled by its compact size. Built from industrial-strength, thickened seamless carbon…
As an affiliate, we earn on qualifying purchases.
As an affiliate, we earn on qualifying purchases.
Frequently Asked Questions
Can I Change the Downrod Length Without Professional Help?
Yes, you can change the downrod length yourself if you have the proper tools and follow safety precautions. First, turn off the power and secure the fan. Remove the canopy and disconnect the existing downrod. Measure and assemble the new downrod securely, ensuring all connections are tight. Reattach the canopy and restore power. If you’re comfortable with electrical and mechanical tasks, this DIY approach is feasible, but consult the manufacturer’s instructions.
What Tools Are Necessary for Replacing a Downrod?
You need a ladder, adjustable wrench, and possibly pliers to replace a downrod. First, turn off the power at the circuit breaker. Use the ladder to reach the fan, then carefully disconnect the fan blades if necessary. With the adjustable wrench, loosen the mounting hardware securing the downrod to the fan motor and ceiling bracket. Remove the old downrod and install the new one, tightening all connections securely to guarantee safety.
How Do I Ensure the Fan Is Balanced After Replacement?
To guarantee your fan is balanced after replacement, first turn it on and observe its operation. If it wobbles, gently tighten the mounting screws, then adjust the blades with a blade balancing kit. Think of balancing as tuning a musical instrument—small adjustments make a big difference. Use a level to verify the fan’s perpendicular alignment. Properly balanced blades reduce noise and prolong motor life, ensuring ideal performance.
Is It Safe to Operate the Fan Immediately After Installation?
Yes, it’s safe to operate the fan immediately after installation if you’ve securely attached all components, including the downrod, blades, and canopy. Double-check that the fan is properly balanced, all mounting hardware is tight, and the electrical connections are correct. Turn on the fan at low speed first to observe for wobbling or unusual noise. If everything runs smoothly, gradually increase to higher speeds, ensuring safe operation.
What Are the Signs of a Faulty Downrod Connection?
You’ll notice if the downrod connection is faulty when the fan wobbles excessively or makes unusual noises during operation. Loose fittings or visible gaps indicate instability, and if the downrod feels loose or shifts when touched, it’s a sign of a poor connection. Also, uneven fan blade movement or vibrations can point to a faulty downrod connection. Always double-check fittings and tighten securely to guarantee safe, smooth operation.
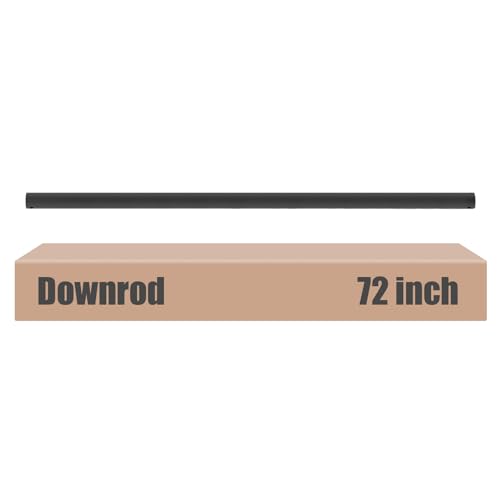
DPXMYG 72 inch Ceiling Fan Downrod, 6 FT Black Downrod for Ceiling Fan, 1 inch Outside Diameter, Boom Suitable for a Wide Range of Fans (Black, Not Threaded)
Ceiling Fan Extension Downrod: The DPXMYG downrod fits most ceiling fans on Amazon (Note: Our downrods are not…
As an affiliate, we earn on qualifying purchases.
As an affiliate, we earn on qualifying purchases.
Conclusion
By carefully removing and replacing the ceiling fan downrod, you guarantee a secure and stable fixture. Follow the proper steps and double-check all connections to prevent issues down the line. Remember, a well-installed downrod is the backbone of your fan’s safety and performance. Don’t cut corners; it’s better to be safe than sorry. With patience and precision, you’ll have your ceiling fan functioning smoothly, and you’ll be back in the driver’s seat, confident in your work.

Akahttbn Ceiling Fan Light Switch Zing Ear ZE-109, Two-wire On-Off Control Replacement, Compatible with Hunter Ceiling Light Fans Lamps and Wall Lights (Nickel Pull Chain)3 Pcs
Zing Ear ZE-109 Two-wire pull chain switch, activates canopy lamps by gently tugging the beaded chain, compatible with…
As an affiliate, we earn on qualifying purchases.
As an affiliate, we earn on qualifying purchases.

AICWIOO Universal Ceiling Fan Mounting Bracket Kit with Hanger Ball – 2.0mm Heavy Duty Steel Mount for 1" Downrods & 4" Boxes, Flat & Low Slope Ceilings (≤10°), NOT for Hugger Fans
【Pro-Grade Stability | 2.0mm SPCC Steel】 Crafted from 2.0mm ultra-thick high-strength carbon steel. This reinforced design absorbs motor…
As an affiliate, we earn on qualifying purchases.
As an affiliate, we earn on qualifying purchases.