To diagnose ceiling fan electrical problems, first turn off power at the breaker and verify de-energization with a multimeter. Remove the fan housing carefully and inspect the wiring for damage, loose connections, or corrosion, ensuring all connections follow manufacturer specs. Test the capacitor and switch functionality with a multimeter, replacing faulty components. After securing all wiring and components, restore power to verify operation. Continuing with proper safety checks and detailed troubleshooting will help identify the root cause effectively.
Key Takeaways
- Turn off power and verify circuit de-energization before inspecting wiring or components.
- Conduct visual inspection for damaged wires, loose connections, and ensure proper wiring matches manufacturer standards.
- Test and replace faulty capacitors to fix humming, stalling, or non-start issues.
- Check switches, remote controls, and control modules for proper wiring and functionality.
- Restore power after repairs and verify fan operation; further issues may require professional diagnosis.
When your ceiling fan isn’t functioning properly, diagnosing the electrical issues begins with understanding the system’s wiring and components. You need to approach this systematically, prioritizing safety and precision. Start by turning off the power at the circuit breaker to eliminate the risk of electrical shock. Use a multimeter to verify that the circuit is de-energized before proceeding. Once confirmed, carefully remove the fan’s housing to access the wiring connections. Familiarize yourself with the typical wiring layout: usually, you’ll find a black (hot) wire, a white (neutral) wire, and a green or bare copper (ground) wire. Some models may include additional wires for light kits or remote controls. Ensuring these connections are secure and correctly matched is essential for proper operation.
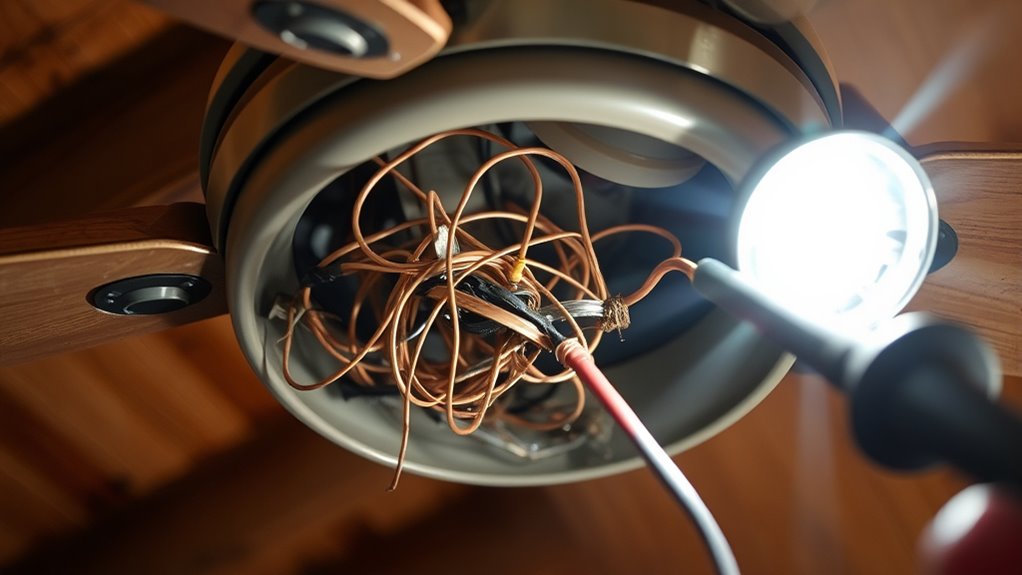
Start by turning off the circuit breaker and inspecting wiring connections inside the fan housing.
Next, inspect the wires for visible signs of damage, such as fraying, burn marks, or loose connections. Damaged wires can cause short circuits or intermittent operation. Check the wire connectors (wire nuts) to confirm they are tight; loose connections can lead to flickering or failure to turn on. Pay particular attention to the switch wiring, especially if the fan is controlled by a wall switch or remote control system. Faulty switches or loose wiring in these components can disrupt power flow. Use the multimeter to test continuity across the switch terminals, ensuring that the switch functions correctly when toggled.
You should also verify the integrity of the fan’s capacitor, a critical component responsible for starting and maintaining the motor’s operation. Capacitors can fail over time, leading to humming sounds, motor stalling, or no movement at all. To test the capacitor, discharge it safely by shorting its terminals with a insulated screwdriver, then use the multimeter set to capacitance mode to measure its value. Compare this reading to the manufacturer’s specifications; a significant deviation indicates failure. If the capacitor is faulty, replacing it often resolves startup issues without requiring extensive rewiring.
Additionally, understanding the role of sound vibrations and frequencies can be helpful, especially if your fan has integrated sound-related features or if noise is an issue, as sound vibrations can sometimes influence electrical components or perceived operation. Finally, examine the switch wiring, remote control receiver, or wall dimmer, if applicable. Confirm these devices are compatible with your fan model and correctly wired according to the manufacturer’s instructions. Faulty or incompatible switches can prevent the fan from responding or cause inconsistent operation. Confirm that all connections are tight, insulated, and free of corrosion. When you’ve completed these checks, restore power and test the fan’s operation. If issues persist, further investigation into internal motor components or control modules may be necessary, but always prioritize safety and adhere to electrical codes throughout the process.

New CEILING FAN CAPACITOR CBB61 4.5uf + 6uf + 5uf 5 WIRE 250V
- Capacitor Type and Ratings: CBB61 4.5uf+6uf+5uf, 250V, 50/60Hz
- Tolerance: 5% tolerance
- Maximum Temperature: Operates up to +70°C
As an affiliate, we earn on qualifying purchases.
As an affiliate, we earn on qualifying purchases.
Frequently Asked Questions
How Can I Identify Faulty Fan Switches?
You can identify faulty fan switches by first turning off the power at the circuit breaker for safety. Remove the switch cover to access the switch, then visually inspect for damage, corrosion, or loose wires. Use a multimeter to test continuity—if there’s no continuity when toggling the switch, it’s faulty. Replace the switch with a compatible model, ensuring all wiring is secure and correctly connected before restoring power.
What Tools Are Best for Electrical Testing?
You should use a multimeter or voltage tester for electrical testing, as over 80% of electrical issues are diagnosed with these tools. Always turn off power at the circuit breaker before testing to guarantee safety. A multimeter measures voltage, continuity, and resistance, helping you identify faulty wiring or switches. Use it carefully, follow manufacturer instructions, and double-check your readings to avoid misdiagnosis and potential hazards.
Can Wiring Issues Cause Fan Wobbling?
Yes, wiring issues can cause fan wobbling. Loose or damaged wires can lead to inconsistent power delivery, affecting the motor’s balance and operation. Faulty wiring connections may also cause the blades to rotate unevenly or vibrate excessively. To prevent hazards, turn off power before inspecting wiring, tighten all connections securely, and replace any damaged wires. Proper wiring guarantees safe, smooth fan operation and reduces wobbling caused by electrical faults.
How Do I Reset a Tripped Circuit Breaker?
Think of a tripped circuit breaker as a safety gate blocking electrical flow. To reset it, first, locate your main electrical panel and identify the breaker marked “OFF” or “TRIPPED.” Firmly push the breaker fully to the OFF position, then flip it back to ON. Make certain your hands are dry, stand stable, and avoid forcing if resistance remains. If it trips again, consult a professional to prevent electrical hazards.
Is It Safe to Repair Ceiling Fan Wiring Myself?
You shouldn’t attempt to repair ceiling fan wiring yourself unless you’re qualified, as it involves high voltage and potential hazards. Always turn off power at the circuit breaker before handling any wiring. Use insulated tools and verify power is off with a tester. If you’re unsure or unfamiliar with electrical work, it’s safest to hire a licensed electrician to prevent shocks, fires, or damage to your home’s electrical system.
Conclusion
By meticulously diagnosing electrical issues in your ceiling fan, you’re not just fixing a nuisance—you’re preventing potential fires, electrical shocks, and costly damages. Always prioritize safety by turning off power before inspection, using proper tools, and understanding circuit diagrams. Remember, a small oversight can lead to catastrophic failures. Approach each problem with technical precision, patience, and respect for electrical safety. Your diligent efforts guarantee a safe, reliable fan that keeps your space comfortable without risking your home or life.