
To tighten loose screws on your ceiling fan, first turn off the power and safely access the fan with a sturdy ladder. Use the appropriate screwdriver to firmly tighten blade screws, brackets, and canopy screws, replacing any stripped or damaged ones as needed. Check that all mounting hardware is secure without overtightening, which can cause damage. If wobbling persists, consider balancing the blades or consulting a professional—there’s more to guarantee your fan runs smoothly.
Key Takeaways
- Turn off the fan and shut off power at the circuit breaker for safety before tightening screws.
- Use the correct screwdriver to gently tighten blade and mounting hardware screws without over-tightening.
- Check for and replace any stripped or damaged screws to ensure secure attachment.
- Tighten the mounting bracket screws to the electrical box and canopy screws for overall stability.
- Reassess fan wobbling after tightening, and balance blades if necessary for smooth operation.
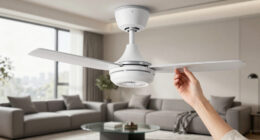
If your ceiling fan wobbles or makes unusual noises, loose screws are often the culprit. Identifying and tightening these screws promptly can prevent further damage and ensure your fan runs smoothly and safely. Start by turning off the fan and shutting off the circuit breaker to eliminate any risk of injury. Once the power’s off, climb a sturdy ladder or use a step stool to get a clear view of the fan’s mounting area.
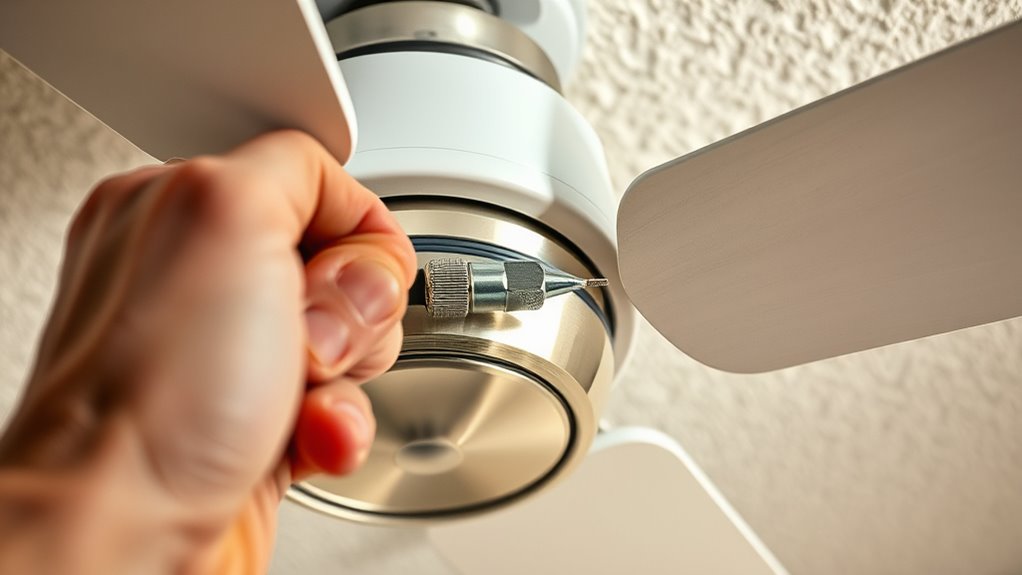
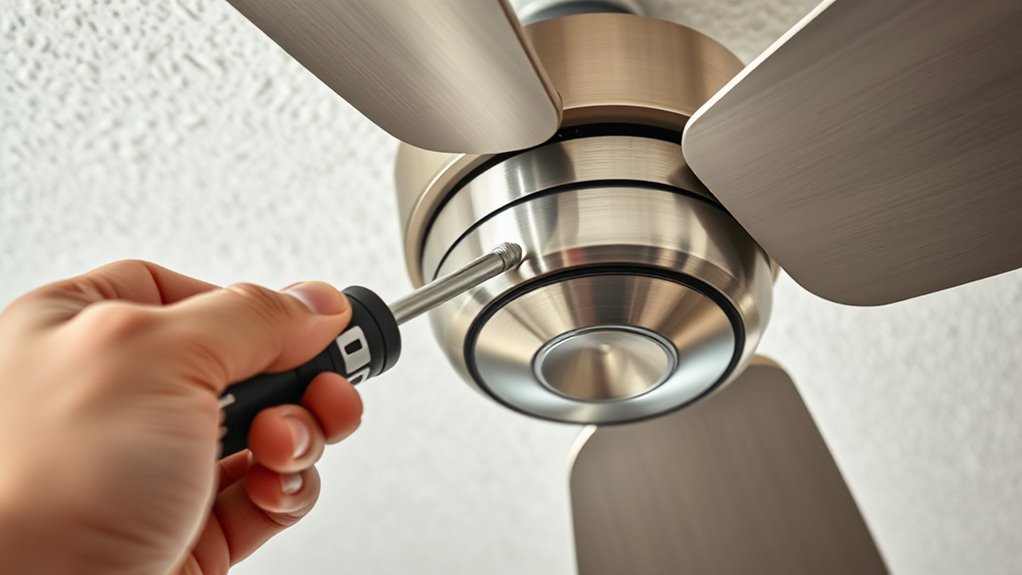
Examine the blades first. Wobbles usually stem from loose blade screws or brackets. Use a screwdriver—typically a Phillips-head or flat-head, depending on your fan model—to tighten each screw securing the blades to the motor arm. Do this gently but firmly, avoiding overtightening, which could strip the screw or damage the blade. If a screw refuses to tighten or feels stripped, replace it with a new one of the same size and thread pattern. Sometimes, blade wobble persists because the mounting brackets are loose. Check the brackets that hold the blades in place and tighten their screws as needed.
Next, inspect the fan’s canopy and mounting hardware. Many fans are secured to the ceiling with screws that attach the mounting bracket to the electrical box. If these screws are loose, the entire fan may wobble. Tighten these screws carefully, ensuring they’re snug but not overtightened to avoid damaging the ceiling or the mounting bracket. Pay particular attention to the canopy screws that cover the mounting hardware, as loose canopy screws can cause instability and noise.
While you’re at it, check the balancing of the blades. Even if screws are tight, uneven blade weight can cause wobbling. You might need to add blade balancing weights or adjust the blades slightly if they’re unevenly positioned. Use a fan balancing kit, which usually comes with adhesive weights, and follow the instructions to attach them to the blades that cause the wobble.
Throughout the process, be methodical. Tighten each screw gradually, checking for stability after each adjustment. Remember, loose screws don’t just cause noise—they can also lead to more severe damage or safety hazards if left unaddressed. Maintaining proper mounting hardware is essential for the safe operation of your ceiling fan. After tightening everything securely, restore power and turn on the fan. Observe its operation carefully—if wobbling or noise continues, recheck all screws and consider inspecting the fan’s mounting hardware or calling a professional if needed. Maintaining tight screws is a simple yet critical part of keeping your ceiling fan safe, quiet, and efficient.

PATIKIL 20Pcs Ceiling Fan Blade Screws, 1/4"-20 x 3/8 Carbon Steel Phillips Pan Motor Replacement Screw for Lighting Ceiling Fan, Copper
- Industrial-grade fan blade screws: Eliminate wobble and vibration
- Copper-colored carbon steel: Corrosion-resistant and durable
- Size and thread details: 8.6x13mm with 1/4-20 UNC thread
As an affiliate, we earn on qualifying purchases.
As an affiliate, we earn on qualifying purchases.
Frequently Asked Questions
How Often Should I Check for Loose Ceiling Fan Screws?
You should check your ceiling fan screws every 6 to 12 months to guarantee safety and proper operation. Regular inspections help catch any looseness early, preventing wobbling or potential accidents. When you notice vibrations, noise, or wobbling, tighten the screws promptly. Make it a routine to visually inspect the mounting bracket, blades, and pull chain connections during your maintenance checks, especially after storms or heavy use.
Can Loose Screws Cause the Fan to Wobble Excessively?
Yes, loose screws can cause your ceiling fan to wobble excessively. When screws aren’t tight, the fan blades may become unbalanced, leading to uneven movement and vibration. This wobbling not only creates noise but can also put stress on the fan’s motor and mounting bracket, potentially causing damage over time. Regularly check and tighten all screws to make certain of smooth, stable operation and prevent excessive wobbling.
Are There Specific Tools Recommended for Tightening Ceiling Fan Screws?
Think of tightening your ceiling fan screws like tuning a musical instrument. You’ll want a Phillips head screwdriver for most screws, and an Allen wrench if your fan has hex screws. Keep a small adjustable wrench handy for stubborn bolts. Make sure your tools are clean and in good condition for a firm grip. This way, you’ll tighten safely and effectively, preventing wobble and ensuring quiet, smooth operation.
What Safety Precautions Should I Take Before Tightening Screws?
Before tightening screws, turn off the ceiling fan and switch off the power at the circuit breaker to prevent electrical shocks. Use a sturdy ladder or step stool to reach the fan safely. Wear safety goggles to protect your eyes from dust or debris, and gloves if you have rough or rusty screws. Double-check that the fan is completely off before starting, ensuring a safe and effective repair process.
How Do I Identify Which Screws Need Tightening on My Ceiling Fan?
Imagine your ceiling fan as a mighty ship, with each screw as a crucial anchor. To find loose ones, gently shake the blades—if they wobble or feel unstable, those screws are your suspects. Inspect each screw holding the blades and canopy; look for signs of wear, corrosion, or gaps. Tighten any that seem slack, ensuring the fan remains steady and secure, just like a ship at anchor during a storm.
Conclusion
Now that you know how to tighten those loose ceiling fan screws, your fan will hum smoothly like a well-oiled machine. Think of each screw as a crucial gear in a finely tuned clock—if one slips, the whole thing stalls. With your handy toolkit and these simple steps, you’ve turned chaos into calm. Keep these tips in mind, and your fan will keep spinning reliably, a steadfast guardian of comfort in your home.