
To rewire an old ceiling fan for safety and longevity, turn off power at the breaker and confirm no voltage present. Carefully remove the fan canopy, inspect and disconnect degraded wiring, then replace with UL-listed 14 or 12-gauge copper conductors, following the manufacturer’s diagram. Secure all connections with wire nuts and tape, ensuring no exposed conductors. Once you’ve properly tucked and reattached everything, restoring power and testing the fan ensures maximum safety and performance—continue for detailed steps.
Key Takeaways
- Turn off power and verify absence of voltage before handling fan wiring.
- Remove old wiring carefully, inspecting for damage or corrosion, and replace with code-compliant cables.
- Follow manufacturer’s wiring diagram to ensure correct connections of hot, neutral, and ground wires.
- Secure all connections with wire nuts and electrical tape, then tuck wiring neatly into the ceiling box.
- Restore power and test the fan to confirm safe operation and proper speed control.
Rewiring an old ceiling fan is a practical way to guarantee safe and efficient operation, especially if the existing wiring has become degraded or outdated. Over time, insulation can deteriorate, connections can loosen, and wiring may no longer meet current electrical codes. Addressing these issues proactively reduces the risk of electrical shorts, fires, or motor damage. To begin, turn off the power supply at the circuit breaker and verify the absence of voltage with a multimeter to ensure safety before proceeding.
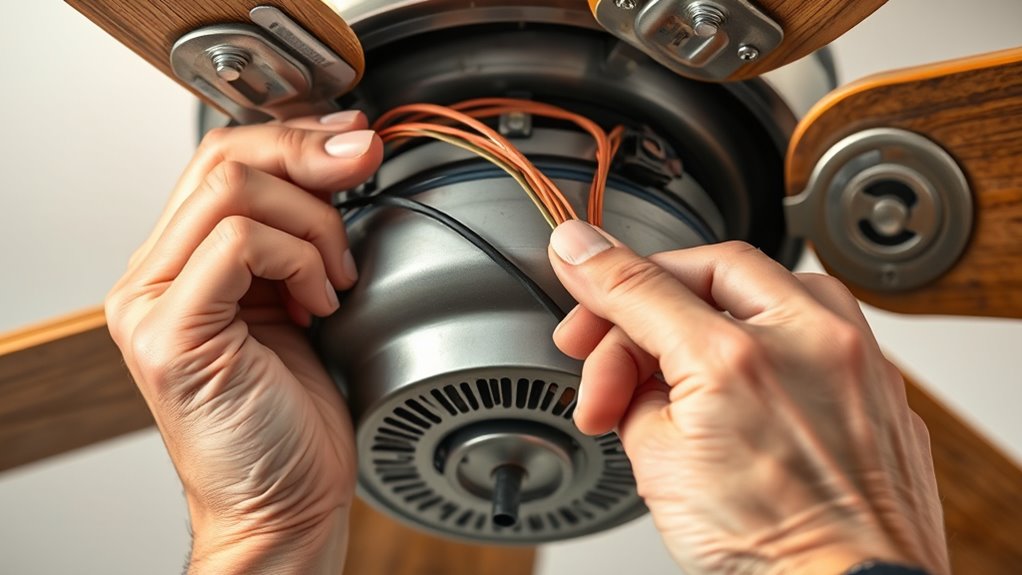
Carefully remove the fan’s canopy and access the wiring compartment. Before disconnecting any wires, take detailed photographs or create a diagram to serve as a reference during reassembly. Start by disconnecting the fan’s wires from the ceiling supply. Inspect the wiring for signs of wear—frayed insulation, corrosion, or discoloration indicate the need for complete replacement. Remove all degraded wiring using insulated tools, ensuring no damage occurs to the wiring terminals or connectors. Use wire strippers to prepare new wires, removing approximately 0.5 inches of insulation to expose clean copper conductors.
Select wiring that complies with local electrical codes, typically 14 or 12-gauge insulated copper wire, depending on your circuit’s amperage. Connect the fan’s wiring to the supply wires according to the manufacturer’s wiring diagram: usually, connect the black or red wire to the hot supply wire, the white wire to neutral, and the green or bare copper wire to the grounding terminal. Secure each connection with a wire nut, ensuring no exposed conductors remain. For added safety, wrap connections with electrical tape, especially if the wire nuts are not fully insulated.
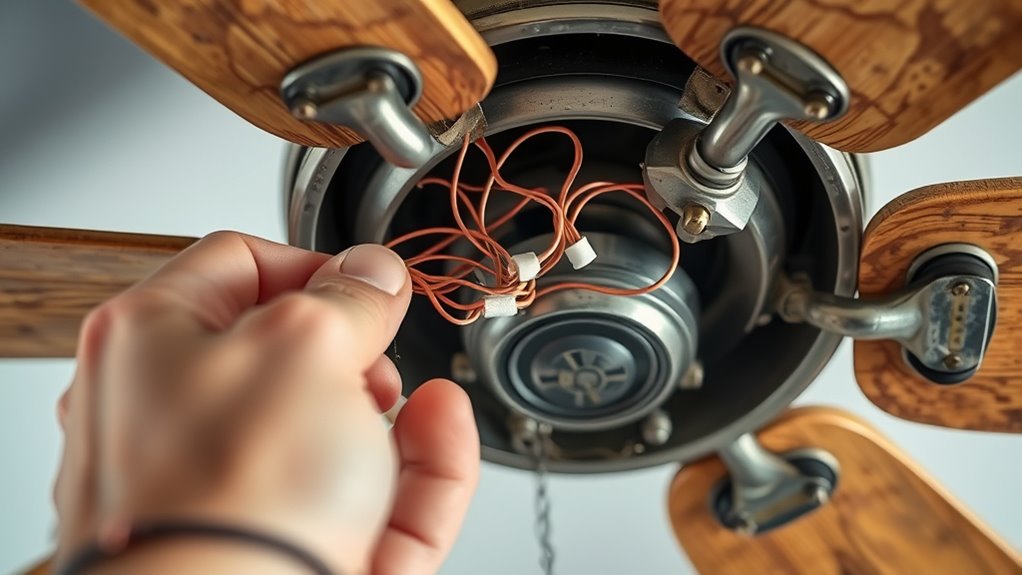
Once all connections are secure, double-check each contact for tightness and proper insulation. Carefully tuck the wiring into the ceiling box, making sure no wires are pinched or strained. Reattach the fan canopy, ensuring all mounting hardware is properly tightened to prevent wobbling or instability. Before restoring power, verify that all wiring is correctly installed and that there are no loose connections or exposed conductors. Turn the circuit breaker back on and test the fan’s operation, checking for smooth startup, proper speed control, and safe functioning.
Regularly inspecting the wiring and connections helps maintain the fan’s safety and performance over time. Rewiring an old ceiling fan with precision and adherence to safety protocols ensures longevity and reduces future maintenance issues. Proper wiring practices, including the use of appropriate wiring materials, are essential for safe operation and compliance with electrical standards. This process, while straightforward for those familiar with electrical work, requires careful attention to detail to prevent hazards. When in doubt, consulting a licensed electrician guarantees compliance with all safety standards and local electrical codes.

Hunter 18-24 inch DC Accessory Extension Wire Kit for Ceiling Fans – 99696
The 18-24 inch wire kit makes adding a downrod simple with our easy-to-follow instructions
As an affiliate, we earn on qualifying purchases.
As an affiliate, we earn on qualifying purchases.
Frequently Asked Questions
Can I Rewire My Ceiling Fan Myself Without Experience?
You can rewire your ceiling fan yourself if you have basic electrical knowledge and proper safety precautions. Turn off power at the circuit breaker before starting, use a voltage tester to verify no current flows, and follow the wiring diagram carefully. If you’re unfamiliar with electrical systems or uncomfortable working with live wires, it’s safer to hire a licensed electrician. Proper wiring ensures safety and fan longevity.
What Tools Are Necessary for Rewiring an Old Ceiling Fan?
You need basic tools like a screwdriver, wire stripper, voltage tester, and pliers. For example, imagine you find frayed wiring in your ceiling fan; using a voltage tester guarantees the power’s off before you begin. A screwdriver helps remove the fan’s canopy, wire strippers prepare new connections, and pliers secure wire nuts. These tools make rewiring safer and more efficient, reducing the risk of electrical hazards.
How Do I Identify Faulty Wiring in My Ceiling Fan?
You identify faulty wiring by first turning off the power and inspecting connections for visible damage like burns, corrosion, or loose wires. Use a multimeter to check continuity and voltage; if readings are inconsistent or show no continuity, the wiring is defective. Look for signs of overheating, melted insulation, or burnt smell. Always test the wiring before re-energizing to guarantee safety and proper operation.
Is Rewiring My Ceiling Fan Cost-Effective Compared to Replacing It?
Rewiring your ceiling fan is often a more budget-friendly choice than replacement, especially if the fan is still functional but shows signs of aging. By investing in proper wiring, you enhance safety and prolong its lifespan without the cost of a new unit. This approach minimizes waste and maximizes your investment, making it a practical and efficient solution that keeps your space safe and comfortable for years to come.
What Safety Precautions Should I Take Before Rewiring?
You should turn off the power supply at the circuit breaker to prevent electrical shock. Use a voltage tester to confirm the power is shut off before handling wires. Wear insulated gloves and safety goggles to protect against accidental sparks or debris. Keep the workspace dry and clear of clutter. Disconnect the fan from the mounting bracket carefully, and follow wiring diagrams precisely to ensure correct connections.
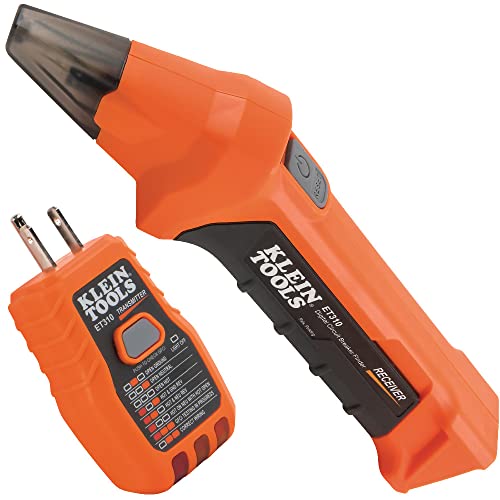
Klein Tools ET310 AC Circuit Breaker Finder, Electric and Voltage Tester with Integrated GFCI Outlet Tester
ACCURATE CIRCUIT BREAKER IDENTIFICATION: Quickly locate the correct breaker with precision using our circuit breaker finder, ensuring efficient…
As an affiliate, we earn on qualifying purchases.
As an affiliate, we earn on qualifying purchases.
Conclusion
By properly rewiring your old ceiling fan, you guarantee safer operation and extended longevity. Vigilantly verify wiring connections, replace worn parts, and follow manufacturer guidelines for maximum efficiency. This meticulous method minimizes malfunctions, maintains performance, and prolongs lifespan. Remember, careful conductivity and consistent checks cultivate a confident, clean, and consistently cool ceiling fan. Prioritize precision, practice patience, and protect your property—powering your fan’s performance for years to come.

WGGE WG-015 Professional 8-inch Wire Stripper/Crimping Tool, Cable Cutter/Crimper, Wiring and Multi-Function Hand Tool, Red With Black
✅ 8 inch Professional Wire Stripper: Cuts, strips wire and loops 10-22 AWG Solid copper wire or aluminum…
As an affiliate, we earn on qualifying purchases.
As an affiliate, we earn on qualifying purchases.

Crweety 100PCS Wire Connectors Nuts Electric Wire Caps Insulating Insert Twist Electrical Wire Connectors Colorful Wire Assortment Nuts for Quick Connection
Package Includes: Total come with 100pcs Colored wire conectors nuts, including 30pcs Grey, 30pcs Blue,20pcs Orange, 10pcs Yellow,…
As an affiliate, we earn on qualifying purchases.
As an affiliate, we earn on qualifying purchases.