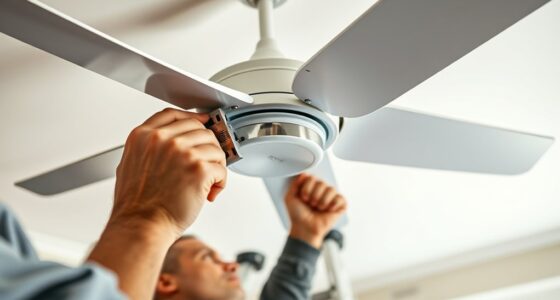
To replace a ceiling fan wall switch and dimmer, start by turning off the power at the main breaker and verifying no voltage is present. Remove the faceplate, then carefully disconnect the existing switch, noting or photographing the wiring configuration. Connect the new switch and dimmer according to the manufacturer’s instructions, ensuring all wires are secure and correctly matched to their terminals. Once reassembled and powered on, test for proper operation; for detailed guidance, continue exploring the necessary steps and safety considerations.
Key Takeaways
- Turn off power at the main breaker and verify no voltage before handling wiring.
- Remove the existing switch or dimmer, noting or photographing wiring connections.
- Connect new switch or dimmer wires according to manufacturer instructions and local electrical codes.
- Secure the device in the electrical box, reattach the faceplate, and restore power for testing.
- Test the fan and switch for proper operation, ensuring smooth functioning and safety.
Replacing a ceiling fan wall switch and dimmer involves careful electrical work that requires proper safety precautions and accurate procedures. Before starting, ensure the power supply to the switch circuit is fully turned off at the main breaker. Use a voltage tester to verify the absence of live voltage at the switch box. This step is critical to prevent electrical shock or other hazards. Gather all necessary tools, including a screwdriver, wire strippers, a voltage tester, and the replacement switch or dimmer. Confirm compatibility of the new device with your wiring and load requirements, particularly if replacing a dimmer with a different type or wattage capacity.
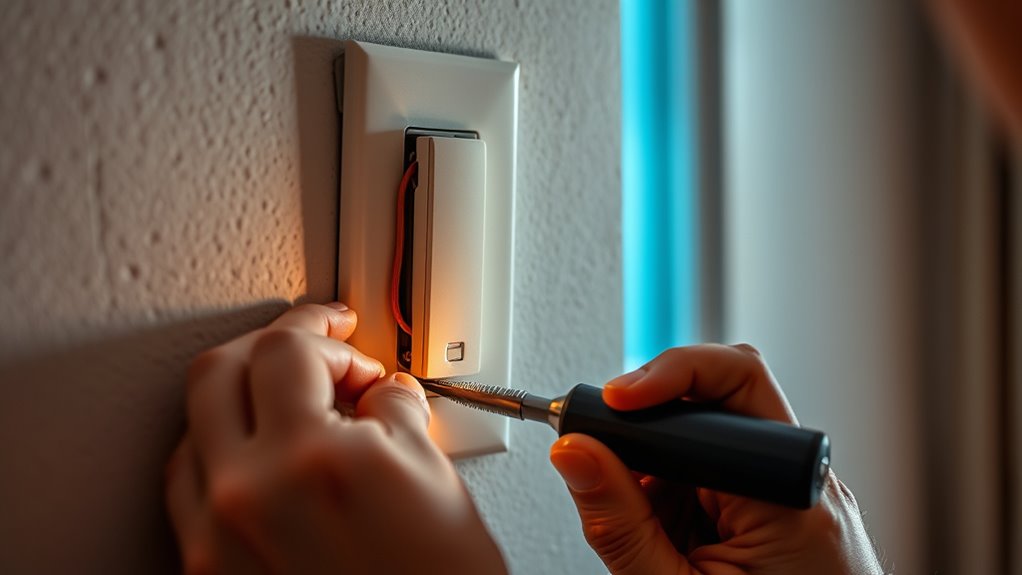
Begin by removing the faceplate of the existing switch or dimmer. Carefully unscrew the mounting screws and gently pull out the device from the electrical box. Take note of the wiring configuration or, for added safety, photograph the existing connections. Loosen the terminal screws holding the wires in place, then detach the wires from the old switch or dimmer. Inspect the wires for any damage or corrosion, and trim or strip the wire ends as needed to ensure clean, secure connections. Proper wiring techniques are essential to ensure the device functions correctly and safely.
Carefully remove and note wiring connections before disconnecting the switch or dimmer.
When installing the new switch or dimmer, connect the wires according to the manufacturer’s wiring diagram and local electrical codes. Typically, the hot wire (usually black or red) connects to the brass terminal, while the neutral wire (white) may or may not be connected depending on the device type. The ground wire (green or bare copper) must be attached to the grounding terminal or wire. Use a wire stripper to prepare each wire end if necessary, and ensure all connections are tight and secure to prevent arcing or loose contact.
Once the wiring is correctly connected, carefully tuck the wires into the electrical box and mount the device securely with the provided screws. Reattach the faceplate, ensuring it sits flush against the wall. Do not overtighten screws to prevent cracking or damage. Restore power at the breaker and test the switch or dimmer for proper operation. Confirm that the fan responds correctly to on/off commands and that dimming functions work smoothly if applicable. If the device does not operate as intended, turn the power off again and double-check all wiring connections for accuracy and tightness.
Throughout the process, adhere strictly to electrical safety standards and local codes. If uncertain about any step or wiring configuration, consult a licensed electrician. Proper installation ensures safe, reliable operation of your ceiling fan and control switch, extending their lifespan and maintaining electrical safety within your home. Additionally, understanding the importance of color accuracy in your electrical components and connections can help prevent issues related to improper wiring or device malfunction.

Hunter 44 inch Outdoor or Indoor Ceiling Fan No Light - Black Ceiling Fan without Light, For Patio, Porch, Garage, or Living Room, Standard Mount, 3 Blades, Pull Chain - Cassius 50260, Matte Black
REVERSIBLE BLADES: Designed with reversible blades, this 44-inch fan lets you customize the look to suit your space...
As an affiliate, we earn on qualifying purchases.
Frequently Asked Questions
Can I Control the Ceiling Fan With a Remote Instead of a Wall Switch?
Yes, you can control your ceiling fan with a remote instead of a wall switch. To do so, you need to install a compatible remote control kit designed for your fan model. These kits typically include a receiver that connects to the fan’s wiring and a remote transmitter. Once installed correctly, the remote provides full control over the fan’s speed and lighting functions, offering convenience and modern functionality.
What Tools Are Necessary for Replacing a Ceiling Fan Wall Switch?
You need a screwdriver (flat-head or Phillips depending on screws), a voltage tester to confirm power is off, wire strippers to prepare cables, and possibly a pair of needle-nose pliers for gripping wires. Always turn off the circuit breaker before starting, verify no voltage with the tester, and carefully disconnect the old switch. Use the tools to connect the new switch securely, ensuring proper grounding and wiring connections for safety and functionality.
How Do I Identify the Correct Replacement Switch or Dimmer?
Think of selecting a replacement switch like choosing the right key for a lock. You need to match the switch’s type, amperage, and wiring configuration. Check the existing switch for labels or model numbers, or remove it to examine the wiring terminals. Confirm compatibility with your fan’s controls (e.g., dimmer or standard switch). Always double-check voltage ratings and make sure the new switch matches the existing wiring setup for safety and functionality.
Is It Safe to Replace a Switch Without Turning off the Circuit Breaker?
No, it’s not safe to replace a switch without turning off the circuit breaker. Always disconnect power to prevent electrical shock or short circuits. Use a voltage tester to verify the circuit is de-energized before handling wiring. Failure to turn off the breaker increases risk of injury and damage to components. Prioritize safety protocols and work only when power is cut off to ensure a safe installation process.
Can I Install a Smart Switch for My Ceiling Fan Instead of a Traditional Switch?
Yes, you can install a smart switch for your ceiling fan instead of a traditional switch. However, make certain you select a switch compatible with fan loads and dimming features if needed. Turn off power at the circuit breaker before installation, follow the manufacturer’s wiring instructions precisely, and verify the switch’s compatibility with your fan’s wiring. Proper installation guarantees safety, functionality, and integration with your smart home system.

72 inch Ceiling Fans with Lights,Large Ceiling Fan with Light and Remote Control, Dimmable, 3CCT, Quiet, Black Modern Ceiling fan For Living Room, Bedroom, Kitchen, Patio, Farmhouse, Indoor/Outdoor
Ceiling Fan with Light: Decorate your home with Amico ceiling fan! While bringing you coolness and comfort, it...
As an affiliate, we earn on qualifying purchases.
Conclusion
Replacing a ceiling fan wall switch and dimmer enhances control and energy efficiency. According to industry data, properly installed switches can reduce energy consumption by up to 15%. Make certain you follow proper safety protocols and turn off power before working. With precise installation, you’ll enjoy reliable operation and improved ambiance. Regular maintenance extends switch lifespan, preventing electrical issues. Ultimately, correct replacement not only boosts functionality but also promotes safety and energy savings in your home.

ZMISHIBO 2 Pack 52 Inch Outdoor Ceiling Fans with Remote, Black Ceiling Fan No light with Quiet Reversible DC Motor, 6 Speeds, 3 Blade Modern Ceiling Fans for Patio Living Room Bedroom Indoor
Indoor and Outdoor Use: The 2 pack black ceiling fans come with 4'' and 8'' downrods, so you...
As an affiliate, we earn on qualifying purchases.

PHORUS 52 Inch Tropical Ceiling Fans with Lights and Remote,Outdoor Palm Leaf Ceiling Fan for Patios Porch Bedroom, Dimmable, 6 Speeds, Reversible, Dark Brown
[Tropical style Ceiling Fan]: 52"outdoor ceiling fan features 5 unique palm leaf blades with exquisite craft, attractive appearance...
As an affiliate, we earn on qualifying purchases.