To diagnose and fix common ceiling fan noises, start by inspecting the blades for wobbling or damage and guarantee they are properly balanced. Check all mounting hardware, screws, and brackets for looseness or wear, tightening or replacing as needed. Lubricate moving parts like bearings and motor shafts, and verify that blades are aligned correctly. If noise persists or you notice wobbling, then considering professional help can prevent further issues. Keep exploring to learn more about quieter, smoother fan operation.
Key Takeaways
- Check for loose or misaligned blades and hardware to eliminate wobbling and rattling noises.
- Lubricate motor parts and blade arms to reduce squeaks and friction sounds.
- Tighten mounting brackets and screws to prevent vibrations and buzzing.
- Inspect and balance blades to correct uneven weight distribution causing noise.
- Seek professional help if noises persist or if there’s significant wobbling or safety concerns.
Top picks for "diagnos common ceil"
Open Amazon search results for this keyword.
As an affiliate, we earn on qualifying purchases.
Identifying Rattling Sounds in Your Ceiling Fan

Rattling sounds in your ceiling fan often indicate loose or misaligned components that need attention. These noises can be distracting and may also affect your fan’s aesthetics, especially if the rattling reveals visible gaps or loose parts. Start by checking the fan blades; if they wobble or aren’t securely attached, tightening the screws can eliminate the noise. Also, inspect the mounting bracket and downrod for looseness. Sometimes, the rattle comes from the fan’s motor or housing, which might need a gentle adjustment. Keep in mind that the fan’s color options and overall design can influence how noticeable these issues are, especially if parts are mismatched or damaged. Regularly inspecting and tightening components helps maintain both the fan’s appearance and quiet operation. Additionally, understanding Glycolic Acid Benefits can be helpful if you’re considering aesthetic repairs or upgrades to your fan’s surroundings. Moreover, staying aware of automation technologies can assist in maintaining your home appliances more efficiently.
Troubleshooting Squeaky Noises During Fan Operation

Squeaky noises often come from parts that need lubrication or are loose. Start by applying lubricant to the fan’s moving components, like the blade arms and motor shaft. Also, check and tighten any loose screws or bolts to keep everything running smoothly.
Lubricate Moving Parts
When your ceiling fan starts to make squeaking sounds during operation, one of the simplest solutions is to lubricate its moving parts. First, check if the blades are properly balanced, as unbalanced blades can cause uneven wear and noise. If the blades are balanced, focus on lubricating the motor and the fan’s moving components. Use a lightweight oil or a silicone-based lubricant specifically designed for fans. Apply the lubricant to the motor’s shaft and other moving parts, avoiding the blades themselves. Proper lubrication reduces friction and minimizes squeaks. Regular maintenance, including lubricating the motor and ensuring blades are balanced, helps keep your fan running quietly and smoothly. Additionally, understanding the role of lubrication in reducing noise can help you maintain optimal performance over time. Being aware of fan maintenance practices can prolong the lifespan of your fixture and prevent future issues.
Tighten Loose Components
If your ceiling fan continues to make noise despite lubrication and balanced blades, loose components might be the cause. Over time, screws and mounting hardware can loosen, causing squeaks during operation. Check the fan blade alignment and ensure all ceiling fan accessories are tightly secured. Loose blades can wobble, creating noise, so tighten blade screws carefully. Examine the mounting bracket and downrod for any looseness, tightening as needed. Also, inspect the motor housing and canopy for loose screws or nuts. Remember, a secure connection reduces vibrations and squeaks. Properly secured components prevent further damage and keep your fan running quietly. Regular maintenance checks can help identify loose parts before they lead to more serious issues. Additionally, performing periodic inspections of self waterer planters can prevent moisture-related problems that might cause equipment noise or malfunction. Staying vigilant about vibrational energy in your maintenance routines can also help detect early signs of wear or looseness.
Why Your Ceiling Fan Might Be Buzzing and How to Fix It

A buzzing ceiling fan can be both annoying and disruptive, signaling that something isn’t quite right. Often, the issue stems from loose mounting hardware or misaligned fan blades. Check that the mounting bracket and screws are tight; loose hardware can cause vibrations that lead to buzzing sounds. Next, inspect the fan blades for proper alignment. If the blades are uneven or bent, they’ll create imbalance, resulting in noise. Use a level to ensure the blades are straight and adjust them if needed. Tightening the blade screws and making sure they’re evenly spaced can considerably reduce buzzing. Properly secured mounting hardware and correctly aligned blades are key to quiet, smooth fan operation. Additionally, regular maintenance and inspection can help prevent future noise issues and prolong the lifespan of your ceiling fan. Being aware of common causes of fan noise can also help you diagnose and address issues promptly. Regularly checking for loose mounting hardware and ensuring all components are secure can prevent many common problems before they worsen.
Checking for Loose or Worn Fan Blades

Loose or worn fan blades can cause imbalance and noise, undermining your ceiling fan’s performance. To check, look for uneven blade movement or wobbling when the fan is on. Inspect each blade for signs of wear or damage, such as cracks or chips. Make sure the blades are properly aligned and securely attached to the motor hub. You might notice:
- Wobbly or uneven blade angles
- Loose screws or brackets holding the blades
- Visible warping or bends in the blades
- Dust buildup causing imbalance
Regular maintenance, including fan blade inspection, helps prevent issues before they worsen. Focusing on fan blade balance and blade alignment helps identify issues early. If blades are loose or misaligned, tighten or replace the hardware to restore stability. Properly aligned blades and balanced weight distribution reduce noise and improve fan efficiency. Additionally, cleaning dust from the blades can help maintain fan performance and reduce noise. Regularly checking for fan blade wear can prevent more serious issues and prolong the lifespan of your ceiling fan.
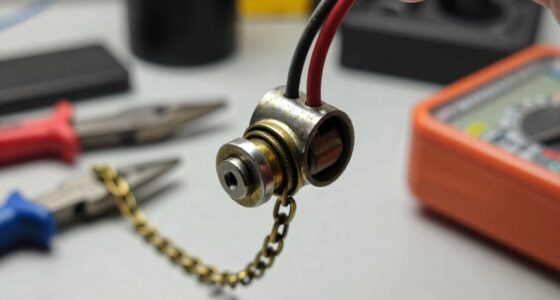
How to Tighten or Replace Fan Mounting Hardware

Start by inspecting your fan’s mounting brackets to make certain they’re secure and undamaged. Next, tighten any loose mounting screws to stabilize the fixture. If parts are worn or broken, replace the hardware to prevent noise and improve safety. Ensuring the mounting hardware is properly installed can also help reduce vibrations and noise during operation. Additionally, reviewing security features in your home can contribute to overall safety and peace of mind. Proper installation and maintenance of these components are essential for preventing common issues associated with angel number influences on home safety.
Inspect Mounting Brackets
When you notice rattling or wobbling, inspecting the mounting brackets is a crucial step in fixing ceiling-fan noises. Loose or damaged brackets can compromise fan stability, causing vibrations and noise. To check, look for signs of wear or looseness around the brackets holding the fan onto the ceiling. You might see wobbling, gaps, or hear rattling. Additionally, ensuring the brackets are free of rust, cracks, or corrosion can prevent further damage and noise issues. Feel for any movement when gently pushing the fan. Check for rust, cracks, or corrosion on the brackets. Ensure the brackets are securely attached to the ceiling. Look for bent or broken mounting hardware. Regular inspection and maintenance can help prevent ceiling fan noise and extend the life of your fan. Remember, strong and secure creative practice can also be applied to maintaining your fan’s hardware, making the process more effective and less stressful.
Tighten Mounting Screws
To guarantee your ceiling fan operates quietly and safely, you should regularly check and tighten the mounting screws. Loose screws can cause wobbling, noise, and diminish your fan’s aesthetics. Tightening them ensures stability and smooth operation, enhancing energy efficiency tips by reducing unnecessary movement. Visualize the mounting hardware as a grid:
| Fan Blade | Mounting Bracket | Ceiling Attachment |
|---|---|---|
| Wobbles when touched | Loose screws | Shaky ceiling attachment |
| Squeaks during operation | Unsecured screws | Noisy vibration |
| Misaligned blades | Rusted screws | Aesthetics compromised |
Regularly tightening these screws keeps your fan steady, quiet, and visually appealing, preventing potential damage and noise issues. Ensuring the mounting hardware is properly secured can also prolong the lifespan of your fan and avoid costly repairs. Additionally, checking for signs of rust or corrosion can help identify screws that need replacement before they cause further issues. Being attentive to vibration patterns during operation can also help detect looseness early and maintain optimal performance.
Replace Worn Hardware
Worn or damaged mounting hardware can compromise your ceiling fan’s stability and increase noise levels. Replacing worn hardware not only improves the fan’s operation but also enhances its ceiling fan aesthetics, making it look newer and more polished. To do this, you’ll need to identify loose or corroded components like brackets, bolts, or screws. Imagine a wobbling fan, rattling blades, or squeaking sounds that disrupt your comfort. Maintaining good hardware can support energy efficiency tips, like reducing wobble to minimize motor strain and improve overall performance. Proper hardware maintenance also supports efficient general ledger coding, ensuring your project costs are accurately tracked and reported.
Addressing Imbalanced Fan Blades for Quieter Operation

Imbalanced fan blades are a common cause of annoying noises and vibrations in ceiling fans. When blades are out of balance, the fan wobbles, causing noise and reducing overall comfort. To improve performance, focus on fan blade balance, which is essential for vibration reduction. Start by turning off the fan and checking for visible damage or dirt on the blades. Use a balancing kit or a simple method like placing a coin on each blade to identify uneven blades. Adjust or replace blades as needed, ensuring they’re evenly weighted. Properly balancing your fan blades minimizes vibrations, leading to quieter operation and less wear on motor components. Maintaining balanced blades not only quiets your fan but also extends its lifespan.
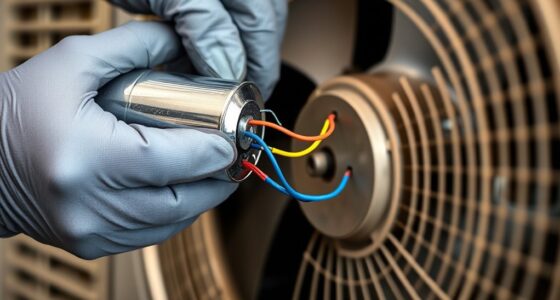
Inspecting and Replacing Worn Bearings or Motor Components

If your ceiling fan makes grinding or squealing noises, worn bearings might be the culprit. You should carefully inspect the bearings for signs of wear or damage. If needed, replacing the motor components can restore quiet, smooth operation.
Identifying Worn Bearings
When your ceiling fan starts making squeaking or grinding noises, inspecting the bearings is a crucial step. Worn bearings can cause noise and wobbling, especially if your fan has decorative fan features that add weight and strain. To identify worn bearings, listen for consistent squeaks or grinding sounds that increase with fan speed. Feel for looseness or resistance when spinning the blades by hand. Look for visible signs such as rust, dirt buildup, or uneven wear around the motor shaft. Also, check if the blades wobble more than usual. These issues often stem from bearings that have lost lubrication or become damaged over time. Properly diagnosing worn bearings ensures your ceiling fan remains smooth, quiet, and functional, avoiding further damage to the ceiling fan installation.
Replacing Motor Components
Once you’ve identified worn bearings or damaged motor components, it’s time to replace them to restore your ceiling fan’s performance. Start by turning off the power and removing the fan canopy. Carefully inspect the motor and bearings for wear or damage. If the motor’s electrical parts are faulty, replacing the entire motor might be necessary. After replacing the motor components, check the fan blade balancing; unbalanced blades can cause noise and wobbling. Also, ensure that remote control interference isn’t affecting motor operation, which can sometimes mimic motor issues. Properly aligned and balanced blades reduce vibration, while eliminating remote signal problems ensures smooth operation. Taking these steps will help your fan run quietly and efficiently, extending its lifespan and restoring comfort to your space.
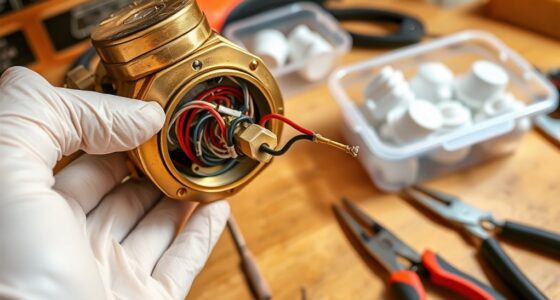
Resolving Electrical Issues Causing Unusual Noises

Electrical issues are a common cause of unusual ceiling fan noises, and addressing them promptly can restore smooth operation. Faulty wiring or loose connections can cause humming or buzzing sounds, disrupting your comfort. If you notice flickering lights or inconsistent fan speeds, electrical problems might be at play, affecting both performance and aesthetic concerns. To troubleshoot, you might:
- Check wiring connections at the fan and switch for looseness
- Inspect for frayed or damaged wires
- Ensure the pull chain and control switches are functioning properly
- Confirm that the electrical box is secure and properly grounded
Addressing these issues not only quiets the noise but also prevents safety hazards. Proper electrical maintenance helps keep your ceiling fan running quietly and ensures it looks good without distracting flickers or irregular movements.
Maintaining Your Ceiling Fan for Ongoing Quiet Performance

Regular maintenance is essential to keep your ceiling fan running quietly and efficiently over time. Start by inspecting and cleaning decorative fan covers regularly to remove dust and debris that can cause imbalance and noise. Tighten any loose screws on blades and mounting brackets to prevent wobbling. If your fan has a remote control, troubleshoot it by replacing batteries and checking for signal obstructions to ensure smooth operation. Keep the fan blades balanced by adjusting or adding weights if needed. Lubricate moving parts as recommended by the manufacturer to reduce friction and noise. Regularly checking these components helps prevent common noise issues and extends your fan’s lifespan, keeping it quiet and reliable for years to come.
When to Call a Professional for Ceiling Fan Repairs

Knowing when to call a professional is essential to avoid risking further damage or injury. If your ceiling fan continues to make loud noises despite basic troubleshooting, it’s time to seek expert help. You should call a professional if you notice unusual wobbling, persistent rattling, or if the fan won’t turn on at all. They can safely handle ceiling fan installation or repairs, ensuring everything is secure and balanced. Additionally, if you’re looking to improve energy efficiency tips, a pro can recommend upgrades or adjustments that save you money and reduce noise. Attempting complex repairs without proper tools or expertise could lead to more damage or safety hazards. When in doubt, trust a licensed technician to diagnose and fix your ceiling fan properly.
Frequently Asked Questions
How Do I Identify the Source of a Persistent Ceiling Fan Noise?
To identify the source of a persistent ceiling fan noise, start by turning off the fan and inspecting it closely. Check for blade imbalance, which causes wobbling and noise, and verify all blades are securely attached. Also, look for loose mounting or screws, as these can vibrate and create noise during operation. Tighten any loose parts, and balance the blades if needed to eliminate the noise and keep your fan running smoothly.
Can Ceiling Fan Noises Indicate Electrical Issues?
Imagine your ceiling fan as a heartbeat; strange noises can be its warning signs. Yes, ceiling fan noises can indicate electrical symptoms, especially if they’re accompanied by flickering lights or a burning smell. You should conduct fan component checks and look for loose wiring or buzzing sounds. Ignoring these signs risks electrical issues that could cause a fire or damage your fan, so always stay cautious and troubleshoot promptly.
Are There Safety Precautions Before Attempting Fan Repairs?
Before attempting fan repairs, you should always prioritize safety. You need to wear safety gear like gloves and goggles to protect yourself from potential injuries. Make sure to shut off the power at the circuit breaker to prevent electrical shocks. Never work on the fan while it’s still connected to power. Taking these precautions helps guarantee your safety during the repair process.
How Often Should I Perform Maintenance on My Ceiling Fan?
Think of your ceiling fan as a finely-tuned instrument; neglect can lead to imbalance and noise. You should perform maintenance every six months to check fan blade balance and address remote control issues. Regular cleaning, tightening screws, and inspecting wiring help prevent squeaks and wobbling. Staying proactive keeps your fan running smoothly and quietly, extending its lifespan and ensuring comfort in your space.
What Signs Indicate I Need to Replace My Ceiling Fan Entirely?
If your ceiling fan shows signs like persistent wobbling due to unbalanced fan blades or ongoing remote control issues, it might be time to replace it. When repairs no longer fix the problems or the fan’s performance declines considerably, replacing the entire unit saves you time and hassle. Don’t ignore these warning signs—upgrading ensures safety, efficiency, and better comfort in your space.
Conclusion
Regularly maintaining your ceiling fan can reduce noise issues by up to 80%. If you notice persistent rattling or squeaking, don’t ignore it—small problems can lead to bigger, costly repairs later. By following these troubleshooting tips, you’ll keep your fan running quietly and efficiently for years to come. Remember, if you’re unsure or the noise persists, it’s best to call a professional. Staying proactive saves you time, money, and the peace of a peaceful, quiet home.