
To remove nicotine stains from fan housings, start by evaluating how deeply the stains have penetrated and gather gentle cleaning supplies like mild soap, vinegar, or baking soda. Turn off and unplug the fan, then dust off loose debris using a soft cloth or brush. Lightly scrub the surface with a damp cloth and cleaning solution, rinse well, and dry thoroughly. Keep your fan clean and fresh—continue exploring for detailed tips to ensure long-lasting results.
Key Takeaways
- Identify stain severity and surface material to select appropriate cleaning agents and prevent damage.
- Remove loose dust and debris from the fan housing before applying cleaning solutions.
- Use mild, non-abrasive cleaners like vinegar or dish soap mixed with warm water to treat nicotine stains.
- Gently scrub affected areas with soft cloths or brushes, then rinse thoroughly to remove residues.
- Dry the surface completely and perform regular maintenance to prevent future nicotine buildup.
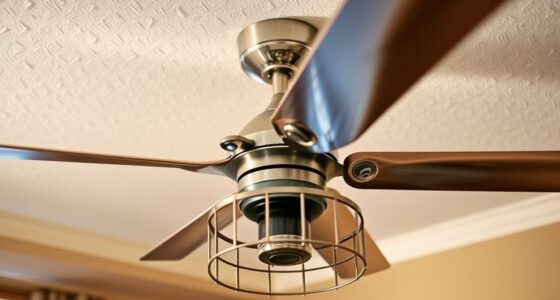
fan housing nicotine stain remover
As an affiliate, we earn on qualifying purchases.
As an affiliate, we earn on qualifying purchases.
Assessing the Extent of Nicotine Damage

Before attempting to clean nicotine stains from fan housings, you need to assess how severe the damage is. Start by inspecting the surface for visible nicotine residue, which appears as a yellowish or brownish film. Check if the stains are light or heavy; light stains may only coat the surface, while heavy stains can seep into crevices and cause discoloration. Consider the stain severity—more intense stains often require stronger cleaning methods. Take note of any lingering odors, as strong smells indicate substantial nicotine buildup. This assessment helps determine the cleaning approach, so you don’t waste effort on minor spots or underestimate the work needed for heavily stained surfaces. Proper evaluation ensures effective cleaning and prevents damage to your fan housing. Additionally, understanding the effects of nicotine on surfaces can guide you in choosing the appropriate cleaning solutions. Recognizing how nicotine impacts surface materials can help prevent deterioration during the cleaning process. Being aware of home improvement techniques can also assist in restoring the appearance more efficiently.

Natural Enzyme Formula to Household Appliances, 2026 New Fly Cleanse Spray, Multi-Purpose Cleaner Kitchen Appliance Cleaner, Effective Stain Remover Spray for Hold, Oven, Stove, Range Hood (300ML)
Tips: Our products are from China and are available in Chinese, but may contain some English subtitles. If…
As an affiliate, we earn on qualifying purchases.
As an affiliate, we earn on qualifying purchases.
Preparing the Necessary Cleaning Supplies
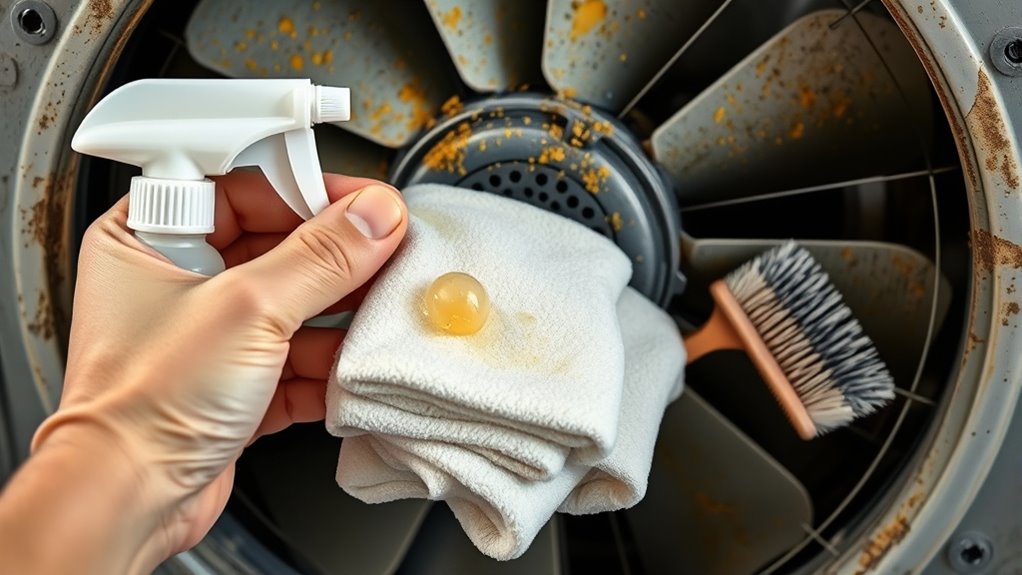
Start by gathering the cleaning agents you’ll need, like mild detergents or specialized stain removers. Then, assemble the tools, such as brushes and cloths, to make the cleaning process smoother. Finally, prepare your workspace area to guarantee safety and efficiency during cleanup.
Gather Cleaning Agents
Gathering the right cleaning agents is essential to effectively remove nicotine stains from fan housings. Using appropriate cleaners can improve air quality by eliminating residual nicotine and preventing unpleasant odors. Choose a gentle degreaser or a mixture of mild dish soap and warm water to target stubborn stains without damaging the fan’s components. Consider adding white vinegar or baking soda for extra stain-fighting power, as these natural agents help neutralize odors and improve air circulation. Make sure to have soft cloths or sponges on hand to avoid scratching surfaces. Proper cleaning agents ensure thorough removal of nicotine buildup, promoting healthier indoor air and better airflow. Additionally, understanding filter replacement indicators laws can help you navigate the process more effectively if your home includes complex or shared assets. Selecting products that are safe for electronic surfaces is crucial to prevent corrosion or damage during cleaning.
Assemble Necessary Tools
To effectively remove nicotine stains from fan housings, you need to assemble the right tools and cleaning supplies. Start with soft microfiber cloths or sponges to avoid scratching surfaces, and gather mild cleaning agents like dish soap or vinegar for effective stain removal. You might also need a small brush for hard-to-reach areas. Remember, during air filter maintenance, ensure the fan is unplugged to prevent electrical hazards. Follow electrical safety tips by turning off power and inspecting cords for damage before cleaning. Use gloves to protect your skin from harsh cleaners and avoid spraying liquids directly into electrical components. Additionally, choosing appropriate cleaning agents can prevent damage to surfaces and prolong the lifespan of your appliance. Ensuring proper ventilation during cleaning can also help disperse any lingering fumes from cleaning products, safeguarding your health.
Prepare Workspace Area
Before you begin cleaning, it’s essential to prepare your workspace with all the necessary supplies within easy reach. Having your cleaning solutions, brushes, cloths, and protective gear ready guarantees efficient fan maintenance and improves air quality. Use a dedicated area to prevent spreading nicotine residues and avoid contamination. Here’s a quick guide to organizing your supplies:
| Cleaning Solution | Tools | Safety Equipment |
|---|---|---|
| Mild detergent | Soft brushes | Gloves |
| Vinegar | Microfiber cloths | Mask or respirator |
| Baking soda | Scrapers | Eye protection |
| Disinfectant | Spray bottles | Ventilation fan on |
| Water | Extension tools | Apron |
Preparing your workspace helps you work safely and effectively, ensuring a thorough clean while maintaining good air quality. Additionally, understanding the role of contrast ratio in image quality can help you assess the effectiveness of your cleaning process, especially if you’re aiming for a clearer, more vibrant display after maintenance. Proper preparation aligns with the transparency in sourcing and manufacturing processes to ensure safe and effective cleaning practices. To further ensure safety, always wear personal protective equipment during the cleaning process.
Zero Odor Pro – Commercial Strength Eliminator Odor Neutralizer, Room Deodorizer Odor Eliminator Musty Smell – Strongest Odor Eliminator Trigger Spray, (32-ounce)
Safe and Gentle Formula: Made in the USA, non-toxic, non-allergenic, and biodegradable, making it suitable for use around…
As an affiliate, we earn on qualifying purchases.
As an affiliate, we earn on qualifying purchases.
Removing Loose Dust and Debris Before Cleaning
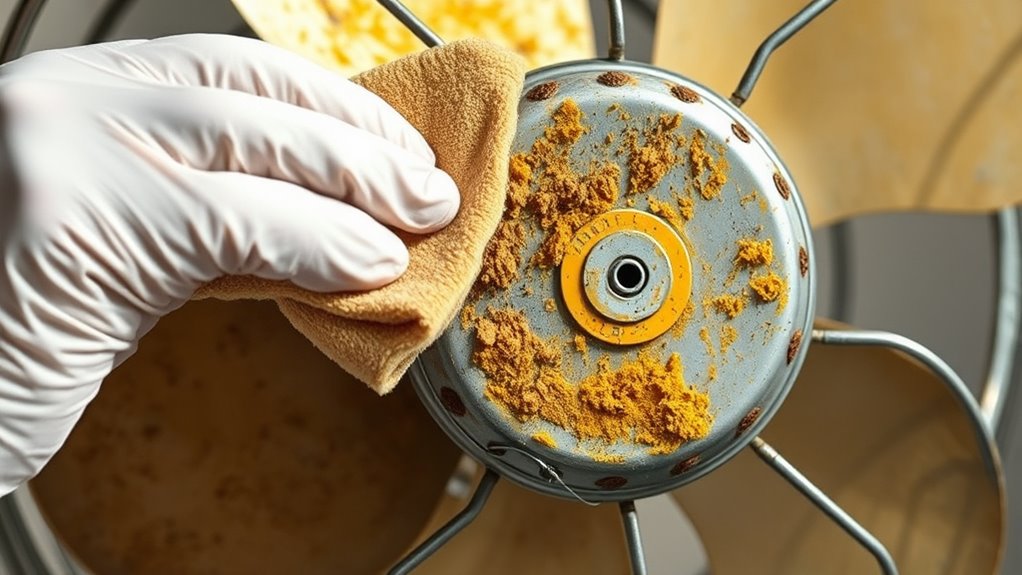
Since dust and debris can interfere with the cleaning process and leave streaks or residue, it’s important to remove them thoroughly first. Use a soft cloth or a vacuum with a brush attachment to gently clear away loose dust from the fan housing and blades. This step ensures airflow optimization, allowing your fan to operate efficiently after cleaning. Removing debris also supports proper fan maintenance, preventing buildup that could cause noise or strain. Pay special attention to corners and vents, where dust tends to accumulate. By eliminating loose dirt upfront, you make the subsequent cleaning more effective, reducing the risk of spreading nicotine stains or dirt during the process. Proper fan maintenance helps extend the lifespan of your appliance and keeps it functioning smoothly. Regular cleaning of airflow pathways also prevents dust buildup that could impair performance. Clear surfaces help you achieve a more thorough and even clean for your fan housing.

Endust for Electronics; Anti-Static Screen & Electronics Multi-Surface Cleaning Spray; Foaming, Streak & Residue Free; Ammonia & Alcohol Free, Oil & Wax Free; 10 oz. Aerosol (096010)
SCREEN & ELECTRONICS CLEANER: Endust for Electronics Aerosol Spray removes smudges, debris, and fingerprints from your screen -…
As an affiliate, we earn on qualifying purchases.
As an affiliate, we earn on qualifying purchases.
Choosing the Right Cleaning Solution for Nicotine Stains

Choosing the right cleaning solution is essential for effectively removing nicotine stains without damaging your fan housing. Start by choosing effective cleaners suited for the surface material. For light stains, a mixture of warm water and mild dish soap often works well. For more stubborn stains, consider using a gentle degreaser or a vinegar-based solution. Always evaluate stain severity before selecting a cleaner, as stronger solutions can harm delicate surfaces. Test any cleaner on a small, hidden area first to prevent damage. Avoid harsh chemicals like bleach unless necessary, and never use abrasive scrubbers that could scratch the surface. Proper cleaning techniques can also help ensure thorough stain removal while protecting the integrity of your fan housing. Additionally, understanding the aesthetic style of your space can help guide you toward cleaning methods and products that maintain its visual appeal. Recognizing the material composition of your fan housing is crucial to choosing the most appropriate cleaning method and avoiding potential damage.
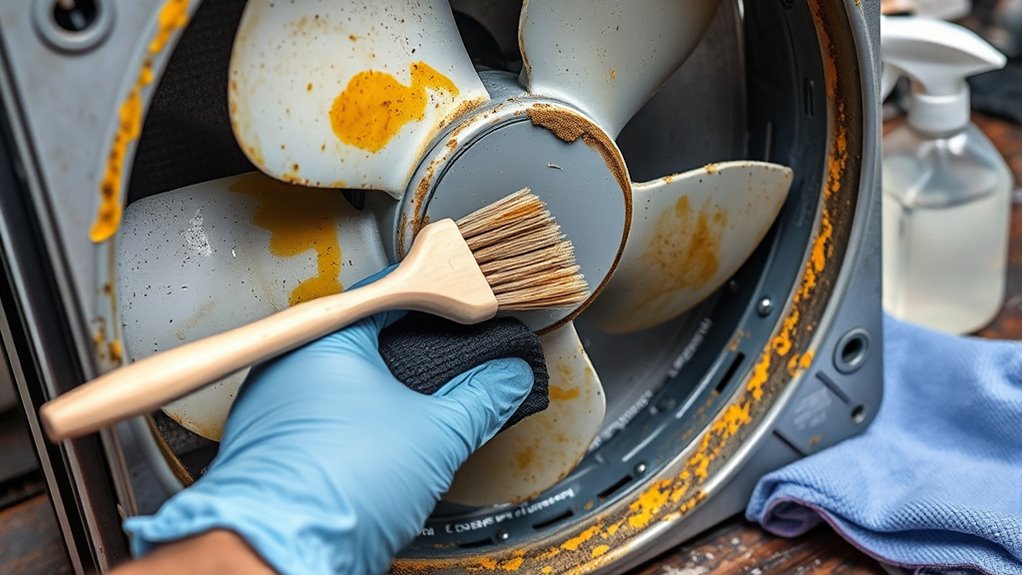
Step-by-Step Guide to Scrubbing and Cleaning Fan Housings
To clean your fan housing effectively, start by gathering all the supplies you’ll need. Next, prepare your cleaning solution according to the instructions. A solution with HEPA filtration can help trap airborne particles and allergens during the cleaning process, ensuring a thorough job. Finally, carefully scrub the surfaces and rinse thoroughly to remove any remaining stains. It is also helpful to maintain proper airflow around the fan during cleaning to prevent dust buildup and ensure optimal performance.
Gather Necessary Supplies
Before you start scrubbing and cleaning your fan housing, gather all the necessary supplies to make the process smooth and efficient. Proper tools ensure effective stain removal and help maintain good air quality by preventing buildup. Here’s what you’ll need:
| Supplies | Purpose |
|---|---|
| Soft microfiber cloth | Gently wipe surfaces without scratching |
| Mild dish soap | Break down nicotine and grime |
| Spray bottle | Apply cleaning solution evenly |
| Soft-bristled brush | Reach into vents and corners for thorough cleaning |
Having these supplies ready streamlines fan maintenance and ensures you remove nicotine stains effectively while preserving air quality. Using appropriate cleaning techniques can further enhance the effectiveness of your cleaning process, especially considering the sustainability efforts highlighted in modern sneaker culture. Regular cleaning can also prevent the buildup of residues that contribute to staining and odors, making your fan housings look and smell fresh.
Prepare Cleaning Solution
Start by mixing a gentle cleaning solution in your spray bottle, combining a few drops of mild dish soap with warm water. This solution helps remove nicotine stains effectively without damaging the fan housing’s surface. A clean fan housing improves air quality by reducing airborne nicotine particles and other pollutants. Ensuring the fan is free of grime enhances ventilation efficiency, allowing better airflow and reducing indoor odors. Avoid harsh chemicals, as they can leave residues that worsen air quality. Stir the mixture well to evenly distribute the soap. Before applying, test the solution on a small, inconspicuous area to prevent damage. Once ready, your prepared solution will be the foundation for thorough scrubbing, ensuring a cleaner, healthier environment with improved ventilation.
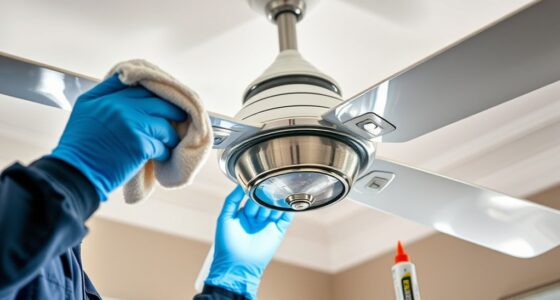
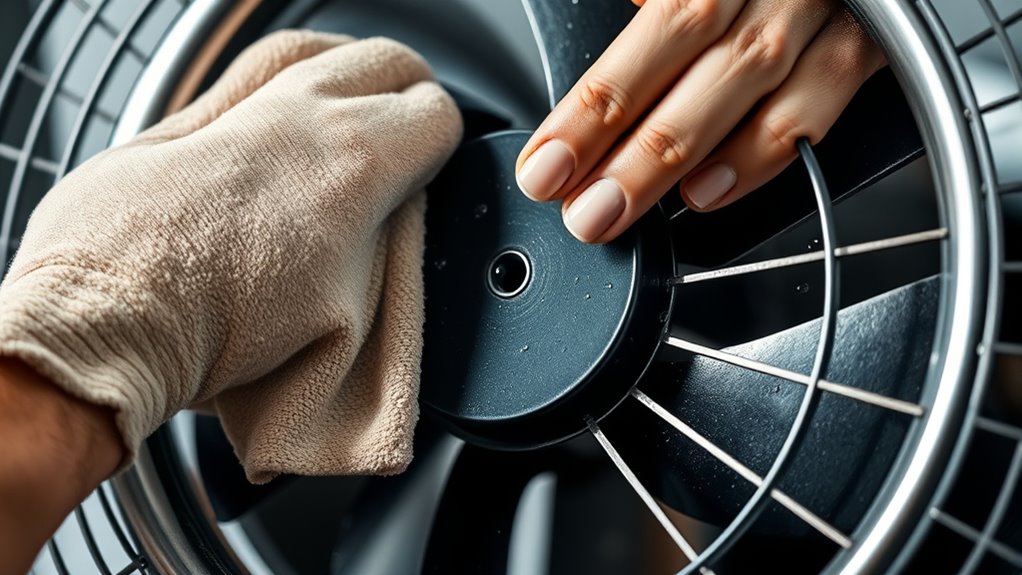
Scrub and Rinse Carefully
Once your cleaning solution is prepared, gently scrub the fan housing using a soft-bristled brush or a clean cloth dipped in the solution. Focus on areas with nicotine stains, ensuring you remove buildup that affects air quality. Be thorough but gentle to avoid damaging the surface or pushing dirt further in. After scrubbing, rinse the housing with clean water or a damp cloth to remove residue and loosened stains. Proper rinsing is essential for effective odor control, preventing lingering smells. Take your time to ensure all cleaning solution and debris are removed. This step helps improve air quality by eliminating nicotine residues and odors, making your fan housing cleaner and healthier. A careful scrub and rinse make a noticeable difference in odor control and overall cleanliness.
Rinsing and Drying the Fan Housings Properly

After removing the nicotine stains, it’s important to rinse the fan housings thoroughly to wash away any remaining residue. Use clean water to ensure all cleaning agents and loosened stains are rinsed out, which helps maintain proper fan housing ventilation. Proper rinsing prevents buildup that could affect stain removal techniques and fan performance. Once rinsed, dry the fan housings completely to prevent moisture buildup, which can lead to mold or corrosion.
Rinse fan housings thoroughly and dry completely to prevent mold and corrosion.
Consider these steps:
- Use a soft cloth or microfiber towel to pat dry the surfaces.
- Allow the fan housings to air dry in a well-ventilated area.
- Avoid using heat sources that could warp plastic parts.
- Inspect for any remaining stains or moisture before reassembling.
Preventative Measures to Maintain a Nicotine-Free Fan Surface

Maintaining a nicotine-free fan surface requires consistent preventative measures to minimize buildup and keep it clean. Regularly changing or cleaning air filters improves air quality and reduces airborne nicotine particles that settle on the fan. Guarantee your ventilation system is functioning efficiently, promoting proper airflow and preventing stagnation that encourages nicotine residue accumulation. Keep the fan housing and surrounding areas dust-free by wiping them down with a damp cloth weekly. Install exhaust fans or air purifiers to help filter out airborne contaminants. Proper ventilation not only enhances air quality but also decreases the likelihood of nicotine stains forming. By staying proactive with these measures, you help preserve a cleaner fan surface and maintain healthier indoor air conditions.
Frequently Asked Questions
Can Nicotine Stains Damage the Fan Housing Material Over Time?
Nicotine stains can indeed cause damage over time. As the stains accumulate, they seep into the fan housing material, leading to material degradation. This process weakens the surface and can cause surface corrosion, which may compromise the fan’s durability and performance. If you ignore these stains, you risk long-term damage that’s harder and more costly to repair. Regular cleaning helps prevent this deterioration and extends your fan’s lifespan.
Are There Eco-Friendly Cleaning Solutions for Nicotine Removal?
Imagine giving your fan a gentle refresh with natural alternatives that are environmentally safe. Yes, eco-friendly cleaning solutions for nicotine removal exist, helping you keep your space clean without harsh chemicals. These environmentally safe options often include vinegar, baking soda, or plant-based cleaners that effectively lift stains while respecting your home and the planet. Embrace these natural solutions for a healthier, greener way to maintain your fan housings.
How Often Should I Clean Nicotine Stains From Fan Housings?
You should clean nicotine stains from fan housings regularly to guarantee proper fan maintenance. Typically, cleaning frequency depends on your environment, but aim for every 3 to 6 months if you smoke indoors frequently. Regular cleaning prevents buildup, improves airflow, and extends your fan’s lifespan. Keep an eye on the housing’s appearance, and don’t wait too long—consistent maintenance helps keep your fan working efficiently and looking clean.
Will Cleaning Remove Odors Associated With Nicotine Buildup?
Cleaning your fan housings can definitely help with air quality by removing nicotine stains, but it may not fully eradicate odors associated with nicotine buildup. To improve odor elimination, use a mixture of vinegar and baking soda or commercial odor neutralizers during cleaning. Regular maintenance ensures better air quality, reducing lingering smells and preventing future buildup, so your space stays fresh and healthier.
Can Professional Cleaning Services Effectively Remove Stubborn Nicotine Stains?
You might wonder if professional cleaning can tackle stubborn nicotine stains. The answer is yes; experts use specialized products and techniques to effectively break down and remove tough stains, improving your air quality. Regular cleaning not only removes existing stains but also helps with stain prevention, ensuring your fan housings stay cleaner longer. Trust professionals to restore freshness and reduce odors, creating a healthier environment in your space.
Conclusion
Now that you know how to effectively remove nicotine stains from your fan housings, you’ll keep your space cleaner and healthier. With proper cleaning and regular maintenance, you can prevent stubborn buildup and enjoy fresher air. Aren’t your indoor environments worth the effort? By following these simple steps, you’ll restore your fan’s appearance and ensure it runs smoothly—making your home a more inviting place to breathe easy.