To run wires through crown molding neatly, start by planning your wiring route and choosing the right tools like fine-tooth saws or wire pullers. Mark discreet access points at strategic spots, then carefully cut small openings for the cables. Secure the wiring with clips and conceal them using paint or stain to blend with the molding. For a polished finish, learn tips on creating seamless access and fixing common obstacles—your project will look professional with these best practices.
Key Takeaways
- Plan the wiring route carefully, choosing crown molding styles with suitable profiles for discreet wire passage.
- Mark and cut small access points at strategic locations using a drill and fine bits for seamless wire concealment.
- Use appropriate cable connectors and tools like fish tapes to navigate around obstacles within the molding.
- Secure and conceal wires along the molding with clips or adhesive mounts for a neat, professional appearance.
- Finish by sealing gaps, painting or staining to blend the molding and ensure a polished, tidy installation.

10-Pack 39.37"(Total 32.8 Ft) Ceiling Crown Molding with LED Duct Kit White Decorative Crown Moulding Trim for Seamless Ambient Accent Lighting, Easy LED Trim Moulding Strip Installation
Complete Pre-Cut Crown Molding Kit: This complete kit includes 10 pieces of pre-cut crown molding with LED light…
As an affiliate, we earn on qualifying purchases.
As an affiliate, we earn on qualifying purchases.
Planning Your Wiring Path

Before you begin running wires through crown molding, it is vital to plan your wiring path carefully. First, determine the best route from your power source to the desired outlets or fixtures. Consider the wire gauge you’ll need; thicker wires carry more current and are essential for high-power devices, while thinner wires work for low-voltage applications. Map out the route to minimize bends and avoid existing electrical wiring or plumbing. When connecting wires, use appropriate cable connectors to guarantee secure and safe connections. Proper planning helps prevent future issues, reduces the need for rerouting, and assures a clean, professional look. Additionally, understanding color accuracy options can inspire modifications that complement your wiring upgrades. Taking the time to plan your wiring path now simplifies installation and guarantees a safer, more reliable setup, especially when considering circuit capacity to handle additional wiring loads.
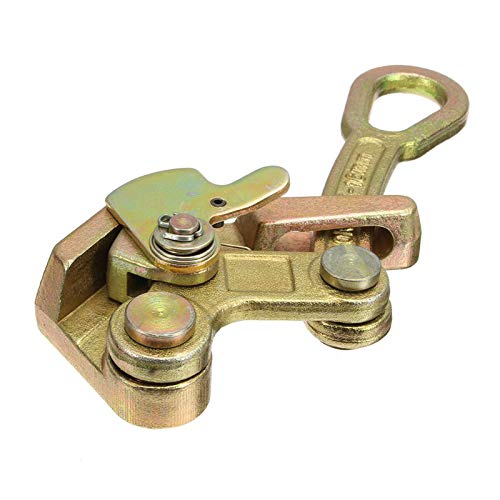
Wogoboo Cable Grip Wire Gripper Steel Cable Puller Tool for Wire Rope,Pulling 2204 Lbs(1 Ton)
High Quality -Made of carbon steel,structure compact,special heat treatment.This clamp is durable,stable and high strength.
As an affiliate, we earn on qualifying purchases.
As an affiliate, we earn on qualifying purchases.
Choosing the Right Tools and Materials

Selecting the right tools and materials is crucial for a smooth and safe installation when running wires through crown molding. You’ll want to choose tools that allow precise cuts and easy access, such as a fine-tooth saw and a utility knife. Using the correct wire gauge ensures the wire can handle the load without risking damage or fire hazards. Proper exfoliation through glycolic acid can also improve skin texture, making the process of working in tight spaces more comfortable by reducing skin irritation. Incorporating data-driven strategies can help you plan the electrical layout more effectively, ensuring safety and efficiency. Additionally, understanding Gold IRA Rollovers can provide insight into secure and diversified investment options for your financial future. Cable connectors are indispensable for secure, professional connections, preventing loose wiring.

Access Doors Panel 10 x 10 inch Aluminum Alloy Access Door for Drywall Panel for Wall and Ceiling Electrical and Plumbing (White, 10x 10 inch)
【HIGH QUALITY】 Metal access panel door is 1mm Galvanized Steel Material With Sleek, Shiny, Durable White Powder Coat…
As an affiliate, we earn on qualifying purchases.
As an affiliate, we earn on qualifying purchases.
Preparing the Crown Molding for Wiring

To guarantee a smooth wiring process, you need to prepare the crown molding properly. Start by selecting the right crown molding styles that accommodate your wiring needs. Some styles have deeper profiles or flat surfaces that make running cables easier and safer. Before installation, inspect the molding for any imperfections or sharp edges that could damage wires. Use a fine-grit sandpaper to smooth out rough spots. Mark the backside of the molding where the wires will pass through, ensuring you avoid areas that could weaken the structure. Always prioritize wiring safety by planning your cable routes carefully and avoiding areas near electrical hazards or sharp corners. Proper preparation helps prevent damage to the wires and ensures a clean, professional-looking installation. Additionally, understanding spoilage signs of materials can help you select the best components for durability and safety. Being aware of Linguistic Features and Figurative Language can also assist in communicating complex ideas more effectively during the planning process. Incorporating proper tools and techniques can further streamline the wiring process and prevent mishaps.

FastCap Crown Molding Clip – Great for General Trim Installation and Remodels – Heavy Duty Nylon, 4-Pack – 99980
Professional Solution – FastCap's Crown Molding Clip, designed by a seasoned cabinet maker, streamlines the crown molding installation…
As an affiliate, we earn on qualifying purchases.
As an affiliate, we earn on qualifying purchases.
Creating Access Points for Cables

How can you create clean, accessible points in your crown molding for running cables? The key is designing discreet access points that facilitate wire management and cable concealment. You can cut small, unobtrusive holes or notches at strategic spots, like corners or ends of the molding. These openings allow you to thread cables through easily without compromising the aesthetic. Using a drill with a fine bit ensures clean cuts, making the access points seamless. Consider installing removable panels or covers for future adjustments or troubleshooting. Properly placed access points keep your wiring tidy and hidden, maintaining a polished look. The goal is to blend functionality with style, so choose locations that are discreet yet practical for cable runs. Additionally, choosing the right cable management techniques can further enhance the neatness and accessibility of your wiring setup. Being aware of security vulnerabilities in new wiring methods can help you implement safeguards against potential issues. To ensure durability and safety, it’s also important to select appropriate materials that won’t damage the molding or compromise your home’s electrical system.
Running Wires Securely and Neatly

Once you’ve created access points in your crown molding, the next step is to run your wires securely and neatly. Start by choosing the appropriate wire gauge; thicker gauges offer durability, but thinner gauges are easier to snake through molding. Proper cable length planning is essential—measure your distances carefully to avoid excess slack or tight pulls. As you run the wires, keep them flat against the molding to prevent sagging or damage. Use clips or adhesive mounts to secure the cables along the molding, ensuring they stay in place and don’t interfere with the aesthetic. Avoid crossing or twisting wires unnecessarily. Staying organized and attentive during this step guarantees a tidy, professional-looking installation that’s both safe and visually appealing. Paying attention to cable organization can also make your space feel more personalized and welcoming, and employing cable management techniques can further enhance the overall appearance.
Concealing Wires for a Seamless Look

Are your wires still visible after running them through the crown molding? If so, there are simple ways to conceal them for a seamless look. Consider using decorative molding designed to hide wires, blending functionality with style. Wireless alternatives also help reduce clutter, making the space look cleaner and more modern. You can paint or stain the molding to match your wall or ceiling, further disguising any remaining wires. Installing a false panel or using adhesive cable clips inside the molding creates a tidy appearance. These options help you achieve a polished, professional finish without sacrificing accessibility. Additionally, support hours for assistance with installation or troubleshooting can ensure you complete your project smoothly. Incorporating conflict resolution skills can also be helpful if you encounter any challenges during the setup process.
Troubleshooting Common Challenges

When running wires through crown molding, you might encounter hidden obstacles or difficult pathways. Using effective techniques to find and create clear routes can save you time and frustration. If you run into obstructions, knowing how to fix or navigate around them guarantees a smooth installation process. Being aware of potential skin changes or signs of damage can help you identify areas where wiring might be problematic. Additionally, understanding Gold IRA options can assist in planning your investments alongside home projects, ensuring your financial goals are protected over the long term.
Hidden Pathways Techniques
Managing the challenges of running wires through crown molding requires careful planning and precise execution. To hide wires effectively, consider using creative pathways that blend seamlessly with your decor. You might explore wireless alternatives for devices, eliminating the need for visible wiring altogether. Alternatively, decorative molding options, like specialized channels or hollow profiles, can conceal wires while maintaining aesthetic appeal. When routing wires, guarantee they follow natural grooves or gaps in the molding, avoiding sharp bends that could damage insulation. Using flexible wiring conduits can also help navigate tight corners. Remember, the goal is a tidy, unobtrusive look that enhances your space without clutter. Incorporating proper home maintenance can boost motivation and make the space more functional. With patience and the right techniques, you can achieve a professional finish that’s both functional and visually appealing.
Fixing Obstructions Effectively
Obstructions in crown molding can disrupt your wiring plans and complicate the installation process. To fix these issues, identify the obstacle first—whether it’s a nail, knot, or dense material. Use flexible tools like fish tapes or wire pullers tailored for crown molding styles. When encountering stubborn obstructions, consider adjusting the wiring route or creating small access points. Remember, matching wiring color codes ensures proper connections, preventing future troubleshooting. Here’s a quick guide:
| Obstruction Type | Fixing Method |
|---|---|
| Nail or screw | Carefully drill around or remove temporarily |
| Dense material | Use flexible fish tape to navigate around |
| Knot or lump | Gently widen the pathway with a tool |
| Structural block | Adjust wiring route or create access point |
| Hidden obstruction | Use a wire finder or inspection camera |
Being precise and cautious prevents damage and keeps your wiring tidy.
Final Tips for a Professional Finish

To achieve a polished look, make sure to seal the edges of your wiring neatly to hide any gaps. Adding finishing touches like paint or stain helps blend the molding with your decor seamlessly. These small details make a big difference in giving your project a professional, clean appearance.
Seal Edges Neatly
Sealing the edges of your crown molding guarantees a clean, professional look and prevents gaps or drafts. To achieve this, use caulk or painter’s sealant to fill any gaps around the wire insulation and cable connectors. Smooth out the sealant with a putty knife or finger for an even finish. Proper sealing also helps keep dust and debris out of the cavity and maintains a sleek appearance. When working around wire insulation, ensure it’s fully compressed before sealing. Double-check that all cable connectors are secure and neatly tucked. For an extra tidy look, consider using painter’s tape to create clean lines when applying sealant. This small step makes a noticeable difference in the overall polished look of your crown molding project.
- Use painter’s tape for clean edges
- Ensure wire insulation is flush before sealing
- Apply sealant smoothly for a neat finish
Use Finishing Touches
Adding the final touches can make your crown molding installation look flawless and professionally finished. Start by inspecting your work and fixing any gaps or uneven edges for a seamless look. Consider aesthetic considerations, such as matching paint or stain to the molding and wall color, to create a cohesive appearance. If wires are still visible, explore wireless alternatives for devices to maintain a clean look without clutter. Use caulk or touch-up paint to hide small imperfections and ensure a polished finish. Adding decorative accents, like corner blocks or embellishments, can enhance the overall appearance. These finishing details not only improve aesthetics but also boost the durability of your installation, giving your space a refined and tidy look.
Frequently Asked Questions
Can I Run Multiple Wires Through the Same Crown Molding?
You can run multiple wires through the same crown molding, but you need to take into account wire gauge considerations to avoid overheating or damage. Use a flexible, sturdy molding material that can comfortably accommodate multiple wires without bending or pinching. Be sure to leave some space for ventilation and future upgrades. Proper planning ensures a neat, safe installation, and selecting the right molding material helps prevent damage and makes wire management easier.
What Safety Precautions Should I Take During Installation?
Oh, sure, just toss those wires in without a second thought—what could possibly go wrong? But seriously, for electrical safety and tool protection, you should always turn off power at the breaker, wear insulated gloves, and use proper tools. Keep your workspace dry and organized, and double-check your wiring before restoring power. Safety first guarantees your beautiful crown molding stay pristine and you stay accident-free.
How Do I Handle Existing Electrical Wiring Behind the Molding?
When handling existing electrical wiring behind crown molding, you should first turn off the power at the circuit breaker for safety. Carefully remove the molding to access the electrical access points. Use a voltage tester to confirm no live wires are present. Then, manage wire concealment by gently guiding the wires, avoiding damage, and ensuring they stay organized. Always follow electrical codes and consider consulting a professional for complex wiring situations.
Are There Specific Crown Molding Styles Better for Wiring?
When choosing crown molding for wiring, opt for modern styles with flatter profiles and wider cavities, making it easier to hide wires. Decorative molding with intricate designs can be more challenging to run wires through, so consider simpler, sleek designs that blend form and function. These styles provide a tidy, seamless look while accommodating your wiring needs, ensuring your space remains stylish and clutter-free.
How Can I Prevent Future Damage to the Wires?
Think ahead to keep your wiring safe. To prevent future damage, use proper wire protection like conduit or flexible tubing inside the crown molding. Avoid sharp bends and tightly pinching wires, which can cause wear over time. Regularly inspect the wiring for signs of damage and address issues promptly. Remember, an ounce of prevention is worth a pound of cure, so take these steps now to safeguard your wiring for the long haul.
Conclusion
With a little patience and attention to detail, you can transform your space into a sleek haven. By carefully planning your wiring route and choosing the right tools, you’ll create a clean, professional look that hints at effortless elegance. Remember, every successful project is just a series of small, confident steps. So, embrace the process and enjoy the satisfaction of a beautifully finished room where everything flows seamlessly—like a quiet whisper of style and sophistication.