To replace a light fixture with a ceiling fan, start by evaluating your space to select the right fan size and style. Turn off the power at the circuit breaker and carefully remove the existing fixture, supporting it as you disconnect the wiring. Attach the mounting bracket, connect the fan wiring following the manufacturer’s instructions, and secure the fan to the ceiling. Once installed, check all connections, test the operation, and ensure safety. If you continue, you’ll learn each step to complete your installation confidently.
Key Takeaways
- Turn off power at the circuit breaker and verify with a voltage tester before removing the existing light fixture.
- Remove the fixture, disconnect wiring, and check that the electrical box supports the weight of the ceiling fan.
- Attach the mounting bracket to the electrical box, ensuring it is properly grounded and rated for ceiling fans.
- Connect the fan wiring to house wiring following manufacturer instructions and securely mount the fan to the bracket.
- Restore power, test fan operation, and check for wobbling, noise, and proper light functionality.
Assessing Your Space and Choosing the Right Ceiling Fan

Before choosing a ceiling fan, you need to evaluate your space carefully. Consider the room’s size and ceiling height to determine the appropriate fan size and style. A well-chosen fan enhances your lighting design by coordinating with existing fixtures and decor, creating a cohesive look. Pay attention to the fan’s energy efficiency features—look for models with a good Energy Star rating to reduce electricity costs and environmental impact. Think about how much airflow you need; larger rooms require fans with higher CFM ratings, while smaller spaces benefit from more compact designs. Proper assessment guarantees your ceiling fan not only looks great but also performs efficiently, providing comfort while saving energy. Additionally, understanding juice yield from citrus fruits can help you select the right size and type of fan for your space, ensuring optimal airflow and comfort. This thoughtful approach makes your upgrade both functional and stylish, especially when considering the benefits of wood-burning for sustainable heating solutions in other areas of your home.
Gathering Necessary Tools and Materials
Before you start, gather all the essential tools and materials you’ll need for the job. Make sure you have a screwdriver, wire strippers, a ladder, and the replacement fan ready to go. Don’t forget safety equipment like gloves and safety glasses to protect yourself throughout the process. Additionally, understanding the installation requirements for your specific ceiling fan model can help ensure a smooth replacement. It may also be helpful to review Glycolic Acid benefits to understand how certain skincare ingredients can improve skin health during your routine. Being aware of divorce celebration ideas can inspire you to create a positive environment during your project to make the process more enjoyable.
Essential Tools Checklist
To successfully replace a ceiling light fixture with a fan, you need to gather the right tools and materials first. Essential tools include a ladder, screwdriver, wire strippers, voltage tester, and pliers. You might also need a drill if mounting brackets require it. Make sure to have a sturdy, well-lit workspace to handle the project safely. When choosing your ceiling fan, consider decorative options that match your room’s style, and opt for energy-efficient models to save on long-term costs. Safety gloves and goggles are also helpful. Having everything on hand before you start minimizes interruptions and ensures a smoother installation process. Double-check your tools and materials to avoid delays, especially if you plan to customize the look or improve energy efficiency with your new fan. Additionally, understanding industry trends can help you select a fan with modern features and better performance. Being aware of support hours for assistance can be useful if you encounter unexpected electrical or installation issues during your project. For example, researching electric motor efficiency can help you choose a fan that offers optimal performance with lower energy consumption.
Material Preparation Steps
Gathering all the necessary tools and materials is a crucial first step to guarantee a smooth ceiling fan replacement. You’ll need basic tools like screwdrivers, pliers, and a voltage tester. Collect any decorative fixtures or mounting components required for your ceiling fan model. Make sure you have replacement electrical wiring if needed, especially if existing wiring is outdated or damaged. Double-check that you have a sturdy ladder and safety glasses. It’s also helpful to have wire connectors and electrical tape on hand. Preparing these materials beforehand minimizes interruptions during the installation. Being organized from the start helps you work efficiently and safely. Additionally, reviewing essential safety measures ensures you understand how to handle electrical components properly. Considering automation in business can also help in planning your work process to improve efficiency. With everything ready, you’ll be set to proceed confidently with removing the old fixture and installing your new ceiling fan.
Safety Equipment Needed
Ensuring you have the right safety equipment is essential for a secure ceiling fan replacement. You’ll need protective goggles to shield your eyes from dust or debris and electrical gloves to prevent shocks when handling wiring. These items protect you from potential hazards during the installation process. Additionally, being aware of trust issues can help if miscommunications occur during the project. Considering environmental considerations, such as proper disposal of old fixtures, can also contribute to a safer and more responsible installation.
Turning Off Power and Preparing the Work Area

Before starting any electrical work, you need to turn off the power at the circuit breaker to prevent the risk of electric shock. Confirm the power is off by testing the existing fixture with a voltage tester. This step is vital for safety and allows you to focus on selecting the right ceiling fan styles that enhance your lighting aesthetics. Once the power is off, clear the work area of furniture or objects below the fixture. Use a sturdy ladder or step stool to reach the ceiling comfortably. Cover the floor with a drop cloth to catch dust or debris. Preparing the work area helps guarantee a safe, efficient installation process and gives you a clear space to work with your new ceiling fan. Additionally, understanding candy installation safety can be useful if you plan to incorporate decorative lighting or themed fixtures into your space. Being aware of payment security features can also help ensure that any electronic components integrated into your lighting or ceiling fan system are protected from unauthorized access.
Removing the Existing Light Fixture
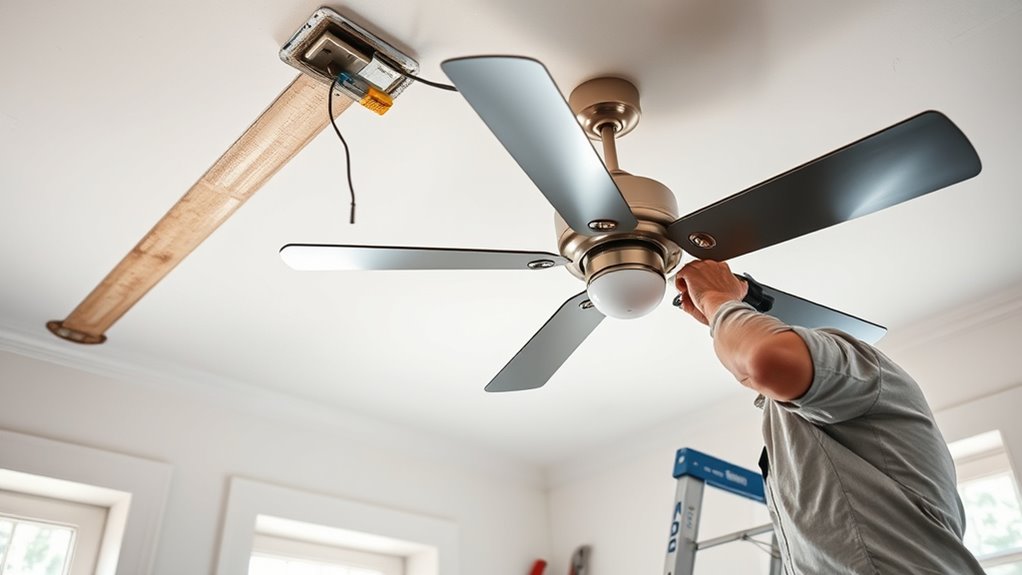
To start removing the existing light fixture, make certain the power is turned off at the breaker. Carefully detach the fixture, supporting it as you disconnect the wiring. Once removed, set the fixture aside and double-check that the power remains off before proceeding. Be sure to safely handle electrical components to prevent any accidents or shocks. Additionally, verifying proper wiring connections can help ensure safety during installation.
Turn Off Power
Have you turned off the power to the light fixture you’re replacing? Ensuring electrical safety is vital before proceeding. Locate your circuit breaker and switch off the breaker controlling the fixture’s circuit. Confirm the power is off by testing the fixture with a voltage tester or a non-contact tester. This step prevents electrical shock and protects you during removal. Remember, not all fixtures are compatible with ceiling fans; verifying fixture compatibility before installation avoids costly mistakes. Once you’re certain the power is off, you can safely proceed to remove the existing fixture. Never skip this step, as working on live electricity poses serious safety risks. Confirming the power is off keeps your project safe and ensures a smooth transition to installing your new ceiling fan.
Remove Light Fixture
Start by removing any bulbs from the fixture to prevent accidental contact or damage. Next, carefully detach the fixture from the ceiling mount. Here are key steps to follow:
- Use a screwdriver to unscrew the mounting plate holding the fixture in place.
- Disconnect the wiring, noting fixture compatibility for your new ceiling fan.
- Remove the fixture completely, checking for any remaining hardware.
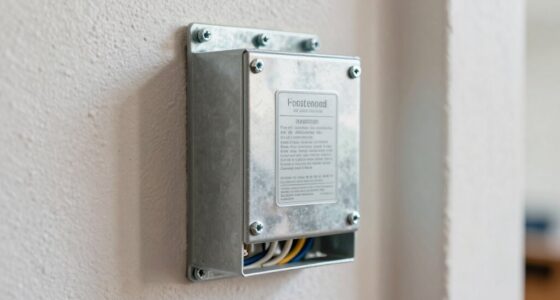
- Inspect the electrical box to ensure it’s secure and suitable for the new fan’s weight. Additionally, verify that the electrical box can support the weight of a ceiling fan, which is crucial for safety and proper installation. Ensuring the electrical box is rated for ceiling fans can prevent potential hazards during operation. It’s also important to confirm that the electrical box is properly grounded to avoid electrical issues. Removing the old fixture improves lighting aesthetics and prepares the space for your ceiling fan. Make sure the electrical box can support the fan, and keep all hardware organized for an easier installation of the new fixture.
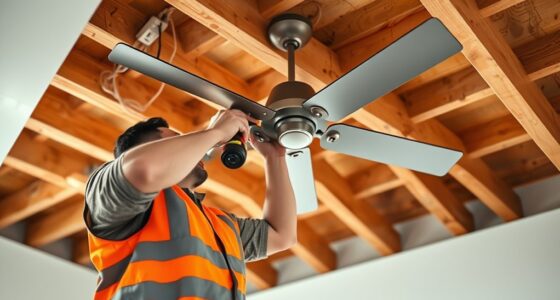
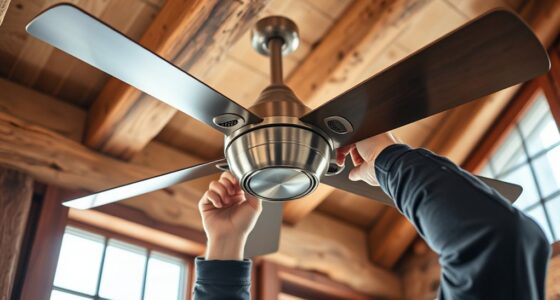
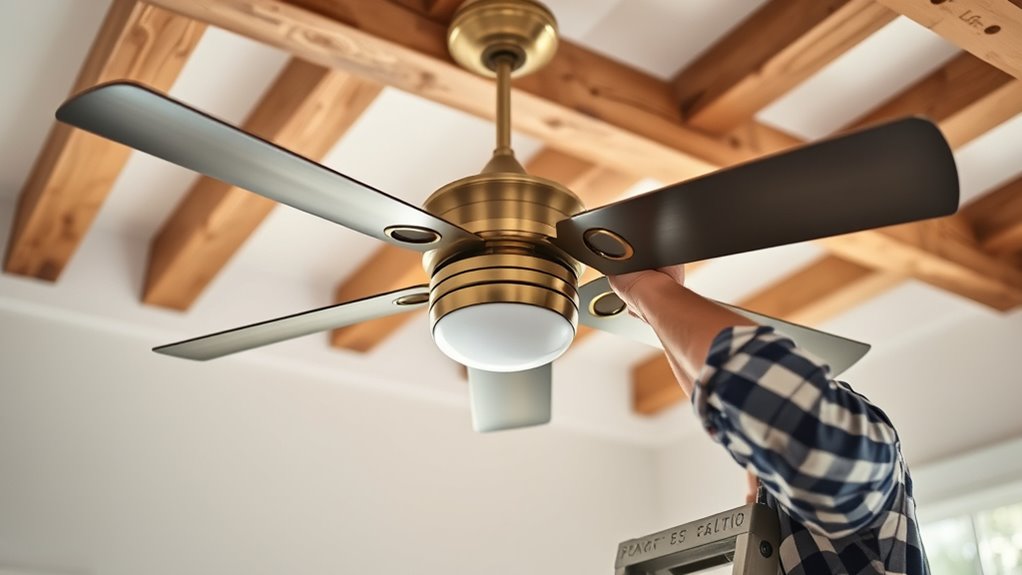
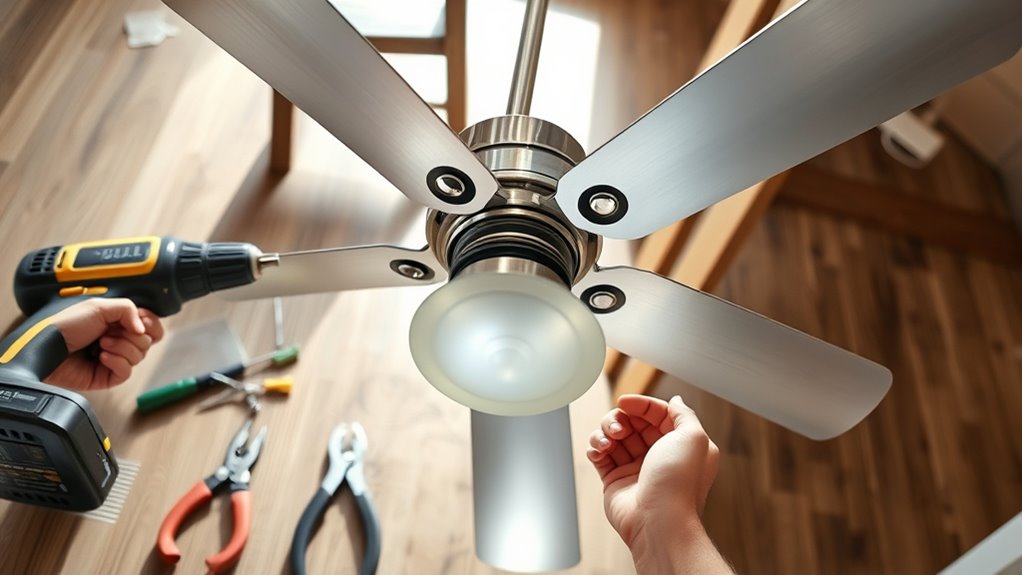
Installing the Ceiling Fan Components

Once you’ve turned off the power and removed the old fixture, you can begin installing the ceiling fan components. Start by attaching the mounting bracket to the electrical box, ensuring it matches your fan’s decorative style. Compatibility considerations are essential here—check that the bracket fits securely and supports the fan weight. Next, connect the fan’s wiring to the house wiring, matching colors and following manufacturer instructions. Attach the fan motor to the mounting bracket, making sure it’s level and stable. If your fan has a decorative cover or canopy, install it last to hide the mounting hardware. Remember, choosing components that complement your room’s décor enhances the overall look, so pick parts that align with your desired decorative style. Take your time to ensure all connections are secure before proceeding. Additionally, reviewing pinball machine weights can help you understand the importance of proper support and installation when handling heavy fixtures. Proper support and installation techniques are crucial for safety and functionality.
Final Checks and Ensuring Proper Functionality

After attaching the fan components, it’s important to verify that everything functions correctly before finalizing the installation. First, test the fan’s speed settings and ensure it operates smoothly without wobbling. Second, check the light fixture, including bulb replacement if needed, to confirm proper illumination. Third, inspect decorative accents to ensure they’re secure and aligned. Fourth, turn the fan off and on again to verify the remote or wall switch responds properly. Additionally, listen for any unusual noises and tighten any loose screws. These checks guarantee your ceiling fan is safe and functioning correctly, giving you peace of mind. Taking these steps now prevents future issues and ensures your new fan looks great and works perfectly. Incorporating proper safety measures during testing helps prevent accidents and ensures long-term performance.
Frequently Asked Questions
Can I Install a Ceiling Fan in a Sloped or Vaulted Ceiling?
Yes, you can install a ceiling fan in a sloped or vaulted ceiling. For sloped ceiling considerations, you’ll need a fan with a suitable angled mounting kit, usually adjustable up to 30-45 degrees. Vaulted ceiling installation often requires longer downrods to ensure proper clearance and airflow. Make sure your fan’s mounting system is compatible, and consider hiring a professional if you’re unsure about the wiring or structural support for safe, effective operation.
Do I Need a Special Ceiling Box for a Fan Installation?
Think of your ceiling as a stage waiting to hold a star. To guarantee your fan stays firmly in place, you’ll need a special ceiling box designed for fan support. This box is stronger and specifically rated for the weight and movement of a ceiling fan. Using a regular light fixture box might cause safety issues, so always opt for a fan-rated ceiling box for a secure, safe installation.
How Do I Balance a Wobbling Ceiling Fan?
To balance a wobbling ceiling fan, start by checking fan blade alignment and ensuring all blades are level. Turn off the fan and gently adjust the mounting bracket if needed. Use a balancing kit to attach weight to the blades, testing each time for stability. Proper blade alignment and mounting bracket adjustment help reduce wobbling, providing smoother operation and preventing potential damage.
Is It Necessary to Upgrade My Existing Electrical Wiring?
Think of your electrical system as the backbone of your home’s comfort. Upgrading your wiring isn’t always necessary, but wiring considerations depend on your current setup and the ceiling fan’s power needs. If your wiring is outdated or doesn’t support additional load, electrical upgrades become essential for safety and efficiency. Consult a professional to assess your system, ensuring your new ceiling fan runs smoothly without risking electrical hazards.
What Maintenance Is Required for Ceiling Fans Over Time?
You should regularly maintain your ceiling fan by cleaning the fan blades to prevent dust buildup, which can affect airflow and efficiency. Additionally, lubricate the motor periodically if your fan’s manufacturer recommends it, ensuring smooth operation and reducing noise. Checking for loose screws or wobbling also helps keep your fan safe and functional. With proper maintenance, your ceiling fan will stay efficient and quiet for years to come.
Conclusion
Once you’ve installed your new ceiling fan, you might notice how the quiet hum complements your favorite room, creating a cozy atmosphere. It’s funny how replacing a simple light fixture can unexpectedly transform your space’s feel, making everything seem fresher and more inviting. So, next time you turn on the fan, remember that a little effort can bring about a surprising change—sometimes, the smallest updates make the biggest difference.