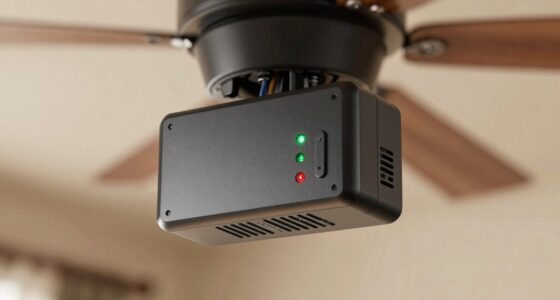
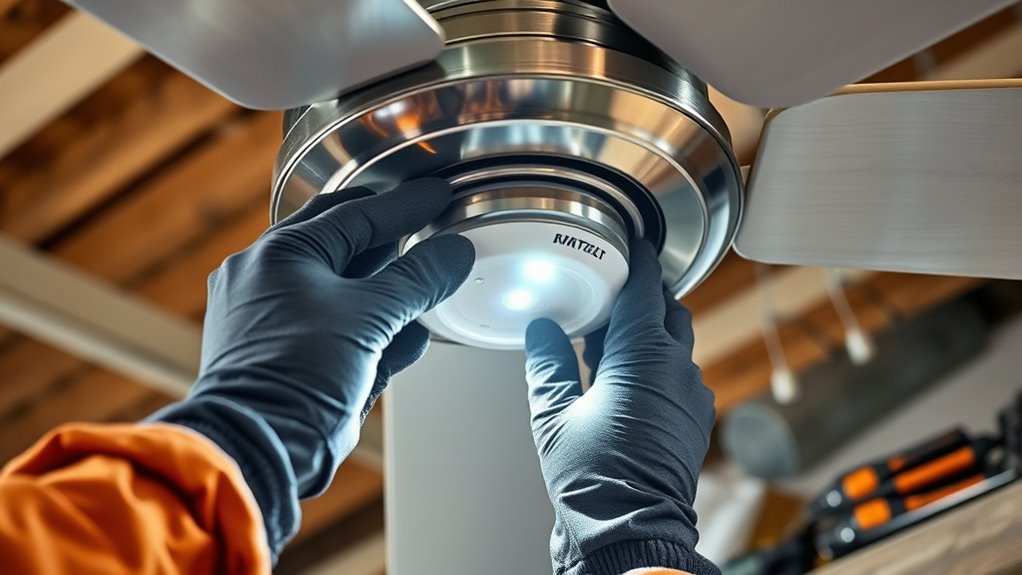
To install a remote receiver inside a fan canopy, first turn off the power at the circuit breaker and carefully remove the canopy cover. Connect the receiver wires to the fan’s wiring, ensuring tight, secure connections with proper insulation. Position the receiver where it won’t interfere with moving parts or metal components, then reassemble the canopy. Test the remote for proper operation. For detailed steps and safety tips, keep exploring the installation process further.
Key Takeaways
- Turn off power at the circuit breaker and carefully remove the fan canopy cover.
- Connect the remote receiver’s wires securely to the fan’s wiring, matching color codes.
- Mount the receiver inside the canopy using tape, zip ties, or brackets, away from metal and moving parts.
- Reassemble the canopy, ensuring wires are neatly tucked to prevent pinching or damage.
- Test the remote at various distances to confirm proper signal transmission before finalizing the installation.
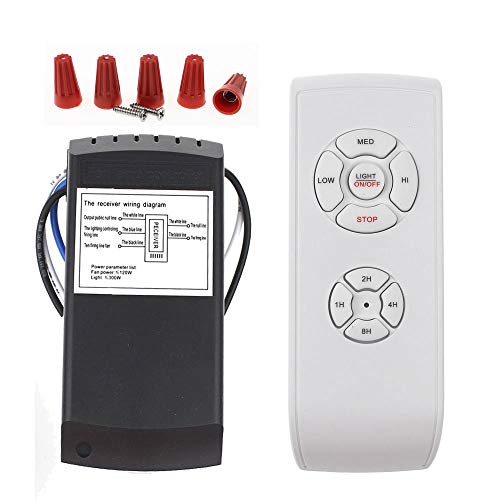
LPHUMEX Universal Ceiling Fan Remote Control Kit, 3-in-1 AC Motor Ceiling Fan Light Timing & Speed Remote, for Hunter/Harbor Breeze/Westinghouse/Honeywell/Other Ceiling Fan lamp
☞Easy Installation – Installation of the Universal Ceiling Fan Remote Controls Kit is a breeze and the looks…
As an affiliate, we earn on qualifying purchases.
As an affiliate, we earn on qualifying purchases.
Tools and Materials Needed

To install a remote receiver inside a fan canopy, you’ll need a few essential tools and materials. First, gather a screwdriver, wire cutters, and electrical tape to handle connections and secure the receiver. You’ll also need a compatible remote receiver with wireless compatibility features, guaranteeing it works seamlessly with your existing setup. Make sure to have a ladder or step stool to access the fan canopy safely. For receiver placement, choose a spot within the canopy that allows clear signal transmission and avoids obstructions. Double-check the receiver’s size to guarantee it fits comfortably inside the canopy. Additionally, understanding the principles of wireless communication can help optimize signal strength and reliability. Being aware of how family photoshoot fails can also guide you in positioning the receiver to prevent interference or accidental dislodging. Ensuring proper placement and understanding of signal interference can greatly improve the performance of your setup. Having these tools and materials ready will streamline the installation process and help you position the receiver correctly for ideal wireless performance.
LPHUMEX Universal Ceiling Fan Remote Control Kit, 3-in-1 AC Motor Ceiling Fan Light Timing & Speed Remote, for Hunter/Harbor Breeze/Westinghouse/Honeywell/Other Ceiling Fan lamp
☞Easy Installation – Installation of the Universal Ceiling Fan Remote Controls Kit is a breeze and the looks…
As an affiliate, we earn on qualifying purchases.
As an affiliate, we earn on qualifying purchases.
Safety Precautions Before Starting
Before you begin installing the remote receiver inside the fan canopy, it’s essential to prioritize safety. Start by disconnecting the power supply to prevent electrical shock. Make sure you follow OSHA guidelines to ensure a safe working environment. Wear insulated gloves and safety goggles to protect yourself from potential electrical hazards. Confirm that your tools are properly grounded and in good condition. Keep the workspace clear of clutter to avoid accidents. Never work on electrical components without turning off the power, even if the fan appears unpowered. Stay alert and avoid rushing; safety should always come first. Incorporating proper inspection procedures helps identify potential hazards before starting, reducing risks and ensuring a smooth installation process. Additionally, understanding electrical wiring principles can help prevent common mistakes during the setup. Familiarizing yourself with electrical safety protocols further enhances your safety during installation.
LPHUMEX Universal Ceiling Fan Remote Control Kit, 3-in-1 AC Motor Ceiling Fan Light Timing & Speed Remote, for Hunter/Harbor Breeze/Westinghouse/Honeywell/Other Ceiling Fan lamp
☞Easy Installation – Installation of the Universal Ceiling Fan Remote Controls Kit is a breeze and the looks…
As an affiliate, we earn on qualifying purchases.
As an affiliate, we earn on qualifying purchases.
Turning Off Power and Accessing the Canopy

Since safety is a top priority, you should start by turning off the power supply at the circuit breaker. This step guarantees that no electricity is flowing to the ceiling fan, preventing electrical shocks. Once the power is off, wait a few minutes for any residual current to dissipate. Next, carefully remove the fan’s canopy cover to access the internal components. As you do this, be mindful of the fan motor and wiring connections. Accessing the canopy allows you to locate the remote receiver’s installation area. Confirm the power is off by gently testing the fan motor or light fixture. Working with the power shut off guarantees your safety while you prepare to install or modify the remote receiver inside the ceiling fan canopy. Understanding the importance of proper installation helps ensure both safety and functionality during this process. Additionally, consulting safety guidelines can further prevent accidents during installation. For added safety, inspecting the fan wiring before handling the internal components is recommended.
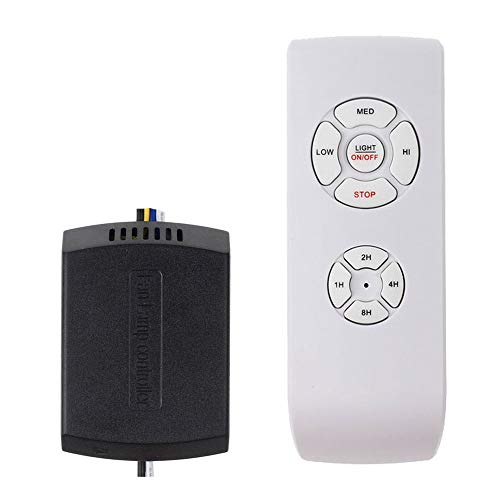
LPHUMEX Ceiling Fan Remote Control Kit, Small Size Speed, Light & Timing 3 in 1 Wireless Control, Compatible with AC Motor Fans from Harbor Breeze, Hunter, Hampton Bay, etc.
☞Fit for AC Motor Ceiling Fan Light- This small ceiling fan remote control kit fits most AC motor…
As an affiliate, we earn on qualifying purchases.
As an affiliate, we earn on qualifying purchases.
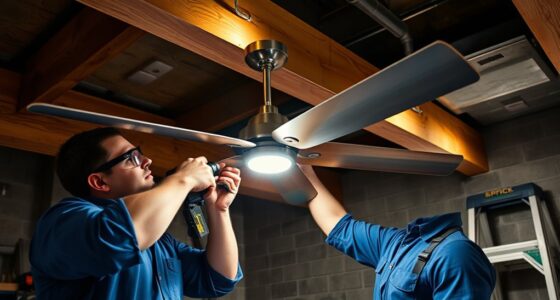
Removing the Fan Canopy Cover

Begin by locating the screws or bolts securing the fan canopy to the ceiling bracket. Carefully unscrew or unbolt these fasteners and set them aside. Gently lift the canopy away from the ceiling, exposing the fan’s motor and wiring. If you need to access the remote receiver, consider removing the fan blades first for easier handling, especially if they obstruct the canopy removal. Take note of the canopy paint to avoid chipping or scratches during removal. Once the canopy is free, set it aside in a safe spot. This step provides clear access to the internal components, making it easier to install the remote receiver. Be cautious not to damage any wiring or paint finish during this process. Automation technologies can also be integrated into the process to streamline installation and maintenance tasks.
Connecting the Remote Receiver to the Wiring

Now, you’ll connect the remote receiver to the wiring, starting with the power source. Make certain you use the proper wiring configuration to guarantee everything works safely and correctly. Once connected, secure all the connections tightly to prevent any issues later on.
Power Source Connection
Have you identified the power source for your fan canopy? Ensuring proper connection is vital. Check the wiring to confirm whether your fan is wired directly to the electrical circuit or powered by batteries. If you’re using a remote receiver that relies on batteries, verify its battery compatibility to guarantee it functions correctly. When connecting to the wiring, pay attention to the signal frequency of your remote control. Some remotes operate on specific frequencies that must match the receiver for reliable communication. Use appropriate connectors and secure all wiring tightly to prevent loose connections. Remember, a solid power connection is essential for the remote receiver to work seamlessly. Taking these steps now helps avoid issues later and guarantees your fan operates smoothly with your remote control.
Proper Wiring Configuration
To properly wire your remote receiver to the fan’s wiring, you need to identify the correct terminals and connections. First, match the wire color codes from the receiver to the fan wiring. Typically, black or red wires are for power, while white wires are neutral. The receiver’s terminal connections should be clearly labeled; connect the power input wire to the fan’s black or red wire, and the neutral wire to the white wire. Verify the ground wire, usually green or bare copper, is connected securely to the fan’s grounding terminal. Double-check each connection to confirm it’s firmly attached and matched correctly based on wire color codes. Properly wiring the receiver ensures safe operation and reliable remote control functionality. Additionally, understanding the Mazda Tuning concepts can help you optimize the setup for better performance and safety, especially when considering electrical wiring standards. Ensuring all connections adhere to electrical safety guidelines is essential to prevent malfunctions or hazards.
Securing the Connections
After verifying that all wiring connections match the color codes and are securely attached, you should focus on physically securing the receiver to prevent it from shifting or coming loose. Use wire connector safety to guarantee all connections are insulated and protected from accidental contact or corrosion. Wrap the connections with electrical tape securing them firmly in place, which adds extra stability and prevents movement. Make sure the tape is wrapped tightly around the connectors and wires, covering exposed metal and preventing any accidental disconnections. Once secured, gently test the receiver’s position by lightly tugging on the wires to confirm they won’t slip out. Properly securing the connections and using electrical tape securing techniques ensures a safe, durable installation inside the fan canopy. Additionally, consulting the installation guidelines can help ensure all safety standards are met during setup. Paying attention to wire management practices can further improve the reliability and safety of the setup. Incorporating proper electrical safety measures can also help prevent potential hazards during operation.
Securing the Receiver and Reassembling the Canopy

Once you’ve positioned the receiver securely inside the canopy, the next step is to fasten it firmly to prevent movement that could disrupt signal reception. Choose appropriate mounting options based on your fan’s design and the receiver’s size. Consider using double-sided tape, zip ties, or brackets to keep it stable. Proper receiver placement is vital; position it away from metal components or moving parts that could interfere with the signal. Ensure the receiver is accessible if you need to adjust or replace batteries later. Proper installation techniques are essential for maintaining reliable signal transmission and reception. Additionally, selecting the right high smoke point oils can help preserve the integrity of your fan’s motor and components during operation. Once secured, reassemble the canopy carefully, making sure wires are tucked neatly to avoid pinching. Double-check that all connections are tight and the receiver remains firmly in place before completing the reassembly.
Testing the Remote Functionality

Have you tested the remote to verify it communicates properly with the fan? Wireless testing confirms the remote’s signal range and functionality. Stand at varying distances to ensure reliable operation across the desired area. If the remote doesn’t respond, check the battery and receiver placement. Use the table below to guide your testing:
| Distance from Fan | Remote Response | Notes |
|---|---|---|
| Close (1-5 ft) | Yes | Confirm immediate response |
| Moderate (10-20 ft) | Yes/No | Test signal stability |
| Far (30+ ft) | No | Adjust receiver position |
This process helps determine the effective signal range and guarantees the remote works smoothly for your setup. Regular maintenance and proper placement of the remote receiver are essential for optimal performance. Additionally, ensure the installation complies with safety standards to prevent potential hazards.
Frequently Asked Questions
Can I Install the Remote Receiver in a Ceiling Fan With Existing Wiring?
You can install a remote receiver in a ceiling fan with existing wiring, but you need to check wireless compatibility and your wiring configuration first. Confirm the receiver matches your fan’s wiring setup and that the remote operates on compatible frequencies. Follow manufacturer instructions carefully to avoid wiring issues. If you’re unsure, consult a professional to prevent potential problems and ensure safe, smooth operation of your remote control system.
What Compatibility Issues Might Arise With Different Remote Control Brands?
Imagine syncing your remote with your fan, but suddenly, it doesn’t respond—frustration kicks in. Compatibility issues can arise because different remote control brands often lack interoperability, meaning their signals may not match. You might find your remote control compatibility limited to its own brand, making cross-brand operation tricky. Always check if your remote control brand is compatible with your fan’s receiver to guarantee seamless operation and avoid frustrating mismatches.
How Do I Troubleshoot if the Remote Receiver Isn’t Responding?
If your remote receiver isn’t responding, start by checking the remote signal. Make sure the remote has fresh batteries and is within range. Next, perform receiver testing by turning off power, then resetting the receiver according to the manufacturer’s instructions. Confirm all wiring is secure and properly connected. If issues persist, reprogram the remote or replace the receiver, as faulty components can also cause unresponsiveness.
Is There a Recommended Height or Location for Optimal Remote Signal?
Position your remote receiver properly to promote perfect signal strength and prevent pesky interference. Keep it at a moderate height—roughly 6 to 8 feet from the ground—away from metal objects, electronics, and thick walls. Clear, open locations help signals soar smoothly through space. By choosing a strategic spot, you’ll prevent interference, improve communication, and guarantee your fan responds promptly, providing peace of mind and perfect airflow all day long.
Can I Upgrade or Replace the Remote Receiver Later Easily?
Yes, you can typically upgrade or replace your remote receiver later, but it’s important to take into account compatibility considerations first. Check if the new remote receiver matches your existing fan model and remote control system. Most modern fans are designed for easy remote receiver upgrades, but some may require specific models. Always consult your fan’s manufacturer instructions or a professional to ensure smooth remote receiver upgrades and avoid compatibility issues.
Conclusion
With the remote now nestled within the canopy, you’ve brought modern convenience into your space, much like Da Vinci blending art and science. By carefully connecting and securing the receiver, you’ve unlocked effortless control, transforming your ceiling fan into a seamless harmony of function and design. Remember, this small act echoes the timeless pursuit of mastery—turning the mundane into a masterpiece, much like the quiet genius that shapes innovation beneath the surface.