To connect ceiling fan wiring safely, first shut off power and verify no voltage with a tester. Identify hot, neutral, and ground wires based on color coding, then connect the fan’s wires accordingly—black to black, white to white, and ground to ground—using wire connectors. Make certain all connections are tight and insulated. Mount the fan securely, restore power, and test operation. For detailed steps and safety tips, keep exploring this guide to ensure a correct and secure installation.
Key Takeaways
- Turn off power and verify no voltage at the wiring before starting installation.
- Identify and connect the black (hot), white (neutral), and green/bare (ground) wires correctly.
- Securely attach the fan’s grounding wire to the electrical box’s grounding screw.
- Connect the fan’s black or red wire to the ceiling’s hot wire, and the white wires together.
- After wiring, mount the fan securely, restore power, and test operation for safety and functionality.

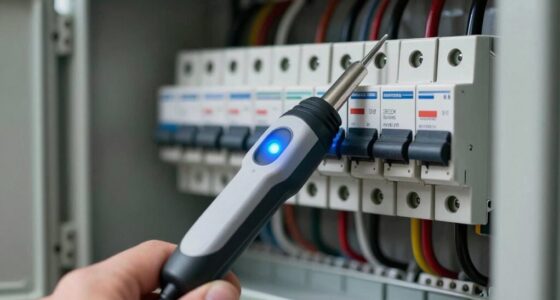
Have you ever wondered how to properly connect ceiling fan wiring? Understanding the correct procedures is essential for guaranteeing safety, functionality, and compliance with electrical codes. Before beginning, verify that the power supply is turned off at the circuit breaker to prevent electrical shock. Use a voltage tester to confirm that no voltage is present at the wiring connections. Familiarize yourself with the standard wiring color codes: typically, black or red wires are hot, white indicates neutral, and green or bare copper is ground. Recognizing these colors is fundamental to making correct connections.
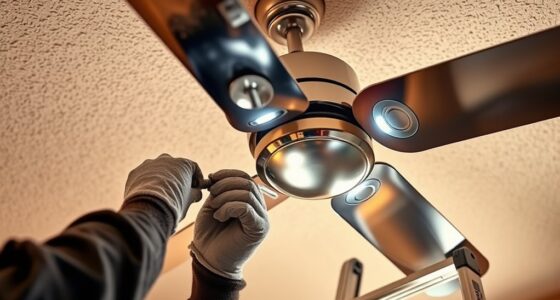
Start by removing the existing fixture or covering plate to expose the wiring. Carefully inspect the wires for any damage or corrosion; replace any compromised wiring before proceeding. Identify the wiring terminals on the ceiling box: usually, there will be a bundle of wires with identifiable colors and possibly a grounding screw. Connect the grounding wire from the ceiling fan to the grounding screw in the electrical box using a wire connector. If your fan has a grounding wire, attach it securely to the grounding screw or wire.
Remove existing fixture, inspect wires, and connect the grounding wire securely to the grounding screw.
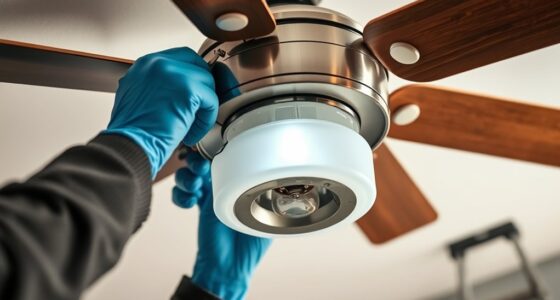
Next, connect the fan’s black or red wire (hot) to the ceiling’s hot wire, typically black. Use a wire connector to secure the connection, twisting the wires together clockwise before screwing on the connector. Ensure there are no loose strands or exposed wire outside the connector. Then, connect the white (neutral) wire from the fan to the ceiling’s neutral wire, usually white, following the same secure connection procedure. Confirm that all wire connections are tight and properly insulated within their connectors.
Some ceiling fans include a blue or purple wire for the light kit; if applicable, connect this wire to the ceiling’s switch wire designated for the fan’s light, often also blue. If your setup lacks a separate switch for the light, leave the light wire capped with a wire connector. Once all wiring is complete, gently tuck the wires into the electrical box, ensuring no pinched or strained connections. Mount the fan to the hanging bracket or mounting plate as specified by the manufacturer, following precise torque requirements to avoid mechanical or electrical issues.
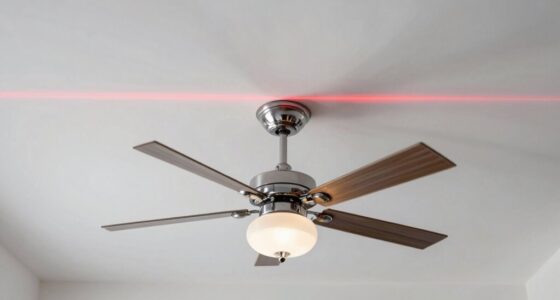
Additionally, consulting home decor resources can help you coordinate your ceiling fan with other room elements for a cohesive aesthetic. Finally, restore power at the circuit breaker and test the fan’s operation. Confirm that the fan and light (if installed) respond correctly to the wall switch or remote control. Proper wiring ensures safe operation, minimizes electrical hazards, and guarantees compliance with local electrical standards. If at any point you feel uncertain about the wiring process, consult a qualified electrician to verify your work, as improper connections can result in damage or personal injury.

Harbor Breeze 54-in Ceiling Fan Wire Extension Cord
Downrod wire extension kit
As an affiliate, we earn on qualifying purchases.
As an affiliate, we earn on qualifying purchases.
Frequently Asked Questions
Can I Install a Ceiling Fan Without Existing Wiring?
Yes, you can install a ceiling fan without existing wiring, but you must add wiring first. This involves installing a suitable electrical box, running new wires from the power source, and guaranteeing proper grounding. If you’re unfamiliar with electrical work, it’s advisable to hire a licensed electrician to ensure safety and code compliance. Proper planning and adherence to electrical standards are essential for a safe, functional ceiling fan installation.
What Tools Are Needed for Ceiling Fan Wiring?
Think of wiring your ceiling fan as assembling a complex puzzle; you’ll need essential tools. Grab a voltage tester to verify power is off, a wire stripper to prepare the cables, a screwdriver to connect mounting brackets, and pliers for gripping and twisting wires securely. These tools enable precise connections, ensuring safety and functionality. Always double-check the instructions for compatibility and safety standards before proceeding with installation.
How Do I Identify the Correct Wires in the Ceiling?
You identify the correct ceiling wires by turning off the power, then carefully removing the fixture cover. Use a voltage tester to verify no live current. Typically, the black or red wire supplies power, the white wire is neutral, and the green or bare copper is ground. Confirm wire functions by referencing your home’s wiring diagram or consulting local electrical codes. Always proceed with caution to prevent electrical hazards.
Is It Necessary to Turn off the Circuit Breaker?
Yes, you should turn off the circuit breaker before beginning. Think of it as flipping the switch off to silence a noisy machine—safety first. This step prevents electrical shock and accidental short circuits. Always verify that power is off by testing the wires with a voltage tester. Never skip this essential safety measure; working with live wires is dangerous and can cause serious injury or damage your electrical system.
How Do I Troubleshoot if the Fan Doesn’T Work After Wiring?
You should first verify all wiring connections are secure and correctly matched to the fan’s wiring diagram. Use a multimeter to check for power at the ceiling box; if absent, inspect the circuit breaker. Confirm the fan’s switch is functioning properly. If the wiring and power are intact, test the fan’s remote control or wall switch, as faulty controls can prevent operation. Troubleshooting these elements guarantees accurate diagnosis.

Hunter 18-24 inch DC Accessory Extension Wire Kit for Ceiling Fans – 99696
The 18-24 inch wire kit makes adding a downrod simple with our easy-to-follow instructions
As an affiliate, we earn on qualifying purchases.
As an affiliate, we earn on qualifying purchases.
Conclusion
Mastering ceiling fan wiring transforms a challenging task into a confident accomplishment. As you complete each connection, you weave a thread of expertise into your home’s fabric, ensuring safety and functionality. With precision and attention to detail, you craft a steady foundation of electrical knowledge. This process, though intricate, becomes a symphony of careful steps—each one harmonizing to deliver reliable airflow and illumination, empowering you with the skill to undertake future projects with assurance.

Klein Tools RT250 GFCI Outlet Tester with LCD Display, Electric Voltage Tester for Standard 3-Wire 120V Electrical Receptacles
CLEAR LCD READOUT: GFCI Receptacle Tester features a large backlit LCD readout for easy voltage reading and clear…
As an affiliate, we earn on qualifying purchases.
As an affiliate, we earn on qualifying purchases.

RACO RETRO-BRACE 936 1.5-in. Deep Ceiling Fan Box for Old Work 2.5-in. Knockouts, Old Work Electrical Box, Adjustable Brace, and Mounting Bracket for Ceiling Light Fixtures & Chandelier Fans
DESIGNED FOR RESTORATIONS: Our Hubbell RACO RETRO-BRACE 1.5-in. Deep Ceiling Fan Box for Old Work is specially designed…
As an affiliate, we earn on qualifying purchases.
As an affiliate, we earn on qualifying purchases.