Connect with us

Guides

Which Way to Have Ceiling Fan in Winter

Not sure how to set your ceiling fan for winter? Discover the simple adjustment that can keep your space cozy and save you money!

Published

on

winter ceiling fan direction

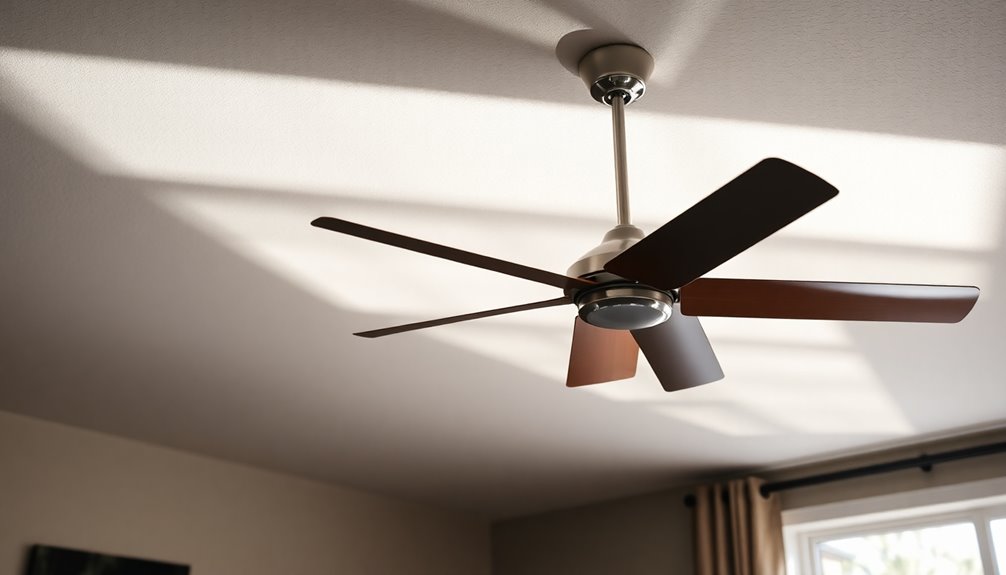
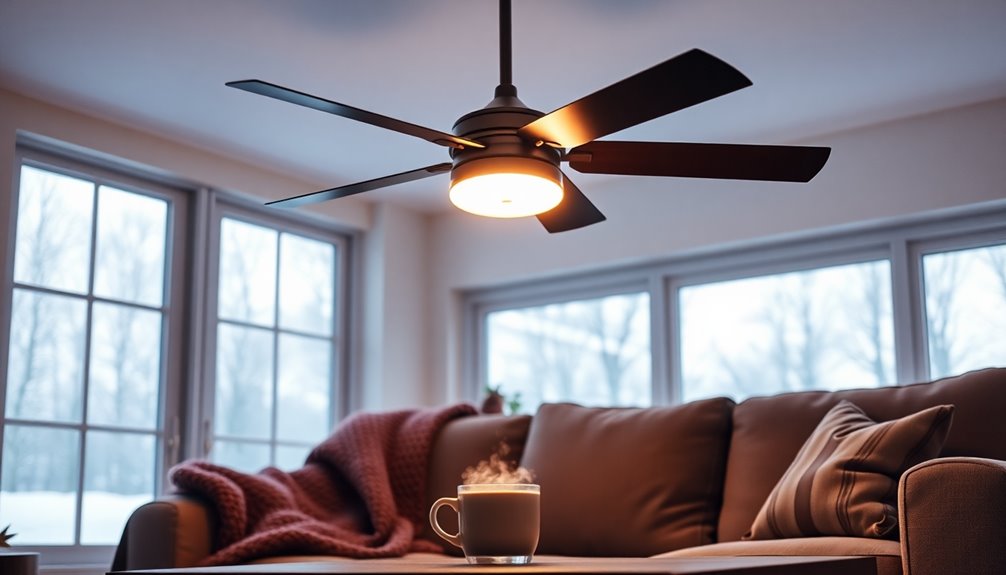
In winter, you should set your ceiling fan to spin clockwise. This direction creates an updraft that pulls cool air up and pushes warm air down, keeping your space cozy and comfortable. Running the fan at a low speed is best, as it redistributes warm air effectively without causing cold drafts. This simple adjustment can help lower your heating costs by up to 15%, so it's worth checking your fan settings regularly. If you want to optimize comfort further, there are easy methods for adjusting your fan, which you'll find quite interesting!

Key Takeaways

  • Set your ceiling fan to spin clockwise in winter to create an updraft and push warm air down.
  • Run the fan at a low speed for effective warm air redistribution and to maintain comfort.
  • Regularly check and adjust the fan direction during seasonal changes for optimal energy efficiency.
  • Changing the fan direction can reduce heating costs by up to 15%, improving overall comfort.
  • Use pull chains, switches, or smart apps to adjust the fan direction safely and easily.

Importance of Ceiling Fan Direction

ceiling fan direction matters

The importance of your ceiling fan's direction during winter can't be overstated. To enhance your home's heating, your ceiling fan should spin clockwise. This rotation creates an updraft that pulls cold air upwards while pushing warm air trapped near the ceiling down toward the floor.

By redistributing the warm air, you enhance comfort and improve energy efficiency. When you change your ceiling fan to run clockwise at low speed, it prevents drafts and keeps the warm air where you need it most—at floor level.

This simple adjustment can lead to a reduction in heating costs by up to 15%. Especially in homes with high or vaulted ceilings, this seasonal change is essential for peak performance.

Regularly adjusting your fan direction in winter not only maintains warmth but also allows you to lower your thermostat settings, contributing to overall energy savings.

Recommended Winter Fan Settings

optimal winter fan settings

When winter arrives, it's crucial to set your ceiling fan for maximum efficiency. You should adjust the ceiling fan direction to clockwise. This rotation creates a gentle updraft, pulling cold air upward and pushing warm air down towards the floor, enhancing your comfort.

Running the fan at a low speed can greatly reduce your heating bills—up to 15%—by redistributing the warm air that tends to accumulate near the ceiling. Before making this change, verify the fan is turned off. Most fans have a fan switch near the base that allows you to reverse the direction easily.

Advertisement

By utilizing this clockwise setting, you can prevent cold drafts and maintain warmth throughout your space. You can also lower your thermostat settings without sacrificing comfort, making your home more energy efficient.

Remember to regularly check and adjust the fan direction with seasonal changes. This simple task can optimize your heating system's performance and save you money.

Methods to Change Fan Direction

adjusting fan rotation direction

Adjusting your ceiling fan direction for winter is a straightforward process that can greatly enhance your home's comfort.

To change the direction, make sure the fan is turned off for safety. If your fan has a pull chain, locate the fan switch on the body and slide it to the opposite direction, which is typically turning clockwise to circulate warm air downwards.

For remote-controlled fans, turn off the fan, then press and hold the fan button on the remote until the light blinks, indicating the direction has changed.

If you have smart fans, you can adjust the direction using the SIMPLEconnect app or via voice commands, but remember to turn off the fan first for the change to take effect.

Advertisement

For those with vaulted ceilings, make sure you can safely reach the fan or use a ladder to make the adjustment.

Regularly check the ceiling fan direction during seasonal changes to guarantee peak heating efficiency and comfort throughout winter.

Seasonal Timing for Adjustments

adjustments based on season

Knowing how to change your ceiling fan direction sets the stage for maximizing its efficiency. As winter approaches, it's essential to adjust your ceiling fan to rotate clockwise. This direction creates an updraft, helping to circulate warm air that naturally rises to the ceiling.

A great time to make this seasonal adjustment is during Daylight Savings Time, specifically when clocks fall back in the fall. By running your fan on a low speed in the clockwise direction, you can effectively redistribute warm air while preventing cold drafts. This simple change can greatly enhance your comfort during the heating season.

Moreover, regularly checking and adjusting your ceiling fan direction can lead to impressive utility bill reductions of 15% or more. Staying proactive about these seasonal adjustments not only boosts energy efficiency but also guarantees a cozy environment in your living space.

Don't overlook this easy yet effective strategy to optimize your heating setup. By prioritizing these adjustments, you can enjoy a warmer home and lower energy costs throughout the winter months.

Advertisement

Benefits of Proper Fan Use

effective cooling energy savings

Maximizing the benefits of proper ceiling fan use during winter can greatly enhance your comfort and energy efficiency. By adjusting the ceiling fan direction to clockwise and running it at a low speed, you facilitate a gentle updraft that redistributes warm air trapped near the ceiling.

This simple adjustment helps:

  • Improve heating efficiency, guaranteeing warm air circulates evenly throughout the space
  • Prevent cold drafts, creating a more stable indoor temperature
  • Contribute to utility bill reductions of 15% or more
  • Provide an energy-efficient alternative to traditional heating methods

Using ceiling fans in winter not only promotes comfort but also reduces energy costs. The combination of warm air mixing with cooler air guarantees that you can maintain a cozy environment while lowering your thermostat settings.

Plus, ceiling fans consume considerably less energy—only 15 to 90 watts—compared to conventional heating systems. By incorporating proper fan use into your winter routine, you can enjoy increased comfort, save money, and make your home more energy-efficient.

Frequently Asked Questions

Which Direction Should a Ceiling Fan Go in Winter?

When you're wondering which direction a ceiling fan should go in winter, it's important to set it to rotate clockwise.

This adjustment creates an updraft, pulling the cold air upward and pushing the warm air down towards you. By running the fan at a low speed in this direction, you can enhance comfort and potentially lower your heating bills.

Just stand underneath to check if the airflow is directed upwards, ensuring it's working effectively.

Advertisement

Does Reversing the Fan in Winter Really Help?

Yes, reversing the fan in winter really helps.

When you set your ceiling fan to rotate clockwise, it creates a gentle updraft that pushes warm air down from the ceiling. This circulation prevents cold spots and makes your space feel cozier.

Plus, running it at a low speed can cut your heating costs by allowing you to lower your thermostat.

You'll enjoy a more comfortable home while saving money on energy bills.

Do Ceiling Fans Really Help in Winter?

Imagine a warm hug wrapping around you on a chilly day. That's what ceiling fans can do in winter!

Advertisement

They really help by circulating warm air that rises to the ceiling, creating an even temperature throughout your space. By running your fan at a low speed in a clockwise direction, you can enjoy comfort while cutting down on heating costs.

Which Way Should a Ceiling Fan Turn in Summer Reddit?

In summer, your ceiling fan should spin counterclockwise. This direction creates a downdraft, pushing cool air down and giving you that invigorating breeze you love.

You'll feel cooler, which lets you raise your thermostat setting without sacrificing comfort. Just stand under the fan to check—it should blow air down towards you.

Conclusion

In winter, reversing your ceiling fan's direction can save you up to 15% on heating costs, making it a simple yet effective way to stay cozy without breaking the bank. By running your fan clockwise at a low speed, you can circulate warm air that rises, keeping your space comfortable. So, don't overlook this easy adjustment—it's a small change that can lead to big savings and a cozier home during those chilly months!
Advertisement

Advertisement

Guides

How Many Blades Is Best for Ceiling Fan

Picking the perfect number of blades for your ceiling fan can enhance airflow, but what else should you consider for optimal performance?

Published

on

By

optimal ceiling fan blades

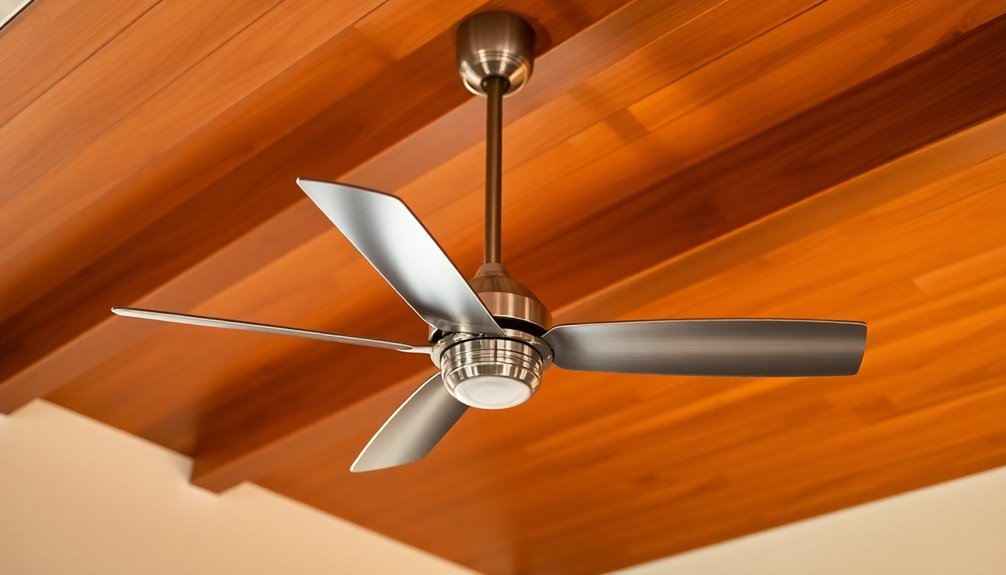
When choosing the best ceiling fan blades, consider your room size. For smaller rooms (up to 150 sq ft), three blades are perfect. They offer powerful airflow and are energy-efficient. In larger spaces (150-400 sq ft), five blades provide smoother and more balanced circulation, which helps eliminate hot spots. If you're dealing with very large rooms (over 400 sq ft), opt for five-blade fans with strong motors. Remember, it's not just about the number of blades; factors like blade pitch and motor power also matter. Curious about how these elements affect your choice? There's more to explore!

Key Takeaways

  • Three-blade fans are ideal for small rooms (up to 150 sq ft) due to their energy efficiency and high-speed circulation.
  • Five-blade fans provide smoother airflow, making them suitable for medium to large rooms (150-400 sq ft) and extra-large spaces (over 400 sq ft).
  • Blade pitch significantly affects airflow; an optimal pitch of 12-15 degrees enhances performance without increasing energy consumption.
  • Higher CFM ratings indicate better airflow performance, regardless of blade count, so consider airflow needs when selecting a fan.
  • Three-blade fans are better for outdoor use due to their durability and wind resistance, while five-blade fans work well in humid climates.

Understanding Ceiling Fan Performance

optimizing ceiling fan efficiency

When it comes to ceiling fan performance, a few key factors really matter. The number of blades plays a role, but it's not the only thing to take into account. You'll find that three blades often generate powerful airflow due to reduced drag, making them ideal for smaller spaces.

On the other hand, five blades provide smoother and quieter air circulation, which is perfect for larger rooms where you want even air distribution.

Another vital factor is motor power. A fan with a strong motor can effectively push air, regardless of its blade count. Additionally, blade pitch—ideally between 12-15 degrees—greatly influences how well the fan moves air.

Think about your room size when choosing your fan; three blades work well for small to medium rooms, while five blades are better suited for medium to large spaces.

Energy efficiency is also a significant factor. You'll often find that three-blade fans consume less energy compared to five-blade models.

Advertisement

However, thanks to advancements in motor technology, both types can perform similarly. So, focus on motor power and blade pitch to guarantee you get the best performance for your space.

Blade Count and Airflow Efficiency

optimizing blade design efficiency

Choosing the right blade count is crucial for maximizing airflow efficiency in your ceiling fan. The ideal blade configuration can greatly impact how effectively your fan moves air.

Three-blade fans are known for their high-speed circulation, providing powerful airflow with less drag, making them perfect for smaller spaces. On the other hand, five-blade fans typically create a more balanced airflow, reducing hot spots and ensuring smoother air distribution, which is great for larger rooms.

Modern advancements in motor technology mean that fans with fewer blades can perform comparably to those with more. This means you don't always need a higher blade count for optimal airflow.

It's important to evaluate the CFM ratings of your ceiling fan as well; fans with higher CFM ratings generally indicate better airflow performance, regardless of the number of blades.

Ultimately, the choice between three-blade and five-blade fans should depend on your space and airflow needs. By understanding blade count and its relation to airflow efficiency, you can select the fan that best suits your environment and keeps it comfortable year-round.

Advertisement

Small vs. Large Room Considerations

room size decision factors

Understanding the size of your room is essential for selecting the right ceiling fan. For small rooms up to 150 square feet, a three-blade fan is often the best choice. It provides powerful airflow while keeping a sleek, modern look.

In medium to large rooms, ranging from 150 to 400 square feet, both three and five-blade fans can effectively enhance air circulation. However, five-blade fans typically deliver smoother airflow, making them ideal for larger spaces.

When dealing with extra-large rooms over 400 square feet, you'll want to opt for a five-blade fan. These fans come with more powerful motors, ensuring excellent air distribution throughout the area.

Additionally, consider your ceiling heights; standard heights of 8 to 9 feet accommodate both three and five-blade fans effectively. If your ceilings exceed 9 feet, you might need downrod extensions to maximize airflow from five-blade fans.

For outdoor settings, three-blade fans are often preferred due to their durability and ability to withstand wind resistance, making them a suitable option for external environments.

Selecting the right fan based on your room size will enhance your comfort greatly.

Advertisement

Aesthetic Appeal of Blade Count

elegant blade count aesthetics

When you choose a ceiling fan, the blade count can greatly impact your room's aesthetic.

Three-blade fans offer a sleek, modern look perfect for minimalist spaces, while five-blade options bring a traditional versatility that fits various styles.

Consider how each design complements your existing decor to enhance the overall vibe of your home.

Modern Minimalist Aesthetics

While many design elements contribute to a room's overall aesthetic, the blade count of ceiling fans plays an essential role in achieving a modern minimalist look. Three-blade ceiling fans are particularly favored for their sleek design, which enhances the visual simplicity that defines modern minimalist aesthetics.

With fewer blades, these fans create an unobtrusive appearance, allowing for an open and airy environment that complements contemporary decor. The aerodynamic design of three-blade fans boosts effective airflow while adhering to the principles of modern design, emphasizing the balance of form and function. Additionally, these fans often boast a high CFM rating for superior performance, ensuring optimal comfort in any space. Incorporating natural materials into your decor can further enhance the minimalist feel of your home.

You'll find that the streamlined shapes not only provide cooling benefits but also serve as elegant decor elements. Additionally, many modern three-blade fans come with customizable finishes and materials, enabling you to tailor their appearance to fit various minimalist interiors seamlessly. Incorporating natural materials adds to the overall aesthetic appeal and complements a modern farmhouse style.

Advertisement

This adaptability means you can achieve the ideal look without compromising on performance. Choosing a three-blade ceiling fan allows you to embrace modern minimalist aesthetics, ensuring that your space remains stylish while maintaining effective airflow.

Traditional Design Versatility

Embracing the charm of traditional design, five-blade ceiling fans effortlessly blend with a variety of décor styles, from classic to contemporary. Their versatile nature allows them to enhance the aesthetics of any room while maintaining functionality.

The symmetrical design of five blades balances visual appeal and performance, making these fans ideal for traditional settings where both elements matter.

With their ability to create a polished look, five-blade fans lend a visual weight that can elevate the overall design of your space. This added dimension contributes to a cohesive appearance, making your room feel more put-together.

Plus, fans with five blades tend to provide smoother airflow and quieter operation, which is perfect for maintaining a serene ambiance in traditional interiors.

Advertisement

You'll find an array of finishes and styles available for five-blade ceiling fans, allowing you to customize them to match your existing home décor seamlessly.

Motor Power and Blade Pitch

propulsion and angle control

When choosing a ceiling fan, don't overlook the significance of motor power and blade pitch.

A powerful motor paired with an ideal blade pitch—ideally between 12-15 degrees—can dramatically boost airflow efficiency.

These factors play an essential role in how well your fan cools a room, often making them more important than the number of blades.

Importance of Motor Power

Motor power plays a pivotal role in the performance of ceiling fans, directly affecting their ability to circulate air efficiently.

While many may focus on blade count, it's the combination of motor power and blade pitch that truly enhances airflow and cooling power.

Advertisement

Consider these key points when evaluating motor power:

  • Efficient airflow: A strong motor allows blades to move air more effectively, regardless of whether you have three or five blades.
  • Ideal blade pitch: A pitch between 12-15 degrees maximizes airflow when paired with an adequate motor.
  • Energy-efficient design: Advanced motors reduce energy consumption while maintaining peak airflow velocity.
  • Enhanced ceiling fan performance: With sufficient motor power, fans can achieve better cooling without relying solely on the number of blades.
  • Versatile fan design: Both low and high blade counts can perform similarly if the motor power is robust enough.

Optimal Blade Pitch Angle

The ideal blade pitch angle is vital for maximizing the efficiency of your ceiling fan, and getting it right can greatly enhance airflow. Blade pitch directly impacts airflow efficiency; typically, a steeper pitch boosts performance by moving more air. For small ceiling fans, a pitch of around 12 degrees works well, while standard fans perform best at 13-15 degrees.

Most ceiling fan designs come with ideal blade pitch pre-installed, so you usually won't need to adjust it. However, if you have specific air circulation needs, tweaking the pitch can be beneficial. Remember, the combination of motor power and blade pitch is vital. A powerful motor paired with the right ideal blade pitch angle maximizes both airflow and energy efficiency.

Here's a quick reference table to help you understand the relationship between blade pitch, motor power, and airflow efficiency:

Blade Pitch (Degrees) Fan Size Airflow Efficiency
12 Small Moderate
13-15 Standard High
16+ Large Very High
Adjusted Specific Needs Variable
Pre-installed Most Fans Ideal

Performance Efficiency Factors

Achieving ideal performance efficiency in ceiling fans hinges on two main factors: motor power and blade pitch. Stronger motors provide better airflow, ensuring your ceiling fan operates effectively, regardless of how many blades it has.

A blade pitch between 12-15 degrees is vital for maximizing air movement, as a steeper angle can greatly enhance airflow velocity.

Advertisement

Consider these key points when evaluating performance efficiency:

  • Motor power is essential for effective air movement.
  • Higher blade pitch allows for increased airflow without extra energy consumption.
  • Fans with fewer blades can still perform well if equipped with a powerful motor.
  • Look for fans rated in CFM (Cubic Feet per Minute) for clear airflow performance comparison.
  • Efficient designs can improve comfort while minimizing energy use.

Environmental and Climate Factors

climate and environmental influences

When it comes to choosing ceiling fans, environmental and climate factors play an important role in guaranteeing comfort and efficiency. If you live in a hot and humid climate, opting for a fan with a higher blade count, like five blades, can greatly enhance air circulation. This helps promote evaporation from your skin, increasing comfort levels.

For outdoor environments, three-blade fans are preferable, as they're designed to withstand wind resistance and other outdoor elements, assuring durability.

In larger rooms or spaces with high ceilings (over 9 ft.), selecting a fan with more blades guarantees effective air distribution, preventing uncomfortable hot spots. Remember that seasonal use is key; in winter, choosing a fan that can reverse blade rotation will help circulate warm air. Blade count can influence this effectiveness based on your room size and design.

Additionally, consider the materials used in fan blades. Weather-resistant materials are vital for outdoor fans, as they help maintain durability in changing environmental conditions.

Making the Right Choice

choosing wisely and confidently

Choosing the right ceiling fan involves balancing several factors to meet your specific needs.

You'll want to take into account the room size, desired air circulation, and the aesthetics of your space. Here are a few key points to keep in mind:

Advertisement
  • Blade Count: 3-blade fans are perfect for small to medium rooms (up to 150 sq. ft.), offering high-speed potential and powerful airflow.
  • Air Circulation: For medium to large rooms (150 sq. ft. – 400 sq. ft.), both 3 and 5-blade fans work well, but 5-blade fans generally provide smoother airflow and quieter operation.
  • Extra-Large Rooms: If your space exceeds 400 sq. ft., opt for 5-blade fans with powerful motors to guarantee effective air distribution.
  • Blade Pitch: Don't forget that blade pitch greatly influences fan performance; aim for a pitch between 12-15 degrees for best airflow efficiency.
  • Personal Preferences: Prioritize what matters most—whether it's airflow efficiency, noise reduction, or aesthetics.

Consulting ceiling fan experts can also help you make an informed decision tailored to your needs.

Ultimately, you want a fan that enhances your comfort while fitting seamlessly into your lifestyle.

Frequently Asked Questions

What's Better, a 3 or 5-Blade Ceiling Fan?

When choosing between a 3-blade and a 5-blade ceiling fan, think about your space and needs. A 3-blade fan's higher speed offers powerful airflow, perfect for smaller rooms.

On the other hand, a 5-blade fan provides smoother, quieter airflow, ideal for larger spaces.

Consider your décor too; 3-blade fans fit modern styles, while 5-blade fans suit traditional designs.

Ultimately, it's about balancing aesthetics, efficiency, and air circulation for your specific environment.

Advertisement

Which Is Better 3 or 4 Blade Ceiling Fan?

Did you know that three-blade fans can be up to 20% more energy-efficient than four-blade models?

When choosing between a three or four-blade ceiling fan, think about your space. If you want powerful air circulation in a smaller room, a three-blade fan's design minimizes drag.

For larger areas, a four-blade fan offers quieter, smoother airflow.

Ultimately, it comes down to your aesthetic preference and the ambiance you wish to create in your home.

Is a 3 or 5-Blade Stand Fan Better?

When choosing between a three-blade and a five-blade stand fan, think about your priorities.

Advertisement

If you want powerful air circulation in a smaller space, a three-blade fan's higher speed potential might suit you better.

However, if you prefer smoother airflow and a quieter operation, go for a five-blade model.

Keep in mind that energy efficiency and design versatility also play significant roles in your decision, depending on your specific needs.

How Many Fan Blades Is Good?

Did you know that ceiling fans can improve energy efficiency by up to 30% in your home?

When it comes to fan blades, the number you choose can greatly impact performance. Three blades are great for smaller spaces, providing strong airflow without much drag.

Advertisement

On the other hand, five blades tend to create a smoother, quieter experience, ideal for larger rooms.

Ultimately, it's about finding what works best for your space and preferences.

Conclusion

In the grand scheme of ceiling fans, you might think more blades always mean better airflow. Ironically, it's often the fans with fewer blades that move air more efficiently—who knew? So, whether you've got a cozy nook or a spacious living room, remember that sometimes less is more. Don't get lost in the blade count; focus on the overall design and function. After all, a ceiling fan isn't just about the blades; it's about keeping you cool in style!

Continue Reading

Guides

What Size Ceiling Fan for 12X12 Room

You’ll discover the perfect ceiling fan size for your 12×12 room, but there’s more to consider for optimal airflow and comfort!

Published

on

By

12x12 room ceiling fan

To cool a 12×12 room effectively, you'll want a ceiling fan with a blade span between 42 and 50 inches. A fan around 44 inches works well to guarantee good airflow without creating uncomfortable drafts. Make sure the fan is installed about 8 feet from the floor for ideal circulation. If you have higher ceilings, consider using downrods to maintain the right height. Choosing a fan with a steep blade pitch can enhance air movement too. For more information on maximizing your fan's efficiency and features, there's a lot more to explore!

Key Takeaways

  • Ideal ceiling fan size for a 12×12 room ranges from 36 to 50 inches in diameter for effective airflow.
  • Fans with a blade span of 44 to 50 inches are recommended for optimal circulation in this space.
  • Maintain a clearance of 8-10 inches from the ceiling to enhance airflow efficiency.
  • Consider the ceiling height; downrods may be needed for ceilings higher than 8 feet.
  • Properly sized fans reduce energy consumption and prevent uncomfortable drafts or stagnant air.

Importance of Ceiling Fan Size

choosing the right size

Choosing the right ceiling fan size is essential for maximizing airflow efficiency in your 12×12 room. With an ideal fan size ranging from 42 to 48 inches in diameter, you'll achieve peak airflow and enhance air circulation throughout the space. A properly sized ceiling fan can greatly improve your comfort levels and create a more pleasant living environment.

If you choose a fan that's too small, you might find the airflow inadequate, leaving you hot and uncomfortable. Conversely, selecting a fan that's too large could create uncomfortable drafts, making it hard to enjoy your room. It's all about balance.

Additionally, the right ceiling fan size can impact your energy consumption and costs. An inefficiently sized fan may lead you to rely on additional cooling systems, increasing your energy bills.

Room Size Guidelines

optimal space measurement standards

When it comes to selecting a ceiling fan for your 12×12 room, knowing the recommended fan sizes is essential.

You'll want to take into account airflow to guarantee you get the right cooling without drafts.

Plus, following some key installation tips can make all the difference in your comfort and energy efficiency.

Advertisement

#

Recommended Fan Sizes

Wondering what ceiling fan size is best for your 12×12 room? For ideal air circulation, you'll want a ceiling fan size between 36 and 50 inches in diameter.

A fan within the 44-50 inch range is particularly suitable for a room of this size, ensuring effective airflow without creating uncomfortable drafts. Choosing a fan that's too small can lead to inadequate air circulation, leaving you feeling stuffy, while a fan that's too large can create a chilling breeze that's hard to enjoy.

When installing your fan, consider the ceiling height. If your ceiling is over 8 feet, using a downrod to achieve the ideal height for your fan is essential.

Advertisement

This positioning helps maximize airflow and enhances comfort throughout the space. Properly sizing the ceiling fan not only improves your comfort level but also contributes to energy efficiency, potentially reducing your electricity costs.

Airflow Considerations

Understanding airflow considerations is key to maximizing comfort in your 12×12 room. Selecting the right ceiling fan size directly impacts air circulation and guarantees ideal airflow. For your space, a fan with a blade span of 44 to 50 inches is recommended. This size will effectively circulate air without straining the motor, minimizing energy consumption and costs.

Here's a quick reference table to guide you:

Fan Size (Inches) Room Size (Square Feet) Airflow Efficiency
44 Up to 144 Good
50 Up to 144 Better
52+ Not recommended May cause drafts

Using the correct ceiling fan size enhances comfort during warm weather. An oversized fan can create uncomfortable drafts, while an undersized fan might not circulate air effectively, leaving you feeling warm. Following these guidelines helps guarantee you enjoy consistent cooling and efficiency in your 12×12 room while maximizing your fan's performance.

Installation Tips

Installing your ceiling fan correctly is vital for maximizing its effectiveness in your 12×12 room. For ideal airflow, choose a ceiling fan size with a blade span between 44 and 50 inches. This size will enhance air circulation, keeping your room comfortable year-round.

Advertisement

When you install, verify the fan is approximately 8 feet from the floor to the blades. This height not only promotes effective air circulation but also adds to your room's aesthetic.

Maintain a clearance of 8-10 inches from the ceiling to the fan blades to avoid noise issues and guarantee proper airflow.

If your ceiling height exceeds 8 feet, consider using a downrod to position the fan correctly. This adjustment is essential for effective air distribution.

Always refer to the manufacturer's guidelines when you install your ceiling fan; these instructions guarantee safety and proper functioning.

## Recommended Fan Sizes

Advertisement
effective setup recommendations

When choosing a ceiling fan for your 12×12 room, aim for a blade span between 44 to 50 inches for ideal airflow.

This size guarantees that the fan circulates air efficiently without creating uncomfortable drafts.

Optimal Blade Span

Choosing the right ceiling fan size can greatly impact the comfort of your 12×12 room. For optimal air circulation, you'll want to select a fan with a blade span between 44 and 50 inches. This size range maximizes airflow efficiency, guaranteeing your space feels cooler and more comfortable, especially during warm months.

If you choose a fan that's too small, it won't circulate air effectively, leaving you feeling stagnant. Conversely, a fan that's too large may create uncomfortable drafts, making your room less enjoyable.

Finding the right ceiling fan size not only enhances comfort but can also lead to energy savings by improving cooling efficiency, allowing you to rely less on air conditioning.

Additionally, it's essential to take into account your ceiling height when selecting a fan. If your ceiling is higher than average, you might need a downrod to position the fan at an ideal height for effective airflow.

Advertisement

Room Airflow Efficiency

Selecting the right ceiling fan size not only enhances comfort but also plays a significant role in room airflow efficiency. For your 12×12 room, you should aim for a ceiling fan size between 44 and 50 inches in blade span. This guarantees ideal airflow efficiency and improves air circulation, keeping your space comfortable.

Here are three key points to take into account when choosing your ceiling fan:

  1. Air Circulation: Fans with a blade span less than 44 inches might struggle to circulate air effectively, which can lead to hot spots or stagnant air.
  2. Avoid Overkill: On the flip side, fans larger than 50 inches can create excessive airflow, causing discomfort and drafts. Staying within the recommended size range is essential.
  3. Energy Efficiency: Properly sized ceiling fans can enhance energy efficiency, allowing you to rely less on air conditioning and reduce your electricity costs.

Ceiling Fan Height Considerations

ceiling fan installation guidelines

Ideal airflow is vital for comfort in a 12×12 room, and ceiling fan height plays an important role in achieving it. The ideal fan height is approximately 8 feet from the floor to the fan blades, guaranteeing optimal airflow and preventing discomfort.

If your ceiling is lower than 8 feet, you might take into account a flush-mount fan, which requires just 6-10 inches of clearance from the ceiling. For ceilings taller than 8 feet, using a downrod mount can help lower the fan, enhancing air circulation effectively.

Maintaining a fan height of 7-9 feet above the floor is recommended. This range promotes the best airflow performance while securing safety and comfort.

Remember to take into account the clearance around the fan; it should be at least 12-14 inches from the ceiling for standard mounts. This distance is essential to avoid obstructing airflow and to guarantee the fan operates safely without interference from walls or furniture. Additionally, using modern Energy Star certified fans can significantly enhance energy efficiency and comfort in your space.

Advertisement

Blade Design and Efficiency

optimizing blade performance metrics

When choosing a ceiling fan, pay attention to the blade pitch and material, as these factors greatly impact airflow efficiency.

A steeper blade pitch can enhance air movement, while the right materials can improve durability and performance.

Understanding these elements will help you select a fan that not only cools your 12×12 room effectively but also saves energy.

Blade Pitch Importance

The angle of your ceiling fan blades, known as blade pitch, plays an essential role in how effectively the fan moves air throughout your 12×12 room. A higher blade pitch, typically between 12-15 degrees, greatly enhances airflow, making your ceiling fan more efficient at cooling.

For peak performance, it's important to take into account the blade pitch when selecting your fan.

Here are three reasons why blade pitch matters:

Advertisement
  1. Airflow Efficiency: A fan with a higher blade pitch will circulate more air, creating a comfortable environment, especially during hot months.
  2. Cooling Power: With better airflow, you can rely less on air conditioning, potentially lowering your energy bills.
  3. Ceiling Fan Sizes: Different ceiling fan sizes can accommodate various blade pitches, so choosing the right size guarantees you get the best performance for your room.

Material Impact on Efficiency

Efficiency in ceiling fans hinges not only on blade pitch but also on the materials used in blade construction. The choice of material directly impacts airflow, durability, and overall performance.

For instance, blades made from lightweight materials like plastic can rotate faster, enhancing air movement in your 12×12 room. When you're looking for peak cooling, consider fans with a higher pitch—typically between 12 to 15 degrees—which work best with these lighter materials to maximize airflow.

On the other hand, wooden and metal blades can provide aesthetic appeal and durability but may not offer the same performance as lighter options. The number of blades also plays a role; while three to five blades are common, too many can hinder airflow if not designed aerodynamically.

So, when selecting a fan, aim for a balance between aesthetic and functional design. Choosing fans with well-designed blades that promote efficient airflow won't only cool your space effectively but also improve energy efficiency.

Ultimately, the right material and design will guarantee you get the most from your ceiling fan, keeping your 12×12 room comfortable year-round.

Motor Types and Performance

types of motors analyzed

Choosing the right motor type for your ceiling fan can greatly impact your comfort and energy costs.

When selecting a fan for your 12×12 room, consider the benefits of different motor types. Here's a quick breakdown:

Advertisement
  1. AC Motors: These are common and economical, typically offering three speed options. They provide decent air circulation but may not be as energy-efficient in the long run.
  2. DC Motors: Known for superior energy efficiency, these motors deliver a greater speed range and faster startup. They allow for more precise speed adjustments, giving you better control over airflow.
  3. Cost vs. Savings: While DC motor fans can be pricier upfront, their reduced power consumption can lead to lower energy bills over time.

Ultimately, choosing the right motor type is essential for ensuring ideal air circulation and energy efficiency in your space.

If comfort and savings are priorities, investing in a ceiling fan with a DC motor might be the best option.

Installation Tips and Techniques

effective installation strategies guide

Installing a ceiling fan in your 12×12 room can transform the space into a comfortable oasis. To optimize airflow, make certain to install your fan at a height of about 8 feet from the floor. If your ceiling is higher, consider using a downrod mount, adjusting its length according to your specific ceiling height for the best air circulation.

When you set up your fan, maintain a clearance of at least 12-14 inches between the blades and the ceiling. This prevents obstruction and guarantees proper airflow. Following the manufacturer's installation instructions is vital; these guidelines provide essential safety and mounting instructions tailored to your fan model.

Before you begin, gather all necessary tools and components to streamline the process.

Once installed, regularly check and maintain both the fan's mounting and electrical connections to enhance longevity and prevent operational issues. Keep these installation tips in mind to guarantee your ceiling fan is both effective and safe, ultimately elevating the comfort of your 12×12 room.

Energy Efficiency Benefits

maximizing resource utilization effectively

When you opt for an energy-efficient ceiling fan in your 12×12 room, you can enjoy substantial savings on your electricity bills—up to 40% less compared to traditional models.

Ceiling fans with ENERGY STAR ratings are specifically designed to maximize energy efficiency while providing an excellent cooling effect. This means you can stay comfortable without cranking up the air conditioning, which can greatly reduce your energy costs.

Advertisement

Here are three key benefits of choosing energy-efficient ceiling fans:

  1. Cost Savings: By allowing you to raise your thermostat setting by 4°F without sacrificing comfort, energy-efficient ceiling fans help you save on cooling costs.
  2. Year-Round Comfort: These fans not only cool your space in the summer but also assist in warm air circulation during winter, ensuring a comfortable environment all year long.
  3. Longevity and Low Maintenance: Investing in energy-efficient models can lead to considerable long-term savings, as they often last longer and require less maintenance than less efficient options. Furthermore, using these fans can lead to a decrease in reliance on HVAC systems, which are major household energy consumers.

Style and Aesthetic Considerations

design and visual appeal

A ceiling fan isn't just about cooling; it can also play an essential role in enhancing the style of your 12×12 room. Choosing the right ceiling fan can greatly elevate the aesthetic appeal and overall design of your space.

With various styles available—modern, traditional, rustic, and industrial—there's a perfect option to complement your existing decor.

Consider how the blade materials and colors impact both visual harmony and functionality. Darker blades may absorb more heat, while lighter colors can reflect light, influencing the room's ambiance. By selecting a fan that matches your room's theme, you create a cohesive look that ties everything together.

Don't forget to think about the finish and design of the ceiling fan in relation to your furniture and fixtures. This attention to detail enhances the aesthetic and elevates the space.

If you're looking for added convenience, features like integrated lighting kits can seamlessly blend with the fan's style, enriching the room's overall design. Additionally, opting for a fan with smart home compatibility can enhance convenience and modernize your living space.

Advertisement

Ultimately, a well-chosen ceiling fan not only serves a practical purpose but also becomes a stylish focal point in your 12×12 room.

Advanced Features and Accessories

enhanced tools and add ons

Equipped with advanced features, modern ceiling fans can greatly enhance your experience in a 12×12 room.

These fans not only provide comfort but also come with functionalities that make them a smart choice for your space. Here are some key features you should consider:

  1. Remote Control: Many ceiling fans come with remote controls, allowing you to effortlessly adjust the speed and lighting from anywhere in the room. No more getting up to change settings!
  2. Integrated Lighting: Some models feature integrated lighting, letting your ceiling fan serve as both a fan and a light source. This can save space and improve the room's overall functionality.
  3. Smart Ceiling Fans: These fans are gaining popularity due to their compatibility with home automation systems. You can control them through voice commands or mobile apps, making them a convenient option for modern living.

Additionally, opting for energy-efficient models can markedly lower your electricity bills while ensuring effective air circulation.

With accessories like pull chains and wall-mounted controls, you can enjoy both style and accessibility in your 12×12 room.

Frequently Asked Questions

Is a 52 Inch Fan Too Big for a 12X12 Room?

You might find a 52-inch fan too big for a 12×12 room.

It exceeds the recommended size for ideal airflow, which is typically between 36 and 50 inches. A fan this large can create uncomfortable drafts and disrupt air circulation, making it inefficient.

Advertisement

You want to verify your fan fits the space properly, so consider a 44-50 inch model instead, which will provide effective cooling without overpowering the room.

What Size Room for a 52 Inch Ceiling Fan?

A 52-inch ceiling fan is best suited for large rooms, typically ranging from 225 to 400 square feet.

You'll enjoy ideal airflow and cooling efficiency in spaces like living rooms and open concept areas.

Make sure to mount it 8 to 9 feet from the floor for the best circulation.

If your ceiling's higher, consider using a downrod to enhance airflow.

Advertisement

This size fan can really improve comfort in bigger spaces.

What Size Room for a 60 Inch Fan?

You're considering a 60-inch ceiling fan, but wait! This size works best in large rooms over 400 square feet where air circulation is essential.

Picture a spacious great room or an expansive outdoor patio; that's where it shines. In smaller spaces, like a cozy den, it might overwhelm you with too much airflow.

Is a 44 Inch Fan Too Small for a Bedroom?

No, a 44-inch fan isn't too small for a bedroom.

It provides effective airflow for medium-sized spaces, ensuring you stay comfortable while avoiding excessive drafts.

Advertisement

You'll find that this size fan can circulate air efficiently, making it ideal for relaxing or sleeping.

If you're looking for more airflow, you might consider a larger fan, but a 44-inch model strikes a great balance for most bedroom settings.

Conclusion

In a 12×12 room, the right ceiling fan is like a gentle breeze on a warm summer day, bringing comfort and style together. By choosing the appropriate size and design, you'll create a space that feels inviting and fresh. Remember to take into account height and efficiency when making your selection. With the right installation and features, your fan will not just cool your room; it'll become a beautiful part of your home's atmosphere.

Continue Reading

Guides

What Is the Red Wire on a Ceiling Fan

So, what does the red wire on a ceiling fan really do, and how can it enhance your lighting experience? Discover the details inside.

Published

on

By

ceiling fan wiring colors

The red wire on a ceiling fan acts as a hot conductor, allowing you to control the light fixture separately from the fan. If you want the flexibility of operating the fan and light with different switches, the red wire is crucial. It's often connected to the blue wire, which controls the light kit. If you don't need this feature, you can safely cap the red wire with a wire nut to avoid contact. This guarantees a tidy installation. If you're curious about proper connections or troubleshooting tips, there's more to discover that can enhance your ceiling fan experience.

Key Takeaways

  • The red wire in a ceiling fan is used for independent control of the light kit, allowing separate operation from the fan itself.
  • It serves as a hot conductor for the light kit, enabling the use of dimmer switches and multiple switch configurations.
  • If not needed, the red wire should be capped off securely to prevent accidental contact and ensure safety.
  • Proper connection of the red wire enhances convenience, allowing for tailored lighting solutions and operational flexibility.
  • Always verify connections when using the red wire to prevent issues like flickering lights or malfunctioning operations.

Ceiling Fan Wiring Basics

ceiling fan installation guide

When it comes to ceiling fan wiring, what do you need to know to guarantee a safe installation? First, familiarize yourself with the wires you'll encounter. Typically, you'll find a black wire, which is the hot wire controlling the fan's operation. The white wire serves as the neutral, completing the electrical circuit necessary for the fan to function properly.

If your fan includes a light kit, you'll also see a blue wire dedicated to controlling that feature. Don't forget the green wire, which acts as the ground wire for safety. If you come across a red wire in your setup, it may allow for separate control of the light kit, but we'll cover that later.

Properly identifying and connecting these wires is essential. Connect the black wire to the hot wire from your ceiling, and link the white wire to the neutral. The green wire should connect to your ground. This setup guarantees your ceiling fan operates safely and effectively.

Always double-check your connections and adhere to local electrical codes for the best results.

Function of the Red Wire

red wire s electrical role

Understanding the role of the red wire in ceiling fan wiring can really enhance how you control your fan and light setup. The red wire primarily provides independent power to the light kit, allowing you to operate the light separately from the ceiling fan. This means you can turn the light on or off without affecting the fan's functionality, offering you greater flexibility.

When you connect the red wire, it enables you to use different switches for your fan and light. If the wiring doesn't include the red wire, you'll find that both the fan and light will operate together from a single switch, which limits your control. This is particularly important if you want to use dimmer switches for the light, as the red wire is essential for providing that independent power.

Advertisement

Some fan models may label the red wire differently, such as R or L2, but its function remains the same.

When Is a Red Wire Needed?

red wire usage guidelines

You'll need a red wire when you want to control your ceiling fan and light independently.

This wiring option gives you the flexibility to upgrade your fan and enhances the overall functionality of your lighting setup.

Without it, you're stuck with a single switch that limits your control over both fixtures.

Independent Light Control

The red wire in a ceiling fan setup plays an essential role in achieving independent light control, enabling you to operate the light fixture separately from the fan motor. When you have a red wire, you can use two separate switches—one for the fan and another for the light—providing greater convenience and flexibility in your home.

This setup is particularly advantageous when you want to turn on the light without activating the fan or vice versa.

Advertisement

If your ceiling fan doesn't have a red wire, both the light and fan will operate together from a single switch, limiting your control options. This is where the red wire shines, especially during the addition of a light kit to a fan, as it allows for independent power without extensive rewiring.

Moreover, utilizing a red wire is vital for installations involving dimmer switches. It lets you dim the light while keeping the fan running at a consistent speed.

Wiring Flexibility Options

When considering wiring flexibility options for your ceiling fan, knowing when a red wire is necessary can greatly enhance your setup. The red wire coming from the ceiling is essential for achieving independent control of your fan and light fixture.

Here are three key scenarios where you'll need it:

  1. Adding a Light Kit Later: If you plan to install a light kit later, the red wire simplifies your setup, allowing you to connect the white wire easily without extensive rewiring.
  2. Multiple Switches: In homes with multiple switches, the red wire allows you to turn the fan and light on and off from different locations, enhancing convenience.
  3. Ceiling Fan Remote: If you want to use a ceiling fan remote, the red wire is often used to control the light separately, providing flexibility in operation.

If you skip the red wire, both the fan and light will operate together from a single switch, limiting your control options.

Enhanced Functionality Benefits

While considering how to enhance your ceiling fan's functionality, recognizing the importance of the red wire can greatly improve your experience. The red wire allows for independent control of the light kit, offering greater user convenience. This feature becomes essential when you use multiple switches to operate different aspects of your ceiling fan and light.

Advertisement

Here's a quick comparison of scenarios with and without a red wire:

Feature With Red Wire Without Red Wire
Independent Control Yes No
Dimming Capability Yes (with dimmer switches) No
Adding Light Kits Easily Yes Requires re-wiring

In installations featuring dimmer switches, the red wire enables you to dim the lights without affecting fan speed. If your lighting needs change, it allows for easy additions of light kits. However, if you have modern ceiling fans with remote controls, the red wire may not be necessary, as those designs often simplify wiring by integrating control functions. So, understanding the red wire's role can profoundly enhance your ceiling fan experience.

Connecting the Red Wire

red wire connection procedure

Connecting the red wire in your ceiling fan setup lets you control the light independently from the fan motor. This is especially useful if you want separate switch controls for your fan and light kit, providing you with maximum convenience.

Here are three key steps to connect the red wire:

  1. Turn Off the Power: Before you start, make sure the power is turned off at the circuit breaker to avoid any electrical hazards.
  2. Identify the Wires: Locate the red wire from the ceiling fan and the blue wire, which usually provides power to the light kit.
  3. Connect the Wires: Twist the red wire together with the blue wire securely. This connection allows the light to operate independently of the fan motor.

If you don't need the red wire for your setup, cap it off with a wire nut to prevent accidental contact.

Tips for Wiring Safely

safe electrical wiring practices

After confirming the red wire is properly connected, it's essential to prioritize safety during the wiring process. First, always turn off power at the circuit breaker and verify it's off with a voltage tester. This prevents electrical shock and keeps you safe while you wire a ceiling fan.

Next, use insulated tools and wear safety goggles and gloves to protect yourself from potential hazards. When connecting wires, double-check that you've identified them correctly—black for hot, white for neutral, and green for ground. This guarantees you connect wire properly and avoid installation errors.

As you work, make certain all wire connections are tight and secure. Use wire nuts to cap any unused wires, preventing short circuits that could cause issues later.

Advertisement

Remember to follow local electrical codes and manufacturer instructions to guarantee your work is compliant and safe.

Finally, take your time during the installation process. Rushing can lead to mistakes that may compromise safety. By adhering to these tips, you'll create a safe environment while installing your ceiling fan.

Ceiling Fan Wiring Methods

ceiling fan installation techniques

When installing a ceiling fan, understanding the wiring methods is vital for guaranteeing proper functionality and safety. Here are three key components to take into account:

  1. Red Wire: This wire is essential for providing independent power to the light kit, allowing you to control the light separately from the fan.
  2. Black Wire: This wire typically connects to the fan motor and directly controls the fan's operation.
  3. White Wire: The white wire is neutral and connects to the electrical box, completing the circuit for both the fan and the light.

When you wire from the fan, connect the red wire to the blue wire of the fan if you want the light to be controlled separately.

If you don't need independent light control, cap off the red wire with a wire nut for safety.

In some models, the red wire may be labeled as R or L2, but its function remains the same.

Troubleshooting Wiring Issues

electrical connection problem solving

Troubleshooting wiring issues with your ceiling fan can be straightforward if you know what to look for. The red wire is essential as it serves as a hot conductor, allowing for independent control of the light kit with a separate switch. If your fan and light operate together from a single switch, check if the red wire is properly connected. For separate control flexibility, connect the red wire to the black wire of the light kit. If you don't need the red wire, cap it with a wire nut for safety.

Flickering lights often signal a loose connection. If the light isn't working as expected, tighten the red wire connection. Additionally, if your fan operates while the light doesn't, or vice versa, it's time to verify connections. Confirm the red wire is correctly wired to its corresponding switch and that all connections are secure.

Advertisement

Taking these steps not only improves functionality but also enhances the security of your ceiling fan setup. By addressing these wiring issues, you can enjoy a fully operational ceiling fan and light fixture that meet your home's lighting needs.

Maintenance and Safety Tips

essential care and precautions

Maintaining your ceiling fan is vital for guaranteeing its longevity and safe operation. Regular checks can prevent hazards like electrical shock or fire caused by loose or frayed wires. Here are some key maintenance and safety tips:

  1. Turn off the power: Always switch off the power at the circuit breaker before you start any maintenance. This step is significant to avoid accidents.
  2. Use a voltage tester: After turning off the power, use a voltage tester to confirm that the power is off at the ceiling box. This verifies you're safely working on the fan.
  3. Inspect wiring connections: Regularly check the wiring connections, including the red wire, to verify they're secure and free from wear. If you find any loose or frayed wires, it's best to address this immediately.

Additionally, keep the fan clean by dusting the blades and housing to prevent buildup.

If you're unsure about any wiring connections or encounter issues, don't hesitate to consult a licensed electrician. They can help you safely install a ceiling fan and verify everything meets safety standards.

Your safety and the fan's efficiency depend on proper maintenance!

Frequently Asked Questions

What Do I Connect the Red Wire to in a Ceiling Fan?

To connect the red wire in a ceiling fan, you'll typically link it to the light kit's black wire.

If you want separate control for the fan and light, attach the red wire to the corresponding red wire from the ceiling.

Advertisement

Make certain to cap off the red wire with a wire nut if you're not using it.

Always double-check that the circuit is off before you start wiring to guarantee safety.

What Do I Connect the Red Wire To?

Did you know that nearly 80% of households use ceiling fans for energy efficiency?

When connecting the red wire, you typically attach it to the blue wire, which controls the light kit. This setup allows you to operate the fan and light independently.

If your fan doesn't have a light, cap the red wire with a wire nut.

Advertisement

Always double-check connections to guarantee everything's secure for safe operation.

Can I Connect Red and Black Wires Together?

You can connect the red and black wires together, but it isn't recommended.

This connection will cause both the light and fan to operate from one switch, limiting your control. If they draw too much power simultaneously, you risk tripping breakers or even starting an electrical fire.

Always follow the manufacturer's instructions and consult a qualified electrician before making any connections to guarantee safety and prevent potential damage.

Is Red the Same as White Wire?

No, red isn't the same as white wire.

Advertisement

The red wire typically carries power, often for a light fixture, while the white wire serves as the neutral, completing the circuit.

If you mix them up, you could create safety hazards or malfunctioning devices.

Always double-check your wiring before making connections, and guarantee you're using the correct wires for their intended purposes to maintain functionality and safety in your electrical projects.

Conclusion

In summary, understanding the red wire in your ceiling fan setup can make all the difference. Whether it's for a light kit or controlling fan speed, knowing its purpose guarantees a smooth installation. Remember, safety first—wiring can be intimidating, but with care and attention, you'll have your fan spinning and shining in no time. So, why not jump in, embrace the challenge, and let your ceiling fan dance to your tune?

Advertisement

Continue Reading

Affiliate disclaimer

As an affiliate, we may earn a commission from qualifying purchases. We get commissions for purchases made through links on this website from Amazon and other third parties.

Advertisement

Vetted

Trending