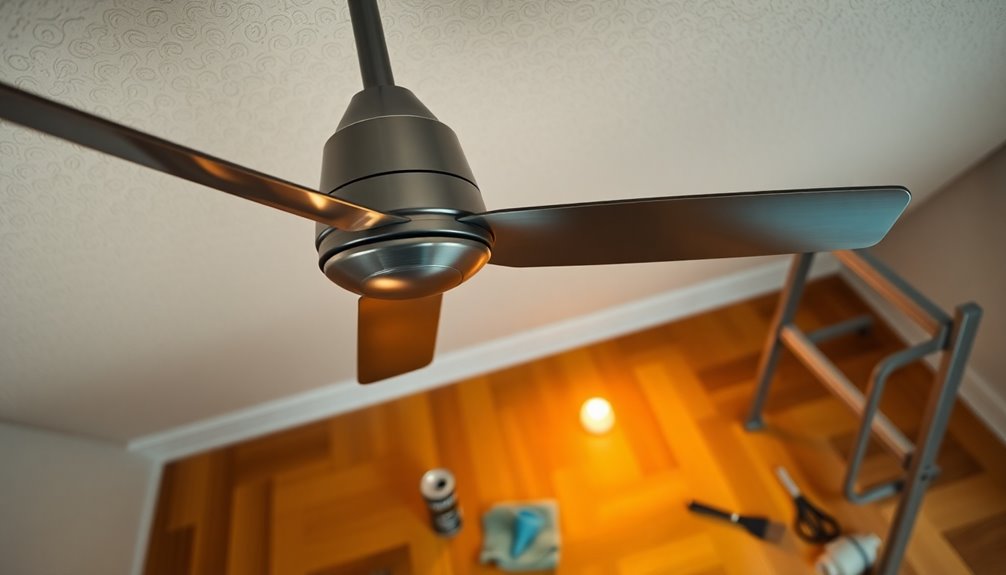
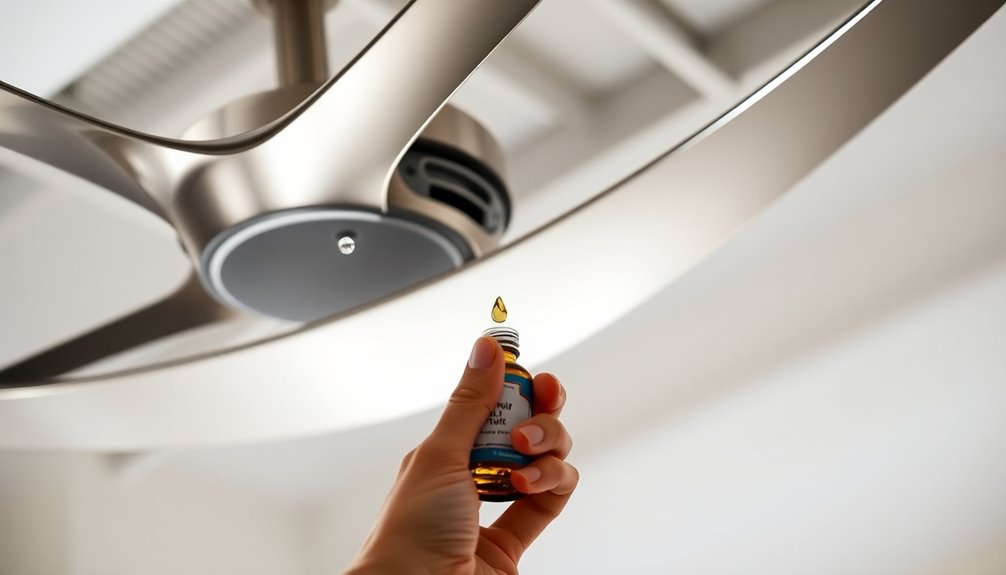
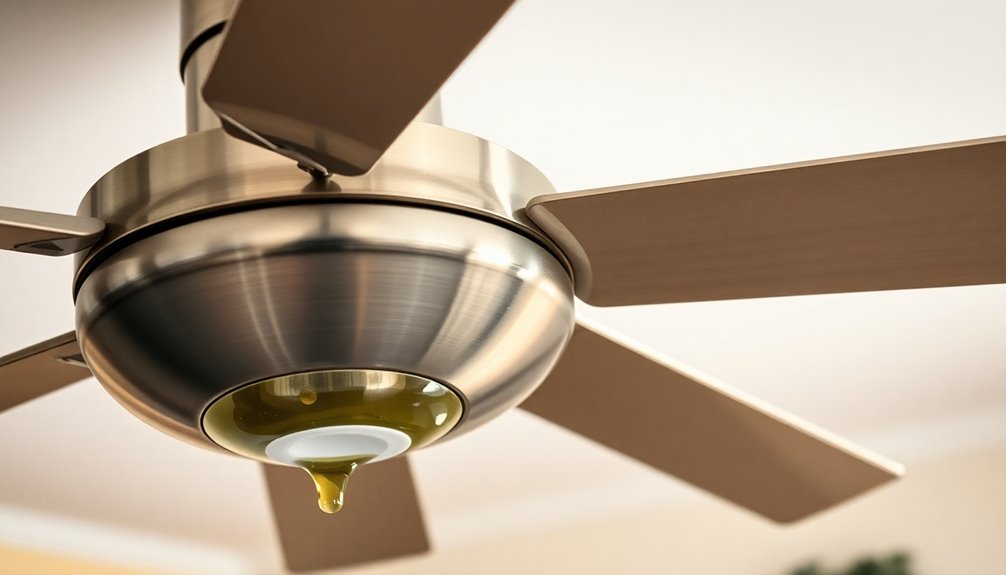
To oil your ceiling fan, start by turning off the power at the breaker. Locate the oil hole, typically found on top of the motor near the downrod. Use a pipe cleaner bent into a hook to check if oil is needed. If it's dry, apply 1-2 ounces of non-detergent electric motor oil using a funnel to prevent spills. Rotate the fan blades manually to help distribute the oil evenly. Don't forget to clean the blades regularly for better air quality and performance. These steps help keep your fan in top shape, but there's more to explore on maintenance.
Key Takeaways
- Locate the oil hole on top of the fan motor, typically near the downrod.
- Use a pipe cleaner to check if the oil hole is dry before adding oil.
- Apply 1-2 ounces of non-detergent electric motor oil through the funnel for lubrication.
- Rotate the fan blades manually after oiling to ensure even distribution of the oil.
- Always turn off the power supply before oiling to ensure safety during maintenance.

Akahttbn Ceiling Fan Light Kit,Twin Light Bulb Socket Compatible with Hunter Fan Black
Zing Ear ZE-310D ceiling fan dual lampholder can hold up to two standard base light bulbs, Includes ZE-109M…
As an affiliate, we earn on qualifying purchases.
As an affiliate, we earn on qualifying purchases.
Importance of Ceiling Fan Maintenance
Ceiling fans play a crucial role in maintaining comfort in your home, but they require regular upkeep to function effectively. Neglecting this maintenance can lead to a decline in performance, causing your fans to work harder and less efficiently.
One significant aspect of maintenance is oiling; it's essential for keeping the motor components well-lubricated. Proper lubrication not only enhances the performance of ceiling fans but also extends their lifespan by reducing wear and tear.
Routine checks and oiling can prevent common issues like noise from low lubrication levels, which can be annoying and signal that your fan needs attention. Additionally, poorly maintained fans could pose safety hazards, such as overheating or electrical malfunctions.
By following the manufacturer's recommendations for oiling frequency and lubricant type, you guarantee peak operation and energy efficiency.
Don't overlook the impact of maintenance on air quality. Cleaning and oiling your ceiling fans can reduce dust buildup on blades, improving airflow efficiency.
In short, regular maintenance is crucial to keeping your ceiling fans running smoothly, maximizing their lifespan, and maintaining a comfortable environment in your home.

3-IN-ONE-10045 Motor Oil, 3 OZ (pack of 1)
Lubricates the moving parts in small electric motors to extend the motor's life by reducing wear and tear
As an affiliate, we earn on qualifying purchases.
As an affiliate, we earn on qualifying purchases.
Tools and Supplies Needed
What tools do you need to oil your ceiling fan effectively? To get started, gather a few essential supplies that'll make the process smoother and more efficient. Here's a handy list to help you prepare:
| Tool/Supply | Purpose | Note |
|---|---|---|
| Step Ladder | Safe access to the fan | Verify it's stable |
| Philips-head Screwdriver | Disassemble parts if needed | Check for loose screws |
| Non-detergent Electric Motor Oil | Lubrication | Follow manufacturer's weight recommendation |
| Pipe Cleaner | Check oil level | Bend into a hook |
| Funnel | Precise oil application | Prevent spills |
| Paper Towels | Cleanup | Wipe excess oil or debris |
Having these tools on hand will help you oil your ceiling fan properly. The step ladder provides safe access to the motor, while the oil and funnel guarantee you're applying just the right amount. The pipe cleaner's flexibility is perfect for checking the oil level, and don't forget the paper towels for any mess. With these supplies ready, you're all set for a successful oiling process!

Blade Maid Ceiling Fan Blade Cleaner & Duster | Extendable Pole for High Ceilings, Moldings, Blinds, Walls & Cars, Corner Cleaning Tool, with Reusable Microfiber Pads | Size 3 feet (Pack of 1)
EXTENDED-REACH VERSATILITY: Blade Maid cleans ceiling fans, moldings, baseboards, blinds, light fixtures & car interiors or exteriors; The…
As an affiliate, we earn on qualifying purchases.
As an affiliate, we earn on qualifying purchases.
Preparing to Oil Your Fan

Before you start oiling your fan, it's crucial to prepare properly to confirm a smooth process. First, consult your user manual to determine the specific oil requirements and maintenance instructions for your fan model. This step verifies you use the right type of motor oil and follow any particular guidelines.
Safety comes first, so make certain to disconnect the power source by turning off the corresponding breaker at the electrical panel. Once that's done, use a step ladder to access the fan safely.
Locate the oil hole, which is usually found on top of the motor near the downrod and often labeled for easy identification.
Gather your supplies, including non-detergent motor oil, a pipe cleaner to check the oil level, and cleaning materials to clear dust and debris around the oil hole.
Before you proceed with oiling your fan, check the oil level by inserting the pipe cleaner about half an inch into the oil hole. If it comes out dry, it's a sign that oiling is necessary for peak fan operation and effective routine maintenance.

DRQ Ceiling Fan Cleaner Duster, Reusable Microfiber Duster with Extension Pole, 13 to 48 Inch Fan Blade Cleaner, Removable Dusters for Cleaning Walls Bookshelves Door Window Top (Blue)
[Easy to Store] The ceiling fan cleaning tools has a hanging hole at the back that is easy…
As an affiliate, we earn on qualifying purchases.
As an affiliate, we earn on qualifying purchases.
Locating the Oil Hole
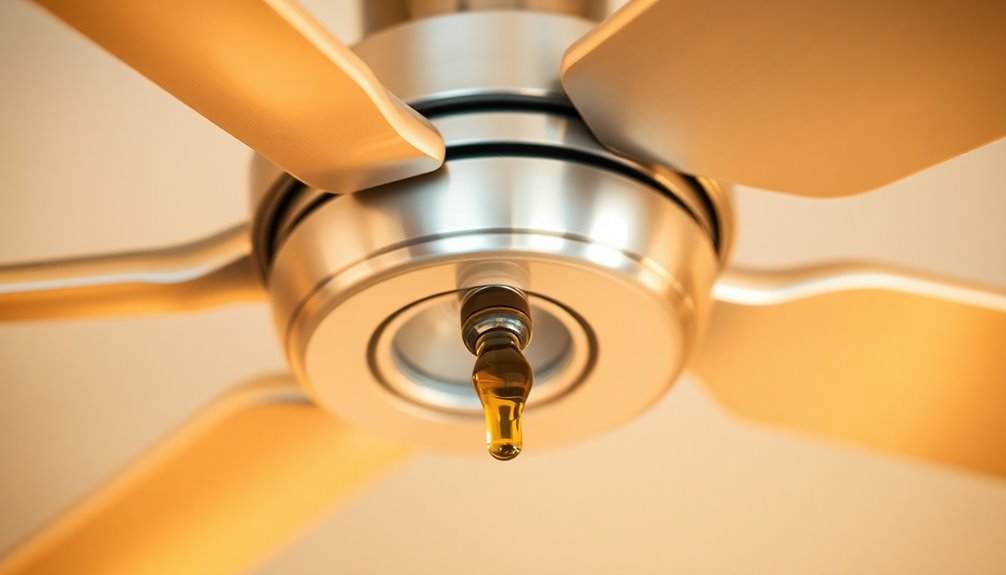
To locate the oil hole on your ceiling fan, start by checking the top of the motor near the downrod.
Many models have the oil hole labeled, making it easier for you to identify.
If you're unsure, consult your fan's user manual for specific guidance on finding the oil access point.
Oil Hole Placement
Proper lubrication is essential for maintaining a ceiling fan's efficiency and longevity, and locating the oil hole is the first step.
Here's what you need to know about oil hole placement:
- Location: The oil hole is typically found on the top of the motor, near the downrod. It's often labeled for easy identification.
- Cap Removal: Many models have an oil hole covered by a cap that you'll need to remove to access the oil reservoir.
- Multiple Holes: Some ceiling fans may feature multiple oil holes, so it's wise to consult your user manual for specific locations related to your model.
Before you start, remember to verify the fan is powered off for safety.
Once you've located the oil hole, you can check for oil presence using a bent pipe cleaner. If it's dry, it's a sign that lubrication is needed.
Keeping your ceiling fan well-lubricated through the oil hole not only enhances performance but also prolongs the life of the motor, confirming that you enjoy a quiet and efficient cooling experience.
Identifying Oil Access Point
When you're ready to locate the oil access point on your ceiling fan, start by verifying it's safely powered off. Use a step ladder to reach the fan motor, and keep an eye out for the oil hole. This access point is typically found on top of the motor, near the downrod, and may be labeled for easy identification.
In some cases, the oil hole might be hidden under a decorative cap, which you'll need to remove for lubrication. To verify you're on the right track, consult your fan's user manual for specifics about your model.
To check the oil level, you can use a pipe cleaner. Simply insert it into the oil hole; if it comes out dry, it's time to add more lubrication. Here's a quick reference table to help you understand:
| Step | Action |
|---|---|
| 1. Locate the Oil Hole | Check on top of the fan motor |
| 2. Remove Covers | Look for decorative caps or covers |
| 3. Use Pipe Cleaner | Insert into oil hole to check level |
Checking the Oil Level

To check the oil level, you'll need a simple tool—a pipe cleaner bent into a hook.
Insert it carefully into the oil hole near the motor's downrod to see if it comes out with oil.
This technique will help you determine if your ceiling fan needs more lubrication.
Tools Needed for Checking
Checking the oil level in your ceiling fan requires a few essential tools to guarantee the process goes smoothly and safely. Here's what you'll need:
- Step ladder: This helps you safely reach your ceiling fan without risking a fall.
- Flashlight: Use this for better visibility when locating the oil hole, which is typically found on top of the motor near the downrod.
- Pipe cleaner: Bend it into a hook shape to easily test for oil presence in the oil hole.
Before you start, make sure the power to the fan is turned off to prevent any electrical hazards.
Once you're ready, climb the step ladder and shine the flashlight to locate the oil hole. Use the pipe cleaner to check your fan's oil, ensuring it reaches deep enough to gauge the oil level accurately.
Don't forget to keep a clean cloth handy to wipe any excess oil or debris from the oil hole area.
Proper Technique for Testing
It's important to guarantee your ceiling fan has the right amount of oil for ideal performance. To check the oil level, start by turning off the power at the circuit breaker to confirm your safety. Next, bend a pipe cleaner into a hook shape and insert it about half an inch into the oil hole, typically located on the top of the motor near the downrod.
If the pipe cleaner comes out with oil on it, your oil level is sufficient. If it comes out dry, your fans need additional lubrication. For fans that require oiling, add 1-2 ounces of non-detergent electric motor oil through the oil hole using a funnel for precision. After adding oil, manually rotate the fan blades to help distribute the oil evenly. Recheck the oil level with the pipe cleaner, adding more oil if it remains dry.
Here's a quick reference table to help you remember the steps:
| Step | Action | Note |
|---|---|---|
| 1. Turn off power | Switch off the circuit breaker | Safety first |
| 2. Prepare pipe cleaner | Bend into hook shape | For checking oil level |
| 3. Insert into oil hole | Check for oil on pipe cleaner | Assess lubrication |
| 4. Add oil | Use funnel for precision | 1-2 ounces recommended |
| 5. Rotate blades | Distribute oil | Confirm even lubrication |
Cleaning the Ceiling Fan

Cleaning your ceiling fan regularly helps maintain its performance and appearance. Here are three key reasons to keep it clean:
- Improves air circulation: Dust on the blades can hinder airflow, making your fan less effective.
- Prevents wear and tear: A clean fan reduces the risk of grime buildup that can damage components.
- Enhances aesthetics: A clean fan looks better and adds to the overall decor of your room.
To start, always turn off the power to the fan for safety. Use a microfiber cloth and an all-purpose cleaner to wipe down the blades and housing, guaranteeing they're completely dry afterward.
It's wise to dust the fan blades weekly with a feather duster to prevent grime buildup and scratches. Aim for a thorough cleaning monthly or bi-monthly, focusing on the motor area to avoid oil and dust accumulation that could affect performance.
While cleaning, check for any signs of wear or unusual sounds during operation. These may indicate the need for maintenance or further inspection.
Keeping your ceiling fan clean guarantees it runs smoothly and efficiently for years to come.
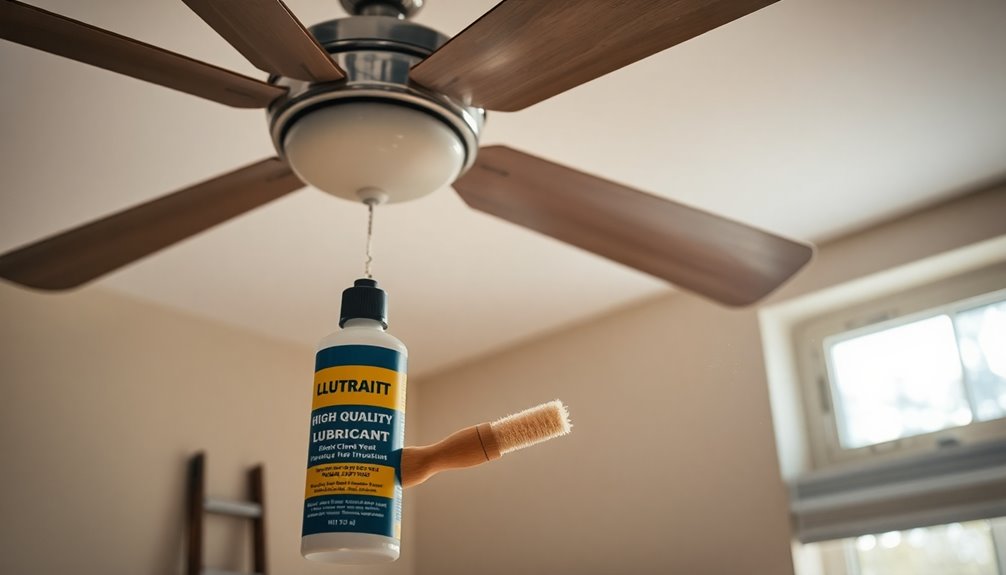
Oiling the Fan

Oiling a ceiling fan is vital for guaranteeing its longevity and efficient performance. To get started, locate the oil hole, which is usually found on the top of the motor near the downrod. You might even find it labeled for easy identification.
Before adding oil, use a pipe cleaner bent into a hook to check the oil level; if it comes out dry, it's time to oil your fan.
Make certain the fan is clean and dry before you pour in 1-2 ounces of manufacturer-recommended non-detergent motor oil. This step is important as it guarantees the oil meets the fan's specific requirements for peak operation.
After adding the oil, manually rotate the fan blades to help distribute the lubricant evenly throughout the motor.
Regular checks and oiling are advised every 1-5 years, depending on how often you use the fan and the conditions it operates in.
Testing Fan Functionality
After oiling your ceiling fan, it's essential to check for unusual sounds when you turn it on.
Listen carefully as you observe the blade rotation speed; if it's spinning slowly on high, there might be an issue.
Addressing these signs early can save you from more significant problems down the line.
Check for Unusual Sounds
Once you've completed the oiling process, it's time to put your ceiling fan to the test. You want to guarantee it's operating smoothly and quietly. Here's what to do:
- Turn on the fan at a slow speed and listen carefully.
- Pay attention to any grinding, rattling, or buzzing noises.
- Make a note of any unusual sounds you hear during operation.
These unusual sounds could indicate a lack of oil or other mechanical issues that need addressing.
Regularly testing your fan after maintenance is vital for its long-term health, helping you avoid potential damage. If you still hear noise after oiling, check for loose screws or misaligned blades, as these can also contribute to sound problems.
Keeping a log of when you oil your fan and any unusual sounds observed can be beneficial in identifying patterns and scheduling future maintenance tasks.
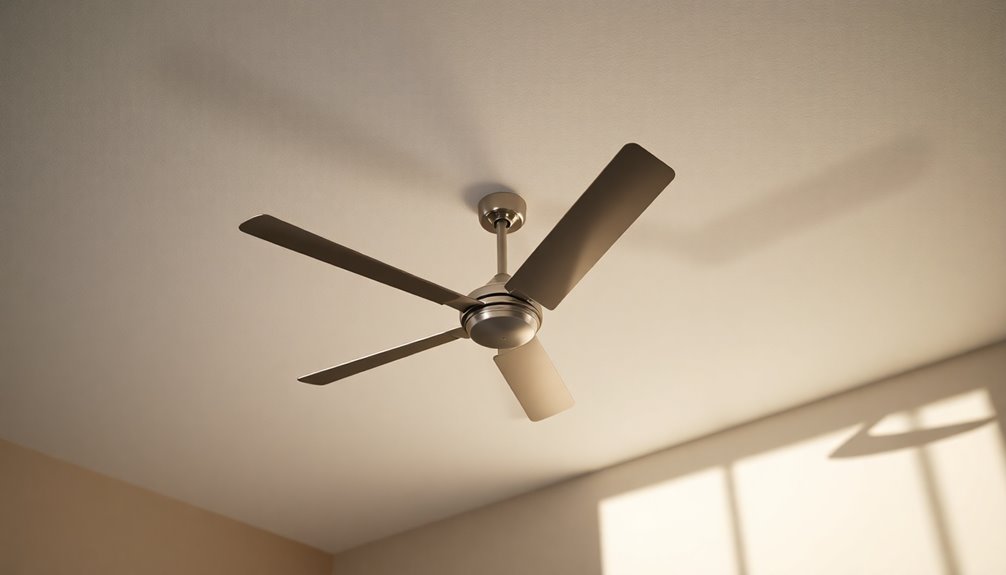
Inspect Blade Rotation Speed
Testing the fan's functionality involves checking the blade rotation speed to verify it's operating at peak performance. Start by turning the fan on to its highest speed setting and observe the blades. They should spin smoothly and consistently. If they're moving slowly or hesitantly, your ceiling fan needs attention. This could indicate a lack of lubrication or motor issues.
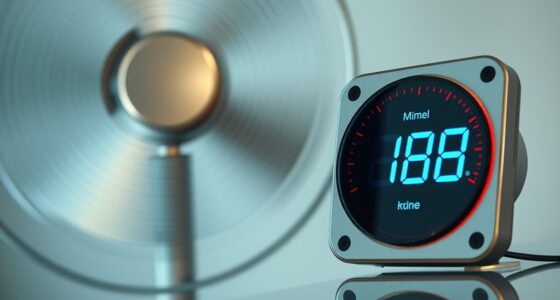
To measure the exact RPM (revolutions per minute), you can use a tachometer or a smartphone app. This precise assessment helps verify that your fan is performing efficiently. Additionally, listen for unusual noises; if your fan is making noise, like grinding or rattling, it's a sign that it may not be properly lubricated.
After oiling, manually rotate the blades to verify they move freely. Test the fan at both low and high speeds to confirm if there's an improvement in performance. Regular maintenance can extend the life of your fan and keep it running smoothly.
| Speed Setting | Observations |
|---|---|
| Low | Blades should rotate smoothly |
| Medium | Consistent speed expected |
| High | Quick, steady rotation |
| Noisy | Check lubrication |
Common Issues to Watch For
Watching for common issues in ceiling fans can help you maintain ideal performance and extend their lifespan. Here are three common problems to keep an eye on:
- Slow Spinning: If your fan spins slowly on high speed, it may need oiling or have motor issues.
- Wobbling or Shaking: This often indicates misaligned blades or loose screws, which can disrupt airflow.
- Unusual Noises: Grinding or squeaking sounds usually mean your fan requires more oil or has mechanical problems.
Regularly inspecting these aspects can prevent further damage. For instance, if you notice your fan motor struggling, it might need oiling.
A dry pipe cleaner test can help determine if additional lubrication is necessary; if it comes out dry after you manually rotate the blades, your fan definitely requires oil.
Also, keep an eye out for any oil leaks, as this could indicate over-lubrication or a seal issue.
Addressing these common issues promptly can save you from costly repairs and keep your fan running smoothly for years to come.
Professional Help Considerations

If you've noticed persistent issues with your ceiling fan that you can't resolve on your own, it might be time to call in a professional. When seeking professional help, make certain the technician has experience specifically with ceiling fan installations. This guarantees your fan receives the proper care it needs for peak performance.
Always verify that the technician is licensed and insured. This step protects you and the installer from potential liability during the service.
Before hiring, take the time to look for customer reviews and ratings. These insights help gauge the reliability and quality of the technician's work. Don't hesitate to compare quotes from multiple professionals to find an affordable option without sacrificing service quality.
Be sure to discuss any specific issues you're experiencing with the fan, like unusual noises or slow operation. This way, the technician can address all concerns during maintenance, guaranteeing a thorough job.
Frequently Asked Questions
Where Do You Spray the Lubricant on a Ceiling Fan?
When you're looking to spray lubricant on a ceiling fan, focus on the areas where the motor connects to the blades.
Find the oil hole, usually at the top of the motor. Before spraying, make sure the fan is clean and free of dust.
Once you've located the hole, apply a few drops of lubricant.
After that, rotate the blades manually to help distribute the oil evenly for best performance.
Where to Spray WD-40 on a Ceiling Fan?
When you're ready to spray WD-40 on your ceiling fan, locate the oil hole on the top of the motor, usually near the downrod.
Make sure the fan's powered off and the area is accessible.
Spray WD-40 into the oil hole to clean the lubrication system.
After that, let it sit for 1-2 hours, allowing any grime to evaporate before checking the oil reservoir with a pipe cleaner.
Are You Supposed to Oil Ceiling Fans?
When it comes to ceiling fans, you might be in the dark about oiling.
To keep your fan running smoothly, it's definitely a good idea to oil it regularly. This helps reduce noise and prevents overheating, so you won't have to worry about it breaking down.
Check your fan's manual for the right oil type and schedule, and you'll keep everything spinning like a well-oiled machine for years to come!
How to Quiet a Noisy Ceiling Fan?
To quiet a noisy ceiling fan, start by tightening any loose screws or bolts, as they can cause rattling.
Next, clean the blades with a microfiber cloth to remove dust and debris that may lead to imbalance.
If the fan wobbles, check its alignment with a level and consider adding weights to lighter blades.
Regularly oil the motor if needed, ensuring proper lubrication to reduce friction and noise.
Conclusion
By keeping your ceiling fan well-oiled, you guarantee it runs smoothly and efficiently, extending its lifespan. Remember, "a stitch in time saves nine." So, don't wait for strange noises or sluggish movement to address maintenance. Regularly check and oil your fan, and you'll enjoy a more comfortable living space. If issues persist, don't hesitate to call in a professional. Your ceiling fan is an essential part of your home, and it deserves the best care!