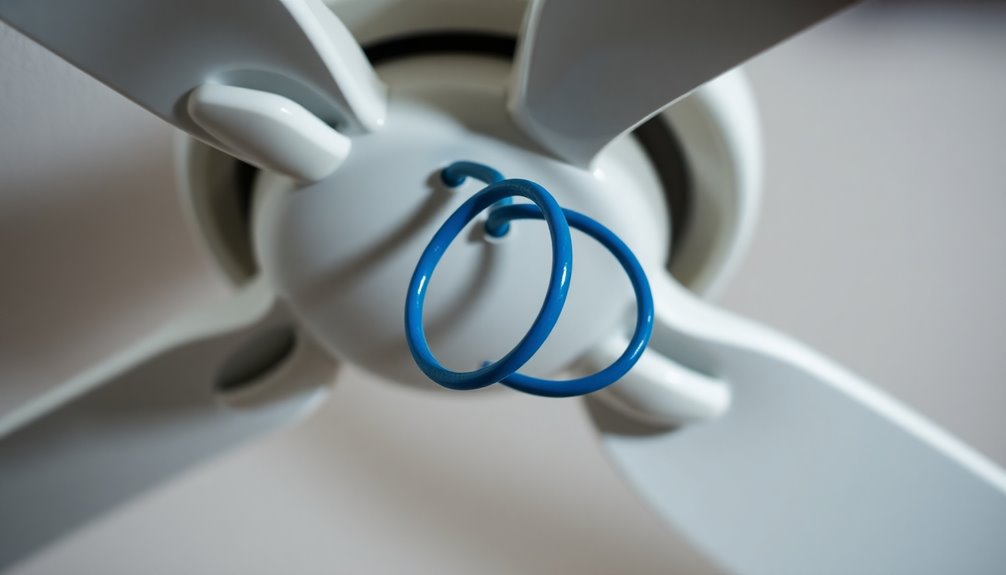
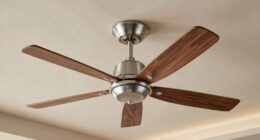
The blue wire on a ceiling fan is usually for the light kit, so it's essential to connect it correctly. In a single switch setup, you connect the blue wire to the black wire from the ceiling, allowing both the fan and light to operate together. If you've got a dual switch setup, attach the blue wire to its own switch for separate control of the light. Don't forget to connect white wires for neutral and ground your wires properly for safety. There's plenty more to take into account to guarantee everything works smoothly.
Key Takeaways
- The blue wire usually controls the light kit on a ceiling fan.
- In a single switch setup, connect the blue wire to the black wire from the ceiling.
- In a dual switch setup, connect the blue wire to its own switch for separate light control.
- Always ensure to connect ground wires for safety and cap any unused wires.
- Refer to the ceiling fan manual for specific wiring configurations and safety guidelines.
Importance of Proper Wiring

Proper wiring is vital for the safe and efficient operation of your ceiling fan. It helps prevent electrical hazards like short circuits or fires, guaranteeing your fan runs smoothly.
When dealing with ceiling fan wiring, you'll often encounter the blue wire, which typically controls the light kit. Connecting this wire correctly allows you to operate the light and fan independently, making your experience more convenient.
However, miswiring the blue wire can lead to problems, such as the light not functioning or being stuck on, which highlights the importance of understanding wiring configurations. Always follow manufacturer instructions and local electrical codes to guarantee compliance with safety standards. This careful approach not only protects you but also assures proper functionality.
Neglecting proper wiring can result in increased energy consumption and potential damage to your fan's motor or light kit. Thus, it's imperative to pay meticulous attention during installation. Additionally, ensuring that your fan is efficiently wired can help improve overall energy savings in your home.
Understanding Wire Color Codes

Understanding wire color codes is important for anyone installing or troubleshooting a ceiling fan. The blue wire is essential as it typically controls the power to the light kit, while the black wire powers the fan motor.
If you're working with a single switch, connect the blue wire to the black wire from the ceiling. This allows for shared power control over both the fan and the light.
However, if you're dealing with a dual switch setup, you'll connect the blue wire to a separate switch just for the light kit. This gives you independent control over the light while maintaining control of the fan through the other switch.
It's critical to properly identify the blue wire and follow the manufacturer's wiring diagram specific to your fan model to guarantee accurate connections.
In some cases, if your ceiling fan doesn't include a light kit, capping off the blue wire is necessary. This prevents interference with the fan's operation, making sure everything runs smoothly.
Understanding these wire color codes simplifies your installation process and enhances the functionality of your ceiling fan.
Tools Needed for Installation

Before you start installing your ceiling fan, gather some essential tools like a screwdriver, wire strippers, and electrical tape.
Don't forget your safety gear—eye protection and rubber gloves will keep you safe while you work.
Having a voltage tester on hand is vital to guarantee the power is off and prevent any shocks.
Essential Installation Tools
When installing a ceiling fan, having the right tools on hand can make the process smoother and safer.
Start with a screwdriver, which you'll need to secure the brackets and components. Wire strippers are essential for preparing the wire ends, ensuring proper connections. A voltage tester is vital to confirm that the power is off, preventing any electrical hazards while you work.
You'll also need a sturdy ladder to reach high ceilings and safely access the installation area. Electrical tape is important for securing wiring connections and insulating any exposed wires.
If you have a heavier model, consider getting a helper to hold the fan in place while you secure it to the ceiling.
While this section doesn't cover safety gear recommendations, it's wise to wear rubber gloves to protect your hands during installation.
Having these essential installation tools ready will help you handle the wiring and setup confidently, making your ceiling fan installation a successful project.
Safety Gear Recommendations
To guarantee a safe and efficient ceiling fan installation, wearing the right safety gear is crucial. Start with eye protection to shield yourself from debris and dust that may arise during the installation process. This simple precaution can prevent injuries and keep you focused on the task at hand.
Rubber gloves are another important piece of safety gear when dealing with electrical components. They help minimize the risk of electrical shock, ensuring you stay safe while working.
Before diving into the installation, gather your essential tools for installation, including a screwdriver, wire strippers, electrical tape, and a voltage tester. A sturdy ladder for access is essential to reach the ceiling safely.
Always check that all your tools are in good working condition to avoid interruptions and enhance safety.
Furthermore, it's important to follow local wiring codes and manufacturer instructions during the installation. This not only ensures compliance but also keeps you and your home safe from potential hazards.
Safety Precautions to Follow

Guaranteeing safety during ceiling fan installation is essential to prevent accidents and injuries. To achieve installation safety, follow these significant precautions:
- Turn off the power: Always switch off the circuit breaker before starting any work to eliminate the risk of electrical shock.
- Use a voltage tester: Confirm that the wires aren't live before touching or connecting any wiring. This step is critical for your safety.
- Wear safety gear: Equip yourself with protective eyewear and rubber gloves to safeguard against accidental injuries. Safety should be your top priority.
- Have tools ready: Make certain all tools are within reach before you begin. This minimizes distractions and allows you to focus on safe wire connections.
If you ever feel uncertain about the wiring connections or safety procedures, don't hesitate to consult a qualified electrician. Additionally, maintaining good indoor air quality can contribute to a safer environment by reducing allergens and pollutants in your home.
Connecting the Blue Wire

When connecting the blue wire on your ceiling fan, it's important to take into account your switch configuration.
If you're using a single switch, connect the blue wire to the black wire from the ceiling for shared control.
In a dual switch setup, you'll want to connect the blue wire to its own switch, while the black wire from the ceiling goes to the fan's black wire.
Single Switch Configuration
In a single switch configuration for your ceiling fan, connecting the blue wire is essential for proper operation of both the fan and the light kit. The blue wire connects to the black wire, which supplies power to your fan.
Here's a quick checklist to guarantee you're set up correctly:
- Connect the blue wire to the black wire for light control.
- Wrap the white wire with electrical tape to indicate it's hot.
- Securely connect all grounding wires (green or copper) to prevent hazards.
- Cap any unused wires to maintain safety and avoid confusion.
With this setup, your ceiling fan will operate seamlessly from a single switch, letting you control both the fan and the light kit effectively.
Remember, the black wire provides the main power supply, while the blue wire specifically controls the light. Keep the black and white wires distinct to avoid wiring issues.
Following these steps guarantees your installation is safe and efficient, allowing you to enjoy the comfort of your ceiling fan without any worries.
Dual Switch Setup
For a dual switch setup, connecting the blue wire correctly is essential to operating your ceiling fan and light independently. The blue wire from your ceiling fan connects to the switch designated for the light kit. This allows you to control the light separately from the fan itself.
Be sure to connect the black wire from the ceiling to the black wire of the fan; this provides power to the fan motor.
It's vital to double-check that the blue wire is connected to the correct switch. If you fail to do this, the light won't function, which can be frustrating.
Additionally, when wiring, make certain to connect the white wires from both the ceiling and fan together, as this completes the circuit necessary for neutral current.
Always verify the wiring configuration with your specific ceiling fan manual, since different models may have variations in wire color coding and usage.
Wiring a Ceiling Fan Step-by-Step

Wiring a ceiling fan can seem intimidating, but with the right steps, you can tackle it confidently. Start by verifying the power is turned off at the breaker to maintain safety.
Then, follow these steps for a successful installation:
- Connect the ground wires: Attach the green or bare copper ground wires first. This step is essential for safety.
- Attach the white neutral wires: Next, connect the white neutral wires from the ceiling to the fan. This helps return power safely.
- Hook up the hot wires: For a single switch configuration, connect the black fan wire to the black wire from the ceiling. If you're using a dual switch setup, attach the blue wire to the light kit for independent control.
- Conduct a functionality check: After all connections are made, turn the power back on and test the fan and light to verify everything works properly.
Once you've confirmed functionality, secure all components. Following these steps will make wiring a ceiling fan a smooth process, allowing you to enjoy your new fixture with ease.
Troubleshooting Common Wiring Issues

Troubleshooting common wiring issues can save you time and frustration when setting up or fixing a ceiling fan. If your ceiling fan light is always on, it might mean the blue wire is connected to a constantly hot wire instead of the switched hot wire from the wall switch. To check if the ceiling fan light is controlled by the switch, toggle it and see if the wire connected to the light changes state.
Make certain all neutral wires are securely connected. Loose neutral connections can lead to inconsistent light functionality, which is a common issue.
If you're capping unused wires, remember to properly insulate them to prevent short circuits or accidental contact with live wires.
Always turn off the breaker first before experimenting with wire connections. This step is essential to avoid electrical hazards and guarantee your safety during troubleshooting wiring issues.
Wiring Configurations Explained

When wiring your ceiling fan, you'll encounter two main configurations: single switch and dual switch setups.
In a single switch setup, the blue wire connects to the black wire for shared control of the fan and light.
With a dual switch setup, the blue wire connects to a separate switch, giving you independent control over the light.
Single Switch Wiring Setup
Understanding how to connect your ceiling fan in a single switch wiring setup is fundamental for guaranteeing proper functionality. In this configuration, you'll control both the fan and light using one switch.
Follow these steps for a safe and effective wiring setup:
- Connect the blue wire from the ceiling fan to the black wire. This allows you to control the fan and light simultaneously.
- Link the black wire from the ceiling to the fan's black wire. This provides power to the fan motor.
- Join the white wires from both the ceiling and fan to complete the neutral circuit. This is critical for proper electrical flow.
- Confirm the ground wires (either green or bare copper) from both the ceiling and fan are connected. This prevents electrical surges and enhances safety.
Always remember, it's essential to identify and connect the wires according to the manufacturer's instructions. This will help you avoid malfunctions or electrical hazards, making your ceiling fan operate smoothly and safely.
Dual Switch Wiring Setup
In a dual switch wiring setup, you'll have more control over your ceiling fan and light, allowing you to operate them independently. This configuration typically involves connecting the blue wire to a separate switch that controls the light kit, while the black wire connects to the fan motor, providing power to the fan.
To set this up, start by ensuring that the ground wires, usually green or bare copper, are securely connected from the ceiling to the fan. This is essential for safety and preventing electrical surges.
Next, connect the white wires from both the ceiling and the fan as neutral wires, completing the circuit. The black wire from the ceiling connects directly to the black wire of the fan.
When working with the blue wire, it should connect to a second live wire, often red or another black, which will power the light.
Always refer to the specific wiring instructions in your ceiling fan manual, as configurations can vary between models. By following these steps, you'll enjoy the flexibility of controlling your ceiling fan and light independently, enhancing your comfort and convenience.
Maintenance Tips for Ceiling Fans

Maintaining your ceiling fan is essential for keeping it running efficiently and extending its lifespan. Regular upkeep not only enhances performance but also helps you avoid costly repairs. Here are some effective maintenance tips:
- Clean the fan blades: Use a damp cloth to wipe down the fan blades regularly. This prevents dust buildup, which can hinder airflow and overall performance efficiency.
- Inspect connections: Periodically check and tighten any loose screws or connections on the fan and light kit. This reduces noise and potential safety hazards.
- Lubricate the motor: Follow the manufacturer's instructions to lubricate the fan motor every few years. This guarantees smooth operation and prolongs the fan's lifespan.
- Adjust fan direction: Change the fan direction seasonally—clockwise for winter to circulate warm air and counterclockwise for summer to create a cooling breeze.
Additionally, don't forget to check for burnt-out bulbs in the light kit and replace them promptly to maintain adequate lighting and prevent strain on the electrical components.
Professional Help and Services

When tackling ceiling fan installations or wiring issues, it's wise to seek professional help. Consulting a licensed electrician guarantees your project complies with local electrical codes and is done safely. They've the expertise in ceiling fan installation to guide you on the correct placement of the blue wire, especially if your setup involves multiple switches. Additionally, understanding the average cost of hiring professionals for electrical work can help you budget effectively.
Hiring a professional electrician can prevent potential hazards associated with incorrect wiring, such as electrical shorts or fire risks. These experts can quickly identify and troubleshoot any wiring issues, making the installation process smoother and safer. Regular maintenance can enhance the efficiency of the refrigeration cycle, ensuring your ceiling fan operates effectively. It's also essential to consider the financial considerations involved, as budgeting for installation costs can impact your overall expenses. Moreover, electricians can also provide insights into Louisiana alimony laws, which may assist with financial planning during a divorce.
Furthermore, many electrical service providers, like AC-DC Electric, specialize in ceiling fan installation, allowing you to benefit from their experience and knowledge. Additionally, professional installation services often come with a warranty, providing you peace of mind and assurance of quality workmanship. This way, if any issues arise post-installation, you can have them addressed without further stress. Moreover, understanding the importance of home security systems can enhance your overall safety while installing electrical fixtures.
Frequently Asked Questions
What Do You Connect Blue Wire To?
When you're connecting wires, the blue wire typically serves a specific function, often relating to lighting.
You'd usually connect it to another wire that powers the light, allowing you to control both the fan and the light separately.
If you're unsure, always check the wiring diagram that comes with your device.
It's essential to match the wires correctly to guarantee your setup works safely and efficiently.
Don't skip this step!
Does Blue Wire Go to Black or White?
When you're wiring, the blue wire typically connects to the black wire, not the white.
The black wire powers the fan, while the blue wire usually controls the light. If you want the light to operate with the fan, you'll connect these two.
If you're using a separate switch for the light, make sure the blue wire connects to that switch instead.
Always check your specific fan's wiring diagram for any variations.
What Does the Blue Wire Connect to in a Light Fixture?
"Don't put all your eggs in one basket."
When it comes to connecting the blue wire in a light fixture, it typically links to the light kit. This connection allows you to control the light independently from the fan.
If there's no light kit, you can cap off the blue wire. Just remember to follow proper wiring protocols to guarantee everything operates safely and efficiently.
Always check your instructions for specific configurations!
What Is the Blue Wire Coming From the Ceiling?
The blue wire coming from the ceiling typically controls the light fixture.
It's important to identify it correctly, as connecting it improperly can lead to issues with your lighting.
In setups with a single switch, you'll likely connect it to the black wire to operate both the light and fan together.
If you have dual switches, it connects separately for independent control.
Always check your specific wiring instructions for accurate installation.
Conclusion
In the end, connecting the blue wire on your ceiling fan isn't just a task; it's the thread that weaves your home's comfort and style together. By understanding the wiring and following safety precautions, you create an inviting space where cool breezes dance through your living room. So, take a moment to guarantee everything's connected correctly—your ceiling fan deserves that care, and so do you. After all, isn't a little effort worth the comfort of a perfectly functioning fan?
