Guides
The Right Way to Optimize Your Ceiling Fan for Summer
Breeze into summer with optimal ceiling fan settings and save on energy costs – find out the secret to staying cool efficiently.
Optimizing your ceiling fan for summer is crucial for staying cool efficiently. Set the rotation counterclockwise to enjoy a refreshing breeze and save on energy costs. Ensuring proper blade height for optimal air circulation is key, along with clearing at least 10 inches between blades and the ceiling for efficient airflow. Vaulted ceilings benefit from counterclockwise rotation, enhancing air circulation by up to 30%. To delve deeper into maximizing your ceiling fan's performance during the summer months, explore ideal clearance, energy-saving tips, and ways to maintain a balance between comfort and efficiency.
Key Takeaways
- Set fan rotation counterclockwise for a cooling breeze.
- Adjust fan height for optimal air circulation.
- Use a flush mount fan for low ceilings.
- Clean and maintain fan blades regularly.
- Enjoy energy savings by running fan at low speed.
Proper Ceiling Fan Height
When optimizing a ceiling fan for summer, the proper height at which it's installed significantly impacts its performance and efficiency. It's crucial to hang the ceiling fan between 7 to 9 feet from the floor to ensure optimal air circulation in the room. This ideal placement allows the fan blades to efficiently move air throughout the space, keeping you cool during the hot summer months.
For vaulted ceilings, using a down rod to hang the fan at the right height is essential for effective cooling. This setup ensures that the airflow is directed downwards, maximizing the fan's cooling capabilities.
In rooms with low ceilings, a flush mount ceiling fan is recommended to maintain proper clearance and ensure efficient operation.
Ideal Ceiling Fan Clearance
When setting up your ceiling fan, it's crucial to ensure proper clearance for optimal performance. Keeping at least 10 inches of space between the fan blades and the ceiling promotes efficient airflow.
Additionally, mounting the fan about 18 inches away from walls prevents air obstruction and ensures the fan operates at its best.
Fan Blade Height
To optimize air circulation and safety, ensuring the ideal ceiling fan clearance of between seven and nine feet from the floor is crucial. Proper fan blade height is essential for efficient airflow and preventing obstructions. Here are key considerations for achieving the right fan blade height:
- Maintain a minimum clearance of 10 inches between the ceiling fan blades and the ceiling.
- Mount the fan at least 18 inches away from any walls to ensure proper air movement.
- Use a down rod when installing the fan on vaulted ceilings to achieve the correct height and improve airflow distribution.
- For low ceilings, consider a flush mount ceiling fan to maintain the recommended distance from the floor and enhance air circulation.
Room Size Compatibility
For optimal air circulation in a room, it's essential to consider the compatibility of the ceiling fan size with the room dimensions. To ensure efficient operation, the ceiling fan should hang between seven and nine feet from the floor.
Maintaining a minimum clearance of 10 inches between the ceiling fan blades and the ceiling is crucial for proper functionality. Positioning the fan at least 18 inches away from walls prevents air obstruction and enhances airflow.
For vaulted ceilings, use a down rod to adjust the fan to the appropriate height. In rooms with low ceilings, a flush mount ceiling fan is ideal to guarantee proper clearance and efficient air circulation.
Vaulted Ceiling Considerations
Considering the unique design of vaulted ceilings, optimizing your ceiling fan's rotation direction can significantly enhance air circulation and cooling efficiency during the summer months. Here are some key considerations for vaulted ceilings:
- Counterclockwise Rotation: Set your ceiling fan to rotate counterclockwise in vaulted ceilings to promote better air circulation and maintain consistent room temperature.
- Cooling Breeze Effect: Running the fan in a counterclockwise direction creates a cooling breeze effect, enhancing comfort in rooms with vaulted ceilings.
- Energy Cost Savings: Properly directing your ceiling fan in vaulted ceilings can help reduce energy costs by up to 30% during the summer months.
- Maximizing Cooling Efficiency: Ensure that the fan blades are set to rotate counterclockwise to maximize cooling efficiency and airflow distribution in rooms with vaulted ceilings.
Low Ceiling Solutions
When addressing low ceiling solutions, ensuring proper clearance and secure installation of a flush mount or hugger ceiling fan is crucial. For ceilings lower than 8 feet, a flush mount fan is ideal to prevent safety hazards. To optimize air circulation, maintain a distance of at least 7 feet between the ceiling fan blades and the ceiling. Secure attachment of the ceiling fan is essential to prevent wobbling or instability.
Low profile ceiling fans are designed specifically for rooms with limited ceiling height, offering efficient air circulation while maintaining safety. By choosing a fan that hugs the ceiling, you can enjoy the benefits of airflow without sacrificing clearance. Whether it's a flush mount or a hugger fan, these options provide practical solutions for low ceilings, ensuring comfort and functionality in your space. Prioritizing proper installation and clearance will help you make the most of your ceiling fan's cooling capabilities.
Summer Fan Rotation
To maximize cooling efficiency during the summer months, adjusting the rotation of your ceiling fan blades to counterclockwise is crucial. This simple adjustment can create a cooling breeze effect in your home and help you feel more comfortable without having to lower the thermostat. Here are some benefits of running your ceiling fan counterclockwise during the summer:
- Air Movement: Counterclockwise rotation pushes air downwards, creating a gentle breeze that can make you feel cooler.
- Wind Chill: Running the fan at high speed in the correct direction can generate a wind chill effect, making the room feel even cooler.
- Energy Savings: By using your ceiling fan in conjunction with your air conditioning and setting it to rotate counterclockwise, you can reduce energy costs by up to 30 percent.
- Cooling Breeze: Increasing the thermostat by 4 degrees while running the fan counterclockwise can still maintain a comfortable temperature in your living space.
Make sure to switch your fan to counterclockwise rotation to enjoy these benefits and stay cool all summer long!
Counterclockwise for Efficiency
Setting your ceiling fan to rotate counterclockwise in the summer enhances cooling efficiency and promotes a comfortable environment. This direction creates a cooling breeze effect in the room, making it feel up to 4 degrees cooler according to Consumer Reports. By following Energy Star's advice to raise the thermostat and use ceiling fans, you can save 3-5% on air conditioning costs for each degree, potentially saving around $110 on power bills as estimated by Hunter Fans. Not only does counterclockwise rotation help maintain a consistent room temperature, but it also reduces the need for constant AC usage, leading to significant energy savings. To emphasize the benefits of setting your fan to rotate counterclockwise, let's look at the table below:
Benefits of Counterclockwise Rotation |
---|
Creates Cooling Breeze Effect |
Helps Save on Energy Costs |
Maintains Consistent Room Temperature |
Enhances Cooling Efficiency |
Promotes Comfortable Environment |
Room-Specific Fan Direction
Optimizing the ceiling fan direction based on the room's purpose and occupants' activities contributes to a more comfortable and efficient environment during the summer months. Here are some room-specific fan direction tips:
- Bedrooms: Set the fan to rotate counterclockwise for a cooling breeze during summer nights, ensuring a restful sleep.
- Living Rooms: Use a high-speed counterclockwise setting to create a wind chill effect, enhancing comfort for relaxation and gatherings.
- Kitchens: Adjust the fan direction to counterclockwise to reduce cooking heat and maintain a cooler atmosphere while preparing meals.
- Home Offices: Opt for a medium-speed counterclockwise rotation to prevent papers from fluttering and ensure a steady airflow conducive to productivity.
Blade Maintenance Importance
Regularly cleaning and maintaining your ceiling fan blades is essential for keeping your fan running smoothly and efficiently.
Dust and dirt buildup can hinder airflow and decrease performance, but simple cleaning techniques like using a pillowcase or applying car wax can help maintain optimal operation.
Blade Cleaning Tips
Ensuring your ceiling fan blades remain clean is essential for maintaining optimal airflow and efficiency during the summer months. Regular cleaning helps prevent dust buildup, which can impede the fan's performance. Here are some tips to keep your blades in top condition:
- Regular Cleaning: Dust and dirt accumulation can slow down your fan, so clean the blades frequently.
- Use Car Wax: Applying car wax can prevent dust buildup and keep the blades operating smoothly.
- Pillowcase Method: Hunter Fans recommend using a pillowcase to effectively remove dust and debris from the blades.
- Longevity and Efficiency: Properly maintaining and cleaning your fan blades ensures longevity and efficient operation.
Balancing Techniques
After maintaining cleanliness and smooth operation of your ceiling fan blades, it's crucial to address balancing techniques to ensure optimal performance. Properly balanced fan blades prevent wobbling, ensuring efficient air circulation in the desired direction.
Imbalanced blades not only cause noise but also reduce performance, leading to increased energy consumption. Regular blade maintenance, including checking for proper alignment, is essential. Balancing kits are available to help adjust and optimize blade alignment for smooth operation, preventing warm air pockets and promoting energy efficiency.
Remote Control Benefits
Having a remote-controlled ceiling fan enhances convenience by enabling users to adjust fan settings from anywhere within the room. Here are some benefits of having a remote control for your ceiling fan:
- Convenience: Easily change fan speed, direction, and lighting options without having to get up or stretch to reach the fan.
- Programmable Settings: Some remote controls offer programmable settings, allowing you to customize your fan experience to suit your preferences.
- Modern Aesthetic: Remote control fans eliminate the need for pull chains, giving your room a sleek and modern look.
- Enhanced User Experience: Adjust fan settings effortlessly, enhancing your comfort and overall user experience.
Remote control ceiling fans not only provide ease of use but also add a touch of modernity to your space. With programmable settings and the ability to control your fan from anywhere in the room, a remote-controlled ceiling fan is a valuable addition to any home.
Energy Saving Tips
Adjusting your ceiling fan to rotate counterclockwise at a lower speed can help with energy savings during the summer months.
By following this simple tip, you can maximize the cooling effect in your home while reducing your electricity bill.
It's an easy and effective way to stay comfortable and eco-friendly.
Adjust Fan Direction
How can you optimize your ceiling fan for summer to save on energy costs while staying cool? Adjusting your fan direction is key. Here's how:
- Set it Counterclockwise: This creates a cooling breeze effect, making the room feel up to 4 degrees cooler.
- Save on AC Costs: Energy Star estimates you can save 3-5% on AC costs for each degree you raise the thermostat, especially with a counterclockwise fan rotation.
- Lower Power Bills: Hunter Fans suggest using ceiling fans could save you around $110 on summer power bills.
- Enhanced Comfort: Properly adjusting your fan counterclockwise can significantly improve comfort and save energy during the summer months.
Use Lower Speeds
Lowering the speed of your ceiling fan is a practical way to save energy and reduce electricity costs during the summer months. By running the fan at a low speed, you can still enjoy a cool breeze without overcooling the room.
Energy Star suggests using ceiling fans on low to potentially save up to 40% on cooling costs. Adjusting the fan speed based on your comfort levels not only enhances energy efficiency but also ensures you stay comfortable while reducing energy consumption.
Comfort and Efficiency Balance
Striking a harmonious balance between comfort and efficiency is key when optimizing your ceiling fan for summer. Here's how to achieve the perfect equilibrium:
- Change the Direction: Set your ceiling fan to rotate counterclockwise in the summer to create a refreshing breeze that can make you feel up to 4 degrees cooler.
- Reduce AC Costs: By raising the thermostat by just one degree and using your ceiling fan, you can save 3-5% on air conditioning costs, as suggested by Energy Star.
- Enhance Comfort: Hunter Fans estimate that using ceiling fans properly can save you up to $110 on summer power bills by enhancing comfort and reducing the need for constant AC usage.
- Improve Efficiency: Properly optimizing your ceiling fan not only improves comfort but also significantly saves energy and reduces cooling costs, making your space more enjoyable and economical during the warm summer months.
Seasonal Fan Optimization
To optimize your ceiling fan for summer, adjusting its rotation counterclockwise is a simple yet effective way to enhance cooling and energy efficiency. Running the fan at its highest speed in this direction creates a cooling breeze effect, offering a comfortable environment through a wind chill effect.
By increasing the thermostat slightly while the fan operates counterclockwise, you can still enjoy a cool space while saving energy. This small adjustment can lead to significant energy cost savings of up to 30% during the summer months.
Most ceiling fans come equipped with a switch that allows you to easily change the direction to counterclockwise for optimal summer cooling. Making this seasonal change not only keeps you comfortable but also contributes to reducing energy consumption and costs.
Remote Control Installation
Installing a remote control for your ceiling fan enhances convenience by allowing operation from anywhere in the room. Here's how to install a remote control for your ceiling fan:
- Ease of Control: With a remote control, you can conveniently adjust the speed settings of your ceiling fan at the touch of a button.
- Direction Changes: Remote controls also allow you to change the direction of your ceiling fan easily, promoting better air circulation in the room.
- No More Pull Chains: Say goodbye to reaching for pull chains or switches – a remote control makes adjusting your fan settings effortless.
- Additional Features: Some remote controls offer programmable features, timers, and even dimming options for the lights connected to your ceiling fan.
Frequently Asked Questions
Can Using a Ceiling Fan Actually Lower the Temperature in a Room, or Does It Just Create a Wind-Chill Effect?
Using a ceiling fan can help lower the perceived temperature in a room by creating a wind-chill effect. It improves air circulation, aiding in heat distribution for a cooler feel.
This method is energy-efficient compared to running an air conditioner constantly. While it doesn't technically lower the room's temperature, the cooling efficiency and comfort it provides make it a practical choice for regulating indoor climate during warmer months.
Are There Any Specific Types of Ceiling Fans That Are More Energy-Efficient Than Others?
When comparing energy efficiency in ceiling fans, various factors come into play. Blade material, remote control options, size considerations, and noise level measurements all impact the overall efficiency.
Opt for fans with energy-saving features like LED lights and DC motors for better efficiency. Additionally, larger fans tend to move air more effectively, while noise levels can affect comfort.
Considering these factors can help determine the most energy-efficient ceiling fan for your space.
How Often Should Ceiling Fan Blades Be Cleaned or Replaced to Ensure Optimal Performance?
Cleaning and replacing ceiling fan blades is crucial for optimal performance. Dust buildup can hinder airflow, affecting efficiency. I recommend cleaning the blades every 3-6 months to maintain airflow and performance.
Replace blades if you notice warping, cracks, or excessive wear for effective cooling. Regular maintenance ensures longevity and effectiveness. Remember, a well-maintained fan is a cool and efficient fan!
Are There Any Safety Concerns or Precautions to Keep in Mind When Installing a Ceiling Fan in a Vaulted Ceiling?
When installing a ceiling fan in a vaulted ceiling, safety precautions are essential. Consider angled mounting for proper airflow. Ensure correct wiring and explore remote access for convenience.
Height considerations and aesthetic choices impact both function and style. Structural support is crucial, and professional installation is recommended for safety.
What Are Some Common Troubleshooting Tips for Remote-Controlled Ceiling Fans?
When dealing with remote-controlled ceiling fans, I've found that troubleshooting common issues involves checking the remote connectivity first.
If that's not it, I look into motor issues, try replacing the batteries, and address any signal interference.
Sometimes, resetting frequencies can also solve the problem.
Is Using Ceiling Fans in Conjunction with Air Conditioning the Best Way to Stay Cool in Summer?
Running ceiling fans with air conditioner can indeed be the best way to stay cool in summer. The fans help circulate the cool air, creating a more even temperature throughout the room. This can allow you to set the air conditioner at a slightly higher temperature, ultimately saving energy and money.
Conclusion
In conclusion, optimizing your ceiling fan for summer is essential for staying cool and comfortable during the hot months. Remember to adjust the fan height, clearance, and rotation direction for maximum efficiency.
By following these simple tips, you can create a refreshing breeze while also saving energy. As the saying goes, 'a well-optimized ceiling fan is a breath of fresh air in the summer heat.'
Guides
How Do Ceiling Fans Cool a Room
Uncover the secrets behind how ceiling fans cool a room and discover tips to maximize their efficiency for ultimate comfort.
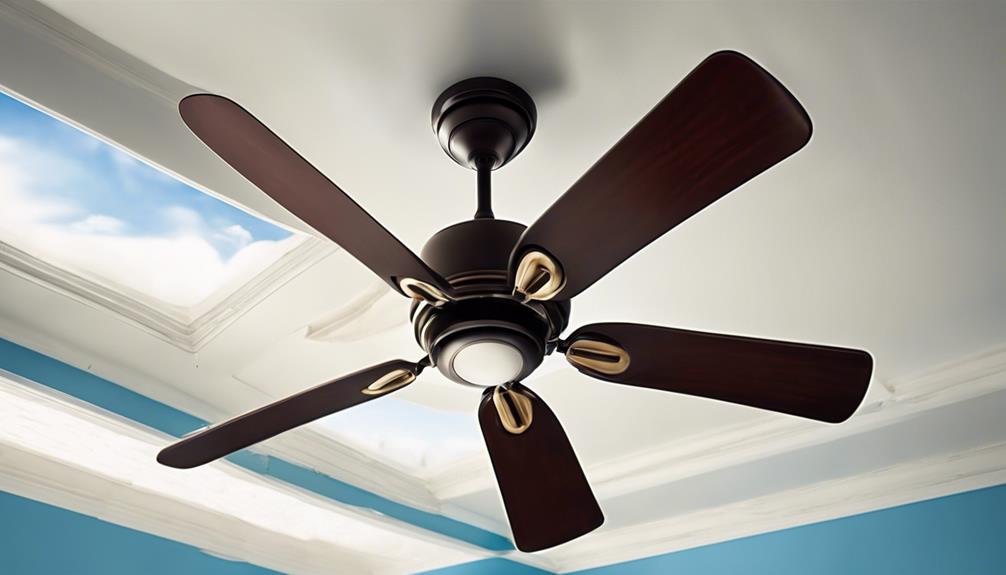
Ceiling fans cool a room by spinning their angled blades to create a downdraft, which circulates air and enhances comfort. This moving air produces a wind chill effect, making you feel cooler—an 80°F room can feel like a revitalizing 72°F when the fan's on. To maximize efficiency, install the fan 7 to 9 feet above the floor. Using the fan in tandem with your air conditioning allows you to raise the thermostat setting, cutting energy costs considerably. Want to learn more about how to get the most out of your ceiling fan? Keep exploring!
Key Takeaways
- Ceiling fans create a downdraft by utilizing angled blades, improving air circulation in the room.
- The wind chill effect makes occupants feel cooler without changing the room temperature.
- Setting the fan to rotate counter-clockwise in summer maximizes the cooling breeze.
- Fans can enhance energy efficiency, allowing air conditioning thermostats to be set higher, saving on energy costs.
- Regular maintenance, such as cleaning blades, ensures optimal performance and cooling effectiveness.
Mechanics of Ceiling Fans
Have you ever wondered how ceiling fans can make a room feel cooler? Ceiling fans utilize angled blades that create a downdraft, pushing warm air down and promoting effective air circulation. As the fan rotates, it generates moving air, which enhances the wind chill effect. This means you'll feel cooler on your skin without actually lowering the room temperature.
For ideal cooling, ceiling fans should be installed at a height of 7-9 feet above the floor and around 10-12 inches below the ceiling. This setup maximizes their cooling capabilities.
It's important to remember that ceiling fans are designed to cool people rather than the air itself. If you're in the room, the moving air will make you feel considerably cooler—an 80°F room can feel like 72°F with a well-placed fan.
This wind chill effect is crucial for energy efficiency, as it allows you to rely less on air conditioning. By creating a breeze, ceiling fans enhance your comfort level, making your space feel invigorating while saving on energy costs.
Benefits of Using Ceiling Fans
Ceiling fans offer a range of benefits beyond just cooling your space. They create a wind chill effect by circulating air, making you feel cooler on your skin without actually lowering the room temperature. This enhancement of comfort is particularly valuable in the summer months.
When you run ceiling fans alongside air conditioning, you can increase your thermostat settings by up to 4°F while still feeling comfortable, which can lead to energy savings of 30-40%.
One of the standout advantages of ceiling fans is their energy efficiency. They consume about 1% of the energy used by air conditioning units, considerably reducing your cooling costs.
By using ceiling fans regularly, you can also extend the lifespan of your HVAC system, as they help reduce its workload and contribute to long-term energy efficiency.
Moreover, ceiling fans are versatile enough to be used year-round. In summer, they provide a revitalizing breeze, while in winter, they help distribute warm air, enhancing overall home comfort.
Ceiling Fans and Air Conditioning
Using a ceiling fan in conjunction with your air conditioning can greatly enhance your indoor comfort while also saving on energy costs.
While ceiling fans don't actually lower room temperature, they create a wind chill effect that makes you feel cooler. This allows you to raise your thermostat setting by up to 4°F without sacrificing comfort, leading to significant energy savings.
Ceiling fans consume about 1% of the energy used by air conditioners, making them a cost-effective solution to improve indoor comfort. Additionally, when considering overall household energy efficiency, using a ceiling fan can complement eco-friendly toilets that help reduce water consumption.
When you run a ceiling fan while your air conditioning is on, you can reduce reliance on your AC unit, which can decrease its workload and potentially extend its lifespan.
To maximize cooling efficiency, set your ceiling fan to rotate in a counterclockwise direction during the summer months. This pushes cool air down and promotes better air circulation throughout the room.
Proper Usage Tips
To make the most of your ceiling fan, start by ensuring it's set to rotate counter-clockwise during the summer months. This setting creates a downdraft that enhances air circulation and generates a cooling breeze, making your room feel cooler.
For ideal airflow, use the medium speed setting; it strikes a balance between energy consumption and cooling effectiveness for most room sizes.
Remember, ceiling fans cool people, not rooms, so turn off the fan in unoccupied spaces to conserve energy. When paired with air conditioning, ceiling fans can help you raise your thermostat settings by up to 4°F without sacrificing comfort, leading to significant energy savings.
Regular cleaning is another essential aspect of proper usage tips. Dust buildup on the fan blades can hinder airflow and reduce the fan's cooling efficiency.
Make it a habit to clean your ceiling fan monthly to maintain ideal performance.
Energy Savings Potential
When you think about cooling your home, ceiling fans offer a surprisingly cost-effective solution. They consume only about 1% of the energy used by air conditioning systems, making them an excellent option for energy savings. By using ceiling fans, you can comfortably raise your air conditioning thermostat settings by up to 4°F, potentially saving you 12% on cooling costs.
Combining ceiling fans with your AC not only reduces energy costs but also lowers the runtime of your HVAC system, extending its lifespan. Energy Star certified ceiling fans can improve your energy efficiency by up to 60%, providing even more savings compared to standard models.
Here's a quick overview of the potential savings:
Feature | Impact on Energy Costs | Benefit |
---|---|---|
Ceiling Fans | 1% of AC energy usage | Significant cost savings |
Thermostat Settings | Raise by 4°F | Save money on AC bills |
Energy Star Certified Fans | Up to 60% efficiency | Increased energy savings |
Installation Considerations
When installing a ceiling fan, it's essential to take into account the room's ceiling height to guarantee safety and ideal airflow.
You'll want the blades positioned correctly for maximum efficiency, ideally 8 to 9 inches from the ceiling.
Following proper installation practices will help you get the most out of your fan, enhancing its cooling benefits.
Ceiling Height Requirements
Installing a ceiling fan requires careful consideration of ceiling height to assure peak performance and comfort. To guarantee ideal airflow and air circulation, keep these guidelines in mind:
- Minimum Ceiling Height: Install ceiling fans in rooms with a minimum ceiling height of 8 feet. This allows the fan blades to operate effectively.
- Blade Positioning: Position the fan blades 8-9 feet above the floor and 10-12 inches below the ceiling to maximize performance.
- Use of Downrods: For ceilings higher than 9 feet, use downrods to achieve the recommended height for proper airflow.
- Blade Diameter: Select fans with a blade diameter of 36-44 inches for spaces up to 225 square feet. Larger rooms may need fans with a diameter of 52 inches or more.
Proper placement of your ceiling fan in the center of the room enhances air circulation efficiency and overall room comfort.
When the air moves freely, you'll feel the cooling effects more effectively, making your space comfortable during warmer months.
Optimal Blade Placement
To achieve ideal cooling and airflow, you should install ceiling fans at a height of 7 to 9 feet above the floor. This installation height guarantees effective airflow without obstruction.
Position the fan blades 10 to 12 inches below the ceiling to maximize air circulation and maintain efficient operation. The ideal placement for ceiling fans is in the center of the room, promoting even air distribution and enhancing cooling effectiveness.
When selecting your ceiling fan, consider the blade diameter. Fans with a diameter of 36 to 44 inches work well in rooms up to 225 square feet, while larger spaces require fans with a diameter of 52 inches or more for adequate airflow.
Proper installation also involves maintaining a distance of at least 18 inches from walls, which enhances air movement and cooling efficiency.
Installation Best Practices
Proper installation of ceiling fans is vital for maximizing their cooling effectiveness and guaranteeing safety. To achieve ideal airflow and air circulation, consider the following best practices:
- Installation Height: Hang your ceiling fan 7-9 feet above the floor, confirming it's 10-12 inches below the ceiling for maximum efficiency. This height promotes effective air circulation throughout the room.
- Fan Size: Choose a fan size appropriate for your room size. For spaces up to 225 square feet, a fan with a diameter of 36-44 inches suffices. Larger rooms may need fans of 52 inches or more to maintain airflow.
- Proper Placement: Position your fan at the center of the room. This location enhances airflow effectiveness and guarantees even air distribution across the space.
- Fan Blades Clearance: Confirm fan blades are at least 18 inches away from the nearest wall. This distance is vital for effective air circulation and peak fan performance.
Additionally, selecting a ceiling fan with a high CFM rating ensures optimal airflow, enhancing the cooling experience in your room.
Frequently Asked Questions
Will a Ceiling Fan Cool Down a Room?
A ceiling fan won't actually cool down a room, but it can make you feel cooler.
By circulating air, it creates a wind chill effect that helps sweat evaporate from your skin, making it feel up to 8°F cooler.
You can set your thermostat higher without sacrificing comfort.
Just remember to turn it off when you leave the room, as it's only effective when you're there to enjoy the breeze.
Which Way Should a Ceiling Fan Turn to Cool the Room?
Did you know that a ceiling fan can make a room feel up to 8°F cooler?
To achieve this effect, you should set your ceiling fan to rotate counterclockwise in summer. This direction creates a downdraft, pushing cool air down and enhancing the wind chill effect.
You'll stay more comfortable without lowering your thermostat.
Remember to switch it to clockwise in winter to circulate warm air effectively!
How Effective Are Ceiling Fans for Cooling?
Ceiling fans are quite effective for cooling, especially during warm months.
You'll feel a noticeable difference in comfort as the fan creates a wind chill effect, making the air feel cooler on your skin. By running it counterclockwise, you can push cool air down, enhancing airflow.
Plus, they use much less energy than air conditioners, allowing you to save on utility bills while enjoying a pleasant environment.
Just remember to turn it off in unoccupied rooms!
How Much Does a Ceiling Fan Cool a Room?
Imagine standing in a gentle breeze on a hot summer day. That's what a ceiling fan does—it creates a wind chill effect that makes you feel cooler.
While it doesn't actually lower the room temperature, it can make an 80°F room feel like 72°F by circulating air.
Running your fan efficiently not only enhances your comfort but can also help you raise your thermostat setting, saving you money on cooling costs.
Conclusion
In the grand symphony of home comfort, ceiling fans are the unsung heroes, orchestrating a delightful breeze that feels like a cool mountain gale. By simply flipping a switch, you summon a rejuvenating whirlwind that makes summer heat a mere whisper. Pairing them with your air conditioning is like having a secret weapon against sweltering days. So, embrace the magic of ceiling fans; they're not just an accessory, they're the key to transforming your room into an oasis of cool bliss!
Guides
Which Direction for Ceiling Fan
Learn how to optimize your ceiling fan’s direction for seasonal comfort and savings—discover the best settings for your home right here.
To get the most out of your ceiling fan, adjust its direction by season. In summer, set it to rotate counterclockwise to create a cooling downdraft. This can lower your energy costs by up to 30%. In winter, switch it to clockwise at a low speed. This helps circulate warm air, potentially saving you around 15% on heating bills. Time your adjustments with Daylight Savings changes for maximum efficiency. Remember, each room may benefit from specific settings tailored to its use. If you're curious about those specifics and more tips, you'll find what you need just ahead.
Key Takeaways
- Set ceiling fans to counterclockwise in summer for a cooling breeze and energy savings of up to 30%.
- In winter, switch to clockwise at low speed to circulate warm air, potentially saving 15% on heating bills.
- Adjust fan direction during Daylight Savings Time changes for optimal efficiency—counterclockwise in spring and clockwise in fall.
- Ensure safety by turning off the fan completely before changing its direction using the reversing switch or remote control.
- Regularly clean fan blades and motor to maintain efficiency and extend the fan's lifespan.
Importance of Ceiling Fan Direction
The direction of your ceiling fan plays an essential role in your home's comfort and energy efficiency. Understanding ceiling fan direction can help you make seasonal adjustments that enhance airflow and optimize temperature perception.
During summer months, setting the fan to rotate counterclockwise creates a cooling downdraft, promoting airflow that helps reduce energy costs by up to 30%. You'll feel cooler without cranking up the AC.
In contrast, when winter rolls around, switching the fan to rotate clockwise generates an updraft that circulates warm air trapped near the ceiling. This simple adjustment can lower heating bills by 15% or more, making your home feel more comfortable without excessive heating.
Failing to adjust your ceiling fan direction may lead to inadequate airflow, resulting in discomfort and higher energy costs. By regularly changing the direction of your fan, you not only enhance comfort but also contribute to overall energy efficiency.
Seasonal Fan Direction Guidelines
Adjusting the direction of your ceiling fan according to the seasons can greatly enhance your comfort at home.
In summer, set your fan to rotate counterclockwise. This creates a cooling breeze that improves air circulation, making those hot days feel more bearable.
When winter rolls around, flip the ceiling fan switch to clockwise rotation at a low speed. This winter mode helps create an updraft, redistributing warm air without creating drafts.
By following these seasonal fan direction guidelines, you can enjoy significant energy savings:
- Up to 30% savings during summer
- 15% savings in winter
- Enhanced comfort levels year-round
- Reduced reliance on HVAC systems
- Ideal timing during Daylight Savings Time changes
Changing Ceiling Fan Direction
Changing your ceiling fan's direction is essential for optimizing airflow with the seasons.
To switch directions, first, turn off the fan and make sure it's completely stopped, then use the reversing switch or remote control, depending on your fan type.
Regularly adjusting the direction, especially during Daylight Savings Time, can help enhance your home's energy efficiency year-round.
Seasonal Adjustment Importance
Comfort in your home can be markedly enhanced by simply adjusting your ceiling fan's direction with the seasons.
By making these seasonal adjustments, you'll optimize airflow for both cooling and heating, ensuring that your comfort levels stay high year-round.
- In summer, set the ceiling fan direction to counterclockwise for a rejuvenating downdraft.
- Increasing thermostat settings by 4 degrees can reduce energy costs by up to 30%.
- In winter, rotate the fan clockwise at a low speed to promote warm air redistribution.
- This helps lower heating bills by 15% or more.
- Shifting to Daylight Savings Time is a perfect reminder to change your fan's direction.
How to Change Direction
To switch your ceiling fan's direction, start by making sure it's turned off and completely stopped for safety. This prevents accidents while you make adjustments. Depending on your fan type, the process varies.
Fan Type | Direction Change Method |
---|---|
Pull Chain | Locate the reversing switch and toggle it to switch between clockwise and counterclockwise. |
Remote-Controlled Fans | Make certain the remote is paired, turn off the fan, then press and hold the direction button until the light blinks. |
Smart Ceiling Fans | Use compatible smartphone apps or voice commands for a convenient change. |
Once you've changed the direction, turn the fan back on to confirm it's operating in the desired rotation. For summer, you want it to rotate counterclockwise for ideal airflow, making the room feel cooler. In winter, switch to clockwise to help circulate warm air from your heating system, which can lead to energy savings. By understanding how to change the direction of your ceiling fan, you can enhance your comfort and efficiency throughout the year.
Timing for Direction Change
When it comes to changing your ceiling fan's direction, timing is key.
You should adjust it during Daylight Savings Time—switch to counterclockwise in spring for cooling and clockwise in fall for heating.
Making these biannual changes not only keeps your space comfortable but can also help lower your energy bills. Additionally, ensuring that your ceiling fan is set to the correct direction can improve air circulation and comfort levels throughout your home.
Daylight Savings Time Adjustment
As Daylight Savings Time approaches, you should take the opportunity to adjust your ceiling fan's direction.
This simple switch can make a big difference in your home's comfort and energy efficiency. When you spring forward, set your fan to rotate counterclockwise to promote summer cooling. This creates a pleasant breeze that enhances airflow, keeping your comfortable home cool.
In the fall, when the clocks fall back, switch the fan to rotate clockwise to distribute winter warmth efficiently.
Here's a quick checklist to guide you through these adjustments:
- Spring Forward: Change to counterclockwise for cooling.
- Fall Back: Switch to clockwise for warmth.
- Energy Savings: Reduce energy costs by optimizing airflow.
- Complement HVAC Systems: Work in harmony with your heating and cooling systems.
- Regular Adjustments: Keep your home consistently comfortable year-round.
Seasonal Direction Changes
Adjusting your ceiling fan's direction seasonally is essential for maximizing comfort and efficiency in your home.
The best times to make these seasonal direction changes are during Daylight Savings Time adjustments, making it easy to remember each spring and fall. When you spring forward in March, set the ceiling fan to rotate counterclockwise. This direction enhances air movement, helping to circulate cool air and prepare your home for the hot summer months.
Conversely, when you fall back in November, switch the fan to rotate clockwise. This change aids in heating your living spaces by pushing warm air down, improving comfort during the chilly winter months.
Always verify the fan is turned off before making direction changes to prevent damage and guarantee safe operation.
Ceiling Fan Direction by Room
Choosing the right ceiling fan direction for each room can greatly enhance comfort and efficiency. The direction you choose impacts airflow, air circulation, and overall room comfort.
Here's how to adjust your ceiling fan based on the room type:
- Dining Rooms: Set the fan to rotate clockwise at medium or low speed. This prevents your food from cooling too quickly while still promoting air circulation.
- Home Offices: Use a medium-speed clockwise setting to avoid blowing papers around, ensuring a comfortable working environment.
- Vaulted Ceilings: Keep the fan on counterclockwise year-round. This minimizes the wind chill effect and maintains comfort.
- Rooms with Smokers: Opt for a clockwise setting. This draws warm air and smoke upward, enhancing ventilation, especially when windows are open.
- Outdoor Areas: Always set outdoor fans to counterclockwise at high speed. This creates a rejuvenating breeze and helps manage insects.
General Ceiling Fan Tips
Maintaining your ceiling fan's performance is key to enjoying its benefits. To maximize efficiency, make certain your ceiling fan is installed 7-9 feet above the floor and at least 10 inches from the ceiling. This setup allows for ideal airflow and helps cool air circulate effectively.
Remember that ceiling fans don't actually cool a room; they create a wind-chill effect that enhances comfort.
To get the right ceiling fan direction, set your fan to rotate counterclockwise during warmer months. This will create a cool breeze and distribute heat more evenly during colder months by reversing the fan direction to clockwise. This change can help push warm air trapped near the ceiling downwards, improving comfort and energy savings.
Regular cleaning of the fan blades and motor is essential for maintaining efficiency and reducing energy consumption.
If you have a larger room over 500 square feet, consider installing multiple fans to make certain consistent air distribution. Using a remote control or smart technology can simplify the operation, making it easy to change ceiling fan settings as needed.
Ceiling Fan Installation and Maintenance
Installing and caring for your ceiling fan correctly is essential for maximizing its performance and longevity. Start by verifying proper ceiling fan installation. Aim for a fan height of 7-9 feet above the floor to guarantee ideal airflow. Maintain a minimum clearance of 10 inches between the blades and the ceiling, and at least 18 inches from walls to enhance airflow and prevent obstructions.
Here are some key tips for effective installation and maintenance:
- Use a down rod for vaulted ceilings to achieve appropriate fan height.
- Regularly check and tighten screws and bolts to guarantee safety and performance.
- Utilize a leveling tool for proper blade alignment.
- Clean the blades and housing periodically to maintain efficiency.
- Monitor the fan's operation, listening for any unusual noises that may signal maintenance needs.
Frequently Asked Questions
How Do You Tell if a Fan Is Going Clockwise or Counterclockwise?
To tell if a fan's going clockwise or counterclockwise, stand directly underneath it and watch the blades. If they move from left to right, it's rotating clockwise.
For counterclockwise, the blades create an upward breeze, giving you a cooling effect.
You can also check for a reversing switch on the fan or use a remote control; pressing the direction button will indicate the rotation, often with a blinking light confirming the change.
What Is the Correct Way for a Ceiling Fan in the Summer?
In the summer, you should set your ceiling fan to rotate counterclockwise.
This direction creates a cooling downdraft, enhancing your comfort by producing a revitalizing wind chill effect.
By running it this way, you can actually reduce your energy costs, allowing you to raise your thermostat by about 4 degrees.
Just stand under the fan to feel the cool air and verify it's working efficiently for those hot days.
What Direction Should I Face My Fan?
Imagine standing in a warm room, wishing for a gentle breeze to cool you down.
When it comes to facing your fan, you want it to create that invigorating airflow. In summer, direct it counterclockwise for a cooling downdraft.
In winter, switch it to clockwise at low speed to circulate warm air.
Adjusting the direction can save you up to 30% on cooling costs and 15% on heating, making your home more comfortable.
Which Way Should a Ceiling Fan Turn in Summer Reddit?
In summer, your ceiling fan should turn counterclockwise. This direction creates a cooling downdraft, making your space feel more comfortable by enhancing airflow.
You'll notice the breeze helps cool your skin, allowing you to set your thermostat higher and save on energy costs. To check if it's rotating correctly, stand under the fan and feel for the airflow coming down.
Most fans have a switch to easily change the direction if needed.
Conclusion
So, whether you're basking in the summer sun or cozying up during winter's chill, adjusting your ceiling fan's direction is a breeze! Embrace the gentle flow of air to keep your space comfortable year-round. Remember, a little tweak here and there can make a world of difference in your home's vibe. With a bit of care and attention, your ceiling fan will be your trusty companion, ensuring every season feels just right. Happy fanning!
Guides
Can You Replace a Ceiling Fan With a Light Fixture
Simplify your ceiling renovation by replacing a ceiling fan with a light fixture—discover essential tips and safety precautions before you begin!
Yes, you can replace a ceiling fan with a light fixture. Just make sure to turn off the power at the breaker first to guarantee safety. You'll need to remove the fan and its mounting bracket, then attach a secure metal bracket for your new light. Connect the fixture wires to the ceiling wires, paying close attention to the ground wire. Always check your ceiling box capacity to support the new fixture's weight. If you're looking for additional tips or troubleshooting advice, there's plenty more to explore.
Key Takeaways
- Yes, you can replace a ceiling fan with a light fixture by following proper installation procedures and safety precautions.
- Ensure to turn off power at the breaker and use a voltage tester to confirm no electricity is flowing before starting.
- Remove the ceiling fan by detaching the mounting bracket and ensuring all electrical connections are completely disconnected.
- Securely attach the new light fixture's metal bracket and connect the corresponding wires: black to black, white to white, and ground wire.
- Test the installation by restoring power and checking the new light fixture for proper operation after all connections are secured.
Overview of the Replacement Process
Replacing a ceiling fan with a light fixture can seem challenging, but it's a straightforward process if you follow the right steps. First, prioritize safety by turning off the power at the breaker. Use a voltage tester to verify that there's no electricity flowing to the fan, guaranteeing a safe working environment.
Next, remove the existing ceiling fan. Start by loosening the cover plate and carefully untwist the electrical wires. Be sure to cap any unused wires, particularly the red wire, if you're not connecting another fan. This step is essential to prevent any electrical issues.
Once the fan is removed, prepare for the new light fixture installation. Attach the metal bracket to the ceiling, making sure it's secure. Connect the ground wire firmly to the electrical box.
Then, take the black and white wires from your light fixture and connect them to their corresponding wires in the ceiling. Verify all connections are tightly twisted and secured before capping them.
Finally, restore power at the breaker and turn on the switch to test your new light fixture. Make any necessary adjustments for peak performance, and enjoy your newly updated ceiling!
Tools and Materials Needed
To replace your ceiling fan with a light fixture, you'll need a few essential tools and materials.
Grab a screwdriver, wire cutters, and a voltage tester to guarantee a safe installation.
Don't forget to have your light fixture kit, electrical tape, and wire nuts on hand for secure connections.
Essential Tools Required
When you're ready to swap out a ceiling fan for a light fixture, having the right tools on hand makes the process smoother.
Here's a list of essential tools you'll need:
- Screwdriver: Use this to loosen cover plates and remove the ceiling fan.
- Wire nuts: These will help you securely connect and insulate electrical wires during installation.
- Voltage tester: Always verify the power is off before starting work; this tool is vital for safety.
- Drill: You might need this to secure the new light fixture's mounting bracket, especially if extra support is necessary.
- Needle nose pliers: These can assist in twisting wire connections and handling small components easily.
With these tools, you'll be well-prepared for the task ahead.
Don't forget to have electrical tape on hand to wrap connections for additional protection.
Taking the time to gather these essentials will make your shift from a ceiling fan to a light fixture efficient and safe.
Necessary Installation Materials
Successfully swapping out a ceiling fan for a light fixture requires more than just tools; it also demands the right installation materials for a seamless changeover.
First, you'll need a ceiling light fixture kit that typically includes mounting hardware, a metal bracket, and the necessary electrical wiring. Make sure your new light fixture is compatible with your existing ceiling box for proper support.
Next, gather some essential electrical wire connectors, like wire nuts, to securely join the fixture's wires to the existing ceiling wires. This step is vital for ensuring a safe and reliable connection.
If you're planning to use a ceiling medallion for added style, double-check that it fits well with your new light fixture and has the appropriate mounting features.
Don't forget about safety equipment! Wearing gloves and safety glasses is recommended to protect yourself from potential electrical hazards during the installation process.
Safety Precautions to Consider
Before you start replacing your ceiling fan, make sure to turn off the power at the breaker to avoid any electrical shocks.
It's also vital to use a voltage tester to confirm the power is off, and don't forget to wear protective gear like gloves and safety glasses.
Properly securing your wire connections and following local electrical codes will help keep your installation safe and compliant.
Power Off Procedures
Turning off the power at the breaker box is the first essential step in ensuring your safety while replacing a ceiling fan with a light fixture. This vital action helps prevent electrical shock or injury.
Once you've turned off the power, you should confirm that it's truly off before touching any wires or fixtures.
Here are some important power-off procedures to follow:
- Use a voltage tester to verify that the power is off.
- Cap off any unused wires with wire nuts to prevent accidental contact.
- Keep one black wire connected to the wall switch for power, while capping off the unused black wire.
- Double-check all wire connections for security before restoring power back.
- If you need to make adjustments, always turn off the power at the breaker box again.
Tool Safety Guidelines
Once you've confirmed the power is off, it's time to focus on tool safety. Following proper tool safety guidelines is vital when replacing a ceiling fan with a light fixture.
Begin by using insulated tools like screwdrivers and pliers to minimize the risk of electrical shock, especially when handling any exposed wires.
Make sure to wear safety goggles and gloves to protect yourself from debris and sharp edges. Safety is paramount when working with the light box and its components.
Before you start, verify that all connections are secure and that the wires are properly capped with wire nuts. This helps prevent short circuits or electrical fires, ensuring a safe installation.
Remember to check that the ground wire is correctly connected to avoid potential hazards.
Additionally, it's important to follow local electrical codes and manufacturer instructions for compliance with safety standards.
By adhering to these guidelines, you'll create a safer working environment and reduce the risk of injury as you shift from a ceiling fan to a light fixture.
Stay focused and prioritize safety throughout the entire process.
Wiring Connection Precautions
When working with electrical wiring, guaranteeing safety is essential to avoid hazards. Before you start, remember these wiring connection precautions to keep yourself safe and your project successful. Always prioritize power safety and double-check everything during the process.
- Turn off the power at the breaker to prevent electrical shock.
- Use a voltage tester to confirm no electricity is flowing through the wires.
- Securely cap any unused wires, such as the red wire if you're not connecting it to a new fan.
- Double-check all wire connections for tightness and proper insulation.
- Follow local electrical codes and guidelines to guarantee compliance.
Guarantee you pay special attention to the white wires, as they're often neutral in your setup and need to be connected correctly to the light fixture.
After you've made your connections, you can turn on the light switch to test the fixture. If anything seems off, don't hesitate to switch the power back off and double-check your work.
Safety first will make your wiring project a breeze!
Step-by-Step Removal Guide
To start removing your ceiling fan, grab a screwdriver and loosen the screws on the ceiling cover plate. Once that's off, you'll see the fan assembly. Carefully remove the wire caps and untwist the electrical wires. Make certain to distinguish between the copper ground wire and the red wire if applicable. If you're not replacing the fan with another, cap the red wire securely to prevent it from touching other wires.
Next, fully remove the fan and its mounting bracket from the ceiling. Verify that all connections are disconnected before you proceed.
Here's a handy table to guide you through the removal process:
Step | Action | Notes |
---|---|---|
1. Remove Cover Plate | Use a screwdriver to loosen screws. | Keep screws in a safe place. |
2. Disconnect Wires | Untwist and remove wire caps. | Identify the copper ground. |
3. Cap Red Wire | Securely cap the red wire if not used. | Prevent contact with other wires. |
4. Remove Fan Assembly | Detach the fan and bracket from ceiling. | Verify all connections are off. |
5. Clean Up | Prepare the area for installation. | Clear debris and inspect wiring. |
Now you're ready for the next steps in your project!
Installation of the New Fixture
Installing your new light fixture is an exciting step in updating your space. Follow these key steps to guarantee a successful installation:
- Attach the metal bracket: Securely attach the metal bracket of your new light fixture to the ceiling light kit, making sure it's compatible with the existing switch box.
- Install a ceiling medallion (if desired): If you want to add a decorative touch, install the ceiling medallion before you push the capped red wire into the light box.
- Connect the ground wire: Attach the copper ground wire from the bracket to the ceiling's copper ground wire, ensuring it's tightly capped for safety.
- Wire the fixture: Twist the black wire from the light fixture to the black wire in the ceiling, and do the same with the white wires. This completes your light and fan connections.
- Restore power: Finally, head to the breaker box and restore power. Test the new light fixture to confirm everything's working smoothly.
Troubleshooting Common Issues
After you've installed your new light fixture, it's essential to be prepared for any issues that might arise. Here are some common problems and how to troubleshoot them effectively.
Issue | Solution |
---|---|
Light doesn't turn on | Double-check that all wire connections are secure and properly twisted together. |
Flickering lights | Inspect wiring connections and verify the total wattage doesn't exceed the circuit capacity. |
Circuit breaker trips | Review your wiring connections to confirm they match the fixture's requirements. |
Remote-operated issues | Verify the remote is paired correctly and check for interference from other devices. |
Always turn off the power at the breaker before making any adjustments to the wiring. This keeps you safe while troubleshooting. If your light isn't functioning as expected, start by inspecting all connections. If flickering occurs, it may indicate a wiring issue or that your circuit is overloaded. For persistent problems, don't hesitate to consult a professional electrician to verify everything is set up correctly and safely.
Community Insights and Tips
Community insights and shared experiences can greatly enhance your confidence when replacing a ceiling fan with a light fixture. Engaging with others in online forums can provide valuable community feedback, helping you navigate your home improvement project more effectively.
Here are some tips from fellow DIY enthusiasts:
- Check the ceiling box: Verify it can support the weight of your new light fixture to avoid safety hazards.
- Follow step-by-step tutorials: Many users appreciate detailed guides that outline the process, making it easier for you to tackle the project.
- Understand wiring configurations: Seek out resources that explain common wiring setups to prevent confusion during installation.
- Ask for help: Don't hesitate to reach out on forums for advice or clarification on specific issues you encounter.
- Celebrate small victories: Positive reinforcement from peers can motivate you to tackle repairs and upgrades you might've otherwise avoided.
Frequently Asked Questions
Can You Put a Regular Light Fixture on a Ceiling Fan?
Yes, you can put a regular light fixture on a ceiling fan, as long as the fan's mounting bracket can support the fixture's weight.
You'll need to verify the wiring is compatible, connecting the black and white wires correctly while capping any unused ones.
Always turn off the power at the breaker box before starting your installation.
Just make sure your electrical box is rated for the new fixture to prevent any issues.
What Can I Replace My Ceiling Fan With?
"Out with the old, in with the new." You can replace your ceiling fan with a variety of options, like a stylish light fixture, chandelier, or pendant lights.
When making your choice, consider the room's size and decor. Confirm the new fixture matches the existing wiring and check that the electrical box can support its weight.
If you want ambiance, think about adding dimmers or smart controls for extra functionality.
Can I Replace a Ceiling Fan Without a Light With One That Has a Light?
Yes, you can replace your ceiling fan without a light with one that includes a light fixture.
Just make certain your existing electrical box can handle the weight and load of the new fixture.
When you install it, connect the black wire for power and the white wire for neutral, capping any unused wires properly.
Don't forget to turn off the power before starting, and test it once you're done to ascertain it works.
Do You Need Special Wiring for a Ceiling Fan With a Light?
When you're thinking about the dance of wires in a ceiling fan with a light, it's important to know you might need a couple more strands than for a simple light fixture.
Typically, you'll deal with a black wire for power, a white for neutral, and potentially a blue or red for the light.
Conclusion
As you stand back and admire your new light fixture glowing softly above, you can feel the satisfaction of a job well done. Swapping out that old ceiling fan for a stylish light not only brightens up your space but also transforms the entire atmosphere. With a bit of effort and care, you've turned a simple room into a warm, inviting sanctuary. So go ahead, bask in the glow of your accomplishment—you've earned it!
-
Guides1 week ago
How Much to Install a Ceiling Fan
-
Vetted2 weeks ago
15 Best Window Air Conditioners With Heat Pumps for Year-Round Comfort
-
Vetted2 weeks ago
15 Best Name Brand Window Air Conditioners for Ultimate Comfort This Summer
-
Guides2 weeks ago
Which Way Does a Ceiling Fan Go in the Summertime
-
Vetted2 weeks ago
15 Best Over-the-Sill Window Air Conditioners for Efficient Cooling in Small Spaces
-
Vetted2 weeks ago
15 Best Window Air Conditioners of 2025, According to Consumer Reports
-
Vetted2 weeks ago
15 Best 115 Volt Window Air Conditioners to Keep Your Home Cool This Summer
-
Guides2 weeks ago
Can You Spray Paint a Ceiling Fan