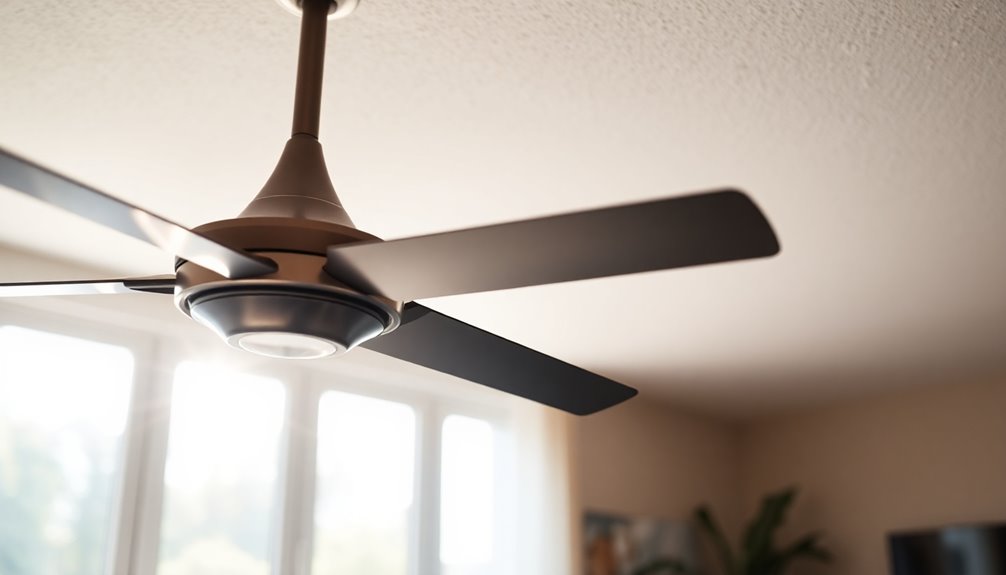
To maintain your outdoor ceiling fan, regularly inspect all components, tighten loose screws, and check for damage or corrosion. Clean dust off blades and motor housing often, and ensure blades are balanced and aligned. Lubricate moving parts if needed, and replace any worn or damaged blades with weather-resistant ones. Protect your fan from salt and moisture, and verify controls and speed settings. Keep up with seasonal checks to guarantee peak performance—there’s more to learn for lasting results.
Key Takeaways
- Regularly clean blades, motor housing, and vents to prevent dust buildup and ensure efficient airflow.
- Inspect and tighten all mounting hardware, brackets, and screws to prevent wobbling and maintain stability.
- Check for corrosion or rust on metal parts; replace or coat to protect against weather damage.
- Lubricate motor bearings as recommended to reduce noise and prolong motor life.
- Test electrical connections, remote controls, and switches seasonally to ensure safe and proper operation.

Westinghouse 20.63-Inch Replacement Fan Blades for 52-Inch Ceiling Fans
Compatible with 52" Outdoor Fans: Designed to fit most standard 52-inch outdoor ceiling fans, ensuring a seamless replacement
As an affiliate, we earn on qualifying purchases.
As an affiliate, we earn on qualifying purchases.
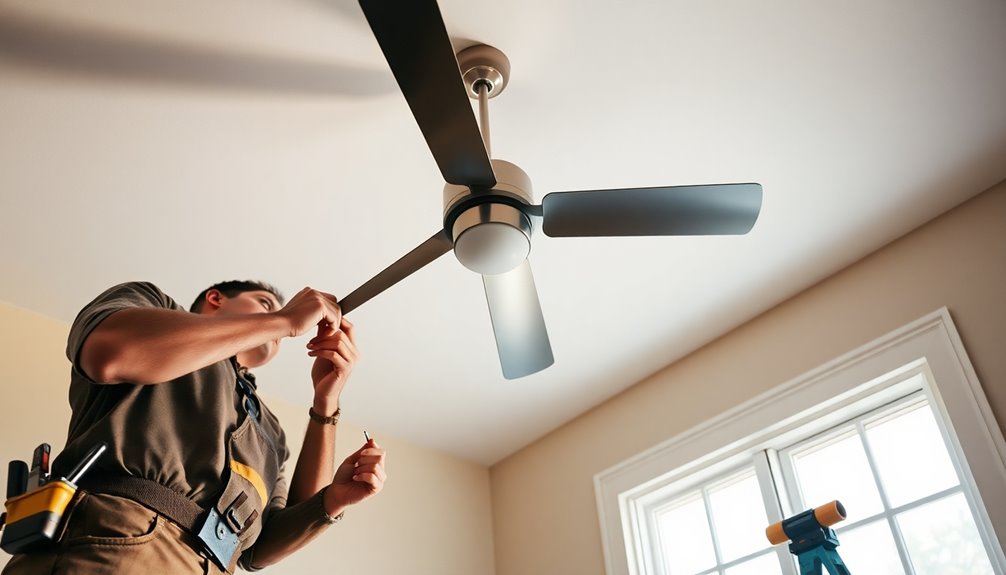
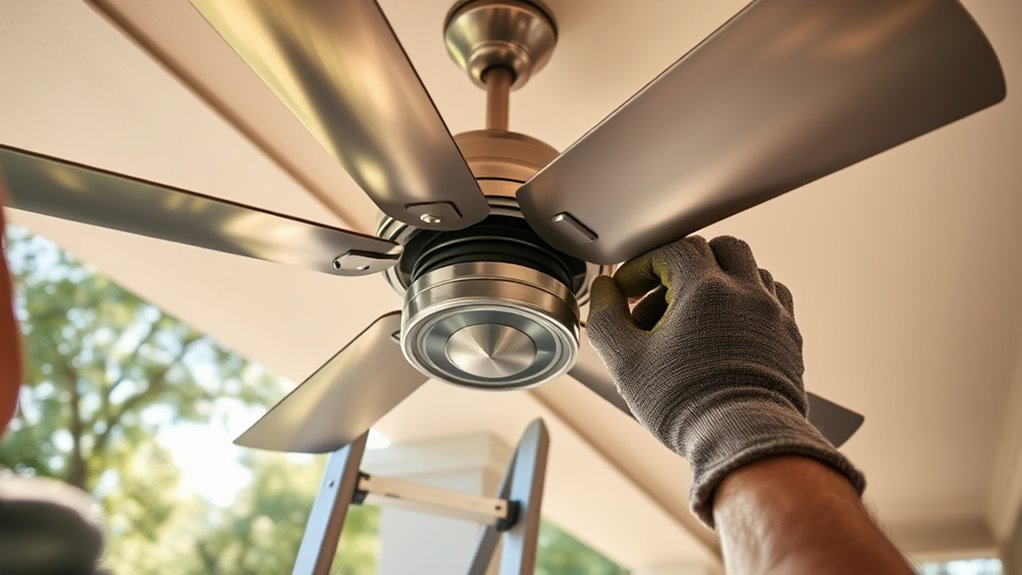
Regularly Inspect and Tighten All Components

To keep your outdoor ceiling fan operating smoothly and safely, it’s essential to regularly inspect and tighten all its components. Start by examining the ceiling fan blades for looseness or damage, as loose blades can cause wobbling. Tighten or replace any damaged blades to keep the fan balanced. Additionally, checking for hidden issues like corrosion or wear can prevent unexpected breakdowns. Over time, environmental exposure can accelerate deterioration, making regular checks crucial.
Next, inspect all mounting brackets, screws, and bolts to ensure they’re securely fastened; loose hardware can lead to wobbling or detachment. Check the electrical connections and wire terminals for corrosion or wear, tightening or replacing any faulty parts. Properly secured hardware and connections help maintain safety and functionality. Ensuring the proper electrical connections are intact reduces the risk of electrical hazards. Regularly inspecting the hardware stability can help catch issues early before they escalate.
Furthermore, inspecting the cycle of breakups patterns can help identify recurring issues that might affect your fan’s stability or safety, such as vibration caused by imbalanced blades. Properly secured hardware and connections help maintain safety and functionality. Addressing these issues promptly can prevent long-term damage to your fan’s components.
Finally, verify that the motor housing and protective covers are firmly attached and free from cracks or rust. Regularly inspecting these components helps prevent issues and keeps your fan functioning safely and efficiently. Incorporating preventive maintenance practices can prolong the lifespan of your outdoor ceiling fan and ensure optimal performance.

Lineshading 5Pcs Replacement Fan Blades for 42 52 Ceiling Fan Waterproof Weatherproof Blades Replacement for Broken Substitution Indoor Outdoor Summer(Black,42 Inch)
Bundle of Convenience: our package comes with 5 fan replacement blades for 42" ceiling fan, providing a convenient…
As an affiliate, we earn on qualifying purchases.
As an affiliate, we earn on qualifying purchases.
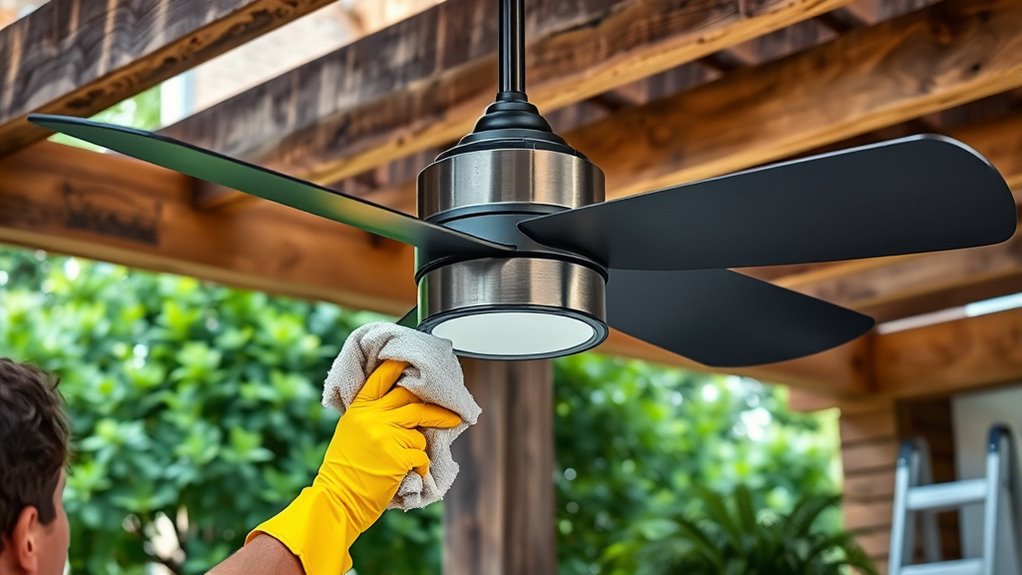
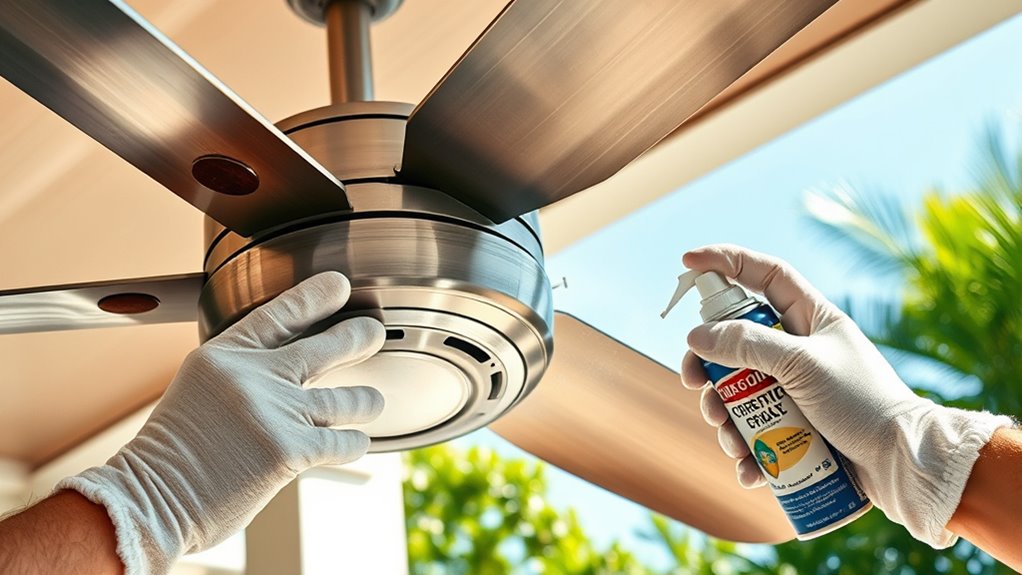
Clean Dust and Debris From Blades and Motor Housing

To keep your outdoor ceiling fan running smoothly, regularly remove dust and debris from the blades and motor housing. Use a dry microfiber cloth or extendable duster for dusting. For more thorough cleaning, use a damp cloth with mild soap. Be sure to dry all components completely to prevent corrosion and electrical issues. Additionally, inspecting the fan for proper ventilation ensures it operates efficiently and prolongs its lifespan. Proper maintenance habits can also help identify potential problems early, saving you time and money. Incorporating regular cleaning routines can further enhance the fan’s performance and longevity. Staying informed about hydrocolloid technology can assist in scheduling and tracking your maintenance tasks effectively.
Dusting Techniques and Tools
Regularly dusting your outdoor ceiling fan is essential for maintaining its efficiency and air quality. Using the right tools, like a soft microfiber cloth or extendable duster, guarantees you gently remove dust and debris without scratching surfaces.
To achieve the best results:
- Use an extendable duster to reach all blades easily.
- Lightly dampen the cloth with a mild cleaning solution or water for stubborn debris.
- Dust blades every few days to prevent buildup.
- Clear dust from motor housing vents with a vacuum or compressed air can for proper airflow.
- Remember that necessary cookies are vital for basic site functions, similar to how essential maintenance keeps your fan running smoothly. Regular dusting also helps prevent the accumulation of dust buildup, which can hinder the fan’s performance over time. Incorporating preventive maintenance routines can further extend the lifespan of your fan and ensure optimal operation. Additionally, inspecting the fan’s lubrication needs periodically helps keep it running smoothly and efficiently. Proper lubrication can reduce wear and tear on moving parts and improve overall longevity.
Always turn off and unplug the fan before dusting. This keeps you safe and ensures the cleaning process doesn’t damage electrical components.
Proper dusting extends the life of your fan and keeps it operating efficiently.
Cleaning Motor Components
When cleaning your outdoor ceiling fan’s motor components, always start by disconnecting the power supply or switching it off to prevent electrical hazards.
Use a soft cloth or microfiber towel to gently wipe dust and debris from the motor housing, avoiding abrasive materials that could scratch the surface.
For hard-to-reach areas, employ compressed air to blow away accumulated dirt and prevent buildup inside vents.
Regularly inspect and remove any spider webs, dust, or insects from the motor components to keep the fan running smoothly and prevent damage.
When cleaning, avoid using water or liquid cleaners directly on the motor housing; instead, use a slightly damp cloth to prevent moisture from damaging electrical parts.
Additionally, ensure your headphones are properly maintained and free of dust to avoid interference with the motor components of your outdoor ceiling fan, as dust buildup can affect overall device performance.
Research indicates that dust accumulation can also impact the overall trustworthiness of electronic devices by causing operational issues.
Furthermore, consulting professional mechanic shops for fuel injection cleaning can help maintain the efficiency of your electrical appliances by ensuring all components are free from debris and functioning properly.
Proper cleaning helps prolong the life of your outdoor ceiling fans and guarantees ideal performance, especially considering that dust buildup can hinder the efficiency of electrical components.
Regular maintenance routines that include dust removal practices can significantly extend the lifespan of your fans and ensure they operate at peak efficiency.

Storystore Ceiling Fan Cleaner Duster – Adjustable Duster with Extension Pole,Dusters for Cleaning Fan Blade, Walls and Cobweb (Blue)
【Ceiling Fan Cleaner Duster Kit】This kit comes with 2 different interchangeable cleaning heads and a 4 – section…
As an affiliate, we earn on qualifying purchases.
As an affiliate, we earn on qualifying purchases.
Maintain Proper Balance and Alignment

To keep your outdoor ceiling fan running smoothly, regularly check that all blades are properly aligned and securely attached. Use a level to verify the fan’s balance and make adjustments or add weight to misaligned blades as needed. Also, inspect and tighten mounting hardware and blade screws to prevent wobbling and guarantee the best performance. Incorporating protective styling benefits through proper maintenance can also extend the lifespan of your fan components. Ensuring that the blades are correctly balanced and aligned helps prevent uneven wear and improves overall operation.
Check Blade Alignment
Ensuring your outdoor ceiling fan blades are properly aligned is essential for smooth operation and to prevent wobbling. Regularly inspect the blades to spot warping or bending, which can cause imbalance. Use a level or straightedge to verify all blades are mounted at the same angle and height.
To maintain proper alignment:
- Check for dirt or debris on the blades that could affect weight distribution.
- Adjust blade brackets or screws if you notice any misalignment.
- Replace warped or damaged blades immediately.
- Confirm all blades are evenly spaced and securely attached.
Keeping your outdoor fan’s blades properly aligned ensures quiet, efficient operation and prolongs the lifespan of your fan. Regular checks help maintain optimal performance and prevent wobbling.
Adjust Fan Mounting
Regularly inspecting and tightening the fan’s mounting bracket and downrod helps keep your outdoor ceiling fan stable and properly aligned. Start by checking the mounting hardware for looseness, and tighten any bolts or screws to guarantee the fan stays securely in place.
Use a level to confirm that the fan hangs evenly; if it appears tilted, adjust the mounting hardware until it’s properly aligned. This helps prevent wobbling and uneven wear on the fan components.
Additionally, inspect the mount for rust or corrosion, especially outdoors, and replace any compromised hardware. Ensuring the ceiling mount is anchored into a sturdy ceiling joist or support maintains correct alignment and prevents sagging over time.
Proper adjustment of the mounting hardware and level keeps your fan functioning smoothly.

HFYHWT 20PCS Ceiling Fan Balancing Kit, 5 Sets High Calibration Blade Balance Tool Including 5 Pcs Resilient Clips and 15 Pcs Metal Self-Adhesive 3G Weight
PROFESSIONAL RESULTS: Ceiling fan balance kit include balance clip to locate problem area, self-adhesive 3G Weight-Balance helps to…
As an affiliate, we earn on qualifying purchases.
As an affiliate, we earn on qualifying purchases.
Lubricate Moving Parts as Needed

Lubricating the moving parts of your outdoor ceiling fan helps keep it running smoothly and prevents unnecessary wear. Proper lubrication is a key part of regular maintenance that can extend your fan’s lifespan.
To do this effectively:
- Turn off and unplug the fan, allowing the motor to cool.
- Identify lubrication points or bearing areas, as indicated in the manufacturer’s guidelines.
- Apply a small amount of lightweight, electrical-grade oil like 3-in-1 or machine oil directly to these spots.
- For fans with sealed bearings, lubrication may not be needed—always check the maintenance instructions.
Regular lubrication every 1-2 years helps prevent squeaking, reduces motor strain, and keeps your fan operating efficiently. Proper maintenance ensures peak performance and longevity.
Check and Replace Worn or Damaged Blades
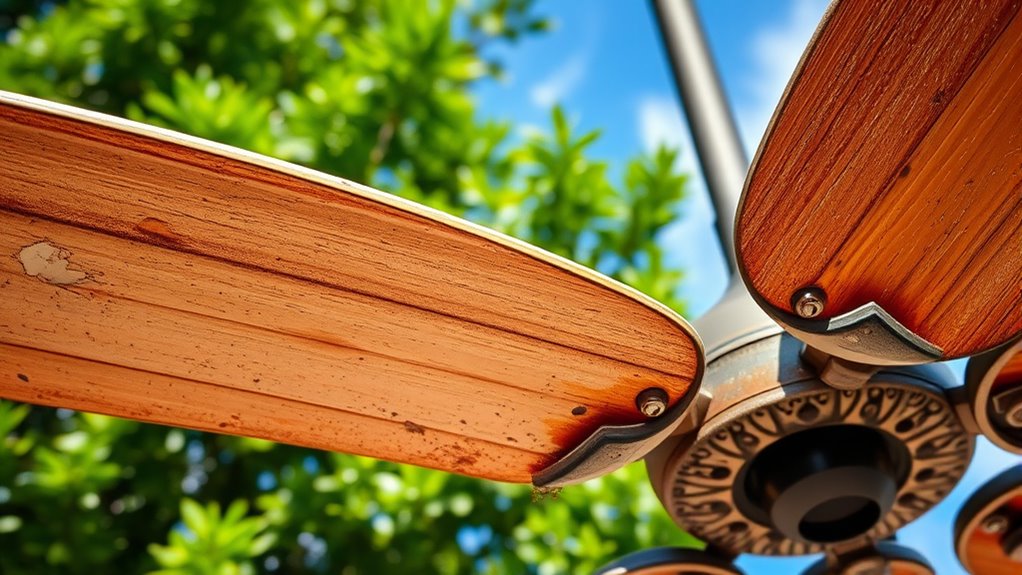
Regularly inspect your ceiling fan blades for cracks, warping, or corrosion to keep airflow smooth and safe.
If you find damaged or worn blades, replace them immediately to prevent wobbling and noise.
Also, check that all blade screws and mounting hardware are tight to ensure a secure, balanced operation.
Inspect Blade Condition
Inspecting your ceiling fan blades is essential to guarantee smooth operation and good airflow. Regularly check your fan blades for cracks, warping, or chips, which can disrupt balance and decrease efficiency.
To keep your outdoor ceiling fan functioning well:
- Examine each blade carefully for visible damage or irregularities.
- Ensure blades are securely attached, tightening any loose screws or brackets.
- Replace any damaged or worn blades promptly to prevent wobbling and uneven wear on the motor.
- Keep blades clean from dirt, debris, and salt buildup, which can cause corrosion and reduce airflow.
Replace Cracked or Warped Blades
Cracks or warping in your outdoor ceiling fan blades can lead to imbalance and excessive vibration, risking damage to the motor. To keep your fan running smoothly, you need to replace damaged blades promptly.
Inspect the blades regularly for signs of cracks, warping, or corrosion from weather exposure. When you find worn or broken blades, use manufacturer-approved replacements that match the original size, shape, and mounting holes for proper fit and balance.
Carefully remove the old blades and securely tighten all screws or fasteners when installing the new ones. Upgrading to weather-resistant materials like treated wood, aluminum, or plastic can also improve durability.
Replacing cracked or warped blades ensures your fan operates efficiently and prevents costly motor damage.
Secure Loose Blade Attachments
To guarantee your outdoor ceiling fan operates safely and smoothly, you should routinely check the blade attachments for looseness, corrosion, or damage, especially after severe weather. Loose blades can cause wobbling and pose safety risks. Here’s what to do:
- Inspect all blade mounting brackets for looseness or corrosion.
- Tighten any loose screws or bolts securing the blades.
- Replace cracked, warped, or severely worn blades immediately.
- Use manufacturer-recommended hardware when replacing blades or attachments.
Additionally, apply a corrosion-resistant lubricant annually to keep the blade attachment points secure and rust-free.
Regularly maintaining these connections ensures your fan stays balanced, quiet, and safe to use outdoors. Keep a close eye on the blades and their fittings for reliable performance.
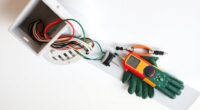
Ensure Electrical Connections Are Secure and Safe

Ensuring your outdoor ceiling fan’s electrical connections are secure and safe is essential for reliable operation and safety. Regularly inspect the electrical wiring and connections for signs of corrosion, wear, or looseness, especially after harsh weather.
Regularly inspect and tighten electrical connections to ensure your outdoor ceiling fan operates safely and reliably.
Tighten any loose terminal screws or wire connectors to prevent electrical shorts and ensure safe operation. Always use a voltage tester or multimeter to verify that power is disconnected before performing any maintenance on electrical components.
Check that the fan’s switch, remote, or smart controls are functioning correctly and securely connected to the power source. Consult the manufacturer’s guidelines for specific wiring requirements and safety procedures to avoid electrical hazards.
Properly securing your electrical connections guarantees your outdoor ceiling fan runs smoothly and safely.
Clean and Test Remote Controls and Smart Features

Regularly cleaning and testing your remote controls and smart features helps keep your outdoor ceiling fan running smoothly. To do this effectively, follow these steps:
- Wipe your remote control with a soft cloth dampened with 70% isopropyl alcohol to remove dirt and germs.
- Replace batteries annually or when signals weaken, ensuring reliable operation.
- Check that all remote buttons work properly; clean sticky or unresponsive buttons with a gentle brush or cloth.
- For smart fans, update the firmware via the app periodically to stay compatible with new features.
Keep your remote control and smart device receivers away from water, heat, and direct sunlight to prevent damage.
Regular maintenance guarantees seamless control and longevity of your outdoor ceiling fan.
Protect Your Fan From Corrosion and Salt Damage
Outdoor ceiling fans in coastal areas face unique challenges from salt-laden air that can cause metal parts to corrode and rust over time. To protect your fan from salt damage, regularly rinse it with fresh water to wash away salt deposits. Applying a corrosion-resistant coating or protective paint on metal surfaces also helps extend its lifespan. Choosing damp-rated fans designed for salty environments offers added protection. Installing fans with stainless steel or coated blades minimizes salt buildup and corrosion, ensuring durability. Here’s a quick comparison:
| Feature | Benefits | Recommendations |
|---|---|---|
| Salt exposure | Accelerates corrosion, damages metal parts | Rinse regularly, use protective coatings |
| Material choice | Reduces salt damage, prolongs lifespan | Opt for stainless steel or coated blades |
| Coatings and paints | Prevent rust, enhance durability | Apply corrosion-resistant paints |
Verify and Adjust Fan Speed and Reversible Motor Settings
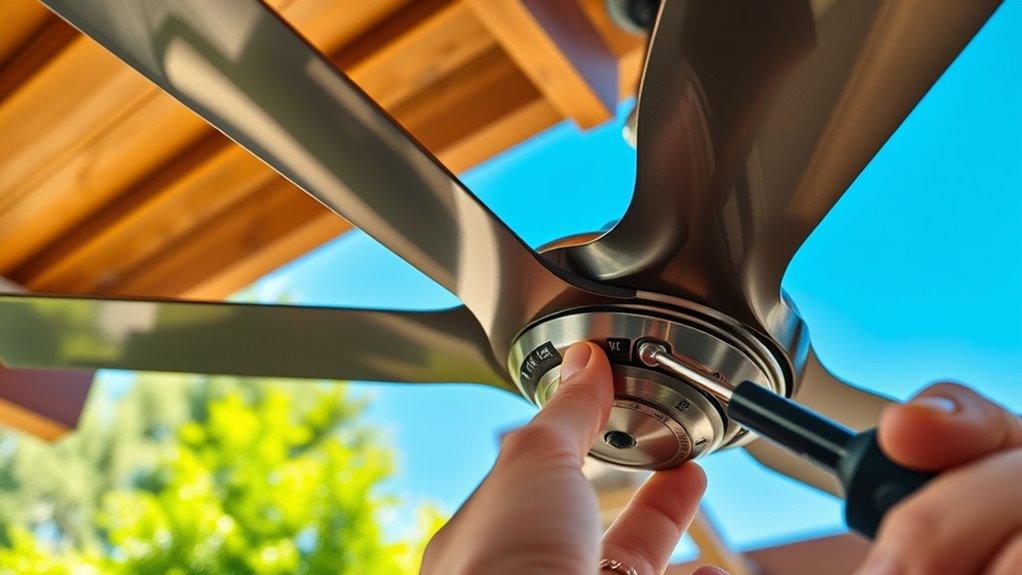
To keep your outdoor ceiling fan operating efficiently, you should verify and adjust the fan speed and reversible motor settings regularly. This helps ensure ideal airflow and energy efficiency.
Start by checking the remote or wall control to confirm the fan’s speed modes work properly and adjust them as needed.
For reversible motors, verify the current direction setting—usually a switch on the fan or remote—and switch it seasonally for better heating or cooling.
To stay on top of maintenance, consider these steps:
- Test different speed modes to ensure smooth operation.
- Listen for unusual noise or wobbling during adjustments.
- Confirm the fan’s direction aligns with seasonal needs.
- Consult the manufacturer’s instructions for specific adjustments.
Regularly verifying and adjusting can greatly improve your fan’s performance year-round.
Schedule Seasonal Maintenance Checks
Scheduling seasonal maintenance checks guarantees your outdoor ceiling fan continues to perform reliably throughout the year. To keep it in top shape, make it a habit to schedule seasonal maintenance checks before each season.
During these inspections, thoroughly clean the blades, motor housing, and light fixtures to remove dust and debris.
Regularly clean blades, motor housing, and light fixtures to maintain optimal outdoor ceiling fan performance.
Check and tighten all mounting hardware, screws, and blades to ensure stability and prevent wobbling.
Test the remote control or wall switch functions, replacing batteries or repairing wiring if needed.
If your fan’s motor is lubricated, follow manufacturer guidelines to keep it running smoothly and quietly.
Frequently Asked Questions
How Do You Lubricate an Outdoor Ceiling Fan?
To lubricate your outdoor ceiling fan, first turn it off and wait for the blades to stop completely.
Use a ladder or stable platform to access the motor housing, usually at the center.
Carefully add a few drops of light machine oil or fan-specific lubricant into the oil ports, being careful not to overdo it.
Regular lubrication keeps the fan running smoothly, quietly, and extends its lifespan.
What Maintenance Does a Ceiling Fan Need?
Back in the day, folks knew the importance of maintaining their tools, and your ceiling fan’s no different. You should regularly clean blades and motor housing to prevent dust buildup, check and tighten mounting hardware for safety, and replace remote batteries to keep it running smoothly.
Also, inspect for corrosion if exposed to weather, and lubricate moving parts if needed. Seasonal checks ensure your fan stays efficient and safe year-round.
How to Clean Outdoor Ceiling Fans?
To clean outdoor ceiling fans, you start by turning off the fan and letting the blades stop completely.
Use an extendable microfiber duster or a pillowcase to gently remove dust from the blades.
For deeper cleaning, dampen a soft cloth with a mild solution or vinegar-water mix, wipe the blades, then dry.
Carefully clean the motor and light fixtures with a microfiber cloth or compressed air, avoiding water contact with electrical parts.
How Long Does an Outdoor Ceiling Fan Last?
Think of your outdoor ceiling fan as a loyal guardian of comfort, lasting between 10 to 15 years with proper care.
Harsh weather can chip away at its lifespan, but high-quality, corrosion-resistant models stand strong longer.
Regular maintenance like cleaning and lubrication acts as your fan’s armor, extending its life.
With proper attention, your fan can serve you well beyond the average, keeping your outdoor space cool and inviting for years to come.
Conclusion
By giving your outdoor ceiling fan the care it deserves, you’re keeping a loyal breeze companion ready to dance through every season. Regular maintenance is like tending to a trusted friend—ensuring it stays strong, smooth, and ready to spin when you need it most. With a little attention, your fan will continue to be a reliable guardian of comfort, silently working in harmony with nature’s ever-changing rhythm. Keep it maintained, and let the breeze always be your ally.