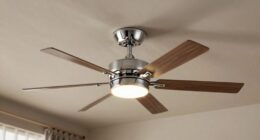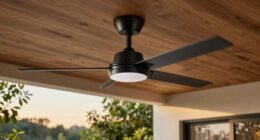

To lubricate your ceiling fan for smooth operation, first turn off the power and support the fan blades. Locate the oil hole on the motor, then clean around it and check the oil level. If needed, apply a few drops of non-detergent oil into the bearings, rotate the blades to spread it, and listen for any noise or resistance. Keep everything well-maintained; more detailed steps follow for a quiet, efficient fan.
Key Takeaways
- Turn off and unplug the fan; ensure it is completely stopped before starting lubrication.
- Locate the oil hole or bearing cap, then clean the area to remove dust and debris.
- Add 3-4 drops of non-detergent oil into each bearing or oil port.
- Rotate the blades manually to evenly distribute the lubricant and check for smooth movement.
- Turn the fan on at low speed to listen for noises and verify smooth, quiet operation.

Ceiling Fan Oil 8 Oz Universal Fan Lubricant
KEEP YOUR FANS RUNNING SMOOTHLY: Keeps Box, Ceilings, table and portable fans operating smoothly in any temperatures!
As an affiliate, we earn on qualifying purchases.
As an affiliate, we earn on qualifying purchases.
Checking the Need for Lubrication
Before lubricating your ceiling fan, it’s important to evaluate if it actually needs oil. Start by locating the oil hole, usually near the motor or on the housing. Insert a pipe cleaner into the oil hole—if it comes out oily, the fan’s oil level is sufficient, and you don’t need to lubricate. If it remains dry, lubrication is necessary. Listen for squeaking sounds or resistance when the fan rotates—these are signs that the bearings or motor oil may need attention. Check the fan blades for wobbling or unusual noise, which can also indicate lubrication issues. Keep in mind, fans with sealed bearings typically don’t require lubrication, but open-bearing models often do. Properly assessing these signs helps maintain smooth operation and prevents unnecessary wear. Additionally, consulting the contrast ratio of your fan’s motor or bearings can provide insight into its performance and lubrication needs. Regular maintenance and proper lubrication can improve the air quality around your fan, ensuring it runs quietly and efficiently. Being aware of fan design features can also help determine whether lubrication is needed, as some models are designed to be maintenance-free. Understanding how AI-powered features in modern fans work can also guide proper upkeep and troubleshooting. Moreover, inspecting the lubrication points can help identify the appropriate areas that require oiling for optimal performance.
Ceiling Fan Oil 8 Oz Universal Fan Lubricant
KEEP YOUR FANS RUNNING SMOOTHLY: Keeps Box, Ceilings, table and portable fans operating smoothly in any temperatures!
As an affiliate, we earn on qualifying purchases.
As an affiliate, we earn on qualifying purchases.
Gathering the Necessary Tools and Materials

To properly lubricate your ceiling fan, you’ll need to gather specific tools and materials to guarantee the job is done safely and effectively. First, prepare a sturdy step ladder to reach the fan’s motor safely. You’ll also need a flashlight or mirror to see the oil hole clearly. Gather cleaning supplies like a microfiber cloth, all-purpose cleaner, and a small brush or pipe cleaner to remove dust and grime. For lubrication, use a non-detergent oil, such as Hunter oil, to avoid damaging the fan’s components. Safety gear like insulated gloves and a circuit tester are essential before working near electricity. Additionally, understanding the automation in business can help you recognize the importance of maintaining mechanical parts for optimal operational efficiency. This knowledge underscores how regular preventive maintenance can extend the lifespan of your equipment and avoid costly repairs. Finally, keep a small container or syringe ready for precise oil application, preventing overfilling and mess.

Storystore Ceiling Fan Cleaner Duster – Adjustable Duster with Extension Pole,Dusters for Cleaning Fan Blade, Walls and Cobweb (Blue)
【Ceiling Fan Cleaner Duster Kit】This kit comes with 2 different interchangeable cleaning heads and a 4 – section…
As an affiliate, we earn on qualifying purchases.
As an affiliate, we earn on qualifying purchases.
Turning Off Power and Preparing the Fan

Ensuring the fan is completely powered off is essential for safe maintenance. First, turn off the fan switch and then switch off the circuit breaker to guarantee electrical disconnection. Use a sturdy ladder to support your reach, making sure it’s stable on a flat surface. Confirm the fan has stopped moving and isn’t connected to power before handling any parts. Wear safety gear like insulated gloves and use a circuit tester to double-check no live wires remain. When disconnecting wiring, support the fan motor with your hand or a tool to prevent damage or falls. Additionally, consulting mechanic shops for fuel injection cleaning can provide insights into proper electrical safety procedures for complex fixtures. Being familiar with home electrical systems can further enhance your safety during such maintenance tasks. Familiarity with electrical safety guidelines can help prevent accidents during electrical work. Understanding circuit breaker operation can also aid in safely restoring power after maintenance is complete. Remember that proper safety precautions are crucial when working with electrical components to avoid injury.
Ceiling Fan Oil 8 Oz Universal Fan Lubricant
KEEP YOUR FANS RUNNING SMOOTHLY: Keeps Box, Ceilings, table and portable fans operating smoothly in any temperatures!
As an affiliate, we earn on qualifying purchases.
As an affiliate, we earn on qualifying purchases.
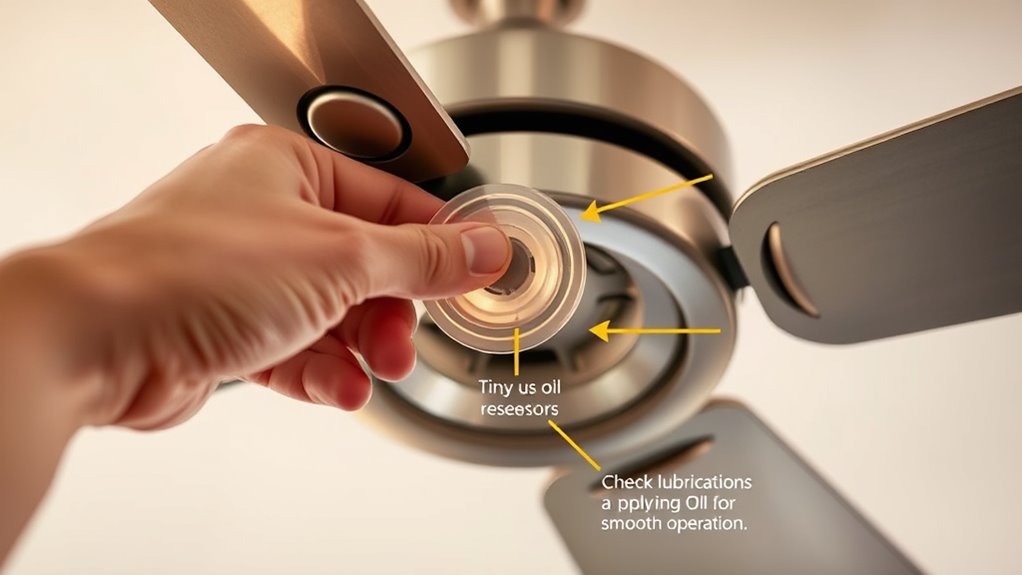
Locating the Oil Hole and Assessing Oil Levels
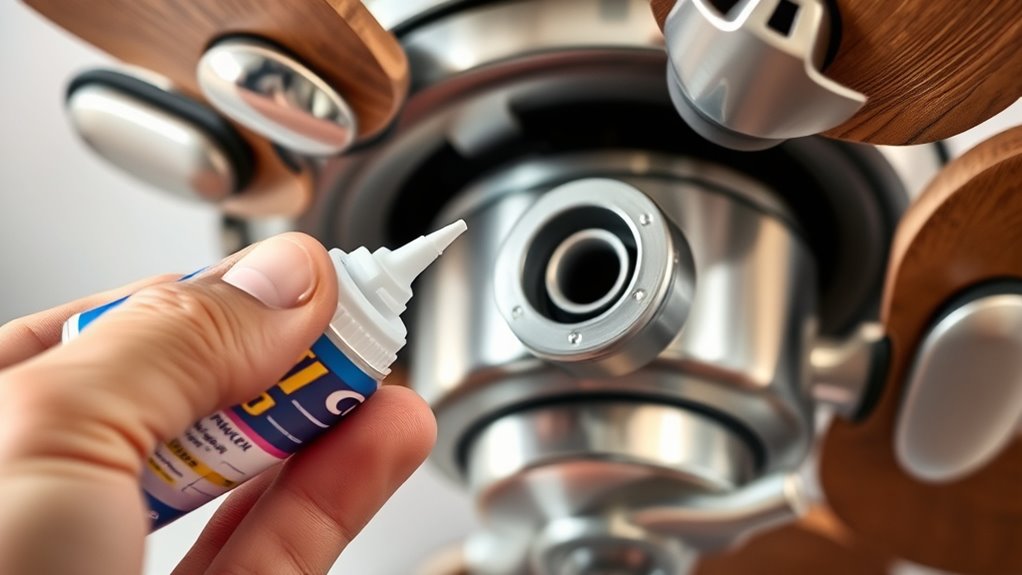
Locate the oil hole on your ceiling fan by inspecting the top of the motor housing near the downrod. This oil hole is usually labeled or marked for easy identification.
To assess oil levels, first confirm the fan is turned off, unplugged, and the area is clean to prevent debris from contaminating the oil reservoir.
Gently clean the area around the oil hole with a rag and all-purpose cleaner.
Use a pipe cleaner, bent into a hook shape, and insert it about half an inch into the oil hole.
Check if oil coats the cleaner; if oily, the oil level is sufficient.
If dry, add lubrication. Regularly inspecting this part helps maintain smooth fan operation and prevents premature wear, especially since proper lubrication is vital for refrigeration cycle efficiency and longevity.
Incorporating the correct type of oil recommended by the manufacturer can further improve fan performance and extend the lifespan of your ceiling fan.
Maintaining proper lubrication not only ensures quieter operation but also helps prevent the need for costly repairs.
Ensuring the use of appropriate fan oil is essential for optimal results and avoiding damage to the motor parts. Proper lubrication techniques can also benefit from understanding AI-driven maintenance tools, which offer precise diagnostics and recommendations for fan upkeep.
Cleaning the Fan and Oil Reservoir Area
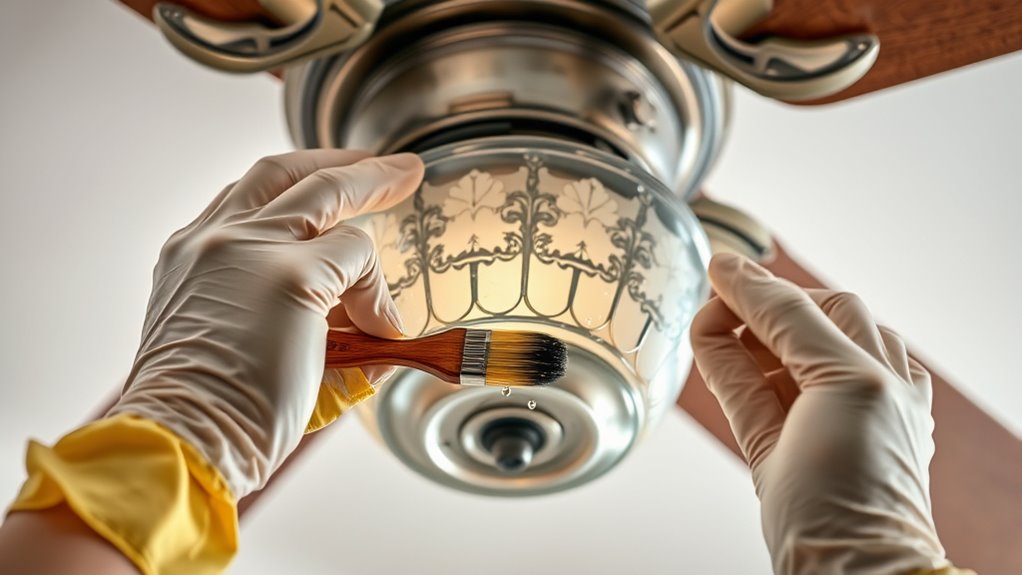
Regularly cleaning the fan blades, motor housing, and oil reservoir area is essential for peak performance. Use a damp microfiber cloth with warm water and all-purpose cleaner to wipe down the fan, removing dust, dirt, and grime.
Carefully clean around the oil reservoir and oil hole to prevent debris from blocking access or clogging the lubrication point. Inspect these areas for dust buildup or grime, and if you find stubborn residue, spray a degreaser like WD-40, then wipe clean after a few minutes. Additionally, ensuring proper fan maintenance can prevent future lubrication issues and keep the motor running smoothly.
Make sure all parts are completely dry to prevent moisture from diluting the lubricant or causing rust. Proper maintenance of your fan components ensures optimal lubrication and longevity. Keeping these areas clean ensures proper oil flow and smooth operation, helping your ceiling fan run efficiently.
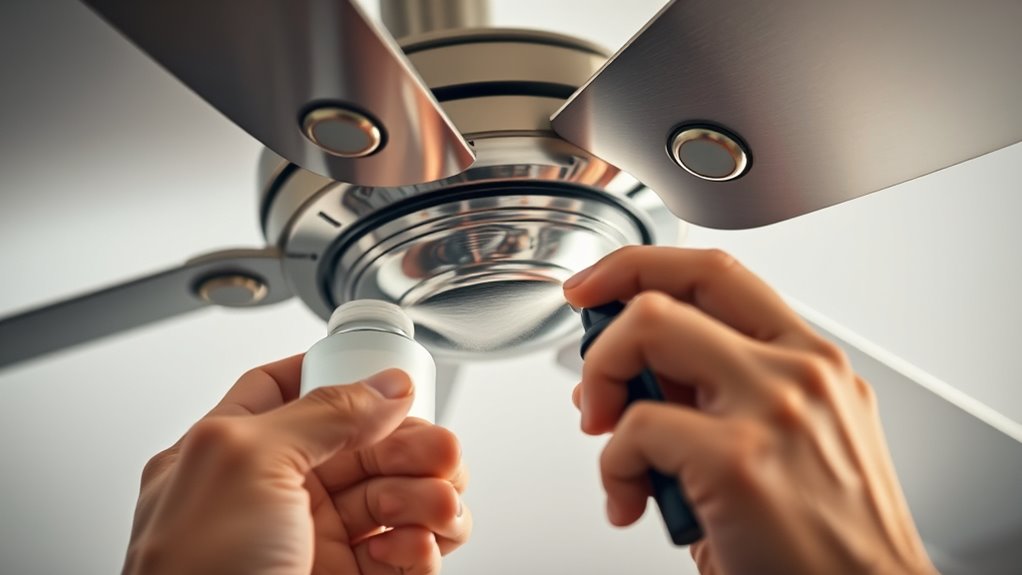
Applying Lubricant and Distributing It Properly

After cleaning the fan and oil reservoir area, it’s time to apply lubricant correctly. Apply 3 to 4 drops of non-detergent electric motor oil directly into each bearing or oil hole on the fan motor. Gently rotate the fan blades by hand to help distribute the oil evenly across the bearings and internal components. Turn the fan on a low setting briefly to allow the motor to run and spread the lubricant throughout the internal parts. Manually spin the blades with the power off to check for smooth movement and ensure the oil has penetrated the bearings. Repeat the oiling and rotation process at each bearing point for proper lubrication and quiet operation. Proper lubrication techniques help prevent squeaks and prolong the life of your ceiling fan. Confirm the oil level is adequate before applying. Rotate blades by hand to distribute oil evenly. Power on fan briefly to spread oil throughout internal components. Check blades for smooth, quiet movement after lubrication. Regular lubrication based on manufacturer guidelines ensures optimal fan performance and reduces wear on moving parts.
Testing the Fan and Performing Final Adjustments
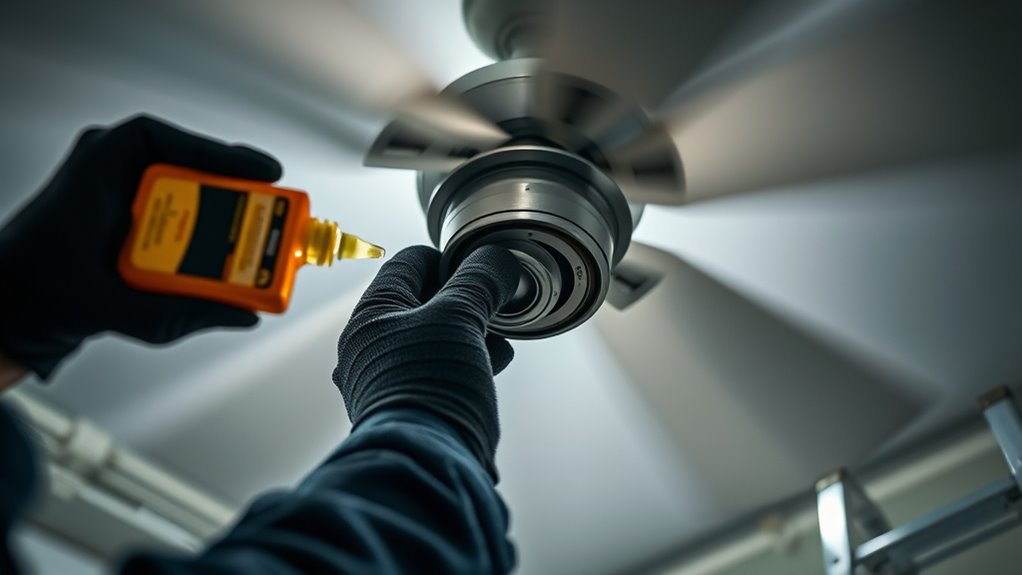
Turn on the fan at low speed and listen for any squeaks or grinding sounds that might indicate lubrication issues.
Watch how smoothly the blades rotate to confirm proper alignment and balance.
Then, increase the speed and check for consistent, quiet operation before making any final adjustments.
Test Fan Speed
How can you guarantee your ceiling fan runs smoothly and quietly after lubrication? Start by testing the fan speed. Turn the fan on at a low setting and listen for squeaks, grinding, or irregular noises. Observe the fan’s rotation to ensure it moves smoothly and quietly without wobbling.
Increase the speed gradually to higher settings, checking that it maintains steady operation and doesn’t slow down or produce noise. Manually spin the blades with the power off to confirm smooth movement and detect any sticking or resistance.
If the fan rotates smoothly and silently at all speeds, your lubrication was successful. Otherwise, consider additional adjustments or professional inspection.
- Check for consistent fan rotation without wobbling
- Listen for any irregular noises during operation
- Confirm smooth movement manually before powering on
- Ensure no resistance or resistance during speed changes
Listen for Noises
Listening carefully for noises is essential to guarantee your ceiling fan runs smoothly after lubrication. Turn on the fan at low speed and listen for squeaks, irregular noises, or grinding sounds that may signal insufficient lubrication or mechanical issues. Use a stethoscope or place your ear close to the motor housing to detect subtle sounds, helping you detect bearing problems or friction. If the fan produces abnormal noises, stop it and check that all screws and parts are properly tightened and aligned. Repeatedly testing the fan at different speeds confirms whether lubrication has reduced noise effectively.
| Noises to Listen For | Possible Causes |
|---|---|
| Squeaks or squeaking | Insufficient lubrication or worn bearings |
| Irregular noises | Mechanical misalignment or loose parts |
| Abnormal sounds | Detect bearing problems or friction issues |
Confirm Smooth Rotation
Have you verified that your ceiling fan rotates smoothly and quietly after lubrication? To confirm smooth rotation, turn on the fan at a low speed and listen for any squeaking or grinding noises, which signal inadequate lubrication.
Manually spin the fan blades with the switch off to check for resistance-free movement, indicating proper lubrication. Observe the fan’s operation over a few minutes, ensuring it runs steadily without wobbling or irregularities.
Use a flashlight to inspect the motor and bearing areas for signs of excess oil leaks or buildup that could hinder smooth movement. If you notice persistent resistance or noise, adjust the fan’s speed or re-lubricate.
Proper inspection guarantees ideal fan operation, preventing future issues.
- Check for consistent rotation and noise levels
- Confirm oil level and absence of leaks
- Ensure blades spin resistance-free
- Reassess after adjustments
Frequently Asked Questions
What Kind of Lubricant Do You Use on a Ceiling Fan?
You should use non-detergent electric motor oil, like Hunter oil, on your ceiling fan. Avoid household oils such as WD-40 or standard motor oils because they can attract dust or cause gumming inside the motor.
Check your fan’s manual for specific recommendations, especially if it has an oil hole. Using the right lubricant keeps your fan running smoothly, quiet, and helps it last longer.
Can You Lubricate a Ceiling Fan Without Taking It Apart?
Think of your ceiling fan as a well-oiled machine waiting to hum smoothly. You can often lubricate it without taking it apart if it has accessible oil ports or holes.
Just locate these openings, apply the lubricant directly to the bearings or motor parts, and then test the fan.
If there are no accessible points, you might need professional help or partial disassembly to keep it running quietly and efficiently.
What Kind of Oil Do You Use for Ceiling Fans?
You should use non-detergent electric motor oil, like Hunter Oil, for your ceiling fan. Avoid household oils such as WD-40 or cooking oils, as they can damage the motor or cause buildup.
Check your fan’s manual for specific recommendations.
Apply just 1 to 2 ounces directly to the bearings through the oil hole, ensuring smooth operation without over-lubricating. This keeps your fan running quietly and efficiently.
Can You Put WD-40 on a Ceiling Fan?
Think of WD-40 as a quick fix, like a band-aid for squeaky ceiling fans. While it can silence noise temporarily, you shouldn’t put it directly on your fan’s motor or bearings. WD-40 isn’t designed for long-term lubrication, and it can attract dust, causing more problems.
Instead, use a proper non-detergent electric motor oil for lasting smoothness. Only use WD-40 sparingly as a cleaning aid.
Conclusion
Regularly lubricating your ceiling fan keeps it running smoothly and can extend its lifespan. Did you know that properly maintained fans use up to 30% less energy? By following these simple steps, you guarantee quieter operation and improved efficiency. Don’t forget to check and lubricate your fan every couple of years. A little maintenance goes a long way in preventing costly repairs and enjoying cool, quiet comfort all year round.