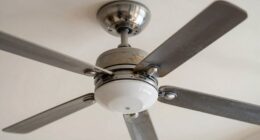
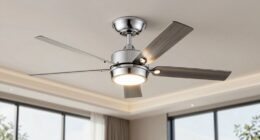
To take down your ceiling fan in 10 easy steps, start by powering off the fan and circuit breaker, ensuring safety first. Disconnect the light fixture carefully, including the light bulbs. Then, remove the fan blades, the bracket, and the wiring systematically. Dismantle the fan body, lower it cautiously, and inspect the ceiling for any damage. Clean the fan parts, following disposal guidelines, and examine the ceiling for repairs. If you want to know more about preventing flickering lights during this process, keep in mind the electrical safety precautions provided earlier and ensure a smooth removal process.
Key Takeaways
- Ensure power is off before starting disassembly
- Disconnect light fixture and label wires
- Carefully remove fan blades and downrod
- Lower fan body from ceiling, detach all wires
- Clean fan parts, dispose properly, inspect ceiling for damage
Power off the Ceiling Fan
Have I powered off the ceiling fan at the circuit breaker to ensure safety during removal? It's crucial to turn off the power before attempting to remove the fan. Using a voltage tester is a smart move to double-check that the power is completely off.
Safety always comes first when dealing with electrical appliances like ceiling fans. Make sure the fan blades aren't spinning and the light isn't operational by testing the light switch or remote control. It's important to treat the fan as live until proven otherwise to avoid any accidents.
Disconnect the Light Fixture

First, make sure to unscrew and remove the light bulb from the fixture.
Next, disconnect the wires that connect the light fixture to the fan, ensuring a safe and careful disconnection.
Once the wires are detached, set the light fixture aside for later disposal or safekeeping.
Remove Light Bulb
I always allow the light bulbs to cool before attempting to remove them from the ceiling fan. This step is crucial to prevent any burns or accidents.
Using a screwdriver, I gently loosen the screws that hold the light bulb cover in place. Carefully, I unscrew and remove the light bulbs from their sockets. If the light bulbs are still functional, I might consider reusing them in a new ceiling fan. It's essential to handle the bulbs with care to avoid breakage.
Remember to disconnect any wires connecting the light fixture to the fan before proceeding with the removal process. Taking these precautions ensures a safe and smooth transition when working on your ceiling fan's light fixtures.
Unplug Light Wires
Carefully identify and disconnect the wires connecting the light fixture to the ceiling fan. To do this, locate the wire nuts or connectors securing the wires and remove them. It's essential to separate the wires gently to detach the light kit from the fan. If necessary, label the wires to make reinstallation easier later on.
Once the wires are disconnected, ensure they're safely capped with wire nuts. This step is crucial for safety reasons and to prevent any electrical hazards. By following these simple steps, you can effectively unplug the light wires from your ceiling fan, preparing it for removal or replacement.
Remove the Fan Blades
Unscrewing each fan blade from the housing using a screwdriver is the initial step in removing the ceiling fan. It's important to handle the fan blades with care to avoid any damage during the removal process. Remember to keep the metal bracket attached to the blades as it will make it easier to remove them all at once. Make sure that all the blades are detached before moving on to the next step in the fan removal process.
Storing the fan blades in a safe place is essential to prevent misplacement and ensure they're readily available when needed. Removing the fan blades is a critical step in disassembling the ceiling fan for replacement or maintenance. By following these steps carefully, you can efficiently dismantle the fan and proceed with any necessary repairs or upgrades.
Uninstall the Ceiling Fan Bracket

To properly uninstall the ceiling fan bracket, you'll need bracket removal tools, such as a screwdriver or pliers, to detach it from the ceiling. Before removing the bracket, ensure that you disconnect all electrical connections to prevent any accidents.
Once the bracket is off, you can then secure the fan blades for safe removal and replacement.
Bracket Removal Tools
Using a screwdriver, pliers, and possibly a wrench, I'll now demonstrate how to remove the ceiling fan bracket for safe installation of a new fan.
To remove the mounting bracket, start by locating the screws that hold it in place. Carefully unscrew these fasteners while supporting the bracket to prevent it from falling. Once the screws are removed, gently detach the ceiling bracket from the electrical box or wooden brace. Be cautious not to damage the ceiling or wiring during this process. Removing the old bracket is crucial for ensuring a stable foundation for your new ceiling fan.
Following manufacturer guidelines will help you install the new bracket correctly and securely.
Disconnecting Electrical Connections
I carefully identify and disconnect the wires from the ceiling fan motor to prepare for removal.
When disconnecting the wires, remember to handle wire nuts with caution to safely separate the electrical connections.
Always ensure the power is off by using a voltage tester before working on any electrical components.
To avoid confusion during reinstallation, consider labeling the wires accordingly.
Lastly, detach the ceiling fan bracket from the electrical box or wooden brace to complete the disconnection process.
Secure Fan Blades
Carefully unscrew and detach the fan blades from the motor housing, ensuring they're free from any wiring or attachments. Remember to keep the screws in a safe place for when you reinstall the blades.
Gently remove the fan blades, taking care not to damage them during the process. Once removed, store the fan blades in a secure location to prevent any accidental harm. Proper storage will also ensure that the blades stay in good condition until you're ready to reattach them.
Disconnect the Fan Wiring

To disconnect the fan wiring, ensure you have identified the wire colors for the fan connections. Here are some steps to help guide you through the process:
- Black Wire: This wire is typically the hot wire responsible for carrying the electrical current to the fan.
- White Wire: The white wire is the neutral wire that completes the electrical circuit.
- Green/Copper Wire: This wire is the ground wire, which is crucial for safety and should always be connected properly.
- Disconnect Wire Nuts: Carefully disconnect the wire nuts that join the fan wires to the ceiling wires, ensuring no damage is done to the wires.
- Label Wires: If needed, label the wires to make reinstallation of the new fan easier.
Take Down the Downrod (If Applicable)

Lower the fan carefully and disconnect any wires before fully removing it from the downrod. Downrod fans have a metal rod that extends from the ceiling to the fan motor. To remove the downrod, you'll need to detach the fan from it. Ensure the power is off and remove any additional components like light kits or blades before dealing with the downrod. Loosen the set screw or pin that secures the fan to the downrod. Once done, lower the fan cautiously and disconnect any wires to detach it completely from the downrod. When handling the downrod mounted ceiling fan, it's crucial to follow these steps to ensure a safe removal process.
| Step | Description |
|---|---|
| Disconnect Wires | Ensure all electrical connections are safely undone |
| Remove Set Screw/Pin | Loosen the fastening mechanism between fan and rod |
| Detach Fan | Carefully lower the fan and remove from the downrod |
Dismantle the Fan Body

First, we need to remove the fan blades to access the fan body.
Next, carefully disconnect the electrical wires attached to the fan body.
Lastly, lower the fan body down from the ceiling after detaching it from the mounting bracket.
Remove Fan Blades
Carefully unscrew each fan blade from the fan housing, making sure to keep the metal bracket attached to facilitate easier removal.
- Detach Fan Blades: Carefully unscrew each blade from the fan housing.
- Keep Metal Brackets: Ensure the metal brackets remain attached for smooth removal.
- One by One: Remove each fan blade individually to prevent any damage.
- Essential Step: Removing the fan blades is a crucial part of dismantling the fan.
- Safety First: Properly detaching the blades ensures a safe and efficient process.
Removing the fan blades is a necessary step in dismantling a ceiling fan. By following these steps, you can ensure a successful removal process and maintain safety throughout.
Disconnect Electrical Wires
To properly dismantle the ceiling fan body, the next step involves disconnecting the electrical wires that connect the fan to the electrical supply. Remember, safety is key when dealing with electrical components. Here's a simple guide to help you disconnect the wires:
| Wire Color | Connection |
|---|---|
| Black | Live wire |
| White | Neutral wire |
| Green | Ground wire |
| Blue | Optional for light kit |
After identifying and disconnecting these wires, use wire nuts to cap each wire individually for safety. If needed, label the wires for easier reinstallation. Keeping the wires organized will help you avoid confusion and ensure a smooth dismantling process. Double-check that the wires are securely disconnected before proceeding further.
Lower Fan Body
Lowering the fan body entails disconnecting its wires from the mounting bracket before handling it with care to prevent any damage to the motor or blades. When dismantling the fan body, consider the following:
- Disconnect wires: Ensure all wires are detached properly.
- Lower fan body: Lower the fan body gently to avoid any harm.
- Keep track of screws and parts: Organize and store them for reassembly.
- Store the fan body safely: Prevent any damage or misplacement.
- Dispose of responsibly: Consider the environment when getting rid of the old fan body.
Taking these steps will help maintain the integrity of the fan body and ensure a smooth removal process.
Remove the Mounting Bracket

Using a screwdriver, remove the screws securing the mounting bracket to the ceiling. These screws are what attach the bracket to the electrical box in the ceiling.
Once the screws are out, carefully lower the bracket to access the wires from the ceiling. It's important to disconnect these wires that are connected to the bracket before proceeding with removing the ceiling fan entirely. Make sure to handle the wires gently to avoid any damage or accidents.
By removing the mounting bracket, you're one step closer to successfully taking down your ceiling fan. Remember to keep track of the screws and parts you remove to make reinstallation easier.
Now that the bracket is detached, you can move on to the next step in the process of removing your ceiling fan.
Inspect the Ceiling for Any Damage

I carefully examine the ceiling for any signs of damage where the fan was previously mounted. It's crucial to ensure that the ceiling is in good condition before proceeding with any new installations. Here are some key points to consider during this inspection:
- Look for any cracks, holes, or damage to the ceiling where the fan was mounted.
- Check for any loose screws or marks left behind from the previous fan installation.
- Ensure that the ceiling is structurally sound and can support a new fan if one will be installed.
- Inspect the wiring in the ceiling to make sure it's in good condition for future fan installations.
- Take note of any areas that may need repair or reinforcement before installing a new ceiling fan.
Clean up and Dispose of Old Parts

After wiping down the fan blades and motor housing to remove dust and debris, it's important to follow proper disposal guidelines for the old parts. When it comes to cleaning up and disposing of old parts, it's crucial to handle them responsibly.
I suggest removing any salvageable pieces and storing them in a labeled container for potential future use or repairs. For the parts that are no longer usable, disposing of them in accordance with local recycling guidelines is the way to go. Consider donating any parts that are still in good condition to a local charity or organization for reuse, promoting sustainability and community support.
Remember to use a mild cleaning solution if needed for stubborn dirt, taking care not to damage any fan components in the process. By cleaning and disposing of the old parts thoughtfully, you not only maintain a clean space but also contribute positively to the environment and those in need.
Frequently Asked Questions
How Do I Take a Ceiling Fan Down?
To take down my ceiling fan, I need to prioritize fan safety and understand electrical wiring. DIY projects like this can enhance my home improvement skills. It involves carefully removing fan blades and disconnecting wires. Following proper steps ensures a safe process.
I find joy in mastering home improvement tasks like this, as they empower me to enhance my living space with confidence.
How Do You Get Rid of Ceiling Fans?
I find that exploring ceiling fan alternatives can lead to DIY fan removal. Some fan removal tips include disconnecting wires and carefully removing the mounting bracket.
Upcycling old fans can also be a creative option. It's crucial to approach removal with caution and follow safety guidelines.
How to Remove a Hampton Bay Ceiling Fan With No Visible Screws?
To remove a Hampton Bay ceiling fan with hidden fasteners, locate the decorative cap covering the screws. Using a flathead screwdriver, carefully pry off the cover to reveal the hidden screws.
Once exposed, unscrew and remove them to start the disassembly process. If no visible screws are present, explore alternative removal methods like checking for a ceiling mount bracket or retrofitting options.
This approach ensures a safe and effective way to take down the fan.
How Do You Remove and Replace a Ceiling Fan?
When it comes to ceiling fan installation, maintenance, troubleshooting, or upgrades, I find that a straightforward approach works best.
First, ensure the power is off using a voltage tester. Then, detach the fan blades, light kit, wires, and mounting bracket.
For safety, always identify if the fan is downrod or flush mounted before removal. This methodical process ensures a smooth transition when removing and replacing a ceiling fan.
Can Removing My Ceiling Fan Help to Silence the Humming Noise?
Yes, removing your ceiling fan can help silence the annoying hum. The source of the silence ceiling fan hum may be the motor or the blades. If it doesn’t work, try balancing the blades or installing a noise-reducing kit.
Conclusion
Just as a ceiling fan can cool a room, sometimes we need to remove obstacles in our lives to let the refreshing breeze of change flow through.
By taking down your ceiling fan in 10 easy steps, you're not just making a practical improvement to your home, but also symbolically clearing the way for new beginnings and positive energy to enter.
Remember, sometimes letting go of the old can make space for something better to come along.
