Replacing a ceiling fan isn't too hard for most homeowners. You'll need to turn off power at the circuit breaker and gather some tools like a ladder and screwdrivers. After removing the old fan, you'll connect the new one by matching the black, white, and ground wires. It's essential to verify the wiring is secure and the fan is mounted properly. While it may seem intimidating, following the manufacturer's instructions can simplify the process. If you're considering tackling this project, stick around to discover more tips and tricks for a successful installation.
Key Takeaways
- Replacing a ceiling fan requires basic electrical knowledge and safety precautions, such as turning off power and using a voltage tester.
- The installation process involves connecting wires (black, white, and ground) and securing them with wire nuts, which can be straightforward.
- Ensuring the electrical box is fan-rated and can support the fan's weight is vital for safety and stability during installation.
- Common challenges include understanding various wire colors and configurations, as well as ensuring proper fan height for optimal airflow.
- Regular maintenance and inspections can prolong the life of the fan and help avoid complications during replacement.

AICWIOO Universal Ceiling Fan Mounting Bracket Kit with Hanger Ball, 2.0mm Heavy Duty Carbon Steel Support, Compatible with Hunter, Harbor Breeze, Fits 1-Inch Downrods, Includes Wire Nuts & Screws
[End Ceiling Fan Wobble & Noise] Crafted from 2.0mm ultra-thick SPCC carbon steel, our heavy-duty bracket provides 40%…
As an affiliate, we earn on qualifying purchases.
As an affiliate, we earn on qualifying purchases.
Ceiling Fan Benefits

Ceiling fans are a smart addition to any home, offering a range of benefits that enhance comfort and style.
They're effective for cooling in the summer by creating a wind-chill effect, making your rooms feel cooler without having to lower the thermostat. In the winter, you can run a ceiling fan in reverse to help distribute warm air from your heaters evenly throughout the space, boosting comfort during colder months. Additionally, using a ceiling fan can help reduce the need for air conditioning, similar to how air purifiers improve indoor air quality, leading to a more comfortable environment. This efficient airflow promotes energy-efficient temperature control, making ceiling fans a practical choice for any season. Moreover, ceiling fans can support sustainability goals through energy-efficient technology, aligning with environmentally friendly practices. This contributes to reduced carbon footprints as you optimize energy use in your home.
When you install a ceiling fan, you not only improve air circulation but also increase your home's energy efficiency. By utilizing ceiling fans, you can potentially lower your energy bill by up to 15%. This means your heating and cooling systems won't have to work as hard, giving you some savings in the long run.
Additionally, ceiling fans come in various styles, sizes, and finishes, allowing you to choose one that complements your existing light fixture and overall decor. Many modern fans even offer smart home compatibility, allowing for convenient remote operation and enhanced functionality.
They add a stylish touch to any room while enhancing functionality. So, if you're considering an upgrade, remember that ceiling fans offer both aesthetic appeal and practical benefits that can transform your living space.

Crweety 100PCS Wire Connectors Nuts Electric Wire Caps Insulating Insert Twist Electrical Wire Connectors Colorful Wire Assortment Nuts for Quick Connection
Package Includes: Total come with 100pcs Colored wire conectors nuts, including 30pcs Grey, 30pcs Blue,20pcs Orange, 10pcs Yellow,…
As an affiliate, we earn on qualifying purchases.
As an affiliate, we earn on qualifying purchases.
Selecting the Right Fan Size

Choosing the right fan size is vital for ensuring ideal airflow and energy efficiency in your space. The appropriate fan size greatly affects how well air circulates in your room, making it important to take into account your room size and ceiling height before fan installation.
Here's a quick guide to help you select the right fan size:
- Rooms under 12 feet: A 36-inch fan is recommended.
- Rooms between 12 to 15 feet: Opt for a 42-inch fan.
- Rooms from 15 to 18 feet: A 52-inch fan works best.
- Larger or long narrow rooms: Think about installing two smaller fans instead of one large fan for better airflow.
To calculate the ideal fan size, divide your room size in square feet by four. For instance, a 200 sq ft room would require a fan with a 50-inch blade span.
By ensuring the right fan size, you'll not only maximize airflow but also enhance the overall comfort and aesthetic appeal of your space.
Don't underestimate the importance of selecting the right fan size; it can make a significant difference in your room's atmosphere.

Southwire Electrical Box for Ceiling Fan, Light Fixture, 50lb Ceiling Fan and 75lb Light Fixture Support, Depth Adjustable, Gray, MSBFAN
Adjustable & Secure Installation: The Southwire Electrical Box offers quick setup and strong support as a durable electrical…
As an affiliate, we earn on qualifying purchases.
As an affiliate, we earn on qualifying purchases.
Preparing for Installation

With the right fan size selected, it's time to prepare for the installation. First, you'll want to guarantee safety by turning off power at the circuit breaker. This step is vital, as it prevents any electrical accidents while you work.
After that, grab a voltage tester to confirm that no electricity is flowing to the electrical box where you'll be installing the new fan.
Next, check that the existing electrical box is fan-rated, which means it can handle the weight and vibration of your new ceiling fan. If it's not, you'll need to replace it with a sturdy fan box designed for this purpose.
Gather your tools for installation: a ladder, screwdrivers, wire cutters, and of course, your voltage tester.
Familiarize yourself with the manufacturer's instructions specific to your new fan model, as this will guide you through the installation process and outline the necessary components.
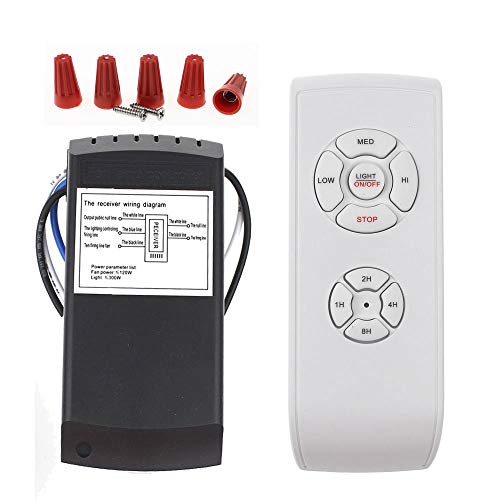
LPHUMEX Universal Ceiling Fan Remote Control Kit, 3-in-1 AC Motor Ceiling Fan Light Timing & Speed Remote, for Hunter/Harbor Breeze/Westinghouse/Honeywell/Other Ceiling Fan lamp
☞Easy Installation – Installation of the Universal Ceiling Fan Remote Controls Kit is a breeze and the looks…
As an affiliate, we earn on qualifying purchases.
As an affiliate, we earn on qualifying purchases.
Removing the Old Fan

Before you start removing the old fan, make certain you turn off the power at the circuit breaker to guarantee your safety.
Once the power's off, you can begin disconnecting the fan by supporting it carefully while unscrewing it from the mounting bracket.
This way, you'll avoid any accidents as you work through the removal process.
Safety Precautions First
Safety comes first when you're replacing a ceiling fan, and taking the right precautions is vital. Before you start removing the old fan, follow these steps to guarantee a safe process:
- Turn off the circuit breaker: You need to cut off the power to the fan. This minimizes the risk of electrical shock.
- Use a voltage tester: Confirm that no electricity is flowing to the wires. This step is essential to avoid any surprises while disconnecting the fan.
- Gather necessary tools: Have a screwdriver and wire nuts ready for safely disconnecting and capping the wires. Being prepared makes the job smoother.
- Support the fan during removal: As you disconnect it from the mounting bracket, make sure to support the fan to prevent it from falling. This helps avoid injury or damage.
Disconnecting Power Supply
To disconnect the power supply while removing the old fan, start by verifying that you've turned off the circuit breaker. This simple step prevents any electrical hazards during the process. Next, grab your voltage tester to confirm that there's no electricity flowing to the wires coming from the ceiling. It's vital for your safety!
Begin by carefully removing the light bulbs and shade. This'll give you better access to the fixture, making the disconnection smoother. Once you've done that, unscrew and detach the existing fixture, making sure to support the fan to avoid any falls.
As you're disconnecting the wires, cap them off with wire nuts. This step is essential to guarantee no exposed wires are left hanging. Don't forget to use electrical tape on switches to prevent any accidental power restoration.
Here's a quick summary of the process:
| Step | Action | Importance |
|---|---|---|
| Turn off the breaker | Prevent shock | Safety first |
| Use a voltage tester | Confirm no electricity | Avoid hazards |
| Remove bulbs/shade | Access fixture easily | Simplify disconnection |
| Unscrew fixture | Support while removing | Prevent falls |
| Cap wires with nuts | Secure connections | Safety during install |
Properly Remove Old Fan
Carefully removing the old fan is essential for a smooth replacement process. Start by confirming the area is safe and you've turned off the power supply. Here's how to do it effectively:
- Remove the existing light: If your fan has an attached light, detach it first to simplify the process.
- Unscrew the canopy: Remove the canopy covering the wiring to access the electrical connections clearly.
- Detach the mounting bracket: Support the fan as you unscrew it from the mounting bracket to avoid injury or damage.
- Inspect the wires: Before fully lowering the fan, use a non-contact voltage tester to check for power. Carefully pull off wire caps, starting with the black wires, then the white wires, and finally the bare/green wires.
As you handle the wires, inspect them and the ceiling joist for any signs of fraying or instability.
This confirms that everything is safe and secure for the new fan installation. Taking these steps will help you avoid complications and set you up for a successful ceiling fan replacement.
Preparing for New Fan Installation

Before diving into your new ceiling fan installation, it's essential to gather all the necessary tools and materials. You'll need a screwdriver, wire strippers, and a sturdy ladder to make the process smoother. Start by checking that all components, including the mounting bracket and screws, are included in the fan package.
Next, assemble the mounting bracket according to the manufacturer's instructions, confirming it's compatible with your ceiling structure. This step is important for a secure installation. If you're using a decorative medallion, apply urethane glue to its back and center it on the ceiling. Secure it with finishing nails before proceeding with the fan installation.
Once the medallion is in place, pull the electrical wires through the center of both the medallion and the mounting bracket. This preparation will simplify the upcoming wiring connections.
Finally, double-check your junction box to verify it can support the weight and functionality of your new fan assembly. Having everything organized and prepared will save you time and frustration, allowing you to enjoy your new ceiling fan sooner.
Connecting and Securing the New Fan

Connecting your new ceiling fan involves matching wire colors correctly to confirm safe operation. Start by identifying your wires: black (hot), white (neutral), and green or bare copper (ground).
Here's how to connect everything securely:
- Connect the black wire from the ceiling to the black wire on the fan.
- Attach the white wire from the ceiling to the white wire on the fan.
- Join the ground wire from the ceiling to the green or bare copper wire on the fan.
- Use wire nuts to secure each connection tightly, confirming there are no loose ends that could cause electrical shorts.
Once the wires are connected, tuck them neatly into the ceiling junction box. This not only keeps your installation looking clean but also prevents interference with the fan's movement.
Afterward, attach the new fan to the mounting bracket firmly. Make sure to tighten all screws to prevent wobbling during use.
Before restoring power, double-check each wire connection for security and accuracy. This careful approach confirms your ceiling fan operates safely and efficiently. Additionally, ensuring a clean environment can significantly reduce allergens that may disrupt air quality during your installation process.
Final Assembly and Testing

With the fan securely mounted, it's time to complete the final assembly and testing. First, attach the fan blades using the screws provided. Verify they're evenly spaced to promote balanced airflow.
Once the blades are in place, install the light fixture or globe according to the manufacturer's instructions, making sure to use compatible bulbs for peak performance.
Next, it's time for testing. Restore power at the circuit breaker and check the fan's functionality. Turn it on and observe how it operates, adjusting the speed settings as necessary.
Listen carefully for any unusual noises or vibrations during operation; these could indicate loose connections or imbalances that need your attention.
After testing, confirm that all screws and fasteners are tightened properly. This step is vital to prevent wobbling and guarantee smooth, safe operation.
If everything checks out, you can enjoy your newly installed ceiling fan, knowing it's been properly assembled and tested. Keeping an eye on its performance will help you catch any issues early, making sure it remains a reliable addition to your space.
Common Installation Challenges

When you're replacing a ceiling fan, you'll likely face some common installation challenges.
Figuring out the wiring can be tricky, and ensuring your electrical box can support the fan's weight is essential for safety.
You'll also need to take into account the ceiling height to achieve the best airflow and avoid any wobbling issues. Additionally, selecting the correct downrod length is crucial for optimal function and performance of the fan.
Wiring Complexity Issues
Wiring complexity often presents a significant challenge during ceiling fan replacement, particularly due to the variety of wire colors and configurations you'll encounter.
Understanding the layout of fan wires is essential for a successful installation. You might find yourself dealing with two black wires and two white wires, which can be confusing.
To navigate these wiring complexity issues effectively, consider these steps:
- Document Existing Connections: Before disconnecting anything, take photos of the current setup to guarantee accurate replication.
- Identify Wire Functions: Typically, black wires are hot, white wires are neutral, and green or bare wires are ground—though variations can occur.
- Check for Dual Switches: If your ceiling fan has separate switches for the fan and light, determine which controls each function.
- Use a Voltage Tester: Always confirm there's no power flowing through the wires from the breaker box before starting your work to prevent accidents.
Weight and Support
One essential factor to evaluate during ceiling fan installation is the weight and support required to safely mount the unit. Ceiling fans typically weigh between 10 to 50 pounds, so verifying that your ceiling box is fan-rated is vital. Standard electrical boxes often can't handle the weight and vibration, leading to potential safety hazards.
When you're ready to install, make certain the mounting bracket is properly anchored to ceiling joists or a support beam. Inadequate support can cause wobbling and noise, detracting from your fan's performance.
If you're replacing an old fan, inspect the existing mounting hardware for any signs of wear or damage—it may not provide the necessary support for your new fan.
For heavier or larger fans, consider using a brace or additional support system to distribute the weight more evenly, enhancing stability and safety during operation.
Ceiling Height Considerations
Considering ceiling height is essential for a successful ceiling fan installation. You need to guarantee that the fan is positioned correctly for both safety and ideal airflow. Here are some factors to keep in mind:
- Minimum Height: Maintain at least 7 feet from the floor to the bottom of the fan blades for safe clearance.
- Standard Downrod Length: For ceilings between 8 to 9 feet, a downrod length of 6 inches is usually recommended to enhance air circulation.
- Longer Downrods: If your ceiling height exceeds 10 feet, use a longer downrod to bring the fan closer to the ideal airflow zone, ideally between 8 to 9 feet from the floor.
- Low-Profile Fans: For ceilings under 8 feet, low-profile or hugger fans are your best bet, as they don't require a downrod and help avoid headroom issues.
If you're dealing with sloped ceilings, remember that specialized mounting kits are necessary to keep the fan level and functioning efficiently. Additionally, choosing the right ceiling fan type can greatly affect both installation ease and airflow effectiveness.
Maintenance Tips for Longevity

To keep your ceiling fan running smoothly and efficiently, regular maintenance is crucial. Start by cleaning ceiling fan blades with a damp cloth to remove dust and debris. This not only guarantees peak airflow but also prevents strain on the motor. Regular cleaning of airborne pollutants can enhance overall air quality in your home.
Every few months, check and tighten all screws and connections to avoid wobbling and guarantee safe operation. Inspect wiring and connections annually for any signs of wear or damage. Addressing these issues promptly can help you avoid electrical hazards that could lead to more significant problems.
Additionally, lubricate the fan motor according to the manufacturer's instructions, especially if you have an older model. Proper lubrication reduces noise and boosts efficiency.
Don't forget about the light bulbs! Replace any burned-out light bulbs promptly and consider using energy-efficient options to enhance your fan's performance and lower electricity costs. To ensure safety and reliability, consider implementing a home security system that can monitor your ceiling fan's electrical connections.
Frequently Asked Questions
Can You Replace a Ceiling Fan on Your Own?
Yes, you can replace a ceiling fan on your own if you feel comfortable with basic electrical work.
Start by gathering the right tools, like a screwdriver, wire strippers, and a voltage tester. Always turn off the power at the circuit breaker before you begin.
Follow the manufacturer's instructions carefully, and make certain to connect the wires correctly.
If you're unsure, it's smart to ask a licensed electrician for help to guarantee safety.
Is Replacing Ceiling Fan Hard?
Replacing a ceiling fan isn't that hard if you're comfortable with basic DIY tasks.
You'll typically spend about 1 to 2 hours on it. Familiarizing yourself with wiring colors makes the process smoother. Just guarantee the junction box is fan-rated and secure.
Most fans come with clear instructions, making assembly straightforward. Remember to turn off the power and use a voltage tester for safety.
With a bit of care, you can do it!
Do You Need an Electrician to Replace an Existing Ceiling Fan?
You don't necessarily need an electrician to replace an existing ceiling fan if you've got basic tools and some electrical knowledge.
However, hiring one can guarantee safety and compliance with local codes. An electrician can confirm that your electrical box is fan-rated and troubleshoot any issues that pop up during installation.
If your new fan requires extra wiring, their expertise will definitely make the process smoother and safer for you.
How Long Does It Take to Replace a Ceiling Fan?
Replacing a ceiling fan usually takes you about 1 to 2 hours.
If the new fan fits the existing mounting and wiring, you can cut down that time. However, if you need to make changes, like reinforcing the junction box, it could take an extra 30 minutes to an hour.
After installation, don't forget to check all connections and test the fan, which adds another 10 to 15 minutes to your total time.
Conclusion
Replacing a ceiling fan isn't as tough as it might seem, especially when you follow the right steps. Did you know that properly installed ceiling fans can save you up to 40% on energy bills in the summer? So, not only do you enhance your room's aesthetics, but you also boost energy efficiency. With a little preparation and care, you can enjoy your new fan for years to come. Get started, and enjoy the breeze!